How to Fix Uneven Spray Paints?

How to Fix Uneven Spray Paints

Wanna know how to fix uneven spray paints? Are you confused about why spray paint looks uneven? Don’t worry at all. Your every query will be resolved here. There can be many reasons behind the uneven surface. Most probably, it happens when you fail to apply the necessary coats. However, getting out of this problem is so easier if you work through a smart process. 

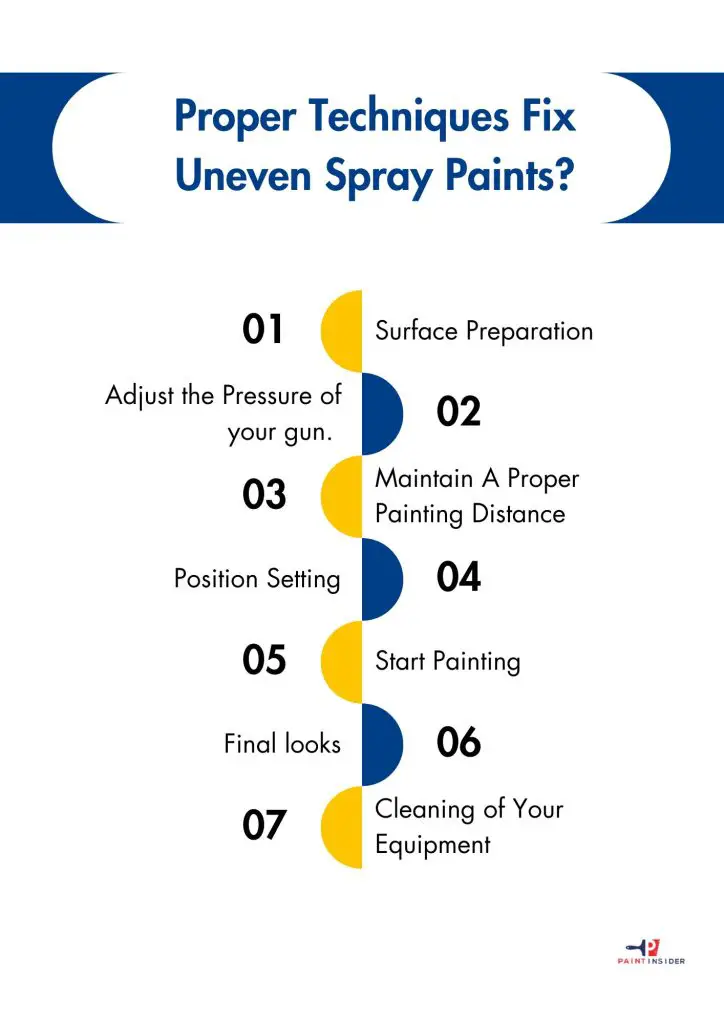
Proper Techniques Fix Uneven Spray Paints?

Supplies Needed:

● Spray gun or spray can 

● Respirator 

● Cardboard 

● Drop Cloth 

● Sandpaper

● Sanding block

● Wire brush

● Alcohol

● Trisodium phosphate (TSP)

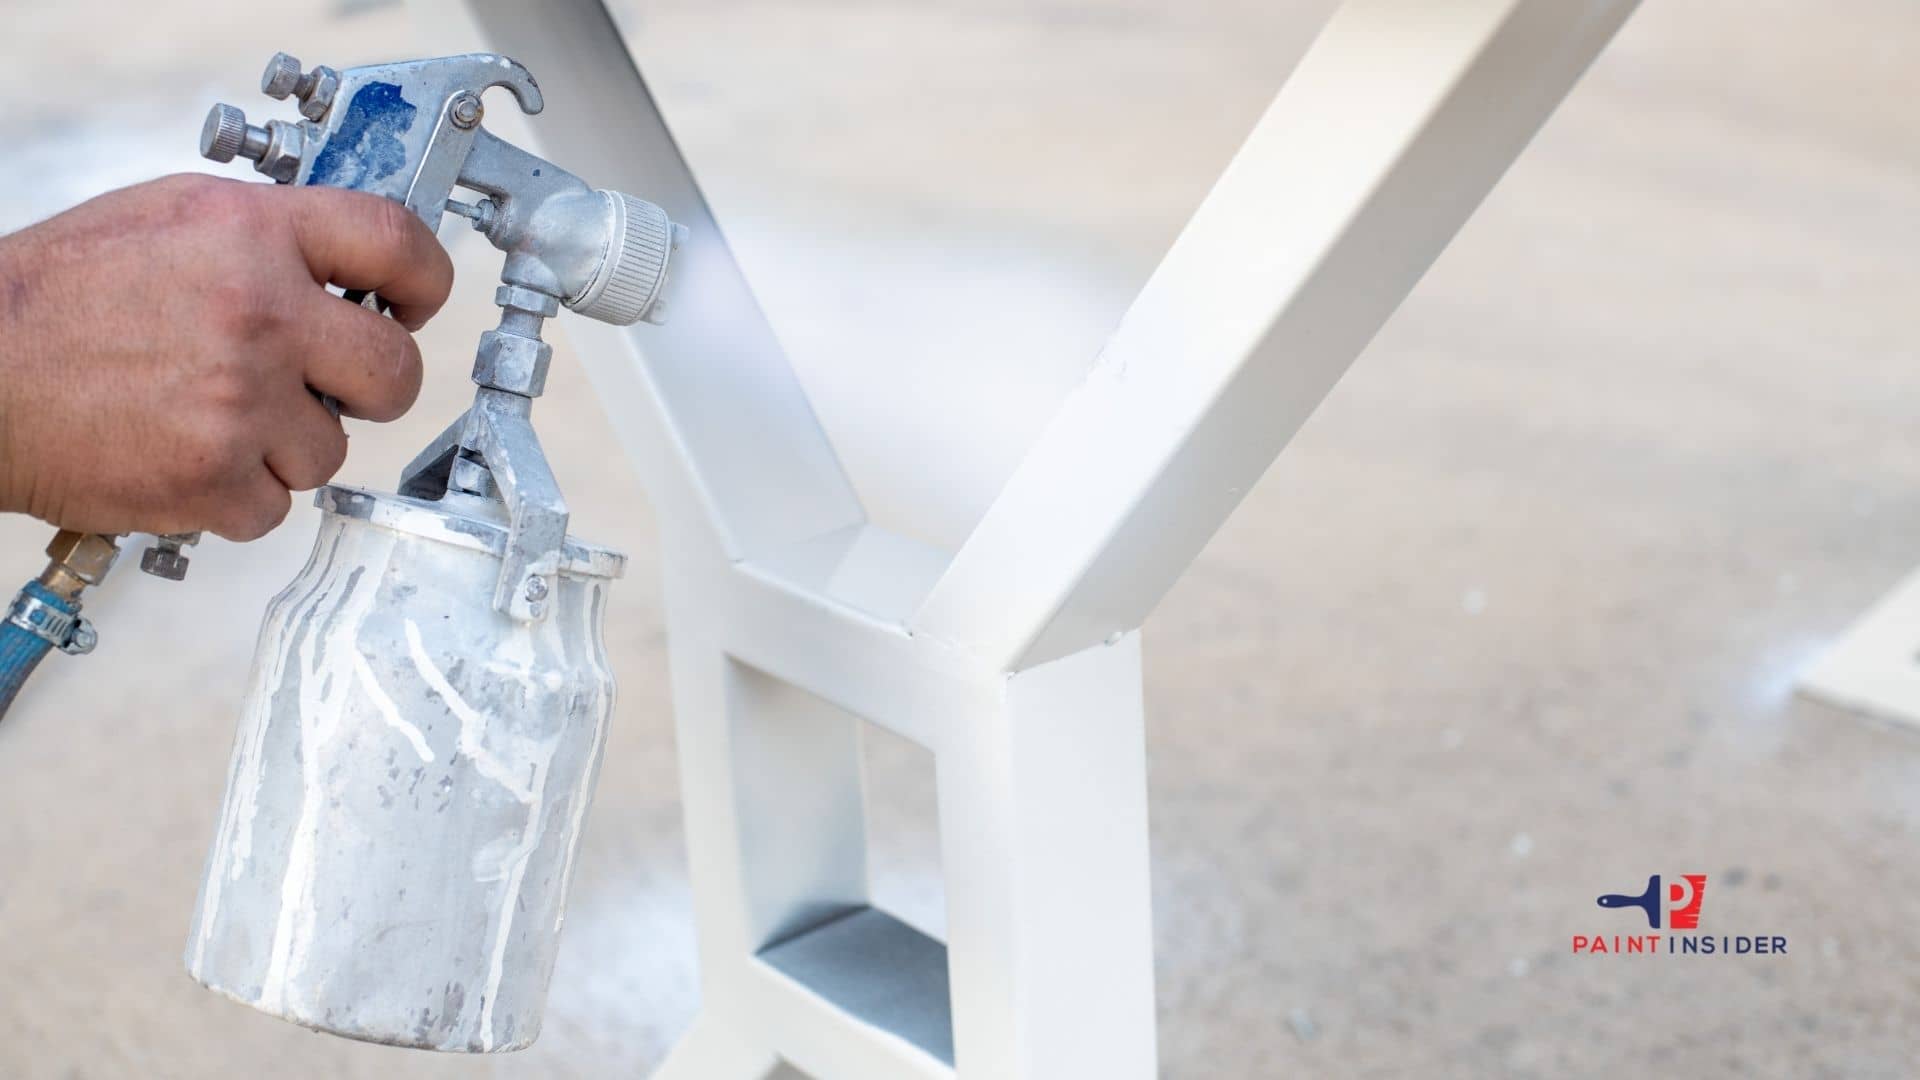
A spray can is a metallic container, and it’s best to use for painting little parts. However, it becomes complicated to paint a large body with this can. A spray gun is in the form of a gun. It’s best for painting any area. It’ll give you more quality results than a spray can. 
How to Fix Uneven Spray Paints 1

Step 1 – Surface Preparation

The surface preparation becomes different with the different surfaces. Let’s discuss in detail which preparations we need for which surface. Here we’re sharing some points that help in properly preparing your required surface. 

Metal Surface

● The first step is picking a moist cloth for the metal surface, removing dust and pollutant particles. 

● If the surface has rust, then try to clear it. You can choose a wire brush for this purpose. 

● If you have any loose paint on your surface, make it clear with fine-grit sandpaper.

Plastic Surface

Now the case is different because we’re using the plastic surface.

● Pick up the soft cloth and start cleaning your surface. 

● For the removal of the base coat, wet sanding the surface lightly.

● To avoid the oil on the surface, remove it with alcohol. 

Wood Surface

Here the process also varies due to the unique composition of wood from other surfaces.

● As this is wood, we need trisodium phosphate (TSP) to remove any precious paint. 

● To remove the base coat, use sanding. To create a smooth surface, use fine-grit sandpaper.

Step 2 – Adjust the Pressure of your gun. 

For adjusting the pressure control knob of your spray gun, we need low pressure for perfect efficiency. That’s why we set low pressure on the gun. A perfect pressure setting helps you obtain fine and satisfactory results on your surface. But if you have any heavy edges or gaps, increase a little bit of pressure. To get a smooth pattern, don’t insert too much pressure.

Step 3 – Maintain A Proper Painting Distance

Distance varies with the gun you’re using. Different guns have their various settings. So it depends upon you which gun you’re using and how much distance you must keep. 

For an HVLP gun, there must be at least 6-8 inches from your painted surface, And if you have a conventional gun, try to keep it 8-10 inches from the surface. Finally, there are other air-assisted airless sprayers. For this, you must be at least 10-12 inches from your painted surface. And at last, you have airless sprayers. For this one, the distance must be 12-14 inches. 

Step 4 – Position Setting 

Keep your position well throughout to the height of your painted surface. It increases your process of painting. Also, you can do a much faster job in this position. Don’t move your wrist but try to move the whole arm to get the best results. Keep the position of the spray gun perpendicular to your painted surface.

Step 5 – Start Painting

Never directly start applying your spray on your painted surface when you’re recoating your surface. Instead, the strategy is first to paint the side areas and move your arm towards your main surface. So how to fix uneven spray paints?

To obtain even coverage on the surface, take your arm in a straight line. 

As compared to thick coats, thin coats are better. For better coverage, apply one coat and make it dry. When you realize it is fully dry, then move towards the next coat. Usually, your paint takes 30-40 minutes. It can vary according to your paint. 

Make sure to have the correct color of your paint. Start your first coat process by spray painting. After applying the first coat, move towards the second coat for smooth and even coverage. And at last, use a top and clear coat.

Step 6: Final looks 

Your first effort is useless if you don’t do the last check. When you’re checking, if you feel any spots pick up the fine-grit sandpaper. You can also choose a dry cloth and start rubbing the paint very gently. After doing this, repaint the final coating. 

Step 7: Cleaning of Your Equipment

Don’t leave your equipment dirty. Your final step is to clean it. Take your spray gun and start cleaning. Refer to the gun’s instructions for guidance. You will mainly need water or solvent, depending on whether you’re using water-based or oil-based paints.

After completing these steps, congratulations! You’ve successfully fixed uneven spray paints. Now you know how to do it. Gather your supplies and start fixing uneven spray paints at home, aiming for great results.

Fixing Common Spray Painting Issues

One common frustration when spray painting is uneven coverage. This usually happens because of being too far or too close to the surface or uneven spraying. To fix this, keep a consistent distance of about 6 to 12 inches and use smooth, sweeping motions. If you see lighter patches, apply a thin second coat after the first one dries; this can help blend the colors and remove streaks.

A common problem is paint drips or runs, which occur when too much paint is applied in one spot. To fix this during your project, let the area dry completely, then lightly sand the drips with a fine-grit sandpaper. After smoothing it out, touch it up with light coats of spray paint for better control. Patience is key; addressing these issues slowly will give you a smoother finish and improve your spray-painting skills for future projects!

Conclusion: Achieving a Flawless Finish

To get a perfect finish when spray painting, you need good technique, preparation, and the right mindset. First, remember that preparing the surface is crucial. Uneven surfaces or dirt can ruin your results, so spend time sanding, cleaning, and priming your workspace. It’s like building a strong foundation before creating a beautiful structure.

When you see uneven spray patterns, be patient. Changing the distance of your spray nozzle can greatly affect the quality. If it’s too close, you’ll get drips; if it’s too far, you’ll have overspray. Also, try different speeds and angles to gain better control over your strokes. Lastly, practice is important! Each project teaches you how to improve uneven sprays and achieve better consistency in the future.

How to Get Rid of Spray Paint Smell?

How to Get Rid of Spray Paint Smell

Painting your walls, fixtures, and furniture is one of the most soothing as well as refreshing tasks. This can make your surfaces look new and clean as you were hoping for. Unfortunately, those fresh coats of paint sometimes alter your home air quality and end up giving you headache-inducing ailments. Why? Because paint usually contains certain toxic chemicals which further release exasperating fumes. After applying, these chemicals mess up with your surroundings and start emitting displeasing comfort in or around you. Whether interior emulsions, exterior paints, or textured paints, almost every painting contains some amount of toxicity that can pose a great risk to your indoor air quality.

While you can still reduce the annoying odor using low-VOC and low-odor paint formulas, it is better to adopt natural methods to get rid of the spray paint smell. In this article, we will discuss some eco-friendly as well as easy solutions that can help you minimize the risk of fumes inside your home.

What Type of Chemical a Typical Paint Contains?

Spray paint is undeniably the easiest applied paint mechanism. It aims to give both professionals and homeowners the advantage of causing no or little mess. Also, it aims to offer you maximum productivity and optimal results. However, some ordinary paints loaded with harsh chemicals can put your life at risk if ignored.

If you think that paint is just a usual color that can be dissolved easily with water, then you might be wrong. Most traditional paints contain a slew of toxins that can cause harm to people, pets, and the whole environment.

To be honest, paints or even other paint-related products are loaded with VOCs (Volatile Organic Compounds). VOCs are the gases that release the fumes directly into the air once you open the can of paint.

The house paints boast of the enormous amount of toxic elements such as:

  • Xylene
  • Ethyl acetate
  • Methylene chloride
  • Glycol
  • Formaldehyde
  • Benzene
  • Phenol
  • Quaternary ammonium compounds
  • Carbamates

Depending on the quality, type, and brand, these are the chemicals responsible for making the air quality poor. It further potentially causes serious risks to your health. You either need to choose the branded spray paints or take the necessary precautions to tackle the spray paint fumes without a hitch.

The Ill-Effects of Spray Paints on Your Health

No matter whether your exposure to VOC fumes or smell is minimal or extended, it can still cause definite risks to your health. From short-term side effects to longer ones, here is what inhaling spray paint fumes can do to your health:

  • Headaches
  • Loss of coordination
  • Nausea
  • Damage to liver, kidneys, and central nervous system
  • Allergic skin reaction
  • Dyspnea
  • Fatigues
  • Dizziness
  • Trouble breathing

Having said that, let us now take you through some of the eco-friendliest methods of minimizing the effects of spray paint smell.

Here’s How You Can Avoid Spray Paint Smell in Less Than a Week

Now, you must be wondering how to eliminate spray paint smell from your home. For your convenience, we have mentioned a few simple tips and tricks that you can use to avoid harmful spray paint fumes and odors completely:

Using Low-VOC Spray Paint

While some paint smell goes away naturally with time, some stay longer for months. The best you can do is choose the low or zero VOC “Volatile Organic Compounds” spray paints to keep the paint smell away. It is one of the most effective, affordable, and eco-friendly ways that can keep your overall health and surroundings in check. These paints are generally made using organic materials such as plants, milk, clay, etc. You get the opportunity to save yourself and the environment alike from the troublesome toxicity.

Scented Candles

Scented candles are another mind-blowing solution to eliminate the paint odor. All you need to do is buy quality scented candles or incense, light them and you will get an odor-free home within hours. From mild to strong-smelling candles, you can pick from a variety of flavors to get the most.

Baking Soda

You must have used this magic powder before to give the perfect volume and texture of baked goods. Now, you can use this surprising pinch of potion to remove irritating smells from your home’s environment. Baking soda has the quality to absorb odors from your clothes, refrigerator, and spray paints. Just pour the right amount of baking soda into a container and place them around the room. It will act as an agent to suck in bothersome odors and fumes while minimizing the risk of breathing. If the odor persists, sprinkle some amount of baking soda on your carpets, leave overnight and vacuum the same next morning.

Onions

Sometimes, it is good to fight against one pesky smell with another smell. To make this thing happen, slice the medium or large-sized onion into half, place each half onion in the freshly painted room and leave for one or two days. The onion tends to eliminate even the harshest paint odor naturally. Make sure to throw away the onions after every use and do not be tempted to eat them or cook them again.

Bucket Full of Water

One bucket full of water can do wonders for you. Here’s how? Just fill one to the three-gallon bucket using tap water only, place the bucket in the center of the room, leave the bucket overnight or until the paint smell goes away completely. If the space is large or wide, use two or three buckets of water to get faster results.

Charcoal

If you’re struggling hard to make your room free from odor or fumes, then activating charcoal could be a good idea. For ages, charcoal is regarded as a household-friendly product that also acts as an odor-absorbing ingredient. To enhance the air quality- pick the activated charcoal in small tubes or aluminum baking pans, leave it in the room overnight to discard the smell of paints from your home.

Coffee Beans

A true coffee enthusiast knows how it feels to smell and take a sip of brewing coffee every morning. Now, the same coffee smell can help you remove those disturbing elements from your home. Just like charcoal, place the coffee grounds or beans in every corner of the room, leave it overnight and let the magic begin.

As a smart homeowner, you want your home to look, feel and smell perfectly. It is important for you to take the necessary precautions after and before applying the spray paint with no health hazards.

Spray Paints: Plan Ahead and Wisely to Mask “Those” Sensitive Smell & Odors

Choosing the right spray paints can enhance the look of your interior effortlessly. But it can also raise a lot of red flags which you are not prepared for. No one wants to deteriorate the air quality as well as affect their health negatively.

If you are opting for spray paint and looking for ways to mitigate spray paint fumes, here are a few additional things that you can do.

  • You must choose top-quality air purifiers or systems to normalize the air quality in your home
  • Selecting the low or zero VOC spray paints can make the painting process much easier while reducing the uncomfortable smell
  • Keep your home well-ventilated. It is important to keep the main gate, doors as well as windows open to get fresh air.
  • The more humid the weather, the more it will produce the strongest fumes. It is advisable to keep a tab on the weather from the beginning to the end of the painting process.
  • Damp walls and wet surfaces can trap fumes easily. It is recommended to fix the walls first with the help of professionals and then use the spray paints for better results.

It is always better to stay “SAFE” rather than “SORRY” by adopting the right methods that can work in your favor. You need to think thoughtfully and positively to keep your health in check. Also, to keep toxic spray paint fumes miles away from your home.

FINAL THOUGHTS

Spray painting is itself a fun, creative, and pleasant activity to make the surface look brand new again. It is worthwhile to not only change the color of your wall but also to keep your home environment smelling better. If getting rid of the spray paint smells seems daunting for you, then you must pick the above-mentioned tips and tricks that you think will significantly help you.

Be it charcoal, baking soda, or buying a low VOC spray paint, you can pick the right steps depending on your level of comfort, severity, and convenience. If you are experiencing spray paint fumes for more than a month, then seeking a professional would be a good option.

Therefore, untrap the trapped spray paint fumes, odors, or smell using the above easy methods to live comfortably inside your home.

How To Remove Spray Paint From Glass?

How To Remove Spray Paint From Glass

Removing spray paint from a glass surface can be a hectic process. Read through the article to learn how to remove spray paint from glass effortlessly.

7 Sure Methods To Get Spray Paint Off Glasses

If you have ever been involved in any painting activities, you probably know that getting rid of spray paint from a given surface is never an easy task. However, armed with the right information, you can remove spray paint from your glass surface with the least effort possible. Read on for more information on how to get spray paint off glasses quickly.

Supplies Needed

  • Suitable bucket
  • Scouring pad
  • Scraper
  • Cleaning rags
  • Paper towels
  • Gloves
  • Protective gear
  • Drop cloth

Method 1 : How To Remove Spray Paint From Glass Using  Acetone?

Removing spray paint from your glass has never been any easier, but thanks to Acetone, you can now get rid of paint stains effortlessly.

  • Cost is a big factor when deciding on the solvent to use. That said, Acetone is cheaper compared to other solvents. Since nail polish remover  is basically acetone, you can use it to get rid of spray.
  • Immerse a rag in a bucket containing your solvent nail polish remover and apply it to the paint spots. Allow your Acetone to sit on the paint stains briefly before rubbing it out.
  • Use a moist rag to wipe the residues left behind after the initial wiping. Use another rag with a warm solution of soapy water to wash dirt on the surface of your glass. At this point, take your paper towel and dry your glass surface.

Important tip: Using Acetone on your fiberglass may cause unprecedented damage.

Method 2 : Using Vinegar To Remove Spray Paint Off Glass

Supplies needed

  • About 1 cup of vinegar
  • Two tablespoons of dish soap
  • Warm water

Using readily accessible household products will help you do the job. Consider using white vinegar because it is as effective as other commercial products.

  • Note that vinegar is an acid. The acidic content in vinegar is enough to dissolve paint stains on your glass, thereby removing them. You can also use  vinegar to get rid of  paint from building glass without any worries.
  • Pour your vinegar into a suitable metal can and boil it. Dip a clean rag in the vinegar solution and rub it onto the paint overspray.
  • It would be helpful to let your vinegar sit on the paint stains for a few minutes before proceeding. At this point, you can use the rag dipped in vinegar to rub on the paint spots.
  • Use your dish soap to clean your glass surface thoroughly. Be sure to use warm water to enable you to remove stubborn and sticky stains. Take a dry cloth and wipe your glass surface dry.

Method 3 : Using Alcohol To Get Spray Paint Off Of The Glass

  • You can easily get rid of spray paint from the  glass using rubbing alcohol. The procedure is nearly the same when using other solvents.
  • Immerse a clean towel in Alcohol and apply it to the paint stains on your glass. Scrap the paint stains using your cloth until the stains begin to come off.
  • It would be helpful to let the alcohol react with the  paint overspray for a  while before moving to the subsequent step.You might want to use a little more of your Alcohol to remove stubborn stains on the surface of your glass.
  • Always perform a sample test on your glass before embarking on your project. Rub a small amount of Alcohol on your glass surface and examine if there is any effect on the glass.
  • Be sure to wash the surface of your glass with soap and warm, then rub the surface using a dry rag.

Method 4 : Removing Spray Paint Off Glass Using Mineral Spirits

  • Did you know that you can use petroleum products to remove paint stains from glass surfaces? Well, now you know. Mineral spirits are excellent cleaning agents, so you should consider using them to eliminate spray paint.
  • As always, wash the surface of your glass using a soapy solution. Be sure to wipe the glass surface after completing the exercise.

Method 5: Using Turpentine To Get Rid Of Spray Paint From Your Glass

  • Using turpentine to remove spray paint from your glass is no different from using Acetone. Immerse a clean rag into a bucket containing turpentine.
  • Rub the soaked rag onto the spray paint. Let the turpentine sit on the stains for a few minutes before you proceed to wipe it off the surface.
  • Scour your glass surface until the paint stains begin to come off. Ensure all the stains have come off the surface before washing the affected areas with soap and warm water. Dry your glass surface using a clean and dry towel.

Method 6 : Using A Water Jet  To Remove Spray Paint From Glass

  • Be sure to work in an open area if you decide to remove spray paint using this method. In this case, you might want to use a high-pressure water source to wash away large debris from your glass surface. However, adjust the nozzle of your horse to avoid damaging your glass.
  • Direct and maintain the jet of water onto the affected parts until the stains begin to come off.

Method 7 : Getting Rid Of Spray Paint Using A Scalpel

  • On the off chance that there are traces of paint remaining on your glass surface, it would be helpful to use a scalpel to chip off the stains.
  • Be sure to hold your scalpel at an appropriate angle to avoid damaging your glass with scratches.
  • It would be a good idea to use your scalpel on a dried glass surface to avoid damaging the glass surface.
  • Be sure to clean your glass surface using warm water and soap, then wipe it dry using a dry rag or piece of towel.
  • If possible, place disposable plastic containers filled with soapy water underneath the paint removal area to catch the paint chips.

Removing spray paint from your glass can be challenging if you’re a newbie on matters to do with paint. The tips highlighted in this article will come in handy whenever you want to get rid of overspray from any given surface. Always remember to clean your glass surface using warm water and soap.

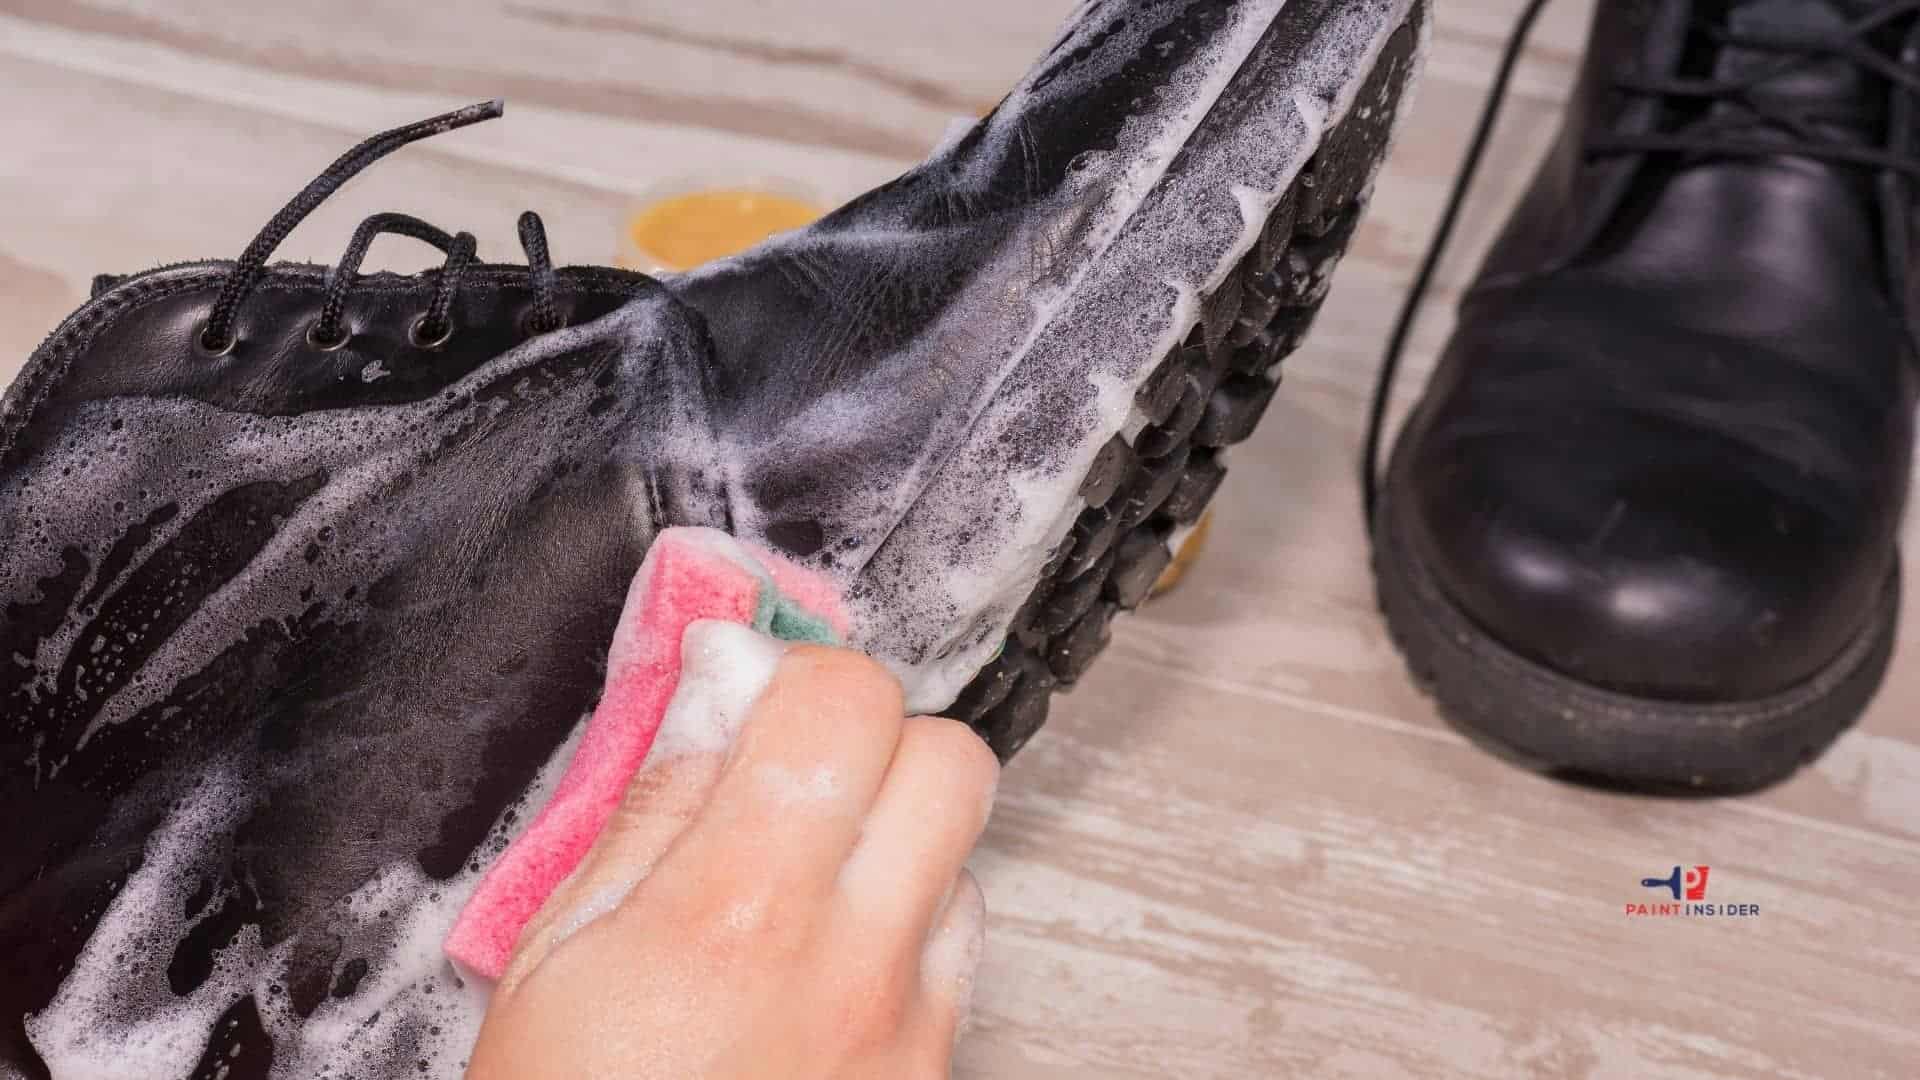
How To Remove Paint From Leather Shoes?

How To Remove Paint From Leather Shoes

The thought of spilled paint on your shoes is an unwelcome one. Regardless, learning how to remove paint from leather shoes is essential. Continue reading for more.

4 Different and Effective Ways to Get Spray Paint off Shoes

You can use many products to remove paint from your shoes; How easy you will to remove spray paint from your shoes depends on the duration the paint has stayed on your shoes. Read on to learn more on this subject.

Method 1 : Using Soap and Water

Before starting anything, note that this method is suitable for freshly spilled paint stains. Nevertheless, you may find it hard to apply this method to dry paint stains. Below is a  step-by-step guide for this method.

Supplies Needed

  • Towel
  • Water
  • Detergent
  • Toothbrush
  • Dry cloth

Step 1 – Wrapping Your Shoes In A Towel: Wrap your towel around your leather shoes so they can absorb the paint stains. The towel will help you to remove excess paint stains on your shoes. Before you apply a soapy solution, stains on stains, so are sure to remove excess paint as much as possible.

Take great care when using your towel on the paint stains because you don’t want to smear the stain all over your shoes. Apply the towel gently to avoid getting messy.

Step 2 – Preparing A Solution Of Soap And Water: Ensure you are using a neutral soap to avoid damaging your leather shoes. One way to ensure your leather shoes are protected is by using suitable detergents when you are cleaning them.

Ensure your soapy solution is made from warm water because you want a fast reaction between your detergent and the paint stains.

Step 3 – Wiping  The Paint Stains: Use a suitable scrubbing tool to get rid of dissolved paint stains from the surface of your leather shoes; It would be helpful for you to use a new toothbrush to work on your shoes. Note that you will be using gentle brushes on the surface of your shoes to get rid of the spray paint.

Step 4 – Use A Soft Towel To Dry Your Shoes: Now that you are removing paint stains from your shoe surface Consider using a soft towel to dry your leather shoes.

Method 2 : Using Organic Oil

In the first section of this article, we examined a method that is suitable only for water-based paints. Olive oil is an excellent detergent for oil-based stains. If you have sufficient quantities of olive oil(cooking oil) in your home, you can use it to get paint off your leather shoes.

One advantage of this method is that you will not do any scrubbing, and with that in mind, here are the supplies you need:

  • Olive oil/cooking oil
  • Clean towel
  • Nail polish remover
  • Cotton swab

Step 1 – Applying Olive Oil: Take a significant quantity of your olive oil and apply it to the paint-stained area of your shoe. Be sure the paint seats on the stains.

Step 2 – Rub The Olive Oil Onto The Paint Stains: Your fingers will be helpful at this point to rub the olive oil over the paint stains. Work thoroughly through the stains until the olive oil interacts fully with the paint stains.

Step 3 – Reaction Time: The Olive oil will react with the paint stains for easy removal, so be sure to allow the oil sufficient time to react with the stains. Note that olive oil can not react with your leather shoes.

Step 4 – Dry The Affected Parts On Your Shoes: Dry the affected area after removing the stains using a clean towel. If you notice traces of tough stains, go over the whole procedure to ensure no strain remains.

 Method 3 : Using Nail Polish Remover

Acetone is considered a cheaper alternative if you don’t have olive oil. Follow these tips to get spray paint off your shoes in no time.

  • Use a cotton swab or a suitable tool to apply the remover on the stains.
  • Blot the remover onto the stains on your boot.
  • Continue pressing the cotton swab on the stains a couple of times.
  • Consider changing your cotton swaps because you don’t want to do a messy job.
  • Gently clean the dissolved stains with a clean and dry cloth.
  • Be sure to apply your preferred leather polish after removing the paint stains to restore the lost dye.

Method 4 : Getting Rid Of Dry Spray Paint Off Leather Shoes

From the previous methods, we discussed how to remove spray paint off your shoes. How do you remove dry paint stains from your leather shoes? Keep reading to discover more.

Supplies  Needed

  • Plastic Material
  • Vinegar
  • Water
  • Stiff brush
  • Sponge

Step 1 – Scraping Off The Paint: Use your plastic material to get rid of excess paint stains from your boot. Avoid using sharp tools to remove the top layers of the paint stains because you don’t want to damage the fabric of your leather shoes.

Step 2 : Applying  Vinegar  To The Stains

You can use vinegar or lemon juice to do the work. Note that both of these solutions are neutral acids and, therefore, cannot damage your leather fabric. Vinegar will break down the paint stains on your leather shoes for easy removal. It would be helpful to consider using alcohol if you don’t have access to either lemon juice or vinegar.

Step 3 – Scrapping The Stained Parts: Use your stiff-bristled bush to scour the affected parts of your shoes. Consider repeating the whole step as described to be sure no paint stains are left behind.

Step 4 – Clean Your Leather Shoes: Use a spongy material to wipe out the paint residue from your shoes. Go over the procedure several times to be sure no stains are left behind.

Getting rid of spray paint from your shoes is not an easy task. Since leather shoes require great care, avoid paint spills on them. It would help to wear suitable shoes when painting to safeguard your leather shoes. Note that it would be best if you learned how to get spray paint off shoes effortlessly. If you apply the methods discussed above correctly, you will get spray paint off your leather shoes much faster.

<!– /wp:paragraph –Follow these tips to get spray paint off your shoes in no time.shoes is an unwelcome one. Regardless, learning how to remove paint from leather shoes is essential. Continue reading for more.

4 Different and Effective Ways to Get Spray Paint off Shoes

You can use many products to remove paint from your shoes; How easy you will to remove spray paint from your shoes depends on the duration the paint has stayed on your shoes. Read on to learn more on this subject.

Method 1 : Using Soap and Water

Before starting anything, note that this method is suitable for freshly spilled paint stains. Nevertheless, you may find it hard to apply this method to dry paint stains. Below is a  step-by-step guide for this method.

Supplies Needed

  • Towel
  • Water
  • Detergent
  • Toothbrush
  • Dry cloth

Step 1 – Wrapping Your Shoes In A Towel: Wrap your towel around your leather shoes so they can absorb the paint stains. The towel will help you to remove excess paint stains on your shoes. Before you apply a soapy solution, stains on stains, so are sure to remove excess paint as much as possible.

Take great care when using your towel on the paint stains because you don’t want to smear the stain all over your shoes. Apply the towel gently to avoid getting messy.

Step 2 – Preparing A Solution Of Soap And Water: Ensure you are using a neutral soap to avoid damaging your leather shoes. One way to ensure your leather shoes are protected is by using suitable detergents when you are cleaning them.

Ensure your soapy solution is made from warm water because you want a fast reaction between your detergent and the paint stains.

Step 3 – Wiping  The Paint Stains: Use a suitable scrubbing tool to get rid of dissolved paint stains from the surface of your leather shoes; It would be helpful for you to use a new toothbrush to work on your shoes. Note that you will be using gentle brushes on the surface of your shoes to get rid of the spray paint.

Step 4 – Use A Soft Towel To Dry Your Shoes: Now that you are removing paint stains from your shoe surface Consider using a soft towel to dry your leather shoes.

Method 2 : Using Organic Oil

In the first section of this article, we examined a method that is suitable only for water-based paints. Olive oil is an excellent detergent for oil-based stains. If you have sufficient quantities of olive oil(cooking oil) in your home, you can use it to get paint off your leather shoes.

One advantage of this method is that you will not do any scrubbing, and with that in mind, here are the supplies you need:

  • Olive oil/cooking oil
  • Clean towel
  • Nail polish remover
  • Cotton swab

Step 1 – Applying Olive Oil: Take a significant quantity of your olive oil and apply it to the paint-stained area of your shoe. Be sure the paint seats on the stains.

Step 2 – Rub The Olive Oil Onto The Paint Stains: Your fingers will be helpful at this point to rub the olive oil over the paint stains. Work thoroughly through the stains until the olive oil interacts fully with the paint stains.

Step 3 – Reaction Time: The Olive oil will react with the paint stains for easy removal, so be sure to allow the oil sufficient time to react with the stains. Note that olive oil can not react with your leather shoes.

Step 4 – Dry The Affected Parts On Your Shoes: Dry the affected area after removing the stains using a clean towel. If you notice traces of tough stains, go over the whole procedure to ensure no strain remains.

 Method 3 : Using Nail Polish Remover

Acetone is considered a cheaper alternative if you don’t have olive oil. Follow these tips to get spray paint off your shoes in no time.

  • Use a cotton swab or a suitable tool to apply the remover on the stains.
  • Blot the remover onto the stains on your boot.
  • Continue pressing the cotton swab on the stains a couple of times.
  • Consider changing your cotton swaps because you don’t want to do a messy job.
  • Gently clean the dissolved stains with a clean and dry cloth.
  • Be sure to apply your preferred leather polish after removing the paint stains to restore the lost dye.

Method 4 : Getting Rid Of Dry Spray Paint Off Leather Shoes

From the previous methods, we discussed how to remove spray paint off your shoes. How do you remove dry paint stains from your leather shoes? Keep reading to discover more.

Supplies  Needed

  • Plastic Material
  • Vinegar
  • Water
  • Stiff brush
  • Sponge

Step 1 – Scraping Off The Paint: Use your plastic material to get rid of excess paint stains from your boot. Avoid using sharp tools to remove the top layers of the paint stains because you don’t want to damage the fabric of your leather shoes.

Step 2 : Applying  Vinegar  To The Stains

You can use vinegar or lemon juice to do the work. Note that both of these solutions are neutral acids and, therefore, cannot damage your leather fabric. Vinegar will break down the paint stains on your leather shoes for easy removal. It would be helpful to consider using alcohol if you don’t have access to either lemon juice or vinegar.

Step 3 – Scrapping The Stained Parts: Use your stiff-bristled bush to scour the affected parts of your shoes. Consider repeating the whole step as described to be sure no paint stains are left behind.

Step 4 – Clean Your Leather Shoes: Use a spongy material to wipe out the paint residue from your shoes. Go over the procedure several times to be sure no stains are left behind.

Getting rid of spray paint from your shoes is not an easy task. Since leather shoes require great care, avoid paint spills on them. It would help to wear suitable shoes when painting to safeguard your leather shoes. Note that it would be best if you learned how to get spray paint off shoes effortlessly. If you apply the methods discussed above correctly, you will get spray paint off your leather shoes much faster.

How To Paint On Silk?

How To Paint On Silk

By now, you realize that you can apply paint on almost any surface provided you follow the proper procedure. With that in mind, let’s learn how to paint on silk.

Introduction: Why Paint on Silk?

Painting on silk is an exciting way to blend creativity with texture and light. Silk, a natural fiber known for its shiny surface, turns simple colors into bright artworks that seem to shine. Each brushstroke flows easily, allowing colors to mix in ways that traditional canvases can’t achieve. This special interaction between the dye and fabric creates a beautiful effect that catches the eye and invites thought.


Painting on silk can also be a calming experience, encouraging artists to take their time and fully engage with their materials. The delicate nature of silk requires patience and precision, helping artists connect more deeply with their work. As you start this artistic journey, you’ll learn new techniques and gain a greater appreciation for every detail in your piece. Whether you’re painting scarves or wall hangings, each silk creation tells a personal story woven into your art.

Tools and Materials Needed for Silk Painting

Painting on silk is a delicate art that requires specific tools and materials. Here’s a list of essentials:

Tools

  1. Silk Frame or Hoop: To stretch the silk and keep it taut for painting.
  2. Paintbrushes: Fine-tip brushes for details and wider brushes for larger areas.
  3. Dropper or Pipette: To transfer dyes accurately.
  4. Spray Bottle: To mist water to create gradients or keep the silk damp.
  5. Pins or Clips: To secure silk to the frame.
  6. Hair Dryer: To speed up drying between layers.
  7. Iron: For heat-setting the paint or dye.

Preparing the Silk Fabric Properly

To prepare silk fabric for painting, start by cleaning it. Wash the silk gently in cool water with a mild detergent made for delicate fabrics. This removes any factory coatings and tightens the fibers, creating a smooth surface for the paint. After rinsing, hang the fabric to dry away from direct sunlight to keep its shine.

Once the silk is dry, stretch it lightly onto a frame or hoop. This will keep it stable and prevent creases while you work. You can also use masking tape along the edges for extra security and to help you create clean lines while painting.

Preparation is not just about cleaning; think about how your colors will work together on the shiny silk. Plan their placement carefully to enhance your artwork.

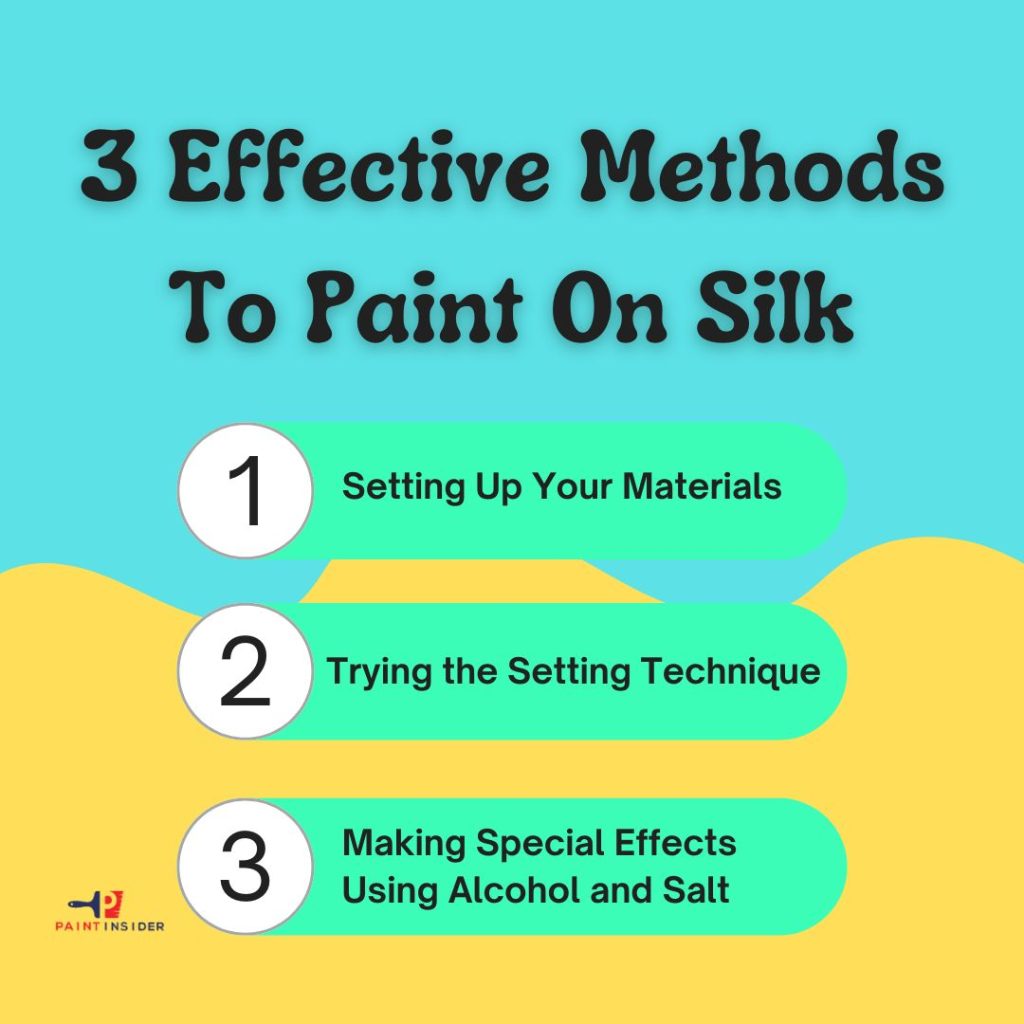
3 Effective Methods To Paint On Silk

Successful painting entails a lot of input from you as an artist. You can paint on any surface if you are armed with the correct information regarding your painting project.

Yellow and Pink Playful Vibes Stress Free in 3 Steps Instagram Post

Method 1: Setting Up Your Materials

Before you begin your project, ensure you have all the necessary supplies at your disposal. If you have the correct supplies at your disposal, you can easily apply paint to your silky fabric effortlessly. Below is a step-by-step guide on how to paint on silk easily.

Step1. Use paints meant for silky surfaces

It is common knowledge that any form of paintwork requires you to use the most suitable color for excellent results. In this case, consider using silk-based paints if you want flawless paintwork.

Step 2. Clean your silk thoroughly

As always, ensure your painting project is clean before applying any paint. This is to remove any dirt that may affect the bonding properties of the color to the surface. The most appropriate way to clean your silk material is to wash it with your bare hands directly.

Step 3. Straighten your silk using a suitable mounting

If you are creative enough, you can craft your prop to stretch out your silk fabric. Alternatively, you can buy ready-made support to carry out your exercise. Be sure your material is adequately stretched for proper painting.

Method 2: Trying the Setting Technique

Step 1. Create a sketch of the silk

At this stage, you need to employ your artistic skills properly. Create several drawings, first on a piece of paper using your pencil. Pick the most appealing graphic and recreate it on your silk fabric.

To recreate your sketches on the material, It would be helpful to trace them using a pencil and an appropriate marker. Note that you are not limited to the designs you can make; patterns such as flowers and wordings of your choice will do better.

 Step 2. Make a bold outline of your sketch

Use a suitable resist substance to outline your designs. You can shop online for the most suitable resist solvent to use for your project. Be sure to outline your sketch bold enough for desired results. While creating the outline, be sure to press gently for efficient products. Avoid breaks between your lines of the sketch.

 Step 3. Let the Tracing Chemical dry

Be sure to give the resist chemical used above maximum drying time before moving on to the next activity. It would be good to consider using a source of dry air to quicken the drying process.

Step 4. Use a suitable brush for paint application

When applying paint on fabric, the most critical consideration should be the paintbrush you are using. In our case, be sure to select a medium brush for use on your silk painting project. Work your way around the silk fabric until all the surface is covered in paint.

Step 5. Place the paint with iron material

Be sure to switch your mounting after every twenty-four hours. Place a suitable ironing material beneath your silk fabric. Set a standard temperature on your iron box and press on your fabric. Ensure you iron the entire surface of your fabric for even and consistent results.

Step 6. Washing /Dry cleaning your Silk fabric

After completing your paint application and ironing exercise, it is time to wash your artwork to remove any chemical substances used in the initial stages. Alternatively, you may consider dry cleaning your fabric depending on the type of Chemical used to create your outline.

Method 3: Making Special Effects  Using Alcohol and Salt

Step 1. Applying  A mixture of alcohol and salt

This method is a bit straightforward, and you are only required to use a combination of alcohol and salt on your silk fabric. A mixture of alcohol and salt will create a medium under which your paint can work efficiently on the silk fabric.

Step 2. Applying the initial coat of paint

After applying a mixture of rubbing alcohol and salt to your silk item, you can go ahead and apply your first coat of paint. Be sure to use a suitable paintbrush at this point because you want the lines and edges of your pattern to be as bold as possible.

Step 3. Adding a dark shade

Apply subsequent coats of paint but be sure to use a shade of paint that is a little darker than the initial one. Be sure of the colors to start with because once you are done applying one color, there is no room to redo it if you are mixed up.

Step 4. Let the shades applied dry correctly

Just as you would other layers of paint, be sure to let your painted layers a sufficient amount of time before jumping into the next step.

Step 5. Make your lines bolder using a darker shade

Since you want the lines on your fabric item to be more visible, it would be helpful to consider using a shade that is a little bit dark to make them bolder. You will notice the outlines once the paint dries out.

Step 6. Sing Alcohol

As mentioned in the preceding sections of this article, consider using a mixture of alcohol and salt to create a medium under which paint can work efficiently on the silk fabric. Note that alcohol is essential if you want to smooth out sharp outlines on your silk paintwork.

Step 7. Ironing Your Silk Paintwork

Prep your fabric for ironing. However, be sure to allow your material a standing time of up to twenty-four hours before you do the ironing. Press your iron over the fabric gently but in circular motions until all the paint sets in properly.

From the preceding information, you may have discovered that you can paint on any project provided you have the right supplies and the correct information. Although painting on silk surfaces is tricky, the tips highlighted above will come in handy whenever you decide to paint on a silky material. Enjoy your painting!

Troubleshooting Common Issues in Silk Painting

Silk painting can sometimes lead to problems. Here are some common issues and how to fix them.

1. Colors Bleeding:
If colors run into each other, it may be due to too much water or not enough resistance. To fix this, use less water when mixing paints and apply resist properly to keep colors separate.

2. Faded Colors:
If your colors look dull after drying, it might be because of low-quality dyes or not enough layers. Use high-quality dyes and apply multiple layers for brighter colors.

3. Streaks or Lines:
Streaks can happen if you don’t apply paint evenly. To avoid this, use a soft brush and work quickly to spread the paint smoothly.

4. Wrinkles in the Silk:
Wrinkles can form if the silk is not stretched properly. Make sure to stretch the silk tightly on your frame before painting.

5. Paint Not Setting:
If the paint washes out, it may not have been set correctly. Follow the setting instructions carefully, and consider using a fixative to help the paint stay in place.

By addressing these common issues, you can improve your silk painting experience and create beautiful artwork.

Conclusion: Embrace Your Creativity with Silk Painting

Silk painting lets you colorfully express your creativity. This art form lets you experiment with colors and textures that other mediums can’t offer. As you paint on silk, you’ll see how the dyes interact with the fabric, bringing your imagination to life. Whether you make a beautiful scarf or a wall hanging, silk painting creates a personal connection between you and your work, allowing for spontaneity in your art.

Silk painting is also a great way to relax and practice mindfulness as you focus on the details of your design. The way the dyes flow reflects our creative processes sometimes unpredictable but always beautiful. So, why not try this art form? Gather some silk, brushes, and gutta resist, and ask yourself how to paint on silk. You might discover hidden talents and passions that bring you joy in every piece you create.

How To Paint Latex Mask?

How To Paint Latex Mask

Having the correct information regarding any painting project is a critical step towards achieving desired results. This article will focus on how to paint a latex mask.

3 Sure Methods To Paint Latex Mask Effortlessly

There could be many methods you can use to apply paint on your latex mask. However, each technique has specific procedures and guidelines which you must follow adequately to produce a stunning piece of painting. Before you embark on your painting project, be sure to have all the necessary supplies as seen below:

Supplies Needed

  • Rubber cement
  • Turpentine
  • Latex-based paint
  • Oil-based paint
  • Compressor
  • Brushes
  • Dubbing substance
  • Water

 Method 1. Blending  your Paint

This method will entail the blending of your paint with other additives such as rubber cement which you will you on your latex mask. Below are the steps involved:

Step 1. Prepare your working area and put on protective gear

Because you will be working with paint-emitting fumes, you only prepare yourself adequately. Arrange your working space for ease of painting, and most importantly, put on suitable protective gear to shield yourself from the harmful paint fumes.

 Step 2. Use a paint specifically meant for latex

Although you can mix your paint to apply on your latex mask, it is advisable to purchase an already packaged paint meant for use on latex surfaces. You can make your order online and have it delivered to your place of work.

 Step 3. Using Rubber Cement

Measure a significant amount of rubber cement and put it in a suitable container. Note that this step is only necessary if you decide to prepare your latex paint; Rubber cement will improve the adhesive properties of your color for easy application on your latex mask.

 Step 4. Adding Turpentine to Rubber Cement

Add the correct proportion of turpentine to the rubber cement and stir until you get a consistent solution.

 Step 5. Mix the rubber cement solution with an Oil-based paint

Mix your contents in a ratio of 2:1. For every two spoonfuls of your oil-based paint, add one spoonful of the rubber cent solution and stir to achieve a uniform mixture. If you mix the contents in the right proportions, you should form a paint that will easily sit on your latex mask.

 Method 2. Paint Your Latex Mask With an Airbrush

Step 1. Use your airbrush and compressor

Because applying paint on a latex material requires high standards, It would be helpful to use a compressor and airbrush even to apply paint. If you are clueless about the working of the two components, consider seeking the service of a technician to help connect the airbrush and the compressor.

Step 2. Pouring your Paint into the spray can

Measure a significant amount of the paint you prepared above and pour it into your spraying can. Alternatively, you can use ready-made paint designed to be used on latex material. Ascertain that your tools are properly fixed to avoid any paint leakage.

 Step 3. Actual Application Of Paint

Now you are almost done with your painting project. Hold the nozzle of your spray gun at a suitable distance from the mask and start spraying. Ensure that your spray is even and consistent by adjusting the nozzle accordingly. One coat is enough if done correctly.

 Step 4. Let the Paint Dry

The recommended drying time, in this case, should be anywhere around one to two hours. Be sure to add one more coat of the pant before allowing it to dry because you want an even and smooth finish; the final coat should be relatively thin to enhance blending properties between the latex surface and the paint.

 Step 5. Cleaning your airbrush and changing colors to use

If you are painting a Halloween mask, you may have to apply various colors to your latex mask. Before switching to a different color, be sure to clean your airbrush properly to avoid messing with your paintwork. It would be helpful to rinse your airbrush tip with the color you’re switching to before filling your spray can with paint.

Step 6. Doing touches on your latex mask

Your airbrush will be very useful in adding final touches and decorations to your latex mask. Be sure to use suitable colors on specific parts of your show. The last look of your latex mask will depend on the type of shades and touches you make on your front.

 Method 3. Painting your Latex Mask Using Standard Paint Brushes

Step 1. Create a primer using a thin coat of paint

Use a suitable brush to apply a thin layer of color to your latex mask. Be sure to use a thick but flat bristle paintbrush for your exercise. Get rid of excess paint drops utilizing a piece of towel.

 Step 2. Allow the paint sufficient time to dry

As always, let your paint dry before continuing to the next step. Allowing your color enough time to dry will ensure that your stains stick correctly on your mask.

 Step 3. Detailing your latex Mask

In this case, it would be helpful to use a small brush to detail your latex mask. Be sure to use a small brush with relatively thick bristles for better application of paint. You want your mask to look natural, so you can be as creative as you want.

Apply gentle and calculated strokes to avoid distorting the intended look on your latex mask. As we mentioned earlier, be sure to wash your brushes thoroughly before alternating between colors.

 Step 4. Use a dubbing material (Sponge) to bring out the outer feel of your mask

Because you want your mask to have an authentic and consistent look, it would be helpful for you to use a sponge to dab on the surface of your latex mask. Immerse your sponge in the paintwork on your mask until you have the results you want.

From the preceding content, you may have realized that applying paint on a latex material is a bit challenging if you don’t have the foggiest idea about the whole process. The tips featured in this article will help you to understand how to paint your latex mask with much ease.

Best White Spray Paint

Best White Spray Paint

When preparing for your next project, it is crucial to have the best spray paint for your project. We will highlight to you ways to identify the best white spray paint.

Nothing is so satisfying than using the best quality spray paint for your painting projects. If you are a do-it-yourself person, you can rest assured of excellent results if you use quality paints.

Your primary focus when shopping for the best spray paint is to buy a paint that has all the essential properties of quality paint. With that in mind, be sure to go for durable paints, you might also want to consider the aspect of resistance to rust and corrosion.

I would suggest that you consider spending a few bucks to buy quality paints if you want a professionally painted surface then go for substandard paints. So, how, are you going to pick the best white spray paint for your project because the market is filled with all types of brands? To answer your question, keep reading to find out.

Who Needs This Product? 

Projects involving spray paint demand that you master the art of using the sprayer besides having the best spray paint. So, if you are trying to weigh your options on the best spray paint to buy, you are in the right place because this product is meant for do-it-yourself guys like you and professional painters.

What Do Readers Will Learn?

So far, if you are still reading this post, one thing stands out; you are in search of information to help you in your next painting project.

In this blog, we have created well-analyzed content to help you to make the best selection regarding the best white spray paint for your project. What is more, we will take you through a brief buying guide consisting of factors to consider when buying the best white spray paint for your next paintwork.

Top 2 Best White Spray Paint in 2021

You would be forgiven for thinking that getting to buy the best spray paint is a walk in the park. Be it as it may, it would be best if you considered learning a few tricks to help you make the correct choice. You don’t want to buy paint that will give you regrettable results.

We crafted this post to help you to make an informed decision concerning the best white spray paint for your next project; considering learning let us jump right into the list of the best white spray paint in the market.

You May Also Like Best Spray Paint For Metal.

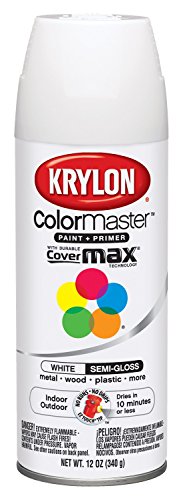
1. Krylon GIDDS-800143 K05150807 Colormaster Paint + Primer, Semi-Gloss, White, 12 oz: Best for  indoor and outdoor paintworks

Krylon GIDDS-800143 K05150807 Colormaster Paint + Primer, Semi-Gloss, White, 12 oz.
Check Latest Price

Out of all the many brands we analyzed, Krylon stood out because it has a ton of beneficial properties when it comes to painting. Krylon Color Master Enamel Spray Paint Semi-Gloss White is a quick-drying paint. It’s easy to apply. It is suitable for use on wood, cane, cloth, paper, cast iron, ceramic, glass, plaster, and metal surfaces. Below we highlight the most prominent features of this product, have a look!

Features

  • KrylonColormaster Paint + Primer has multiple applications.
  • The product is compatible with most surfaces.
  • It is suitable for indoor and outdoor-based paintworks.
  • This paint is suitable for both small and big projects.
  • It has durable Covermax technology for premium coverage and brilliant color.

Pros

  • KrylonColormaster Paint + Primergives your surface a bit of longevity.
  • The product is pocket friendly but of high quality.
  • It is pretty easy to use by anybody.
  • It takes less drying time.
  • It is safe to use.

Cons

  • It is affected by scarcity(not readily available).

Reason to Buy

Out of all the many brands we analyzed, Krylon stood out because it has a ton of beneficial properties when it comes to painting. The paint is pretty versatile so you can work seamlessly, special-purpose additionally, you can use it for most painting projects.

2. Rust-Oleum 3389286-PK Stops Rust Advanced Spray Paint, 12 Ounce (Pack of 6), Gloss White, 72 Ounce: Best for protection  against rust and corrosion

Rust-Oleum 3389286-PK Stops Rust Advanced Spray Paint, 12 Ounce (Pack of 6), Gloss White, 72 Ounce
Check Latest Price

Looking for the most suitable paint to help you fight the effects of rust and corrosion? Look no further because, with this product, you are assured of durability on your art and what is more, this product prides itself on color retention properties to give your artwork a more refined finish. Rust-Oleum Stops Rust Advanced Spray Paint is resistant to environmental effects. Features of this paint are highlighted below:

Features

  • Rust-Oleum Stops Rust Advanced Spray Painthas matte finish.
  • It is rust and corrosion-resistant.
  • It can be used as a shield for outdoor surfaces.
  • It has excellent output to give your surface a clean finish.
  • It has excellent color retention properties.
  • It is a durable paint to give you a lasting effect.

Pros

  • Rust-Oleum Stops Rust Advanced Spray Painthas excellent color retention enhances the final look.
  • It is easy to apply.
  • It produces a more refined finish on the surface.
  • It has well designed nozzle for fast spray.
  • This paint spray comes in many colors to give you a variety of color options.

Cons

Reason to buy

Looking for the most suitable paint to help you fight the effects of rust and corrosion? Look no further because, with this product, you are assured of durability on your art and what is more, this product prides itself on color retention properties to give your artwork a more refined finish.

Top 2 Best White Spray Paint in 2021: Buying Guide and Key Factors to Consider When Choosing the Best White Spray Paint

Ensuring you are well versed in matters to do with spray paints will come in handy whenever you contemplate buying spray paint for your upcoming project. With that being said, there are basic factors that you should take into consideration to help you to settle on the best white spray paint. Below we discuss the above-mentioned products.

Nature of the surface

This should be your main consideration whenever you are shopping for your preferred paint. The nature of the surface will determine the type of paint you are going to buy. Spray paints can be classified according to their use such as general-purpose,special-purpose et cetera.

The color and finish of the paint

If you have done a couple of paintworks involving spray paints, you may have noted that you can capitalize on spray paint to create customized paintworks. The color of your spray paint will determine the nature of the finish you will achieve on your project.

Most spray paint is multicolored to allow you to make your preferred color. Always go for spray paint that will blend in properly with the surface. Your primary concern should be to give your piece of painting a more nuanced finish.

The texture of the paint

We tend to think that fluids have no texture. This is an outright lie because patients, just like other substances, have a particular feel when applied on a given surface. With that being said, it would be a good idea to go for a paint that has the correct composition of additives to achieve the kind of finish you want.

A good example of textured paintwork is hammered paint. Not that this type of paintwork requires a high degree of precision to achieve desired results. Be sure to buy high-quality paint to achieve better results.

The time it takes to dry

Depending on the type of your project, you might want to consider the aspect of drying time of the paint you intend to buy. It would be best if you go for fast-drying paint because you don’t want to spend a ton of time waiting for your paintwork to dry. Note that the nature of the prevailing climate will affect the rate at which your paint will dry. The density of your paint will influence drying time.

The base of the spray paint

Another key consideration would be the base of your preferred paint. Before you decide on the most suitable paint to use, it would be better to find out whether it is oil-based or water-based. This will enable you to plan whether to use a primer or not. If I were you, I would go for oil-based paints because they are pretty durable.

It would be a good idea to consider buying the suitable density of your preferred paint if you want to achieve a professionally painted piece of art.

The advantage of using water-based spray paint is that they require less effort to clean. However, be sure to use a suitable primer to enhance the adhesive features of your paint. If you utilize the information we have shared in this post, you are on your way to mastering the spray painting (opens in a new tab)” rel=”noreferrer noopener” class=”ek-link”>art of spray painting and choosing the best paint for your projects.

The viscosity and hue of the paint

Light paints have many advantages. Apart from the fact that they dry fast, these kinds of paints are also easy to give you a consistent and even coat of paint. It would be a good idea to consider buying the suitable density of your preferred paint if you want to achieve a professionally painted piece of art.

Coverage of the paint

When shopping for your preferred spray paint, one of the factors to note is its coverage properties and the ease with which it dries. You want to achieve a professionally painted surface, so it would be a good idea if you take this factor seriously to get the results you want.

It is recommended to go for general-purpose paint if you are unsure of the right type of paint to use for your painting project. Other crucial factors worth looking at include resistance to heat and other environmental hazards. It would be a good idea to consider buying the suitable density of your preferred paint if you want to achieve a professionally painted piece of art.

Frequently asked questions

Even when you are certain that you have mastered the art of painting, there is still more to be covered. Having said that, while carrying out our research, we came across a ton of frequently asked questions both by professional and amateur painters. We crafted a well-thought solution to each of the questions to enable you to understand better. Have a look at them below.

Question: Where is spray paint applicable?

Answer: Spray paint has many uses which is why it is the most preferred paint by most painting artists. You can use it to add creative finishes to your paintwork to give it a more refined look. What is more, you can do away with the effects of rust and corrosion by applying a light coat of paint on your preferred metal surface.

Question: Is it possible to apply paint over spray paint?

Answer: Yes. However, you must ensure that you have a thorough mastery of the subject of spray paint. For better results, it would be better to consider doing the basic preparatory activities on your surface such as sanding and priming. We strongly suggest that you seek expert advice in addition to what we have mentioned in this post to be on the safer side.

Question: Is it necessary to prime your surface before spray painting?

Answer: We are going to be straightforward, so yes. It is common knowledge applying a primer on whatever painting project you have is essential to enhance the bonding properties of the paint. It would be better if you consider using a primer based for your project.

Question: What is the life of spray paint?

Answer: If well stored, spray paint can last for quite some time, to be more precise, up to ten years. This is only possible if the can containing the paint remains closed. On the other hand, the maximum time the spray paint will last if the can is opened is anywhere between two to three years.

Conclusion

From the discussion in this post, it is clear that there is more to spray painting than what we normally think. It even becomes more challenging if you don’t have the slightest idea about spray paints. However, if you utilize the information we have shared in this post, you are on your way to mastering the art of spray painting and choosing the best paint for your projects. We strongly suggest that you seek expert advice in addition to what we have mentioned in this post to be on the safer side.

How To Paint Cedar?

How To Paint Cedar

You might have heard of the multiple benefits of cedar woods, so you may want to know how to protect them, in this segment, we will share some tips and tricks on how to paint cedar woods.

Introduction:

Cedarwoods are popular for their multiple uses, its aromatic qualities have allowed it to become a favorite of many, as it can be used to treat many different ailments and also, can be found in multiple beauty products. Cedar trees are available in various shapes and forms, and many varieties of cedar wood are used for different purposes. For example, if you’re planning on creating outdoor structures then you may want to choose a type of cedar wood that is resistant to the different environmental conditions. In the end, cedar woods last long and are easy to take care of.

When it comes to choosing water vs oil-based paint, you may encounter mixed opinions about this.

  • Cedarwood cleaner
  • Water / Brush
  • Stain paint
  • Regular Paint
  • Sandpaper /Rag

The painting process when it comes to cedar woods is similar whether you painting large or small objects, although it may take some time to complete so make sure you have some time available when painting cedar woods. Below are steps you can follow to paint your cedar woods

Preparing the Cedar Surface for Painting

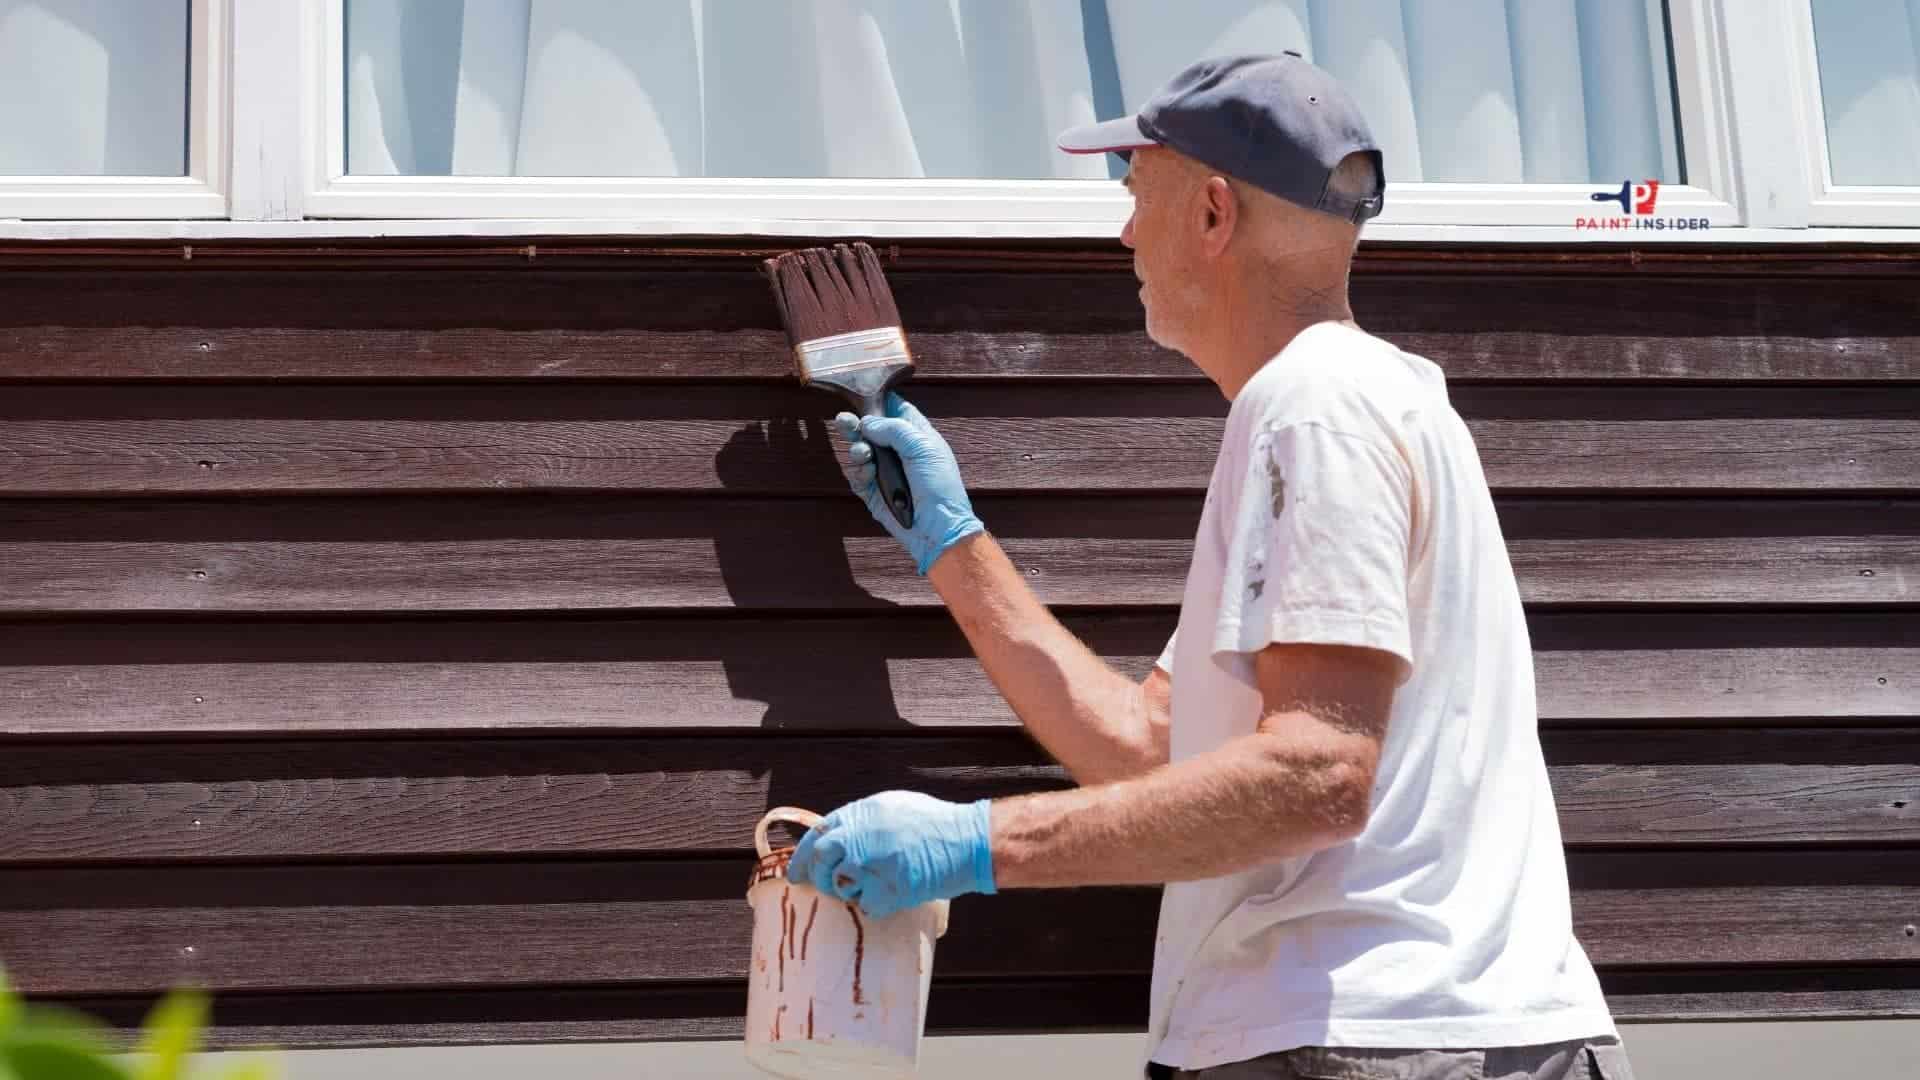
  • Preparing your cedar surface for painting is a vital step that can make all the difference in achieving a smooth, long-lasting finish. Start by ensuring the wood is clean and free of contaminants such as dirt and grease. A simple mixture of mild soap and water can work wonders; just scrub gently to avoid damaging the grain. Once you’ve washed away any residue, dry thoroughly cedar tends to retain moisture longer than other woods.
  • Next comes sanding, which not only creates a better surface for paint adhesion but also reveals the beautiful character of the cedar. Use medium-grit sandpaper followed by fine grit for an ultra-smooth feel; this process allows you to eliminate rough patches while enhancing the rich texture inherent in cedar wood. Don’t forget to remove dust with a tack cloth before painting this small detail prevents imperfections that could mar your final look.
  • Lastly, consider applying a primer specifically formulated for cedar or exterior woods, it acts as both a barrier against tannins and a foundation that promotes paint durability. By taking these careful preparatory steps, you’re setting yourself up for painting success! Remember, patience during preparation will reward you with stunning results that highlight cedar’s natural beauty while ensuring your project stands the test of time.

Choosing the Right Type of Paint

When it comes to painting cedar, the choice of paint can significantly influence both the aesthetic and durability of your project. One option that often gets overlooked is using high-quality outdoor acrylic latex paint. This type not only adheres well to the natural oils in cedar but also allows for the wood to breathe, preventing moisture build-up which can lead to warping or peeling. Moreover, consider opting for a saturating oil-based stain if you desire a more natural look that enhances the wood grain while still providing protection against UV rays.

In addition to selecting the right paint type, don’t underestimate the impact of preparation on your final outcome. Thoroughly clean and sand your cedar surfaces before applying any product this ensures even application and longer-lasting results. Using a primer specifically designed for wood can further enhance adhesion and color fidelity, especially if you’re transitioning from a darker shade or treating previously unpainted cedar. Ultimately, understanding how these elements come together will not only transform your space but will also keep your beautiful cedar looking pristine for years ahead.

Essential Tools and Materials Needed

When diving into the enchanting world of painting cedar, having the right tools and materials is essential for achieving that flawless finish.

Here are the essential tools and materials you’ll need for painting cedar:

Tools:

  1. Paintbrushes – High-quality, natural, or synthetic bristle brushes for detailed work and edges.
  2. Paint Roller – A roller with a ¾-inch nap for smooth and efficient application on cedar surfaces.
  3. Paint Sprayer (optional) – For fast and even coverage, especially on large or rough cedar surfaces.
  4. Sandpaper (120-150 grit) – To sand the cedar surface for smoothness and better paint adhesion.
  5. Drop Cloths or Plastic Sheets – To protect the ground and surrounding areas from paint splatters.
  6. Painter’s Tape – For masking off areas you don’t want painting, such as windows or trim.
  7. Ladder – If you’re painting a high or vertical cedar surface, like siding or fencing.
  8. Stir Sticks – To thoroughly mix the paint before and during application.
  9. Bucket – For mixing or holding water/cleaning solution.

Materials:

  1. Exterior Primer – A high-quality primer designed for wood surfaces, especially one with mildew resistance for cedar.
  2. Exterior Paint – A 100% acrylic latex or oil-based paint, which works well on cedar and is weather-resistant.
  3. Wood Filler – To fill any gaps, cracks, or holes in the cedar surface before painting.
  4. Wood Cleaner – A solution to clean dirt, mildew, and grime from the cedar before painting.
  5. Caulk – For sealing any gaps or seams between cedar boards to prevent moisture infiltration.
  6. Paint Tray and Liners – For holding paint while using brushes or rollers.

These tools and materials will help ensure that your cedar surface is properly prepared and painted for a durable, beautiful finish.

How To Paint Cedar

Techniques for Applying Paint Evenly

When painting cedar, achieving an even finish is crucial to showcase its natural beauty. Start by investing in high-quality paint and tools; a good brush or roller can make all the difference in how evenly the paint spreads. Before you dip your brush, consider lightly sanding the surface of the cedar. This not only helps with adhesion but also creates a smoother canvas, allowing your paint to glide on effortlessly.

Using a technique called wet-on-wet can enhance your painting experience and help prevent unsightly streaks. Instead of letting each coat dry completely before applying another, work in sections and apply fresh paint over areas that are still wet. This allows for smooth blending and reduces watermarks or uneven patches. Additionally, be mindful of lighting painting in direct sunlight can cause the paint to dry too quickly, leading to lap marks. Working during cooler parts of the day or utilizing shade will give you more working time and result in a beautiful, uniform application on your cherished cedar surfaces.

Common Mistakes to Avoid When Painting

One of the most common mistakes when painting cedar is neglecting proper preparation. Cedarwood, known for its natural oils and tannins, requires thorough cleaning and sanding to ensure paint adheres properly. If you skip this step, you’re likely to end up with peeling paint or uneven coverage down the line. Take the time to remove dirt and grime with a gentle wash, followed by light sanding to create a smooth surface that allows your chosen paint to bind effectively.

Another pitfall involves using the wrong type of paint. Many assume that any exterior paint will work on cedar, but choosing a high-quality, specially formulated siding or deck paint can make all the difference in durability and appearance. Additionally, consider applying a primer designed for cedar, this not only helps block stains from bleeding through but also enhances color vibrancy and longevity. By investing in the right products from the start, you’ll be able to enjoy your beautifully painted surfaces longer without costly touch-ups or repeated applications.

Caring for Painted Cedar Surfaces

Caring for painted cedar surfaces goes beyond mere maintenance, it’s about preserving the natural beauty and longevity of this unique wood. When it comes to painted cedar, selecting the right paint is crucial. Opt for high-quality exterior water-based or acrylic paints that allow the wood to breathe while providing a durable layer against moisture and UV damage. Remember, even the best paint can only do its job if applied correctly ensure your surface is clean, dry, and properly primed beforehand.

As seasons change, lend extra attention to your painted cedar by inspecting it for peeling or fading every six months. A simple touch-up can often rejuvenate tired areas without requiring a full repaint. Don’t forget about sealing! Applying a clear protective sealant every couple of years enhances durability while illuminating the underlying grain patterns of the cedar, creating an attractive visual contrast with the paint. By nurturing your painted cedar surfaces with these thoughtful steps, you’ll not only enhance their aesthetics but also ensure they stand strong against time’s relentless passage.

Conclusion: Enjoying Your Beautifully Painted Cedar

After putting in the effort to paint your cedar, take a moment to truly appreciate the transformation. The vibrant colors will not only enhance the beauty of your outdoor space but also create a warm and inviting atmosphere that you, your family, and your guests can enjoy for years to come. Picture hosting summer barbecues or cozy evenings on the patio, surrounded by stunning woodwork that reflects your personal style.

Maintaining and enjoying your beautifully painted cedar is an ongoing journey. Regular touch-ups and protective coats ensure it remains a centerpiece of joy rather than a chore, making each glance at its rich hues a reminder of your creativity and dedication. Consider incorporating plants or outdoor decor that complement the color scheme these small touches can elevate the overall aesthetic even further. So grab a cup of coffee or tea, sit back in your favorite spot, and bask in the satisfaction of having turned ordinary cedar into an extraordinary showcase!

How To Paint A Sugar Skull?

How To Paint A Sugar Skull

Sugar skulls are allowing you to get really creative when it comes to painting. Here, we will share some tips on how to paint a sugar skull.

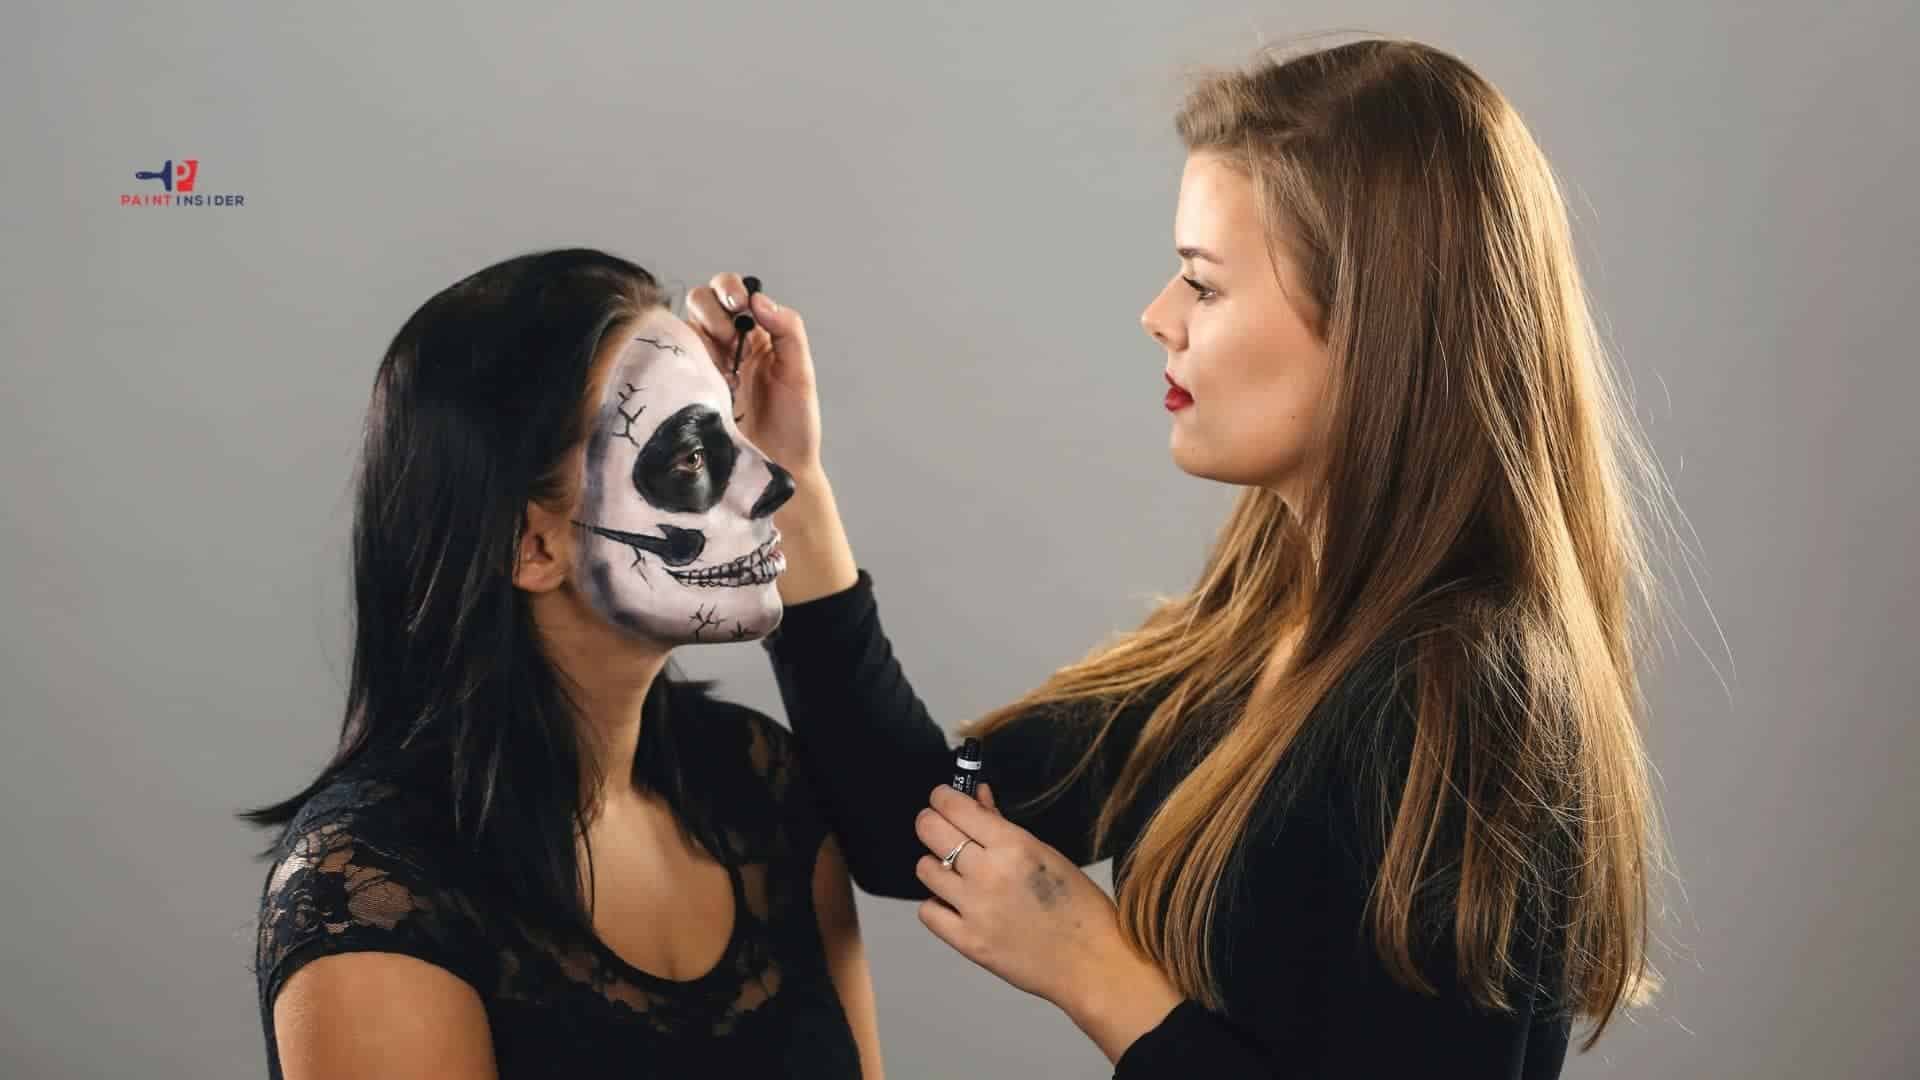
Sugar skulls are an imitation of a human skull and actually known as a Mexican tradition used during a holiday called “Día de Los Muertos” or the day of the dead. The sugar skulls are the actual offerings offered during this holiday and the size of the skull represents a child or an adult. They are called sugar skulls because traditionally they have been made from sugar and other ingredients, but nowadays, they can also be made from other materials such as clays. Sugar skulls can be molded by hand or by using a skull mold and once completely dried, you can begin the painting process.

Things you’ll need to paint and decorate your Sugar Skull:

  • Royal Icing
  • Food Coloring
  • Acrylic Paints
  • Small Brushes
  • Mod Podge

There a so many colors and details that can be added to a sugar skull but traditionally the colors on a sugar skull have specific meanings, whether you add these colors are not, is optional and based on your style, so below we list some steps on how you can easily paint a sugar skull.

Step 1. Choosing the base paint for your sugar skull

The type of color you choose will be based on the type of material used to create the sugar skull, as different types of materials require different types of paintings. As mentioned before, sugar skulls can be made from different types of materials such as clay, plastic, concrete, so in this case, this post will focus on the most popular type of sugar skulls people prefer.

Sugar skulls made from Sugar: This sugar skull is considered very popular and very easy to make. The sugar is molded into a skull using a front head and a back head mold and then allowed 24 hours to dry. Once it’s dry, it is then sealed together with royal icing to form the skull, and once applied, it takes around 1 hour to dry, and once dry, you’ll be able to decorate or paint it.

Before painting the sugar skull, you’ll first need to create the colors using royal icing. Once the royal icing is made, it is then separated into small portions and mixed with different food colorings you’ve chosen to be applied onto the sugar skull. Use these colors to decorate the sugar skull, piping different colors unto it and getting as creative as you want. Different types of decorative items can be added such as feathers, beads, sequins, and glitter. Once the royal icing colors are applied, it can take from 7-8 hours for it to dry.

Although sugar skulls are considered unhealthy and made for decorative purposes only, they can be edible although it is not recommended, so if you are planning on eating them, make sure to remove all non-edible items before consuming.

Sugar skulls made from plastic: These sugar skulls are also very popular, they can be found at your local arts and crafts store together with any other item you may need to complete this process such as flowers and paints, and are considered to be inexpensive. You can actually paint the skulls in the color of your choice, and then get creative by adding different details.

Different types of paint can be used when painting plastic sugar skulls. Neon acrylic paints are a favorite as it allows the skulls to glow in the dark. In this case, if you would like to skip the sanding and priming process when painting your skull then a recommended paint you can consider is the white dixie belle paint. This paint will provide your skull with a chalk-white basecoat which will make your topcoat colors really stand out. When using white dixie belle paint, it is recommended to add 2 coats of the paint, allowing around 20 minutes in between coats for the paint to dry. Make sure you stir the paint well.

Note that spray paints can also be used, if you consider this option to be easier, adding 2-3 coats of paint and allowing around 10 minutes for the paint to dry will also help you achieve a great finish look for your sugar skull. Make sure you shake the spray paint well, that you’re in a well-ventilated area and that you’re using protective gear.

Step 2. Styling your sugar skull with different colors

Once the paint on the sugar skull is dry which can take a couple of hours, you can then proceed with adding details onto it. Use a pencil to draw out different types of designs onto the skull such as flowers, swirls, and different types of embellishment, add patterns and different shapes until you’re satisfied, you can definitely check sugar skulls designs online also, to have an idea of what to add to your sugar skull and get really creative.

Use acrylic paints to outline the drawing marks with a small brush, using different types of color as you go, normally the black color is used to outline most of the designs then different colors are used to fill them in. Although acrylic paints are the most used method to paint sugar skulls, other types of paint can also be used such as sharpies and neon puffy paints. Once the paint is added it can take about 30 minutes for it dry.

Step 3. Sealing your sugar skull designs

Your sugar skulls paint can definitely be sealed so that the paint may last longer. They are many sealants that can be used, in this case, you can choose to spray the sealant onto your sugar skull for a faster application then leave it overnight for it dry.

Another favorite sealer used by many sugar skull fanatics is Mod Podge. The sealer looks whites when first applied but then dries to a shone clear coat adding some gloss to your sugar skull. You can also choose to add some glitter to the mod podge before applying it so your sugar skull may dry with a glittery coat. We hope you find these tips helpful.

How To Paint A Snowboard?

How To Paint A Snowboard

Painting your keyboard may not be as difficult as you think but it may require some patience to get it done so in this segment, we will share some steps on how to paint a snowboard easily.

As you may know, painting your snowboard may take some time, especially if you’re adding details to it. Most people love to customize their snowboard to kinda personalize it in their own style. It may take some time but, in the end, it will be worth it, and this is whether you’re painting on a brand-new snowboard or just trying to repaint or add some fresh coats to the one you already have. Painting a snowboard is a great way to add life or revitalize an old snowboard and save some cash while at it. You’ll also be able to add some creativity along the way, whether you’re painting an old or a brand-new snowboard.

Things you’ll need to paint your snowboard:

  • Screwdriver
  • Dawn citrus cleaner
  • Cotton Swabs / Painters Tape
  • Rag / microfiber cloth
  • Paint / Sealers
  • Stencils
  • Water
  • Sandpaper

Painting your snowboard can be easily done or achieved by following the simple steps listed below:

Step 1. Remove the bindings if applicable

Before you start painting the snowboard make sure to remove the bindings if they are actually added to the snowboard as this will make painting the snowboard easier. Bindings help you clip into place but removing them while painting can provide you a better finish look.

To remove the bindings, you can use a screwdriver, locate the front cover and the back cover of the bindings, which actually protects the bindings screws, then pry them with a flat head screwdriver to open. Once open, unscrew the screws with the screwdriver, then pull bindings upward to remove. Keep in mind that this process is only required in cases where bindings are attached, new snowboards don’t actually come with the bindings added on.

Step 2. Cleaning your snowboard

Before you begin the process of painting the snowboard, you want to make sure the paint is added over a clean surface. If you add paint to a surface that is not cleaned properly it can cause the paint to not adhere properly and basically peel off. There are actually cleaners designed specifically for snowboards known as base cleaners which can be used if available but any other cleaning solution will work as well as long as you don’t use anything abrasive.

To create a cleaning solution, pour some water into a spray bottle and add some drops of Dawn citrus cleaner, mix well and apply it to the snowboard, use a sponge to scrub the surface using circular motions then use water to rinse it off. Dry excess water with a lint-free cloth and allow it to dry completely. You can also use rubbing alcohol by simply adding some to a rag or paper towel and wiping down the surface of the snowboard

Step 3. Sanding the snowboard with the right sandpaper

Sanding is very important as it will allow the new paint to adhere properly to the surface of the snowboard and also smoothen the area to even it out. Depending on the condition of the surface, sandpaper or a Scotch-Brite can be used. If there is a lot of scratches on the snowboard, 220-grit sandpaper may be required to smoothen out the surface, especially if you previously used any p-tex material on the surface, then use 320-grit sandpaper to even out the area.

To sand the snowboard, wrap the sandpaper on a sanding block and begin to sand the surface using long strokes and sanding from side to side adding a bit of pressure until the surface has been evenly sanded. Once finished, clean off the sanding dust with a damped micro fiber cloth until the surface is clean.

Step 4. Filling the binding holes and adding tape to the snowboard

Before you begin painting the snowboard, the binding holes should be covered to prevent them from filling up with paint. This can be done by using cotton swabs, big enough to fit into the hole. Once you’re finished with covering the binding holes, you can proceed with taping around the snowboard to prevent paint from splattering on the edges or on the back of it. In this case, painters’ tape can be used for a smooth removal, it will also be useful for taping the areas you’re planning to add details to.

Step 5. Choosing your snowboard sealer

In this phase, the painting process begins by choosing the color of the undercoat you want to be added to the snowboard. In this case, painters choose a color to add to the snowboard, and once cured, the tape can be used to add details to the snowboard but not all details require tape. Overall, a sealer will prevent a previous paint from reflecting through the topcoat and will also help create a water-resistant layer.

They are different ways to apply a sealer, it can be air sprayed or done with spray cans which are the most used methods when it comes to snowboards. In this case, a brushed-on option is not recommended to prevent brush strokes on the surface of the snowboard. The sealer can be applied 2-3 times allowing 10 minutes in between coats for the paint to dry. Apply more coats if necessary. Once all sealer coats are added, allow drying 2-3 hours before proceeding with the topcoat paint.

Step 6. Applying the paint to the snowboard

Once the sealer is added, you can proceed with the topcoat paint, which is actually the color you’ve chosen to paint on the snowboard.  Snowboard paints are normally added with air sprays but spray cans can also be used. Apply 2-3 coats of the paint, allowing 10 minutes in between coats for the paint to dry. Then let cure for 24 hours for the paint to complete. Once the paint is dry, you can then add any stencils to personalize your snowboard, and once dry, you can then apply 2-3 coats of clear coat to protect the paint.

During this process, make sure you’re working in a well-ventilated area and with proper protective gear such as masks and gloves. Hope you find these tips helpful.