Removing tape from a painted wall can be a daunting task. If done incorrectly, you may end up peeling the paint off your wall in the process! In this guide, we will teach you how to remove the tape from a painted wall without damaging the paint. Follow these simple steps and your walls will be looking good as new in no time!
Introduction: Importance of Proper Tape Removal
Proper tape removal is often an overlooked aspect of home maintenance and DIY projects, yet it plays a crucial role in preserving the integrity of your walls. When we rush through the removal process, we can inadvertently peel paint or damage the surface underneath. This can lead to more extensive repairs and additional costs down the line, making it essential to prioritize careful techniques when tackling tape.
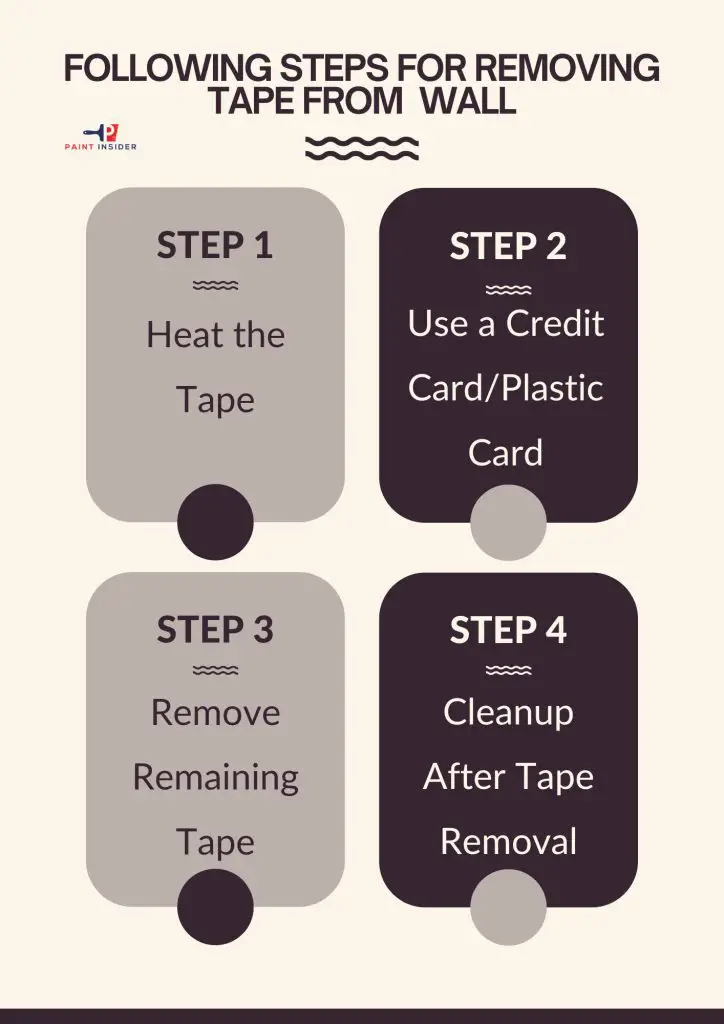
You can remove the tape from your wall with some simple steps:
- Heat the Tape
- Use a Credit Card/Plastic Card to remove the tape
- Remove Remaining Tape
- Cleanup After Tape Removal
Gather Necessary Tools and Supplies
To remove tape from a wall without peeling paint, you’ll need to gather the following tools and supplies:
Tools and Supplies:
- Hair Dryer or Heat Gun
- Plastic Putty Knife or Credit Card.
- Tweezers
- Soft Cloth or Sponge
- Masking or Painter’s Tape
- Cotton Balls or Q-tips
Step 1: Heat the Tape
The first step is to heat the tape. This can be done with a hairdryer or by running a hot towel over the area. The heat will help to loosen the adhesive on the back of the tape, making it easier to remove.
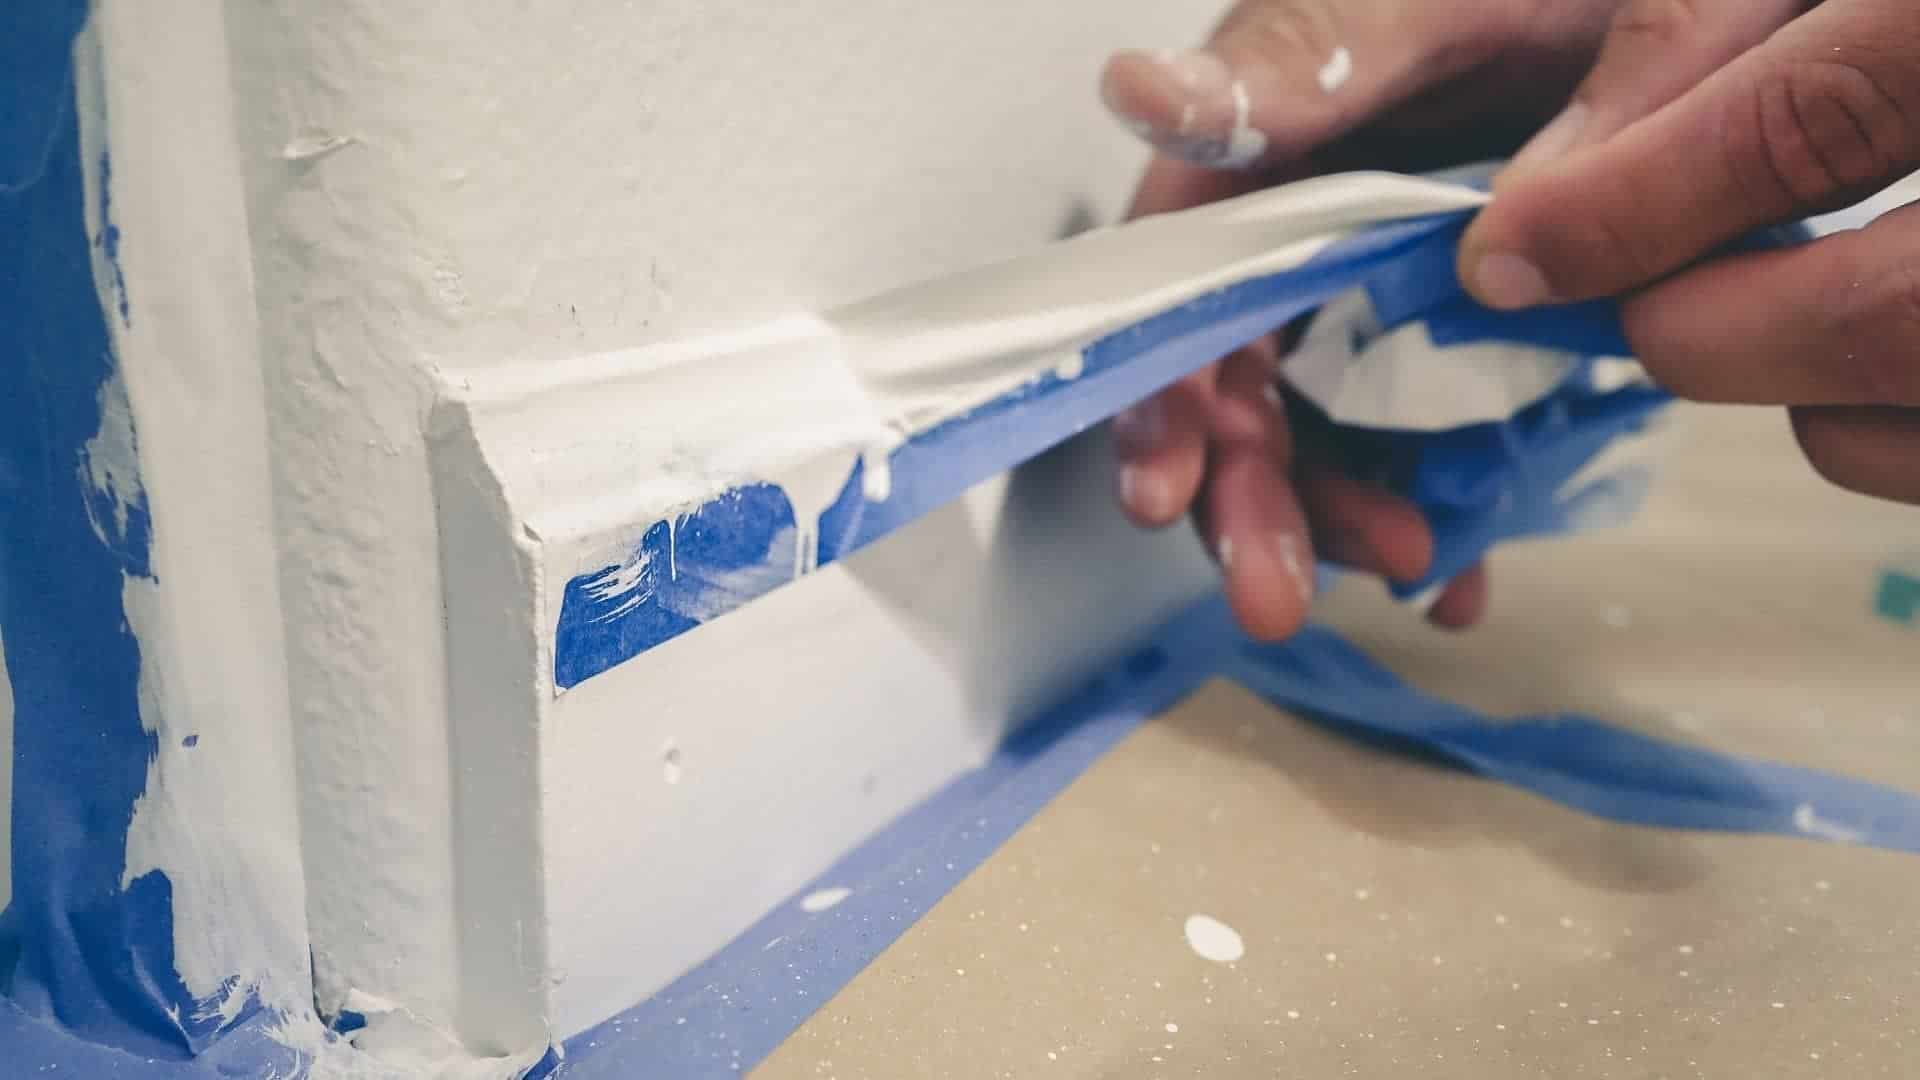
Step 2: Use a Credit Card/Plastic Card
Once the tape is heated, use a credit card or similar object to scrape along the edge of the tape. This will help to separate the tape from the wall and should make removal much easier. Be careful not to scrape too hard, as you don’t want to damage the paint underneath.
Step 3: Remove Remaining Tape
If there are still some stubborn pieces of tape remaining, you can try using a solvent like Goo Gone or WD-40. Apply a small amount to a cloth and rub it onto the remaining tape. This should help to dissolve the adhesive and make removal much easier.
Step 4: Cleanup After Tape Removal
Cleanup after tape removal is important to avoid any potential hazards. After removing the tape, dispose of it properly. Clean up any adhesive that is left behind on surfaces. Be sure to clean upholstery and carpeting as well. If there are any instructions on the label of the product being removed, be sure to follow them. Cleaning up after tape removal may seem like a hassle, but it is important to do to keep your home safe and clean.
Factors of Removing Tape From The Wall Without Peeling The Paint
There are some factors, that can affect removing the tape from the wall without peeling the paint, and below we list a few
Using a good painter’s tape
When you are painting a wall, it is important to use a good painter’s tape. This will help you remove the tape easily after you finish painting. If you do not use a good painter’s tape, you may have to scrape off the paint with a putty knife or sandpaper. This can be very time-consuming and frustrating. A good painter’s tape will also help you paint straight lines. If you do not use a good painter’s tape, you may end up with paint on your hands or clothes. Therefore, using a good painter’s tape is essential for anyone who wants to paint a wall correctly.
Removing the tape at the proper time
Removing the tape at the proper time after the painting is important for several reasons. Firstly, if the paint is still wet, the tape will peel off the paint and damage the surface. Secondly, if the paint has dried but the tape is left on for too long, it will be difficult to remove and may cause the paint to crack or chip. Finally, leaving the tape on for an extended period can leave behind a sticky residue that will attract dust and dirt. For these reasons, it is recommended to remove the tape after an hour of painting.
Painting on a clean surface
One way to make the job easier is to paint on a clean surface before applying the tape. This will help to ensure that the paint does not seep under the tape, making it much easier to remove when you are finished painting. In addition, painting on a clean surface will also give you a more even and consistent finish. So, next time you are getting ready to paint, take the extra time to wipe down the surfaces first. It will save you time and hassle in the long run.
Tape is a great way to hang decorations or artwork on a wall, but it can be tricky to remove without damaging the paint. If you’re careful and follow these simple steps, however, you can remove the tape from your walls without any fuss or peeling paint. So what are you waiting for? Get taping!
Repair Any Minor Damage if Needed
Once you’ve successfully removed the tape from your wall, you may notice some minor damage or residues left behind. Addressing these blemishes is key to restoring your wall’s pristine appearance. For any lingering adhesive, a gentle approach works wonders: dab a soft cloth with rubbing alcohol and gently scrub the area in circular motions. This simple trick not only removes residue but also minimizes the risk of peeling paint.
If you’ve uncovered scratches or scuffs during your cleanup, consider using touch-up paint that matches your wall color. A tiny brush can help you carefully blend patchwork with existing paint for an invisible finish. For more textured walls, applying a small amount of spackle can fill in tiny dents and holes; once dry, lightly sand it before painting it over to achieve a seamless look. With just a bit of effort and time, you can bring life back to your walls making them as good as new without the hassle of repainting entire sections!
Conclusion:
In conclusion, removing tape from walls without damaging the paint requires a blend of patience, technique, and the right tools. Instead of yanking it off in haste, consider using a hairdryer on a low setting to gently heat the adhesive. This warmth can soften the glue’s grip and allow for smoother removal. Additionally, using a plastic scraper or an old credit card can help lift the tape away while minimizing potential harm to your wall’s surface.
It’s also essential to understand that every type of wall paint and finish may respond differently to tape removal. For instance, glossy finishes might be more forgiving than matte ones. Therefore, conducting a small test in an inconspicuous area can save you from any unexpected mishaps. With these tips at your disposal, you’ll not only preserve the integrity of your walls but also develop skills for future projects where precision is key. Embracing these methods transforms a mundane task into an opportunity for mastery over crafting your space beautifully.