How To Paint Latex Mask?

How To Paint Latex Mask

Having the correct information regarding any painting project is a critical step towards achieving desired results. This article will focus on how to paint a latex mask.

3 Sure Methods To Paint Latex Mask Effortlessly

There could be many methods you can use to apply paint on your latex mask. However, each technique has specific procedures and guidelines which you must follow adequately to produce a stunning piece of painting. Before you embark on your painting project, be sure to have all the necessary supplies as seen below:

Supplies Needed

  • Rubber cement
  • Turpentine
  • Latex-based paint
  • Oil-based paint
  • Compressor
  • Brushes
  • Dubbing substance
  • Water

 Method 1. Blending  your Paint

This method will entail the blending of your paint with other additives such as rubber cement which you will you on your latex mask. Below are the steps involved:

Step 1. Prepare your working area and put on protective gear

Because you will be working with paint-emitting fumes, you only prepare yourself adequately. Arrange your working space for ease of painting, and most importantly, put on suitable protective gear to shield yourself from the harmful paint fumes.

 Step 2. Use a paint specifically meant for latex

Although you can mix your paint to apply on your latex mask, it is advisable to purchase an already packaged paint meant for use on latex surfaces. You can make your order online and have it delivered to your place of work.

 Step 3. Using Rubber Cement

Measure a significant amount of rubber cement and put it in a suitable container. Note that this step is only necessary if you decide to prepare your latex paint; Rubber cement will improve the adhesive properties of your color for easy application on your latex mask.

 Step 4. Adding Turpentine to Rubber Cement

Add the correct proportion of turpentine to the rubber cement and stir until you get a consistent solution.

 Step 5. Mix the rubber cement solution with an Oil-based paint

Mix your contents in a ratio of 2:1. For every two spoonfuls of your oil-based paint, add one spoonful of the rubber cent solution and stir to achieve a uniform mixture. If you mix the contents in the right proportions, you should form a paint that will easily sit on your latex mask.

 Method 2. Paint Your Latex Mask With an Airbrush

Step 1. Use your airbrush and compressor

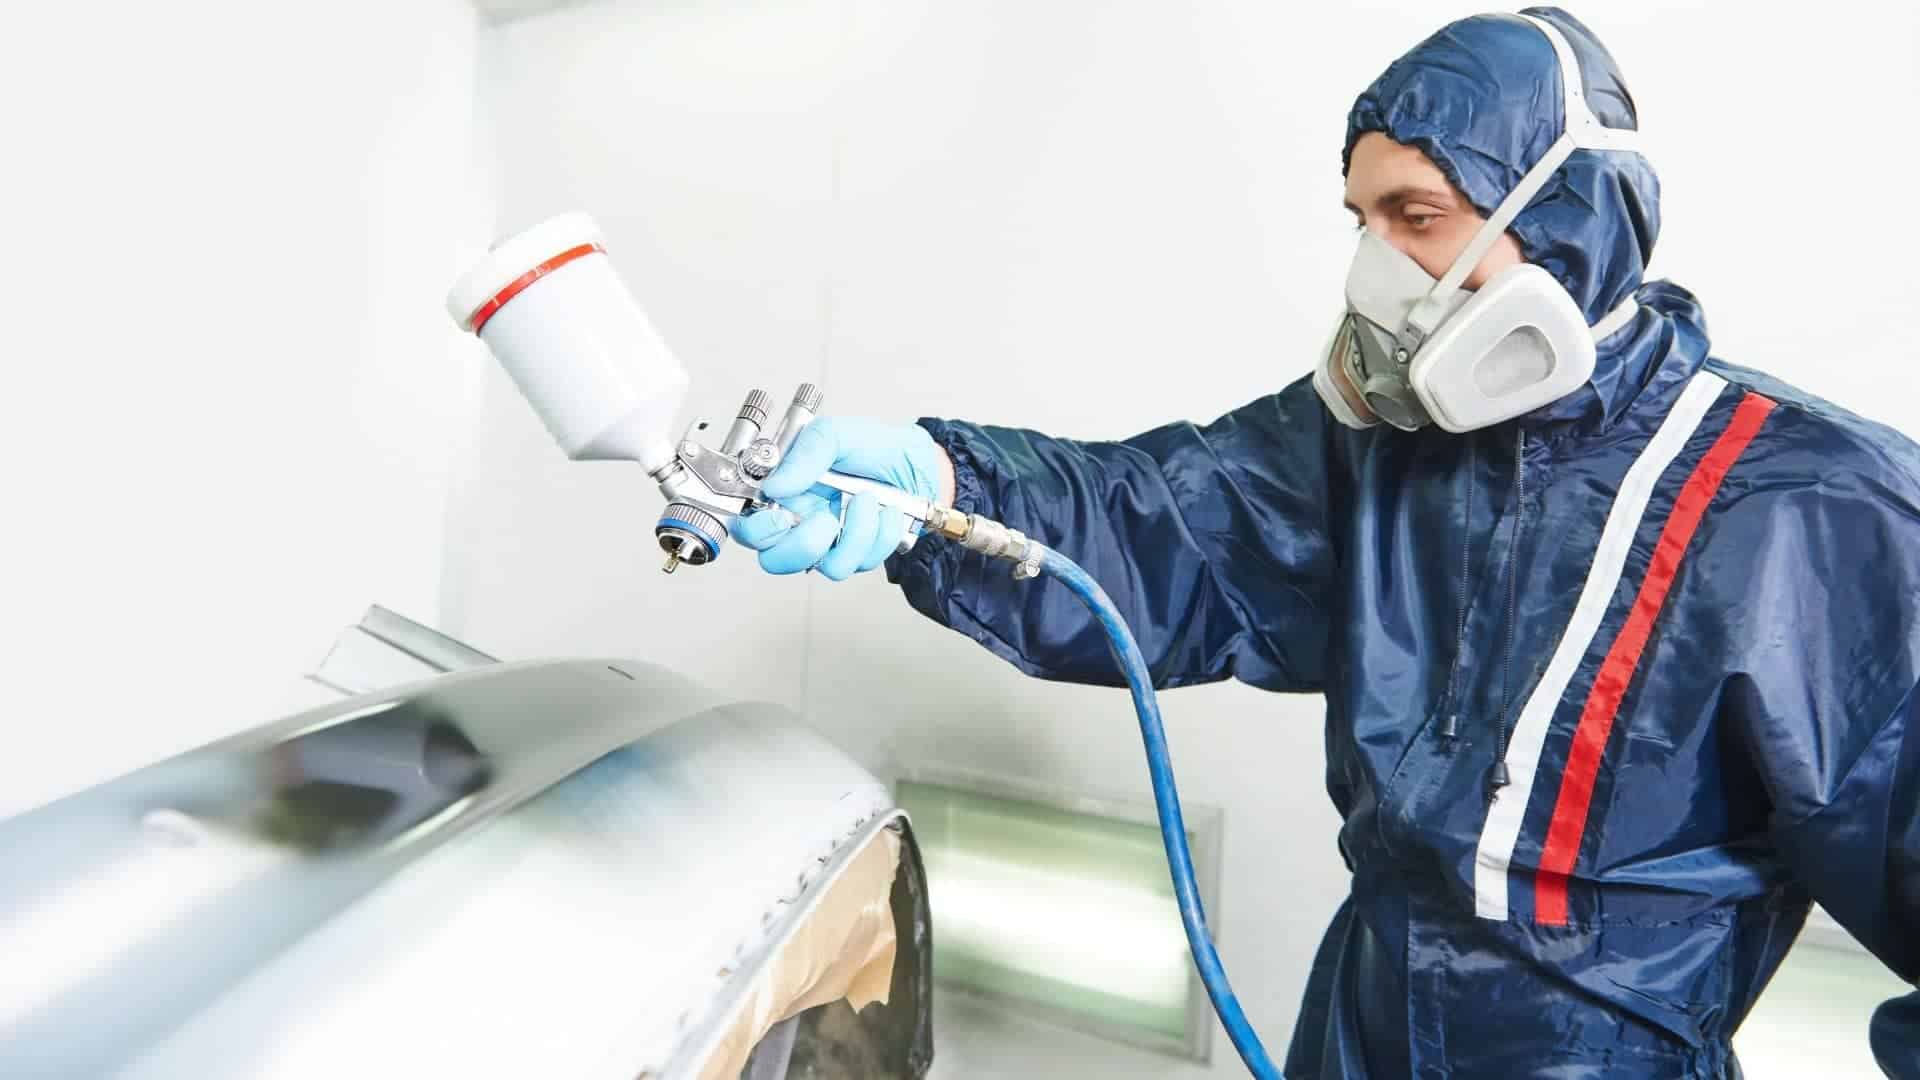
Because applying paint on a latex material requires high standards, It would be helpful to use a compressor and airbrush even to apply paint. If you are clueless about the working of the two components, consider seeking the service of a technician to help connect the airbrush and the compressor.

Step 2. Pouring your Paint into the spray can

Measure a significant amount of the paint you prepared above and pour it into your spraying can. Alternatively, you can use ready-made paint designed to be used on latex material. Ascertain that your tools are properly fixed to avoid any paint leakage.

 Step 3. Actual Application Of Paint

Now you are almost done with your painting project. Hold the nozzle of your spray gun at a suitable distance from the mask and start spraying. Ensure that your spray is even and consistent by adjusting the nozzle accordingly. One coat is enough if done correctly.

 Step 4. Let the Paint Dry

The recommended drying time, in this case, should be anywhere around one to two hours. Be sure to add one more coat of the pant before allowing it to dry because you want an even and smooth finish; the final coat should be relatively thin to enhance blending properties between the latex surface and the paint.

 Step 5. Cleaning your airbrush and changing colors to use

If you are painting a Halloween mask, you may have to apply various colors to your latex mask. Before switching to a different color, be sure to clean your airbrush properly to avoid messing with your paintwork. It would be helpful to rinse your airbrush tip with the color you’re switching to before filling your spray can with paint.

Step 6. Doing touches on your latex mask

Your airbrush will be very useful in adding final touches and decorations to your latex mask. Be sure to use suitable colors on specific parts of your show. The last look of your latex mask will depend on the type of shades and touches you make on your front.

 Method 3. Painting your Latex Mask Using Standard Paint Brushes

Step 1. Create a primer using a thin coat of paint

Use a suitable brush to apply a thin layer of color to your latex mask. Be sure to use a thick but flat bristle paintbrush for your exercise. Get rid of excess paint drops utilizing a piece of towel.

 Step 2. Allow the paint sufficient time to dry

As always, let your paint dry before continuing to the next step. Allowing your color enough time to dry will ensure that your stains stick correctly on your mask.

 Step 3. Detailing your latex Mask

In this case, it would be helpful to use a small brush to detail your latex mask. Be sure to use a small brush with relatively thick bristles for better application of paint. You want your mask to look natural, so you can be as creative as you want.

Apply gentle and calculated strokes to avoid distorting the intended look on your latex mask. As we mentioned earlier, be sure to wash your brushes thoroughly before alternating between colors.

 Step 4. Use a dubbing material (Sponge) to bring out the outer feel of your mask

Because you want your mask to have an authentic and consistent look, it would be helpful for you to use a sponge to dab on the surface of your latex mask. Immerse your sponge in the paintwork on your mask until you have the results you want.

From the preceding content, you may have realized that applying paint on a latex material is a bit challenging if you don’t have the foggiest idea about the whole process. The tips featured in this article will help you to understand how to paint your latex mask with much ease.


How To Paint Cedar?

How To Paint Cedar

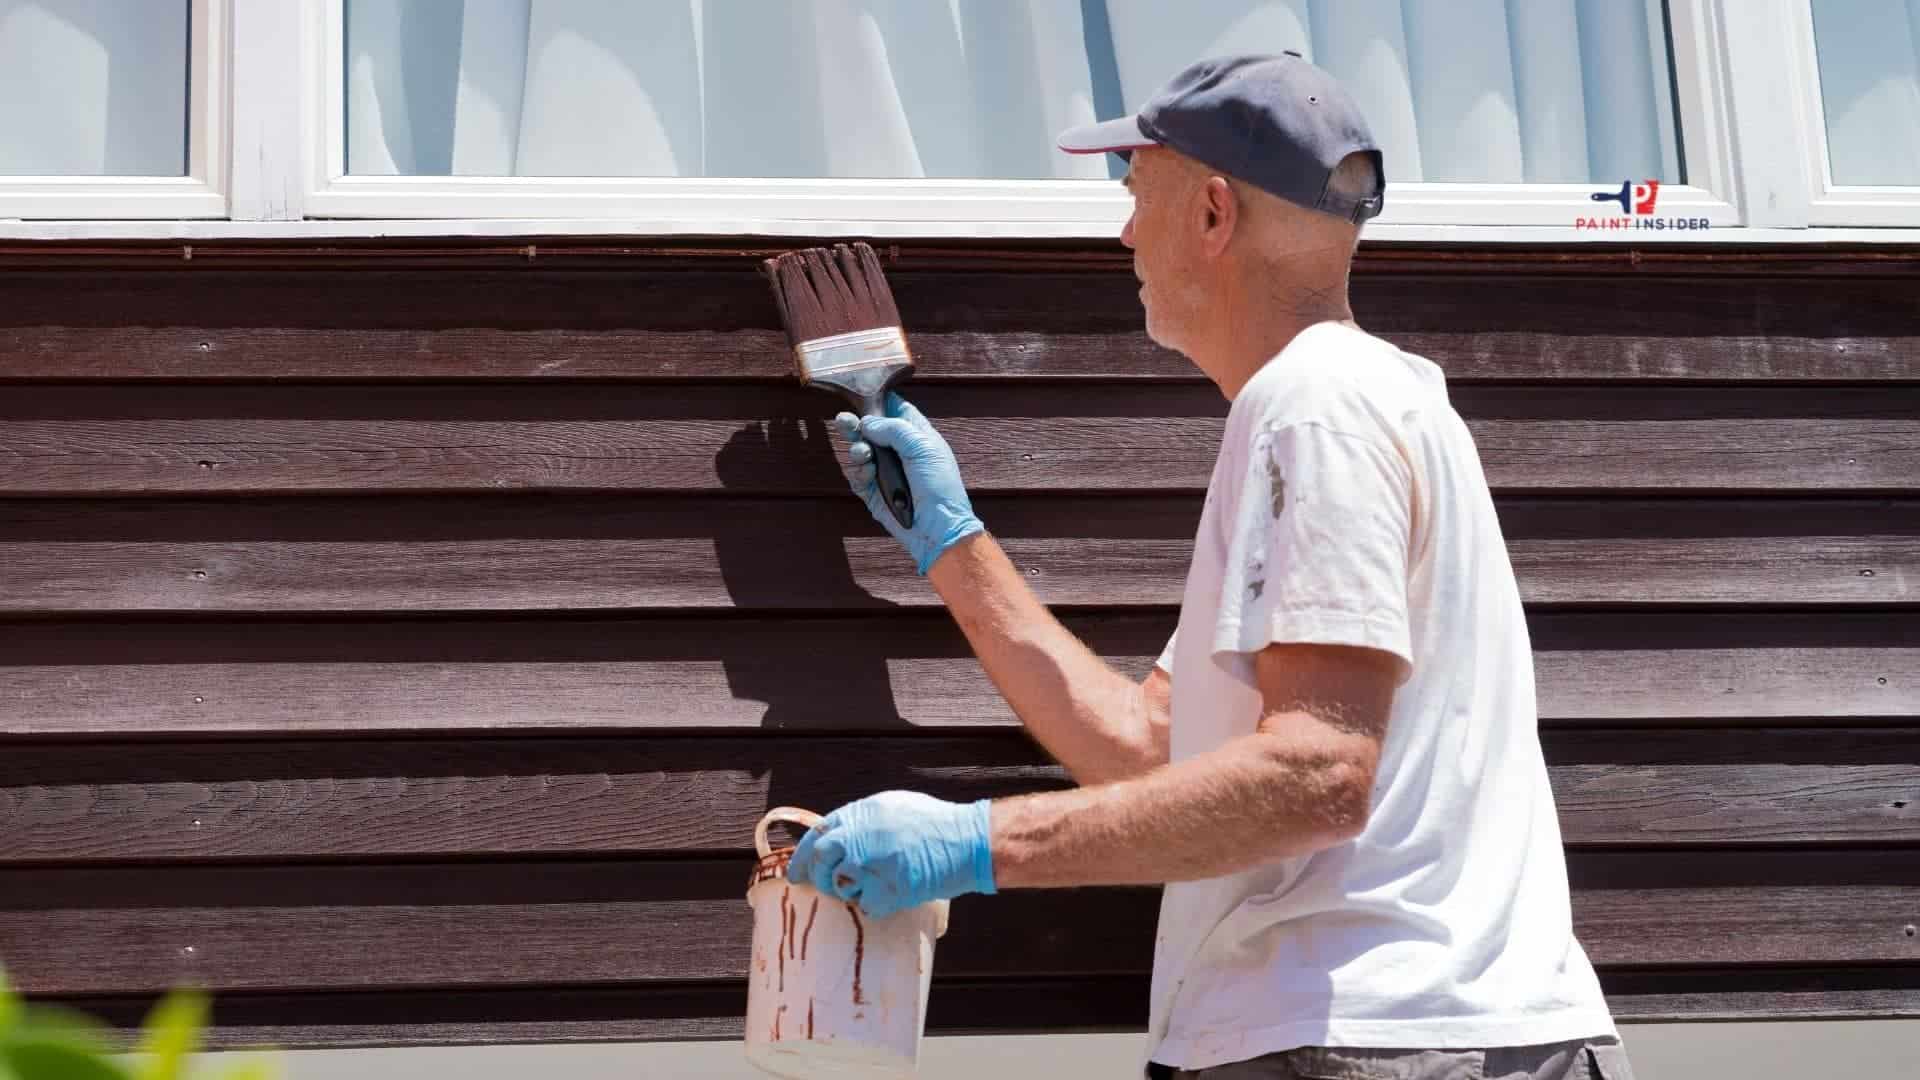
You might have heard of the multiple benefits of cedar woods, so you may want to know how to protect them, in this segment, we will share some tips and tricks on how to paint cedar woods.

Introduction:

Cedarwoods are popular for their multiple uses, its aromatic qualities have allowed it to become a favorite of many, as it can be used to treat many different ailments and also, can be found in multiple beauty products. Cedar trees are available in various shapes and forms, and many varieties of cedar wood are used for different purposes. For example, if you’re planning on creating outdoor structures then you may want to choose a type of cedar wood that is resistant to the different environmental conditions. In the end, cedar woods last long and are easy to take care of.

When it comes to choosing water vs oil-based paint, you may encounter mixed opinions about this.

  • Cedarwood cleaner
  • Water / Brush
  • Stain paint
  • Regular Paint
  • Sandpaper /Rag

The painting process when it comes to cedar woods is similar whether you painting large or small objects, although it may take some time to complete so make sure you have some time available when painting cedar woods. Below are steps you can follow to paint your cedar woods

Preparing the Cedar Surface for Painting

  • Preparing your cedar surface for painting is a vital step that can make all the difference in achieving a smooth, long-lasting finish. Start by ensuring the wood is clean and free of contaminants such as dirt and grease. A simple mixture of mild soap and water can work wonders; just scrub gently to avoid damaging the grain. Once you’ve washed away any residue, dry thoroughly cedar tends to retain moisture longer than other woods.
  • Next comes sanding, which not only creates a better surface for paint adhesion but also reveals the beautiful character of the cedar. Use medium-grit sandpaper followed by fine grit for an ultra-smooth feel; this process allows you to eliminate rough patches while enhancing the rich texture inherent in cedar wood. Don’t forget to remove dust with a tack cloth before painting this small detail prevents imperfections that could mar your final look.
  • Lastly, consider applying a primer specifically formulated for cedar or exterior woods, it acts as both a barrier against tannins and a foundation that promotes paint durability. By taking these careful preparatory steps, you’re setting yourself up for painting success! Remember, patience during preparation will reward you with stunning results that highlight cedar’s natural beauty while ensuring your project stands the test of time.

Choosing the Right Type of Paint

When it comes to painting cedar, the choice of paint can significantly influence both the aesthetic and durability of your project. One option that often gets overlooked is using high-quality outdoor acrylic latex paint. This type not only adheres well to the natural oils in cedar but also allows for the wood to breathe, preventing moisture build-up which can lead to warping or peeling. Moreover, consider opting for a saturating oil-based stain if you desire a more natural look that enhances the wood grain while still providing protection against UV rays.

In addition to selecting the right paint type, don’t underestimate the impact of preparation on your final outcome. Thoroughly clean and sand your cedar surfaces before applying any product this ensures even application and longer-lasting results. Using a primer specifically designed for wood can further enhance adhesion and color fidelity, especially if you’re transitioning from a darker shade or treating previously unpainted cedar. Ultimately, understanding how these elements come together will not only transform your space but will also keep your beautiful cedar looking pristine for years ahead.

Essential Tools and Materials Needed

When diving into the enchanting world of painting cedar, having the right tools and materials is essential for achieving that flawless finish.

Here are the essential tools and materials you’ll need for painting cedar:

Tools:

  1. Paintbrushes – High-quality, natural, or synthetic bristle brushes for detailed work and edges.
  2. Paint Roller – A roller with a ¾-inch nap for smooth and efficient application on cedar surfaces.
  3. Paint Sprayer (optional) – For fast and even coverage, especially on large or rough cedar surfaces.
  4. Sandpaper (120-150 grit) – To sand the cedar surface for smoothness and better paint adhesion.
  5. Drop Cloths or Plastic Sheets – To protect the ground and surrounding areas from paint splatters.
  6. Painter’s Tape – For masking off areas you don’t want painting, such as windows or trim.
  7. Ladder – If you’re painting a high or vertical cedar surface, like siding or fencing.
  8. Stir Sticks – To thoroughly mix the paint before and during application.
  9. Bucket – For mixing or holding water/cleaning solution.

Materials:

  1. Exterior Primer – A high-quality primer designed for wood surfaces, especially one with mildew resistance for cedar.
  2. Exterior Paint – A 100% acrylic latex or oil-based paint, which works well on cedar and is weather-resistant.
  3. Wood Filler – To fill any gaps, cracks, or holes in the cedar surface before painting.
  4. Wood Cleaner – A solution to clean dirt, mildew, and grime from the cedar before painting.
  5. Caulk – For sealing any gaps or seams between cedar boards to prevent moisture infiltration.
  6. Paint Tray and Liners – For holding paint while using brushes or rollers.

These tools and materials will help ensure that your cedar surface is properly prepared and painted for a durable, beautiful finish.

How To Paint Cedar

Techniques for Applying Paint Evenly

When painting cedar, achieving an even finish is crucial to showcase its natural beauty. Start by investing in high-quality paint and tools; a good brush or roller can make all the difference in how evenly the paint spreads. Before you dip your brush, consider lightly sanding the surface of the cedar. This not only helps with adhesion but also creates a smoother canvas, allowing your paint to glide on effortlessly.

Using a technique called wet-on-wet can enhance your painting experience and help prevent unsightly streaks. Instead of letting each coat dry completely before applying another, work in sections and apply fresh paint over areas that are still wet. This allows for smooth blending and reduces watermarks or uneven patches. Additionally, be mindful of lighting painting in direct sunlight can cause the paint to dry too quickly, leading to lap marks. Working during cooler parts of the day or utilizing shade will give you more working time and result in a beautiful, uniform application on your cherished cedar surfaces.

Common Mistakes to Avoid When Painting

One of the most common mistakes when painting cedar is neglecting proper preparation. Cedarwood, known for its natural oils and tannins, requires thorough cleaning and sanding to ensure paint adheres properly. If you skip this step, you’re likely to end up with peeling paint or uneven coverage down the line. Take the time to remove dirt and grime with a gentle wash, followed by light sanding to create a smooth surface that allows your chosen paint to bind effectively.

Another pitfall involves using the wrong type of paint. Many assume that any exterior paint will work on cedar, but choosing a high-quality, specially formulated siding or deck paint can make all the difference in durability and appearance. Additionally, consider applying a primer designed for cedar, this not only helps block stains from bleeding through but also enhances color vibrancy and longevity. By investing in the right products from the start, you’ll be able to enjoy your beautifully painted surfaces longer without costly touch-ups or repeated applications.

Caring for Painted Cedar Surfaces

Caring for painted cedar surfaces goes beyond mere maintenance, it’s about preserving the natural beauty and longevity of this unique wood. When it comes to painted cedar, selecting the right paint is crucial. Opt for high-quality exterior water-based or acrylic paints that allow the wood to breathe while providing a durable layer against moisture and UV damage. Remember, even the best paint can only do its job if applied correctly ensure your surface is clean, dry, and properly primed beforehand.

As seasons change, lend extra attention to your painted cedar by inspecting it for peeling or fading every six months. A simple touch-up can often rejuvenate tired areas without requiring a full repaint. Don’t forget about sealing! Applying a clear protective sealant every couple of years enhances durability while illuminating the underlying grain patterns of the cedar, creating an attractive visual contrast with the paint. By nurturing your painted cedar surfaces with these thoughtful steps, you’ll not only enhance their aesthetics but also ensure they stand strong against time’s relentless passage.

Conclusion: Enjoying Your Beautifully Painted Cedar

After putting in the effort to paint your cedar, take a moment to truly appreciate the transformation. The vibrant colors will not only enhance the beauty of your outdoor space but also create a warm and inviting atmosphere that you, your family, and your guests can enjoy for years to come. Picture hosting summer barbecues or cozy evenings on the patio, surrounded by stunning woodwork that reflects your personal style.

Maintaining and enjoying your beautifully painted cedar is an ongoing journey. Regular touch-ups and protective coats ensure it remains a centerpiece of joy rather than a chore, making each glance at its rich hues a reminder of your creativity and dedication. Consider incorporating plants or outdoor decor that complement the color scheme these small touches can elevate the overall aesthetic even further. So grab a cup of coffee or tea, sit back in your favorite spot, and bask in the satisfaction of having turned ordinary cedar into an extraordinary showcase!

How To Paint A Sugar Skull?

How To Paint A Sugar Skull

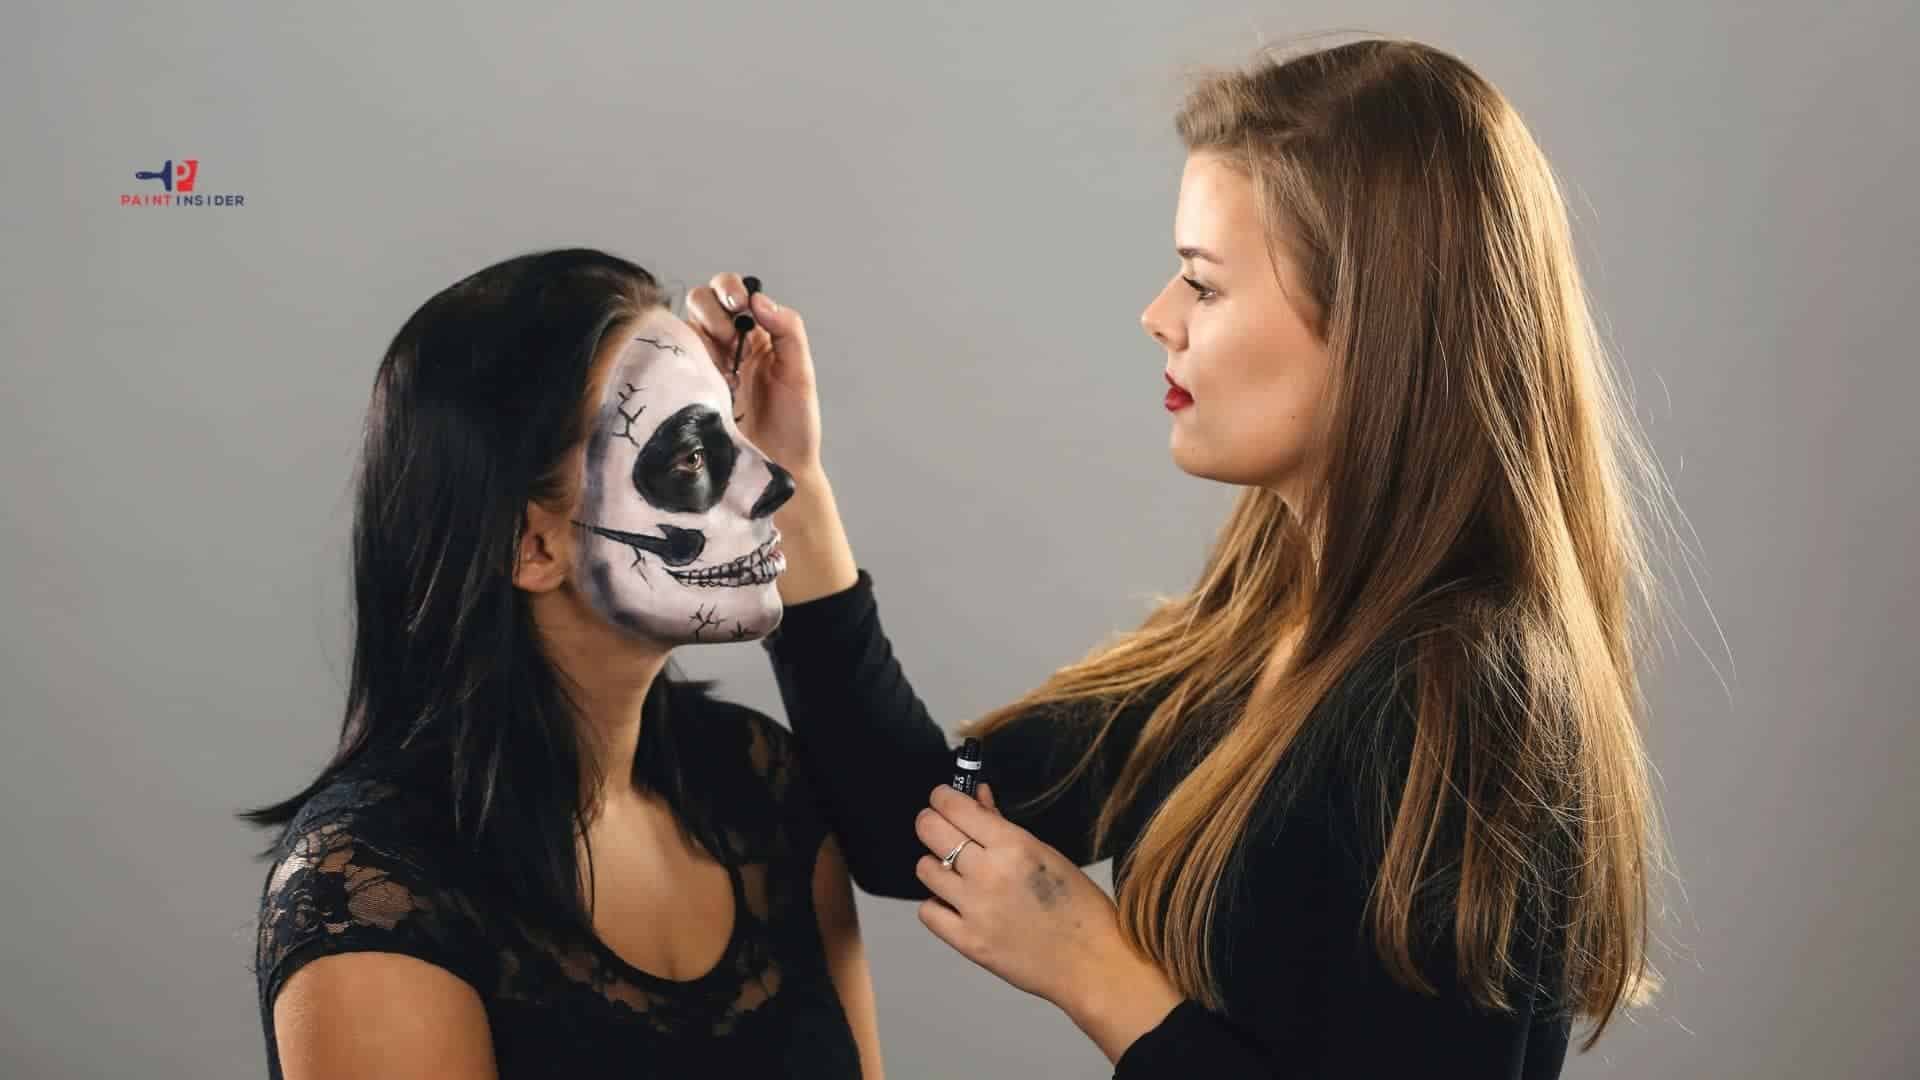
Sugar skulls are allowing you to get really creative when it comes to painting. Here, we will share some tips on how to paint a sugar skull.

Sugar skulls are an imitation of a human skull and actually known as a Mexican tradition used during a holiday called “Día de Los Muertos” or the day of the dead. The sugar skulls are the actual offerings offered during this holiday and the size of the skull represents a child or an adult. They are called sugar skulls because traditionally they have been made from sugar and other ingredients, but nowadays, they can also be made from other materials such as clays. Sugar skulls can be molded by hand or by using a skull mold and once completely dried, you can begin the painting process.

Things you’ll need to paint and decorate your Sugar Skull:

  • Royal Icing
  • Food Coloring
  • Acrylic Paints
  • Small Brushes
  • Mod Podge

There a so many colors and details that can be added to a sugar skull but traditionally the colors on a sugar skull have specific meanings, whether you add these colors are not, is optional and based on your style, so below we list some steps on how you can easily paint a sugar skull.

Step 1. Choosing the base paint for your sugar skull

The type of color you choose will be based on the type of material used to create the sugar skull, as different types of materials require different types of paintings. As mentioned before, sugar skulls can be made from different types of materials such as clay, plastic, concrete, so in this case, this post will focus on the most popular type of sugar skulls people prefer.

Sugar skulls made from Sugar: This sugar skull is considered very popular and very easy to make. The sugar is molded into a skull using a front head and a back head mold and then allowed 24 hours to dry. Once it’s dry, it is then sealed together with royal icing to form the skull, and once applied, it takes around 1 hour to dry, and once dry, you’ll be able to decorate or paint it.

Before painting the sugar skull, you’ll first need to create the colors using royal icing. Once the royal icing is made, it is then separated into small portions and mixed with different food colorings you’ve chosen to be applied onto the sugar skull. Use these colors to decorate the sugar skull, piping different colors unto it and getting as creative as you want. Different types of decorative items can be added such as feathers, beads, sequins, and glitter. Once the royal icing colors are applied, it can take from 7-8 hours for it to dry.

Although sugar skulls are considered unhealthy and made for decorative purposes only, they can be edible although it is not recommended, so if you are planning on eating them, make sure to remove all non-edible items before consuming.

Sugar skulls made from plastic: These sugar skulls are also very popular, they can be found at your local arts and crafts store together with any other item you may need to complete this process such as flowers and paints, and are considered to be inexpensive. You can actually paint the skulls in the color of your choice, and then get creative by adding different details.

Different types of paint can be used when painting plastic sugar skulls. Neon acrylic paints are a favorite as it allows the skulls to glow in the dark. In this case, if you would like to skip the sanding and priming process when painting your skull then a recommended paint you can consider is the white dixie belle paint. This paint will provide your skull with a chalk-white basecoat which will make your topcoat colors really stand out. When using white dixie belle paint, it is recommended to add 2 coats of the paint, allowing around 20 minutes in between coats for the paint to dry. Make sure you stir the paint well.

Note that spray paints can also be used, if you consider this option to be easier, adding 2-3 coats of paint and allowing around 10 minutes for the paint to dry will also help you achieve a great finish look for your sugar skull. Make sure you shake the spray paint well, that you’re in a well-ventilated area and that you’re using protective gear.

Step 2. Styling your sugar skull with different colors

Once the paint on the sugar skull is dry which can take a couple of hours, you can then proceed with adding details onto it. Use a pencil to draw out different types of designs onto the skull such as flowers, swirls, and different types of embellishment, add patterns and different shapes until you’re satisfied, you can definitely check sugar skulls designs online also, to have an idea of what to add to your sugar skull and get really creative.

Use acrylic paints to outline the drawing marks with a small brush, using different types of color as you go, normally the black color is used to outline most of the designs then different colors are used to fill them in. Although acrylic paints are the most used method to paint sugar skulls, other types of paint can also be used such as sharpies and neon puffy paints. Once the paint is added it can take about 30 minutes for it dry.

Step 3. Sealing your sugar skull designs

Your sugar skulls paint can definitely be sealed so that the paint may last longer. They are many sealants that can be used, in this case, you can choose to spray the sealant onto your sugar skull for a faster application then leave it overnight for it dry.

Another favorite sealer used by many sugar skull fanatics is Mod Podge. The sealer looks whites when first applied but then dries to a shone clear coat adding some gloss to your sugar skull. You can also choose to add some glitter to the mod podge before applying it so your sugar skull may dry with a glittery coat. We hope you find these tips helpful.

How To Paint A Snowboard?

How To Paint A Snowboard

Painting your keyboard may not be as difficult as you think but it may require some patience to get it done so in this segment, we will share some steps on how to paint a snowboard easily.

As you may know, painting your snowboard may take some time, especially if you’re adding details to it. Most people love to customize their snowboard to kinda personalize it in their own style. It may take some time but, in the end, it will be worth it, and this is whether you’re painting on a brand-new snowboard or just trying to repaint or add some fresh coats to the one you already have. Painting a snowboard is a great way to add life or revitalize an old snowboard and save some cash while at it. You’ll also be able to add some creativity along the way, whether you’re painting an old or a brand-new snowboard.

Things you’ll need to paint your snowboard:

  • Screwdriver
  • Dawn citrus cleaner
  • Cotton Swabs / Painters Tape
  • Rag / microfiber cloth
  • Paint / Sealers
  • Stencils
  • Water
  • Sandpaper

Painting your snowboard can be easily done or achieved by following the simple steps listed below:

Step 1. Remove the bindings if applicable

Before you start painting the snowboard make sure to remove the bindings if they are actually added to the snowboard as this will make painting the snowboard easier. Bindings help you clip into place but removing them while painting can provide you a better finish look.

To remove the bindings, you can use a screwdriver, locate the front cover and the back cover of the bindings, which actually protects the bindings screws, then pry them with a flat head screwdriver to open. Once open, unscrew the screws with the screwdriver, then pull bindings upward to remove. Keep in mind that this process is only required in cases where bindings are attached, new snowboards don’t actually come with the bindings added on.

Step 2. Cleaning your snowboard

Before you begin the process of painting the snowboard, you want to make sure the paint is added over a clean surface. If you add paint to a surface that is not cleaned properly it can cause the paint to not adhere properly and basically peel off. There are actually cleaners designed specifically for snowboards known as base cleaners which can be used if available but any other cleaning solution will work as well as long as you don’t use anything abrasive.

To create a cleaning solution, pour some water into a spray bottle and add some drops of Dawn citrus cleaner, mix well and apply it to the snowboard, use a sponge to scrub the surface using circular motions then use water to rinse it off. Dry excess water with a lint-free cloth and allow it to dry completely. You can also use rubbing alcohol by simply adding some to a rag or paper towel and wiping down the surface of the snowboard

Step 3. Sanding the snowboard with the right sandpaper

Sanding is very important as it will allow the new paint to adhere properly to the surface of the snowboard and also smoothen the area to even it out. Depending on the condition of the surface, sandpaper or a Scotch-Brite can be used. If there is a lot of scratches on the snowboard, 220-grit sandpaper may be required to smoothen out the surface, especially if you previously used any p-tex material on the surface, then use 320-grit sandpaper to even out the area.

To sand the snowboard, wrap the sandpaper on a sanding block and begin to sand the surface using long strokes and sanding from side to side adding a bit of pressure until the surface has been evenly sanded. Once finished, clean off the sanding dust with a damped micro fiber cloth until the surface is clean.

Step 4. Filling the binding holes and adding tape to the snowboard

Before you begin painting the snowboard, the binding holes should be covered to prevent them from filling up with paint. This can be done by using cotton swabs, big enough to fit into the hole. Once you’re finished with covering the binding holes, you can proceed with taping around the snowboard to prevent paint from splattering on the edges or on the back of it. In this case, painters’ tape can be used for a smooth removal, it will also be useful for taping the areas you’re planning to add details to.

Step 5. Choosing your snowboard sealer

In this phase, the painting process begins by choosing the color of the undercoat you want to be added to the snowboard. In this case, painters choose a color to add to the snowboard, and once cured, the tape can be used to add details to the snowboard but not all details require tape. Overall, a sealer will prevent a previous paint from reflecting through the topcoat and will also help create a water-resistant layer.

They are different ways to apply a sealer, it can be air sprayed or done with spray cans which are the most used methods when it comes to snowboards. In this case, a brushed-on option is not recommended to prevent brush strokes on the surface of the snowboard. The sealer can be applied 2-3 times allowing 10 minutes in between coats for the paint to dry. Apply more coats if necessary. Once all sealer coats are added, allow drying 2-3 hours before proceeding with the topcoat paint.

Step 6. Applying the paint to the snowboard

Once the sealer is added, you can proceed with the topcoat paint, which is actually the color you’ve chosen to paint on the snowboard.  Snowboard paints are normally added with air sprays but spray cans can also be used. Apply 2-3 coats of the paint, allowing 10 minutes in between coats for the paint to dry. Then let cure for 24 hours for the paint to complete. Once the paint is dry, you can then add any stencils to personalize your snowboard, and once dry, you can then apply 2-3 coats of clear coat to protect the paint.

During this process, make sure you’re working in a well-ventilated area and with proper protective gear such as masks and gloves. Hope you find these tips helpful.

How To Paint A Ping Pong Table?

How To Paint A Ping Pong Table

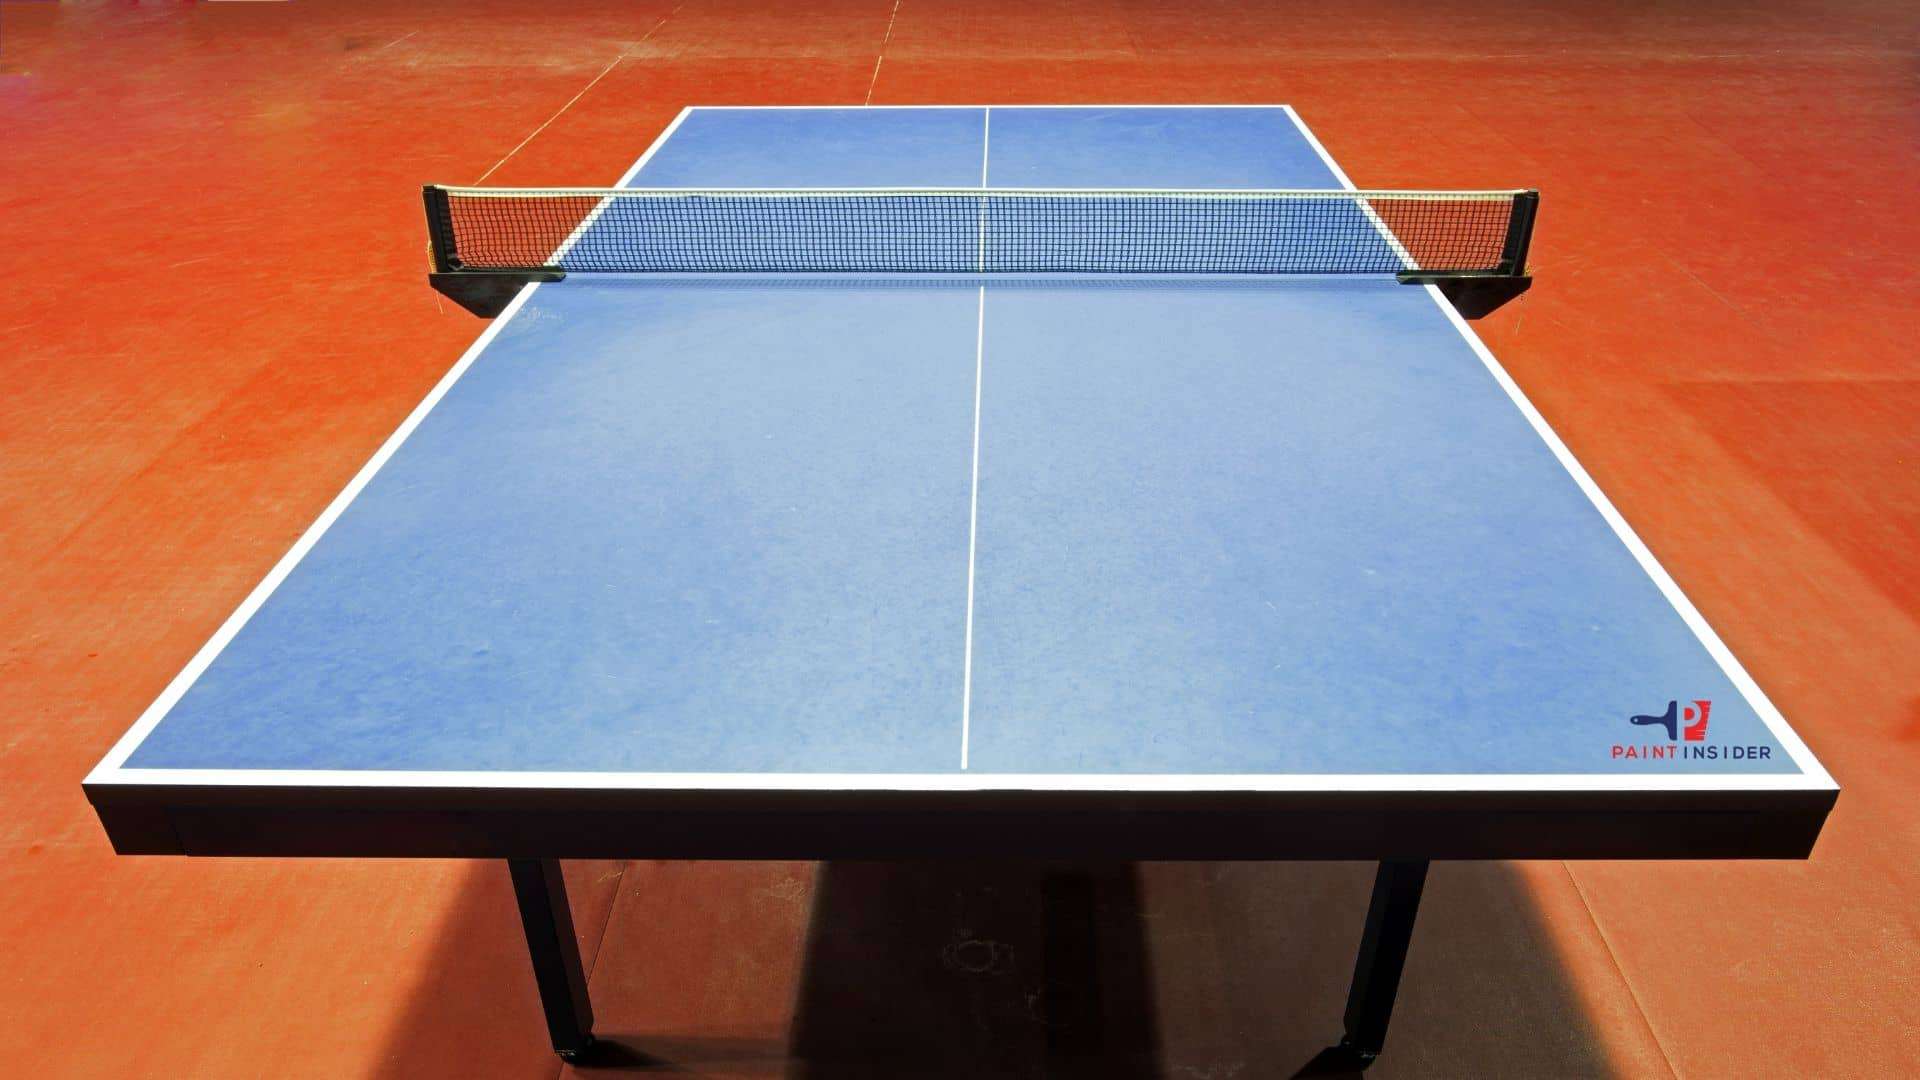
You can never exhaust ideas on how to paint a ping pong table. The article will try to uncover a suitable method on how to paint a pong table. Keep reading for more content.

9 Effective Steps to Paint Your Ping Pong Table

Regardless of whether you are a professional painter or an amateur, your main aim is to make sure that you produce the best paintwork as possibly as you can. Having the necessary supplies at your disposal does not necessarily mean you can perfectly paint on any piece of art. This is the reason why this article will walk you through a step-by-step guide on how to apply paint to your ping pong table with much ease. Highlighted below are the steps to follow.

Supplies Needed

  • Green/Blue and white alkyd, or chalkboard paint
  • Suitable paint brushes
  • Painters tape

 Step 1 – Gather the required Supplies

Any painting project requires you to have the right supplies at your disposal to achieve the painting results you want. Be sure to have essential supplies during the earlier stages of your painting project, like a suitable primer and paint. Another must-have tool is the painter’s tape to mask a specific area on your ping pong table when applying paint.

 Step 2 – Prepare your table for painting

Cleaning will form part of the most crucial part of your preparation exercise. Be sure to do a few repairs on your table if necessary. You can choose from a variety of products to conceal damaged parts of your table. Ensure the table is smooth and ready for paint application. It would be helpful to sand your table for a more nuanced and smooth texture.

 Step 3 – Cleaning your Ping Pong Table

After sanding your table, you can now use a suitable cleaning agent to eliminate dust particles that might hamper your painting exercise. Ensure you clean every part of your table. Be sure to clean every corner of your table before embarking on your paint application.

 Step 4 – Applying the primer

Like you would other painting projects, it is crucial to apply a suitable primer to enhance the bonding properties of your paint on your ping pong table. Be sure to use an even and thick coat of your primer for best results.

 Step 5 – Mask the lines on your Ping Pong Table

Your painter’s tape will come in handy to help you conceal specific lines on your ping pong table. Be sure to mask all the cables properly before applying the first coat of your paint.

Note that you will have to make the line bolder with color after you are done painting, so be cautious when applying paint to the other parts.

Ensure the primer is fully dry before applying your paint for better bonding properties between your color and the table.

 Step 6 – Applying the First Coat

Having gone through the most critical stages, here comes an equally important step, applying the first layer of paint on your table. Apply the first coat just as any piece of painting would let dry before adding a subsequent layer. Note that a maximum of two layers can give you the results you want. Allow each layer to dry before applying a subsequent one.

 Step 7 – Applying Paint on The Lines of Your Table

As mentioned somewhere in this article, you will apply suitable paint on the lines you covered earlier to make them more bold and visible. Ensure the color you applied earlier has adequately dried before taking off your tape. It must be remembered that you are supposed to apply paint on the strips using your hand, so a lot of care is needed on your part.

Step 8 – Remove your Masking Tape

We stated earlier that a lot of care is required on your part when removing the tape to avoid damaging your paintwork. Apply your white paint on the lines after carefully taking off the tape

Consider applying paint on the lines with much caution to avoid any damage. Rushing through the painting process will only give you regrettable results. None of us wanted to redo the whole exercise due to a mistake that could have been avoided. Be sure to use a suitable paintbrush for better results.

 Step 9 – Allowing your paint to dry

Once you are sure that you have followed the above steps to the letter, you can place your ping pong table in a suitable place and allow the paint to dry properly before using it.

Examine your table for any painting flaws and rectify them before the paint dries completely. You can always go over the whole exercise as many times as possible to attain the best standards possible.

 Tips To Keep In Mind

  • Masking tape/painter’s tape is a must-have tool before you embark on your painting project because you will use it to conceal the white stripes on your table.
  • Examine your table for any paint flaws and rectify them immediately before the paint dries out. You want nothing but a professionally painted ping pong table.
  • Always go through any instructions regarding the usage of your supplies before you begin your painting exercise; this way, you will minimize the occurrence of possible mistakes while painting your table. Reading instructions is also a great way to understand critical information about the most appropriate paint used on your ping pong table.
  • Ensure you study the initial coats properly on your ping pong table before applying fresh paint, and this is one way of avoiding substandard paintwork.
  • Always select the best paints for use on your ping pong table. It might help you seek professionals’ services before you erroneously apply any color to your table. Alternatively, you can pay a professional artist to do the work for you.

Applying paint on a ping pong table requires you to have more than the correct supplies. Strive to learn a few tips and tricks regarding this topic coupled with the information in this article, and within a short while, you will master the art of painting a ping pong table like a pro.

How To Paint A Beer Pong Table Like A Pro?

How to Paint a Beer Pong Table

There’s nothing like a good game of beer pong to get the party started. But if you’re looking to take your game to the next level, painting your beer pong table might just be the way to go. With a few simple steps, you can turn that plain old table into a work of art – and make your opponents green with envy. So what are you waiting for? Read on to learn how to paint a beer pong table like a pro!

Steps you need to follow to paint Beer Pong Table are:

  1. Gather Supplies
  2. Tape Off The Edges
  3. Prime The Table
  4. Applying your first coat
  5. Applying  paint to the concealed parts
  6. Removing your masking tape
  7. Let It Dry

Supplies Needed

  • Be sure to have an alkyd color or chalkboard paint
  • Paintbrushes
  • Painters tape/suitable masking tape

Gather your supplies in readiness for painting

The common understanding is that any painting project will require you to have your supplies and tools ready for your project. Set up your working space and assemble everything you need before you start your painting project. Most of this project will require you to use masking tape because there are parts that you are not going to paint.

Tape Off The Edges of A Beer Pong Table

At the time of painting, always Tape Off The Edges of A Beer Pong Table to prevent paint from getting on the other side of the table. Also, it is very important to use the right kind of Tape. painter’s tape is the best choice because it is made to not damage surfaces and to come off cleanly. Also, be sure that before you Tape Off The Edges of A Beer Pong Table, you clean the surface really well. This will help the Tape adhere better and also help to avoid any paint bleeding under the Tape. When you are finished painting, carefully remove the tape and enjoy your new paint job!

 Applying a primer to your table

  • Like you would other painting projects, it is significant to apply a suitable primer to improve the sticking properties of your paint on your beer pong table.
  • Be sure to use an even and heavy coat of your primer for promising outcomes.

Applying your first coat

  • Apply the first coat just as any piece of painting would let dry before adding a subsequent layer. Note that a maximum of two layers can give you the results you want.
  • Allow each layer to dry before applying a subsequent one.

Applying  paint to the concealed parts

  • As indicated somewhere in this article, you will apply suitable paint on specific parts you covered earlier to make them more bold and visible.
  • Ensure the color you applied earlier has satisfactorily dried before taking off your tape.

Removing your masking tape

  • We stated earlier that a lot of care is required on your part when removing the tape to avoid damaging your paintwork.
  • Apply your white paint on the  taped parts after carefully taking off your painter’s tape
  • Be sure to use a suitable paintbrush for better results.
  • It would be helpful to be a little more cautious when applying paint on taped parts of your beer pong table because you want to minimize any damage to your paintwork.
  • Rushing through the painting process will only give you regrettable results.
  • None of us wants to redo the whole exercise due to a mistake that you can easily avoid. Be sure to use a suitable paintbrush for better results.

Allow your paint to dry

  • Once you are sure that you have followed the above steps to the letter, you can now place your beer pong table in a suitable place and allow the paint to dry properly before using it.
  • Examine your table for any painting flaws and rectify them before the paint dries completely. Then, of course, you can always go over the whole exercise as many times as possible to attain the best standards possible.

 Important Tips to note

  • Masking tape/painter’s tape is a must-have tool before you embark on your painting project because you will use it to conceal certain parts on your beer pong table.
  • Examine your table for any paint flaws and rectify them immediately before the paint dries out. Of course, you want nothing but a professionally painted beer pong table.
  • Always read all the instructions regarding the usage of your supplies before you begin your painting exercise; this way, you will minimize the occurrence of possible mistakes while painting your table.
  • Reading instructions is also a great way to understand critical information of the most appropriate paint use on your beer pong table.
  • Ensure you study the initial coats properly on your beer pong table before applying fresh paint, and this is one way of avoiding substandard paintwork.
  • Always select the best paints for use on your beer pong table. It might help you seek professionals’ service before you erroneously apply any color to your table.
  • Alternatively, you can pay a professional artist to do the work for you.

what types of paint is perfect To Paint A Beer Pong Table?

When choosing paint for a beer pong table, it is important to select a type that will be durable and easy to clean. Latex paint is a good option because it is resistant to water and staining. However, oil-based paints may provide more durability. If you are planning to use the table outdoors, be sure to choose paint that can withstand the elements. For added protection, you may want to apply a clear sealant after painting. When applying the paint, be sure to use several thin coats rather than one thick coat. This will help prevent drips and runs. Allow each coat of paint to dry completely before applying the next.

When it is a painting question, you may realize that some projects are quite demanding and engaging. On that note, applying paint on a beer pong table requires you to have more than the correct supplies.

It would be better to learn a few tips and tricks regarding this topic coupled with the information in this article, and within a short while, you will master the art of painting a beer pong table like a pro.

How To Paint Headphones? best 3 methods

How To Paint Headphones

In this article, I’ll tell you the simple ways of how to paint headphones on your own, requiring easily accessible supplies needed.

Using headphones has become common today among teens. Let’s imagine how your entertainment will increase when you wear attractive headphones. Don’t think about buying new expensive headphones for attraction. If you’re a creative person, you can modify your headphones by painting them at your home with your creativity.

Don’t worry if you think you’re not a creative person and have never done any creative work because, in this article, I’ll show you the easy and facile methods to paint your headphones at home. Let’s start.

Method 1 To Paint Headphones

Let’s look at the first method designed for you to do the painting headphones quickly and entertainingly.

  • Supplies needed:
  • Different nail polish colors
  • Headphones
  • Clothespins
  • Masking tape

Step 1 : Accomplish pre-painting requirements

Cover some pieces of headphones with tape. The pieces can differ in distance from half a half-inch to few inches apart. Ensure to press the tape firmly to avoid the paint seeping through. Hang the headphones using two clothespins to paint around the entire wire easily.

Step 2 : Start painting

It’s better to use different nail polish colors as you like. Paint the covered parts and give time to them for drying completely. Remove the tape. While doing this process, nail polish should not be wet. Otherwise, it’ll seep and cause problems in appearance. Paint the remaining pieces that you can paint. Do it by taping off it to ensure straight lines. You can also do this by freehand. Then, allow it to dry.

Step 3 : Sealing

Apply a clear nail polish thin layer for sealing. Ensure that the paint will not chip. After doing these steps, you’ll get custom paint headphones.

Method 2 To Paint Headphones

Supplies Needed:

  • Primer
  • Headphones
  • Blowdryer
  • Acrylic sealant or polyurethane
  • Wire
  • Towel
  • Alcohol
  • Masking tape

Let’s start with another method of painting the headphones. Do you want to do a pro job? Sand the plastic for roughing it up. Don’t sand the current paint off, but you require something to adhere to. After getting it, clean it using a towel and alcohol (mainly fingernail polish remover) or alcohol. It removes residue and oils. Blow it clean using an air duster can.

Step 1 : Use primer

 It helps to adhere to paint better and makes the paint job long-lasting and even more. Use spray paint for better results.

Step 2 : Make adjustments

Hang the headphone on the string or little bits of wire. Please don’t touch them. Using wire is better because it’s stiff than string, and you can control spin. Use coats of primer and light. Dry it for at least 20 minutes in between coats. Don’t see drops running; use light coats, and use many. Don’t rush; instead, give it the proper time to dry. Do two or three coats this way. If it’s cold or humid where you’re at, give it more time to dry out; 30-45 min between coats.

Step 3 : Leave it for some time

Give time to primer for drying out and leave it for at least overnight. If accessible, use a blow dryer for speeding up by blow drying on low heat for a max of 15 minutes. The solvent will evaporate, and the solid primer shell will leave.

Step 4 : Repeat the process

Repeat the same process except with paint. If you don’t want to paint at some point or do multiple tones, use a razor blade and masking tape for creating masks. You can also add pin stripping later. When you feel you have left enough thin paint coats that the color is hard and stable enough, leave it overnight again or use a blow dryer if accessible.

Step 5 : Finalizing the product

 If you’re looking for an outstanding and exceptional finish, apply an acrylic sealant, or better if you use polyurethane. In this way, you’ll make the finish as smooth as possible. Use lightly sand and very fine grit sandpaper and lightly sand. Use two to three coats, not sanding the last coat for the finalizing project.

Congratulations, you have done a paint job like a professional. Here’s the best method to paint headphones. It’ll last as long as you own the headphones. The paint won’t peel, bubble, flake, or rub off on you. It’s fantastic to say that it will be like the factory finish.

How to Paint Headphones with spray paint?

It’s another method designed to accomplish uniquely painting the headphone process.

Supplies Needed

  • Spray paint
  • Tape (use packing tape if you don’t have masking tape)
  • Clear matte finish spray paint
  • Headphones
  • Exacto (in case if you get fussy about taping off stuff and knobs)

Step 1 : Painting Preparation

Ensure that the headphones’ top sliders are extended for the painting if you will not ensure that the old bad color areas will appear to viewers. Tape the soft parts. You don’t need to paint the area that’ll touch. Don’t forget the jack/connector metal part.

Step 2 : Proceed painting

Put on a ventilator. Set the headphones on a surface so that it doesn’t mess up with spray paint. It’s your choice to use any spray paint. If there is metal on the headphones, use metal-adhering paint.

Step 3 : Finish the process

Ensure you get swivel areas inside and sides and top of the headpiece. Dry it and then turn the side. Use a matte protectant clear coat when the paint is dry. Clean off mistakes with paint/solvent remover on a bit of rag or a paper towel. If you forget to do this, then go back to using a solvent for wiping it off. Apply attractive stickers of your own for covering up the brand name. So, the product is ready! Enjoy your less-gaudy and stunning headphones.

So, this is all about painting headphones. Choose the process you love the most. It’s the best choice to try all methods for fun. Even inexperienced and non-creative people can do this. I have not recommended anything that’s not possible or difficult for you to get access to. Now, you don’t have to invest money to buy attractive headphones that are too costly due to their attraction. Not only will this process give you a fantastic product, but also it’ll give you a lot of fun during the process.

How To Paint Chrome Bumpers? The Best Method

How To Paint Chrome Bumper

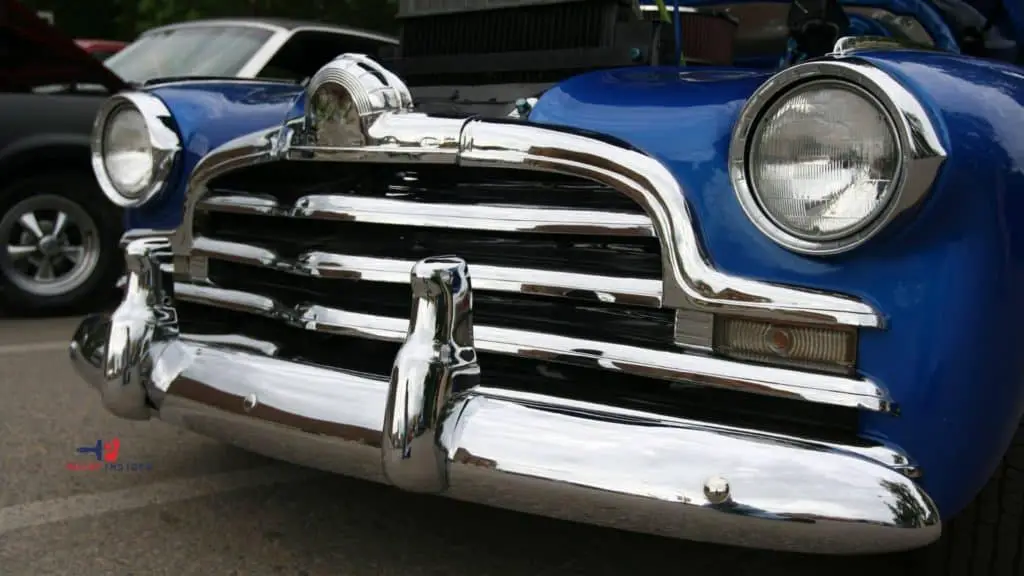
Painting over a rusty chrome bumper is not an easy task. The chrome bumper of your car is prone to wear and tear as time passes, so it is crucial to learn how to paint a chrome bumper to make it more durable. With that in mind, continue reading to find out possible ways how to paint chrome bumpers.

3 Steps to Follow When Painting a Chrome Bumper

As time rolls by, the general look of your car deteriorates, and you may consider repainting it to restore it to its original look. With that said, our primary focus today is the chrome bumper and possible ways to apply paint on your chrome bumper to do away with the unsightly look.

How To Paint Chrome Bumper

Below is a list of Supplies You Will Need:

  • Well ventilated area
  • Protective gear
  • Spanner
  • Soap
  • Dry Towel
  • Masking tape
  • wax
  • Sandpaper
  • Primer
  • Paint of your choice
  • Clear Paint

Step 1 : Readying the Surface for the Primer

  • Be sure to have the right tools to help you unscrew the bolts and nuts that hold the bumper to the vehicle. Note that most screws are visible, so you will not find it hard to remove them. Firstly, you need to detach the bumper from your vehicle.
  • Just like you would any other surface, ensure you clean your bumper thoroughly using soap and water. Washing your bumper will remove unwanted particles such as dust and any other sticky substances. Let the bumper dry before proceeding to the next level.
  • Consider getting rid of rust from the surface of your bumper if there is any. Mix an acidic solution with sodium carbonate (baking powder) and use it to remove rust from your bumper.
  • The baking powder solution should remove the rust material on the surface of your bumper by dissolution.
  • Use a clean towel to wipe the bumper. Once again, consider using soap and water to be sure the surface of your bumper is spot-free.
  • At this point, you need to prepare the surface to improve its bonding ability with the Primer. Note that if you don’t prepare the surface of your chrome bumper properly, then your paint will peel off within a short period.
  • Use appropriate sandpaper to smoothen the surface as much as you can. Consider using fine-grained sandpaper at this stage.
  • Large-grained sandpaper will help smooth dents and ugly spots.
  • Use fine-grained sandpaper to make the surface even and smoother.
  • Be sure to achieve a smooth surface devoid of any scratches and unwanted dents.
  • Because you want the paint to stick properly on your chrome bumper, it would be helpful to use a substance that will eliminate any unwanted blemishes n the surface of the chrome bumper.
  • Apply wax on the surface of your bumper and wipe it off using a soft cloth.
  • Shop for the most suitable grease or wax to apply on the surface of your bumper.
  • There may be areas on your bumper which you might not want to paint. In this case, mask those parts with an appropriate covering material before you start your painting exercise.

Step 2 : Applying a Primer on the Chrome Bumper

  • Select a good location for your project. Ensure the area you choose for the painting exercise is well ventilated because spray paint contains harmful substances. Be sure to have all the necessary supplies before you start any painting. Always put on your protective gear before you start spraying your paint.
  • Spray 2-3 layers of your Primer on the surface of the chrome bumper. Be sure to use a primer with good bonding properties because you want your paint to stay on for a more extended period. Allow a significant amount of drying time in between the layers for an even finish.
  • Consider doing light sanding on the Primer but be sure not to over-sand until you reach the metal. Note, you can only file on the Primer after it dried completely. You want a smooth and even surface before applying any paint on the surface of your chrome, so be sure to use fine-grained sandpaper at this point.
  • On the off chance that you have done heavy sanding, you should consider reapplying the Primer on the areas affected.
  • Dust away any unwanted particles on the surface of your chrome bumper using a clean and soft cloth. Note that you want to achieve a clean and even surface devoid of any contaminants.
  • Consider using an appropriate cleaning substance to wipe any dust particles and impurities on the surface of your chrome bumper.

Step 3 : Actual Application of Paint on your Chrome Bumper

  • You don’t want to do a shoddy painting job on your bumper, so you consider sharpening your painting skills, especially when using a spray gun. You should maintain a constant distance between the surface of your chrome bumper and the nozzle of your spray gun as you spray. A distance of about 15 centimeters is considered to be more appropriate in this context.
  • After spraying your paint, you may notice that some arrears contain raised spots. In that case, you can do a light sanding to level the surface for an even and smooth surface.
  • Be sure to spray at least three to four coats of the paint while allowing a sufficient drying time between the coats. You want to achieve a perfect finish, so consider applying even and consistent layers of your paint. Note that you should allow a sufficient amount of drying time for a single coat to dry before applying the subsequent coat.
  • You might consider going through the instructions regarding drying time for a particular type of paint.
  • You want to make your bumper look stunning, so you might want to spray layers of appropriate clear paint to get an attractive and consistent finish. Be sure to use up to a maximum of three coats on the surface of your chrome bumper to give you a clear finish.
  • Note that applying a clear finish on the surface of your chrome bumper will also act as a protective layer against scratches and other environmental conditions.
  • Now you are through with your painting project. Allow your chrome bumper a significant amount of drying time before fixing it to its position on your car. Be sure to let the paint dry before you start improving your bumper to the vehicle. Fasten the screws properly to ensure the bumper is firmly in its place
How To Paint A Chrome Bumper

Consider getting rid of rust from the surface of your bumper if there is any. Mix an acidic solution with sodium carbonate (baking powder) and use it to remove rust from your bumper. Washing your bumper will remove unwanted particles such as dust and any other sticky substances. Enjoy your painting!

How To Paint Baseboards Before Installing?

How To Paint Baseboards Before Installing

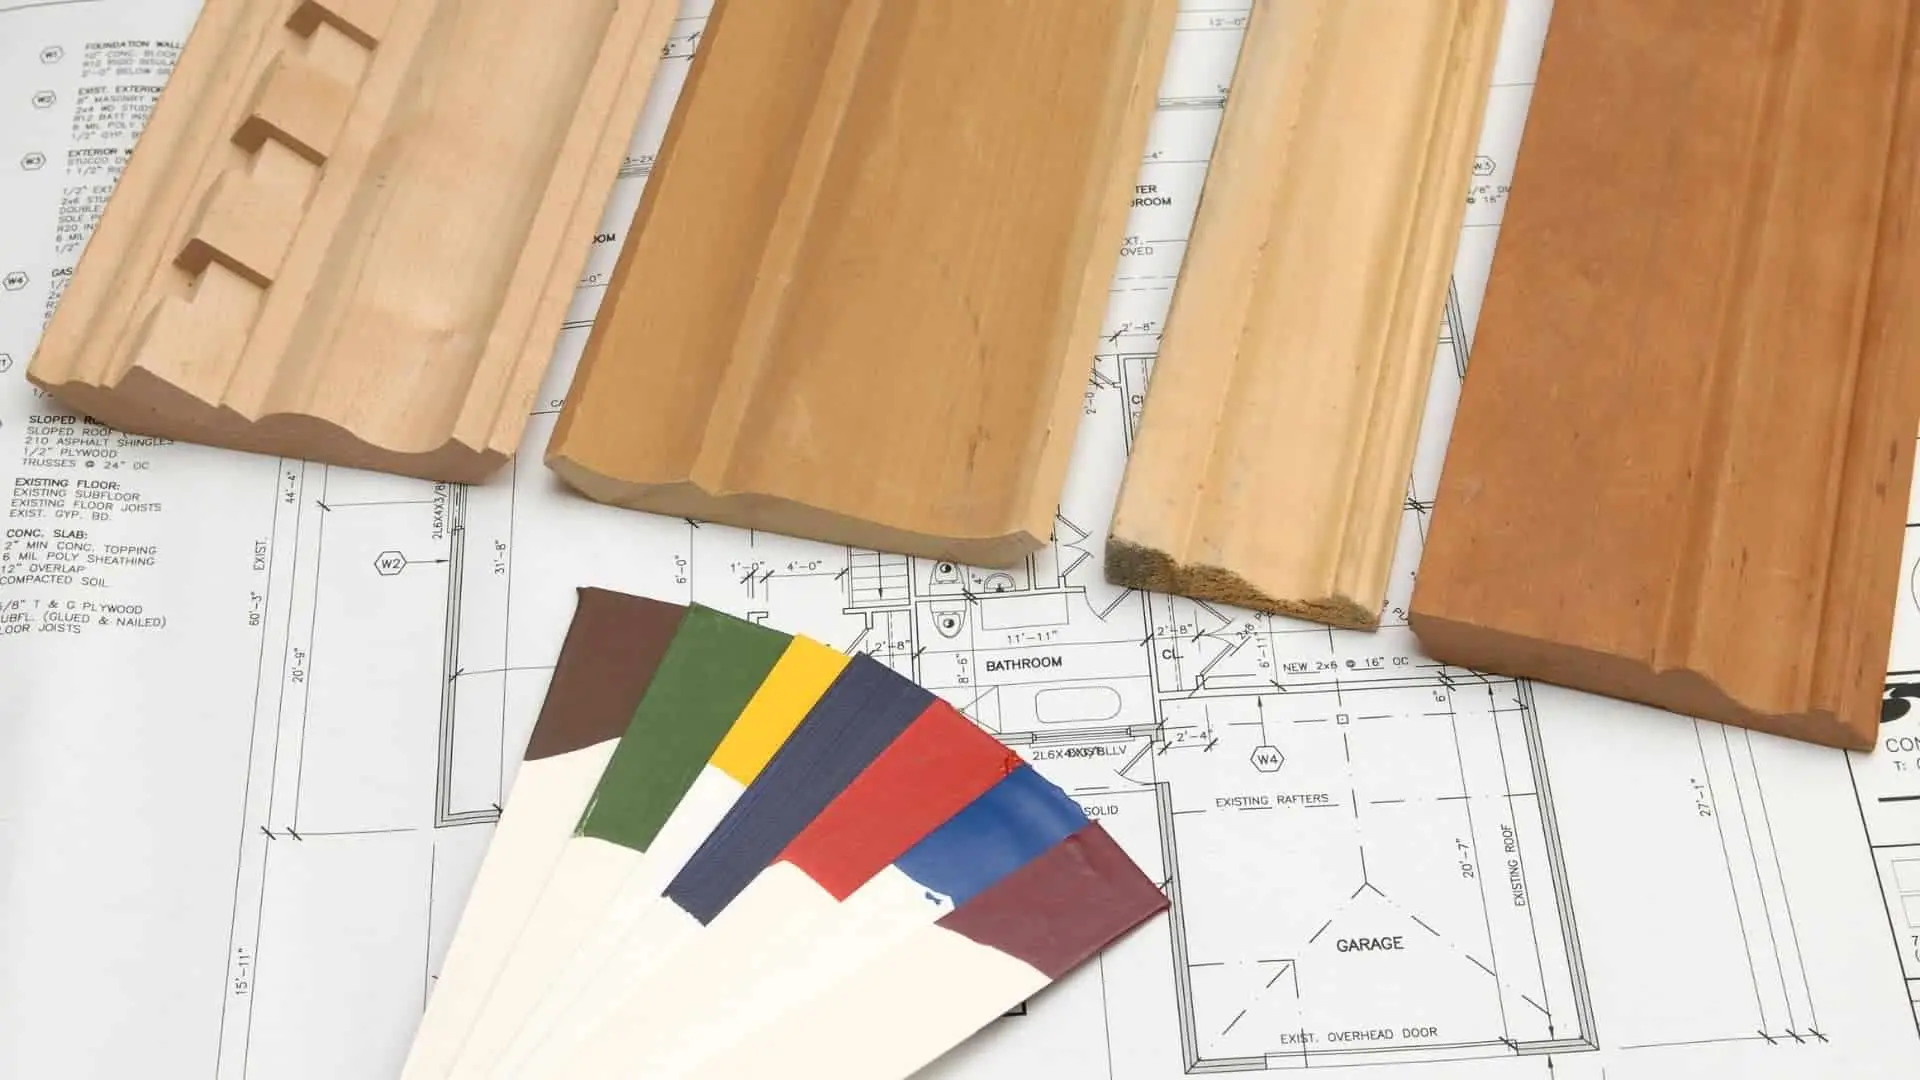
Painting a baseboard before installing is widely recommended as it saves you lots of time, and here, we will provide some simple steps on how to paint baseboards before installing.

Home improvements are not always fun, but they can be easy if the right method is followed. The thing about baseboards is that they make your home look renovated and fresher once installed or improved, and the products you’ll need to make it happen are considered inexpensive. These steps can be used to renovate your current baseboard or install a new one and will provide you with great results. Different paints are also available for baseboards, although most recommend glossy paints as they last longer and will add some shine to the surface of your baseboard.

How To Paint Baseboards Before Installing

Steps To Paint Baseboards Before Installing

Things you will need:

  • Protective gear such as masks and gloves
  • Utility knife, pry bar, putty knife, hammer
  • Dish soap, sponge, and microfiber cloth
  • Wood putty, paint, and primer
  • Sandpaper, drop cloth
  • Penetrol, brush

Step 1: Removing The Baseboard

If you’re replacing or just renovating your baseboard, it is recommended to set them aside in a ventilated area so applying the paint can be much easier and faster. If your baseboard is not yet removed, there are simple steps you can follow to do so without damaging your wall.

To start removing the baseboard, you can use a utility knife or a short blade to cut around the caulking or joint and release the baseboard from the wall. Next, use a putty knife or a thin pry bar, push it down into the joint behind the molding, and gently pry until the baseboard loosens up and can be removed. You can also use a hammer to tap the blade of a thin bar down the molding and slowly pry until the baseboard has loosened up enough and you’re able to remove it. If there are any nails, use a hammer or a player if needed to remove them.

Step 2: Prepping Your Current Or Brand-New Baseboard

Once removed, place the baseboard on a surface that will allow you to paint the baseboard easily. You can use a sawhorse, chairs, or table to do so, adding drop cloths around the area if needed to prevent paint from splattering or dripping all over the floor. Next, clean the baseboard of dust and grime by mixing dish soap with water, soak a sponge into the solution, and wring dry. Wipe the baseboard well, then use a microfiber cloth to dry.

Let it dry, then proceed to sand the baseboard with 220 fine-grit sandpaper to smoothen the surface and create a bond with the new paint. The sanding will also work to remove old finishes from the baseboard and allow the new paint to adhere better. Dust off the area with a brush once finished, then use a damped microfiber cloth to wipe the baseboards from any additional dust. If any dents or imperfections are found, use a spackling compound to fill them in, and once dry, sand the baseboard again to smoothen the surface and clean off the dust once finished.

Step 3: Adding A Primer

Primers painted on baseboards are used specifically to create a smooth finish. Interior baseboard primers are recommended since they seal the wood and have a higher bonding option. In this case, primers are normally brushed on as it is considered an easy and faster application method. Start by mixing the primer well and pouring a small amount of paint into a paint tray; apply 1-2 coats of paint to the baseboard horizontally by dipping at least one inch of the brush into the paint, removing excess, and using long strokes to paint the baseboard. Once the primer is added, allow the paint to dry for 24 hours. Most baseboard primers paint dry in a matte finish.

Once the primer is dry, it is recommended to sand the surface of the baseboard once again using 120-grit sandpaper to remove any brush strokes and achieve a smooth surface. Remove dust and clean the area well.

Step 4: Choosing Your Paint And Painting The Baseboard

Semigloss paints are mostly used when it comes to painting baseboards since they protect the baseboard from scuffings and are easier to clean. Latex and water-based paints are also highly recommended; they are environmentally friendly and tend to dry faster. Most baseboards are painted white, but other colors can be used.

In this case, you can choose to apply a final coat to your baseboard before or after installing it on your wall. Most experts recommend adding a final coat of paint to the baseboard before it’s installed; in this way, you will be left only with doing some final touches once the baseboard is installed, and you will save time. There are many ways to apply a final coat to your baseboard. Many chose to install the baseboard and then add a final coat; others chose to add a coat of the final paint, then install the baseboard and add additional coats if needed. In this case, there’s no right or wrong way but only depends on what you may consider easier for you.

A common method is installing your baseboard after priming, caulk, and putty nail holes where needed, and once dry, do a final sanding to then apply a final 1-2 coats of paint to the baseboard and allow 24 hours for the paint to dry.

Step 5: Painting Baseboard Without Brush Mark

Avoiding brush marks will provide a professional, smooth finish look to your baseboard. In this case, it is recommended to use a paint conditioner such as petrol, specifically designed to reduce brush marks from most surfaces. It also helps to use a good quality brush. To use petrol, start by adding it to the paint and mix well before use, then use your brush to apply 1-2 evenly coats of paint onto the baseboard allowing 1 hour in between coats for it to dry and paint in the direction of the grain for a smooth finish. It is also recommended to read the instructions on the product for best results. We hope you find these tips helpful.

How To Paint An Acoustic Guitar?

How To Paint An Acoustic Guitar

Painting the acoustic guitar is always unique creativity; that’s why here you’ll get the most effortless procedure to paint your guitar. The method you’ll get here is facile and can be done quickly at home. Let’s proceed.

To paint the acoustic guitar is the most fun creativity; you can make your favorite designs on the guitar. But this activity takes a long time. So the first thing you must have in doing the painting is patience and then start towards painting. Painting the guitar helps remove and cover the pits, scratches, and dents. It also helps in making your guitar new. Or if you’re just bored with your old one, then paint this guitar with your favorite color. For painting the acoustic guitar, you do not need canned paints. They need something different and more.

Steps To Paint An Acoustic Guitar

Supplies Needed

  • Guitar
  • Denatured alcohol
  • Cleaning cloth
  • 600grit sandpaper
  • 1200grit sandpaper
  • sharp razor knife
  • Primer
  • Masking tape
  • Newspaper
  • Acrylic paint
  • Brushes

Collect all the supplies you need in painting the guitar. If one thing is a shortage, it’ll disturb you. Moreover, your guitar will not give a smooth finish.

Step 1 : Removal Of Strings

As you are painting the guitar, the first step is to remove its string. Remove the strings efficiently. One thing to remember is to untie the guitar strings and then cut. Otherwise, it’ll cause injury to you.

Step 2 : Cleaning With Denatured Alcohol

When your strings will remove adequately, pick up the cloth, put a denatured cloth on it, and start cleaning the guitar’s surface. Clean all the guitars carefully throughout all the surfaces and ensure no surface will remain empty. This alcohol helps ineffective cleaning of your guitar.

Step 3 : Covering The Areas

Start covering the parts of the guitar where you are not painting. For covering these areas, you can use masking tape. Or you can also use a newspaper to cover the areas like the neck of your guitar. Make sure that your guitar is completely covered from electronic areas. For covering the edges, use the blunt edge of your knife. If you feel excess tape on some areas, use a sharp razor knife to remove these excess tapes.

Step 4 : Sanding The Surface

Sanding is the most crucial step in painting. If you send off the surface of your guitar, then your surface sticks to paint very efficiently. For sanding the surface:

  • Pick up the 1200grit sandpaper and start sanding the guitar.
  • Make sure that your motion is not in a circular motion.
  • Sand off only in one direction and do it gently.

Step 5 : Applying Primer

Primer is the basic need for paint. If you’ll not correctly prime the paint’s surface, then doing paint on the surface is useless. Here we also prime the surface. For priming the surface hang the guitar in a dry place where there is no moisturizer. Now start priming the surface evenly. For guitar, you should use only two layers of primer, do not exceed. Apply the first layer, wait for about 50 to 60 minutes, then move towards the second layer.

Step 6 : Painting The Guitar

Now the most fun and exciting part is painting. Choose your favorite color from acrylic paint to paint on the acoustic guitar, and start painting on the guitar thoroughly. Acrylic paint is best to use on the guitar, and it is also safe. Apply the first coat on the guitar and make it dry for about 2 hours. If you feel that after 2 hours still, it is not dry, then make it drier unless it dries completely. When the first coat dries entirely, apply the second layer of your paint.

Step 7 : Again, Sanding The Surface

After applying the two layers, make your paint dry for the night. After the night, it has dried completely, now aging and sanding the guitar. Pick up the 600grit sandpaper to sand the surface of the acoustic guitar.  You can also opt for 1200grit sandpaper to make your surface more smooth. Make sure that you are Using your grit sandpaper in one direction. 

Step 8 : Repetition Of Step 6 And 7

Apply 6 and 7 steps continuously and stop when you get six layers of paint on the guitar’s surface.

Step 9 : Applying Of Clear Coat And Make A Draft

As you have done with six layers on the guitar, it’s useless if you’ll not apply the clear coat. Applying a clear coat helps your guitar protect you from pits and bumps. Pick up the 600grit sandpaper and start sanding all the imperfections before applying the clear coat. If you want to make the acoustic guitar paint designs, make it as you want. Make the draft of what you want on the guitar. Show your best creativity here.

Step 10 : Sealing The Design And Applying Clear Coat Paint

Now it’s time to seal the drafts you have made on the guitar. For sealing it, we use clear coat paint. Apply the first layer of the coat and wait until it is dry. When the first layer dries completely, then apply the second layer. Wait overnight and make your guitar completely dry.

Step 11 : Sanding And Apply Another Coat

The use of 1200grit sandpaper, again and again, makes it look weird, but this use makes your paint smooth. Again sand with 1200grit sandpaper and then again apply the clear coat. Wait for almost two hours, and then apply another layer. Again and again, repeat the process unless you get six layers of clear coat paint.

Step 12 : Sand With 2000 Grit Sandpaper 

Above you’ve done with 1200grit sandpaper, now pick up the 2000grit sandpaper and start sanding the surface. It’ll give a smooth and even finish.

Step 13 : Painted Acoustic Guitar Is Ready

So, after all your efforts, you can see that you have done the paint very efficiently. Now remove all the measuring tape and newspaper you have used on the guitar. After removing all the tape and newspaper, a beautifully painted guitar is ready.

After your effort, your hand-painted acoustic guitar is ready. It has taken a long time, but time doesn’t matter when you will get efficient results. So why are you waiting to pick up your guitar and start painting with your favorite colors and designs on the guitar? Bring your inner talent in front of the world.