How To Paint A Knife Blade?

How To Paint A Knife Blade

Painting a knife blade adds a unique touch to your tool or collection. Whether to prevent rust, refresh its appearance, or add designs, proper techniques and materials are necessary for a smooth, lasting finish. This guide will walk you through prepping, painting, and sealing a knife blade for professional results. Let’s begin!

Introduction

How to paint a knife blade? It’s the question that comes to our minds. Similarly, many more questions like how to get the black finish on knife blades come to our mind. The idea of a back finish on the blades is the most demanding and attractive design. Because it not only looks fantastic but also prevents rust. It is pretty simple DIY to get that layer and also get a patina black finish. The method I’ll tell you is the best for carbon steel blade knives. If you have these knives in your collection, you’ll enjoy them. The process is incredible, and the supplies you need for this are also readily available. So, are you ready to start? Let’s proceed!

Preparing the Knife Blade Surface

Preparing the knife blade surface is a crucial step that can make or break your painting project. Before applying any paint, it’s essential to clean and smooth the blade thoroughly. Start by removing any grease or oils using a degreaser, as even a tiny residue can cause the paint to bubble or peel. Once cleaned, use fine-grit sandpaper to gently abrade the blade surface, creating a rougher texture for better paint adhesion. This unconventional yet effective method helps in forming micro-abrasions on the surface that enhance the grip of the coating.

Supplies Needed

  • Cotton balls
  • paper towels
  • Silver polish
  • Rubbing alcohol if it is not present, then you can also use ( naphtha or acetone)
  • Apple cider vinegar or lime juice.
  • tongs if you have not, you can also use large tweezers

Choosing the Right Paint Type

When it comes to choosing the right paint type, it’s essential to consider both the surface you’ll be painting and the intended use of that surface. For instance, if you’re looking to spruce up a knife blade say for an artistic display or a unique gift opting for paint designed specifically for metals is crucial. These paints often feature enhanced adhesion properties, allowing them to withstand wear and tear better than standard acrylic options, which might chip or peel over time.

Techniques for Applying Paint

When considering how to paint a knife blade, the technique is everything. One effective method involves using a high-quality spray paint designed for metal surfaces. Start by ensuring the blade is thoroughly cleaned and dried, removing any grease or grime that could interfere with adhesion. Hold the can about 8-12 inches away from the surface and apply light, even coats, allowing each layer to dry before adding another. This prevents drips and ensures a smooth finish that showcases your artistic flair.

How To Paint A Knife Blade

For those seeking more control over their designs, using a fine-tipped brush can open up new avenues of creativity. Mixed media techniques can elevate your project; for instance, layering multiple colors or integrating textures like metallic flakes can produce stunning effects on the blade’s surface. Remember to seal your painted creation with a clear coat specifically formulated for metal this not only enhances durability but also brings out the vibrancy of the colors you’ve chosen. With these techniques in mind, painting knife blades transforms into an art form that merges aesthetic appeal with functionality.

Drying and Curing the Painted Blade

Once the paint has settled on your knife blade, drying and curing are important to keep your work intact. Instead of quickly putting it away, create a space with good airflow to avoid smudging or imperfections. The drying time varies by paint type; water-based paints dry faster but take longer to cure than solvent-based ones. You might want to use a small fan to help dry the paint evenly while thinking about how to improve your future painting sessions.

Curing the painted blade gives it a shiny finish and strong durability. Some may see curing as just waiting for paint to dry, but it also ensures good adhesion and lasting quality against wear and tear after all, it’s a tool, not just art! To boost resilience, gently buffing the surface after curing can add a professional shine. Keep in mind that each step after painting adds protection and a personal touch to your design. A canvas becomes a conversation starter with practical appeal!

Safety Precautions While Painting Knifes

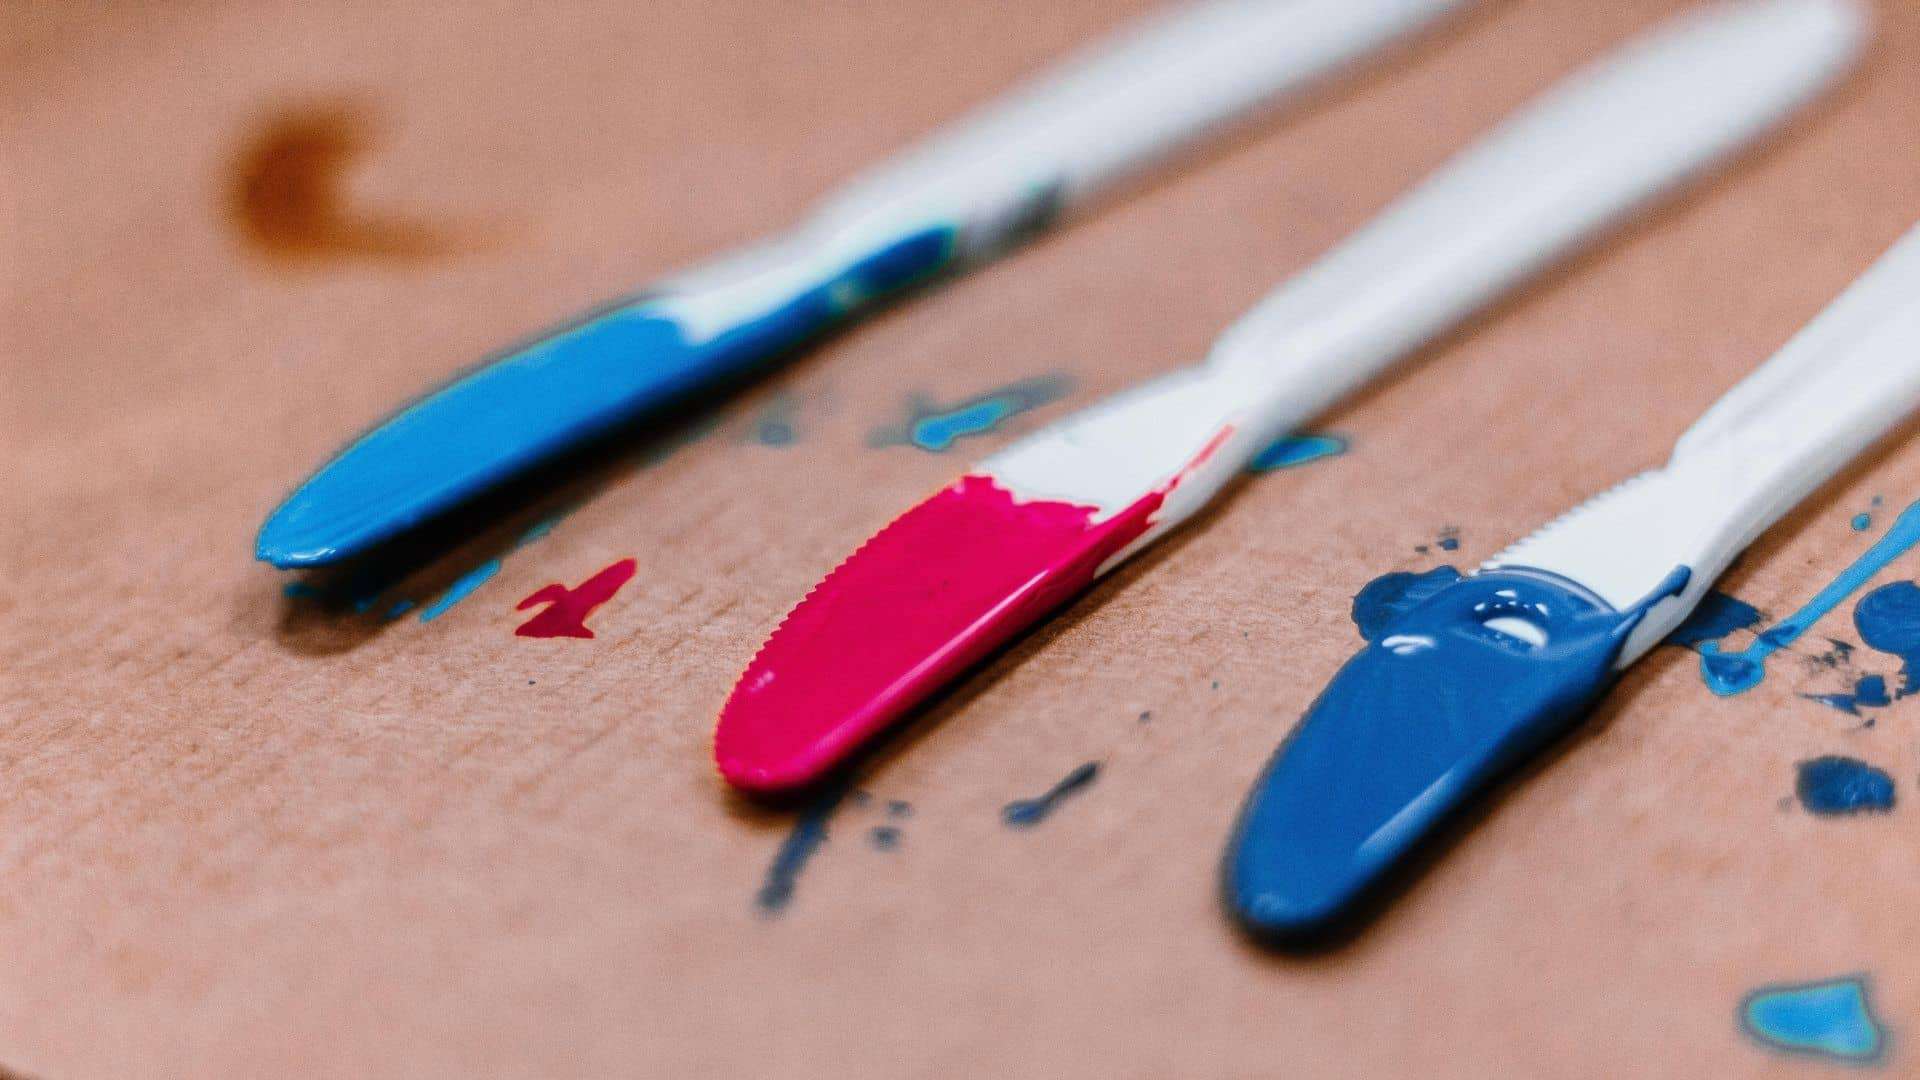
When using painting knives, safety is crucial to avoid accidents and achieve the best results. Wear gloves to protect your hands from sharp edges and paint chemicals. A sturdy apron can keep your clothes safe from spills, especially with spray paint or acrylics that may splatter. Also, consider wearing a mask; it’s easy to forget when focusing on creativity, but it helps protect you from inhaling fumes and fine particles.

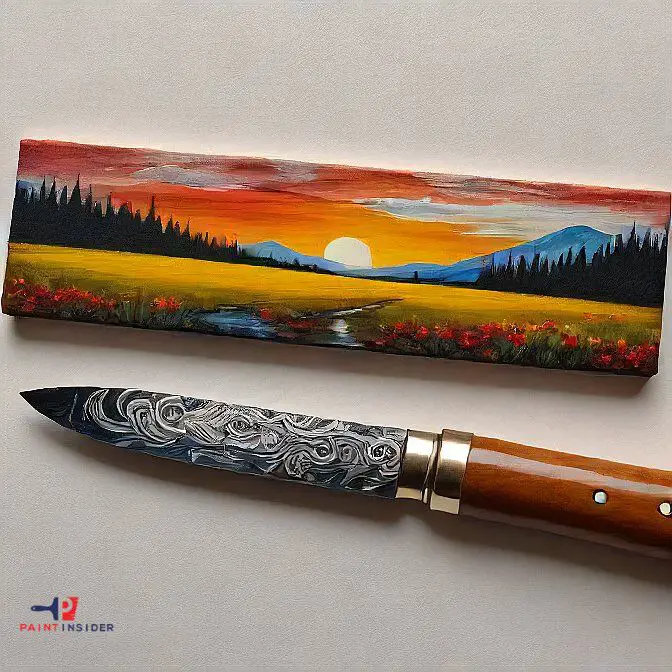
Conclusion: Enjoy Your Customized Knife Blade

Enjoying your customized knife blade comes from the bond you create with it. Each design and finish reflects your personality and creativity. Painting your knife blade can be a way to blend practicality with art. Picture using your custom-painted knife at a picnic; it’s not just useful, but also a conversation starter that highlights your unique style.

How To Paint Anodized Aluminum?

How To Paint Anodized Aluminum

To the lovers of chemistry, you are going to enjoy this topic. I never liked the chemical formulae; honestly speaking, it made the better part of the chemistry lessons. Whether you liked your chemistry classes or not, you ideally have basic knowledge about the terms used in chemistry, such as anodization. Leaving that aside, let’s jump right into our discussion. Won’t we?

Introduction: Importance of Painting Anodized Aluminum

You can apply Anodized Aluminum in the window and door frames, various finishes, and interior applications like illuminating fittings; This makes it a splendid substance. With that in mind, occasionally, you might want to alter its color to give it a look you wish to, which is why you may ask yourself whether you can paint. So, can anodized aluminum be painted? Read on for more insight.

Like any material, you can paint anodized aluminum. The only takeaway is ensuring the surface is cleaned correctly and allowed to dry before applying a suitable primer and polish. Note that you may need to apply more than one coat of paint to achieve desired results.

Anodized aluminum is a coating that strengthens the aluminum metal and elongates its life. According to Lorin.com, anodized aluminum is made through an electrochemical process; The metal is immersed in specific tanks, and an anodic layer is formed in one of the tanks.

Preparing the Surface for Painting

Preparing the surface is crucial when it comes to painting anodized aluminum, as this step can ultimately determine the longevity and aesthetic appeal of your project. Begin by thoroughly cleaning the surface with a mixture of gentle soap and water. This removes contaminants like dust, grease, or oils that could interfere with paint adhesion. For enhanced results, consider using a solvent like denatured alcohol to wipe down the metal after washing; this will ensure any remaining residues are eliminated.

4 Steps to Paint Anodized Aluminum

Recall that any form of painting requires you to have all the necessary products and rules to follow carefully. In the case of painting anodized aluminum with the correct items and a few hours, you are good to start your painting.

These are the materials you will need:

  • Soap, brush, and water
  • Primer
  • Sandpaper
  • Paint
How To Paint Anodized Aluminum

Step 1: Clean the Anodized Aluminum.

Although anodized aluminum has good adhesive properties, you will need to wash it accordingly before painting it to improve its adhesive properties, which might deteriorate over time due to impurities on the surface. Note that pollutants make it a little more difficult to paint over anodized aluminum.

Scrub the surface with suitable soap and water to remove any contaminants on the surface of anodized aluminum. Use your paintbrush to remove any foreign substances, and then use more soap and water to remove any unwanted substances on the surface. On that note, ensure you rinse the surface with water to remove any soap that might interfere with your anodized aluminum’s adhesive properties.

Have your etching primer ready to apply on the surface immediately; Ensure that the washed material is dry because you don’t want to leave the anodized aluminum surface to catch any impurities from the environment.

Step 2: Application of the Etching Primer

Place the primer into your container; Work on the material thoroughly and ensure the primer covers every spot because the primer contributes significantly to adhesion between the paint and anodized aluminum. Allow the adequate primer time to dry appropriately, say two hours. In the meantime, ensure you clean your brush adequately because you will need it during the painting step.

Step 3: Sanding The Surface

You might not achieve a perfect finish when applying the primer, which is why you will need to sand the surface to remove bumps and make the surface as smooth as possible. Sanding will enable you to achieve a clean and smooth finish. However, while doing the sanding, ensure you don’t scrape off the primer from the anodized aluminum.

Step 4: Painting

Apply a thick layer of oil-based paint to your anodized aluminum material. Using oil-based paint will improve adhesion between the color and the surface. A proper bonding between the two substances will allow you to paint the anodized aluminum surface with much ease.

Let the paint dry for about two hours before adding another layer of polish if necessary. To achieve the density of the color you want, you may need to add more than one coat. Note that you must wash your paintbrush before applying subsequent layers.

Anodized aluminum is an electrochemical process which is why it is a top choice among painters. Anodized aluminum has a wide range of applications due to its excellent properties, including window and door frames, finishes, interior applications, and illuminating fittings. Anodized aluminum has superior adhesive properties that allow for easy application of paint. Painting over anodized aluminum requires you to follow specific steps to achieve your desired finish.

Common Mistakes to Avoid While Painting

One common mistake many encounter while painting anodized aluminum is neglecting proper surface preparation. While the smooth, glossy finish may seem ready for a coat of paint, failing to clean and etch the surface can lead to poor adhesion. A light sanding with fine-grit paper and a thorough wipe-down with a degreaser are essential steps that not only promote adhesion but also help the paint last longer and wear more evenly over time.

Another frequent pitfall is choosing the wrong type of paint. Not all paints are compatible with anodized surfaces; using standard enamel or acrylics could result in peeling or chipping as they lack the flexibility needed for metal substrates. Instead, investing in high-quality paints specifically designed for metal applications will yield superior results. Additionally, keeping an eye on temperature and humidity levels when painting and applying coats in less-than-ideal weather can compromise your project’s longevity. Embracing these insights will elevate your painting skills and transform your projects into lasting pieces of art.

Conclusion

Painting anodized aluminum can enhance your projects while keeping the metal’s strength and look. By knowing the special features of anodized surfaces, you can select the best methods and materials for a lasting, professional finish. It’s not only about appearance; a well-painted surface can guard against corrosion and damage, prolonging the lifespan of your items or structures.

As you start this creative journey, remember that preparation is important. Cleaning, sanding, and priming will create a strong base for your paint. Enjoy the process and use it to try out different colors and textures, bringing your vision to life. In the end, painting anodized aluminum not only changes its look but also lets you express your style.

How To Paint Already Fired Ceramic?

How To Paint Already Fired Ceramic

Painting ceramics is a fulfilling and cheap way to restore the vibrancy of your home. Let us look at how you can paint your already-fired ceramics. Won’t we?

Introduction: Painting on Fired Ceramics

Painting on already-fired ceramics opens up a creative world that blends art and craftsmanship. Unlike painting on raw clay, which has a porous surface, bisque-fired pottery provides a smooth and durable canvas. This lets you focus on your artistic expression without worrying about material interactions. Whether you’re transforming thrift store finds or reviving family heirlooms, this process offers endless possibilities.

Supplies Needed

  • Sandpaper
  • A rag
  • Suitable Brush
  • Paintbrush
  • Oil-based paint

The initial glaze on your items protects your ceramic items from wear and tear. However, just like any other item, ceramic items are prone to harsh surroundings like scratches and many other forms of wear and tear.

With that in mind, you might want to repaint your ceramics, but you will face one challenge since ceramics are extremely smooth, it is not easy to paint over them. The question to answer then is, how do you paint an already fired (glazed) ceramic? Continue reading to find out.

Steps To Paint Already Fired Ceramic

How To Paint Already Fired Ceramic

Step 1: Choosing The Right Paint

It is recommended to choose the most appropriate paint that will stick with much ease on your ceramic; acrylic paint works better if you are painting ceramic tiles or big ceramic items. You can use liquid paint if your ceramic item includes a surface like a wall.

Since ceramics are super shiny, you should consider using epoxy polish to give you a brilliant finish on your painting. On a positive note, both acrylic and epoxy are way cheaper than other paints, which is why you should use them. Note that if you use latex paint, it will imply no stepping on the painted surface.

Step 2: Cleaning The Ceramic

You want to restore your piece of ceramic to its original luster, so like any other form of painting, you must prepare the surface adequately for painting. Depending on the type of ceramic you are dealing with, you need to clean the surface thoroughly either by sanding or scrubbing to remove the original layer of glaze. It would be best to use a soft cloth or sponge on ceramic items like pots and dishes because you don’t want to deface them.

Step 3: Sanding The Surface Of The Ceramic

Sanding will remove unwanted bumps and particles on the surface of your ceramic; note that steel wool will work well on smaller ceramic items like dishes. After sanding, ensure you wipe the surface of your ceramics to get rid of dust particles that might interfere with your painting.

Step 4: Applying  Light Coats Of Primer

You will apply two layers of a recommended primer to your ceramic item. It is advisable to opt for an oil-based adhesive primer in the case of ceramic tiles.2-3 coats should be enough. However, be sure to apply uniform coats of the primer and let them dry completely before painting another layer. If you are dealing with tiles in a shower room, consider using a primer made purposely for wet areas. A good pick, in this case, would be an epoxy primer or something similar.

Step 5: Paint Over Your Ceramic Item In Zigzag Patterns

Be sure to start your painting in smaller areas until you cover the whole surface. Applying your paint in a zigzag manner will ensure that paint is even applied to your ceramics item.

Step 6: Light Sanding After The First Layer Of Paint

You will need to do light sanding after applying the first coat to remove unwanted debris and ensure that you achieve a smooth finish on your final coat. Consider using the right sanding material on each of your ceramic items. Note that you need to allow adequate time for the first coat to dry before you do the sanding.

Step 7: Adding The Second Layer Of Paint

Apply a second coat on your ceramic item using a roller if you apply over a large surface. You will need to apply your paint in an up-and-down motion to achieve an even layer this time around.

Step 8: Allow Your Ceramic To Dry

You are now done with the painting, and you need to place your ceramic item in free space to dry. Allow up to a maximum of three days for your ceramic item to dry adequately. Apply a light finishing coat, preferably, a sealant to cure your ceramic item and make it more durable.

Step 9: Applying A Glossy Finish

You want your ceramic item to be as sparkly and as glossy as possible. To achieve this look, you need to apply a clear finish such as Urethane, and you will need not more than two coats to give you the final look you want. Such finishes, additionally, help strengthen your ceramic substances.

common mistake to avoid when painting

A common mistake when painting fired ceramic is not preparing the surface. Skipping this step can lead to paint that chips or peels. To get a lasting finish, make sure the surface is clean and free of dust or oils. A quick wipe with rubbing alcohol can help create a good base for your artwork.

Another mistake is choosing the wrong paint. Regular acrylics may fade or wash away easily on ceramics. Instead, use ceramic-specific paints or those marked as waterproof for glazed surfaces. Also, try different tools like sponges or brushes, as they can create unique textures and effects that enhance your work. Understanding these tips boosts your creativity and ensures a result you’ll be proud to show off!

Frequently Asked Questions (FAQs)

 Is acrylic paint a suitable choice for use on glazed ceramic?

Although they are used to paint over already fired ceramics, acrylic paints have poor adhesive properties on smooth surfaces; they do not stick properly on already glazed ceramics. Since such paints are water-based, within a short while, they begin coming off the surface. Additionally, if exposed to water and high temperatures, acrylic paints may become pervious.

Can you polish over already-fired ceramic?

The initial glaze on your ceramics acts as a protective barrier against the harsh environmental conditions of wear and tear. However, with time, the ability of your ceramic to withstand such environmental effects is greatly reduced, which is why you should paint your ceramic

What is the most appropriate paint for ceramics?

There is no specific paint that can give you the results you want. However, latex, acrylic, and epoxy paint are the best paints you can use on your ceramics to achieve your painting goals.

Is there a Specific Paint you can use on already glazed ceramic?

Fusing paints are known to do the magic when painting over glazed ceramic. You can use Krylon Fusion paint since it has good bonding properties.

Painting over an already fired ceramic can pose a big problem which is why you need the right skills to paint your ceramics. Like any other piece of painting, ceramics age, and on that note, you should be able to restore and give them a new look. You need to keep in mind how to prepare your ceramics for painting and have the right supplies at your disposal. Hopefully, this article will be of great help.

Conclusion: Enjoying Your Custom Ceramic Creations

Enjoy the beauty of your custom ceramic pieces and think about the stories they tell. When you learn to paint fired ceramics, you aren’t just adding color; you’re giving each piece your personal touch and bringing it to life. Each brushstroke adds warmth and uniqueness, turning everyday items into beloved decor or meaningful gifts. The joy of customization lets you express your personality or celebrate special moments, making each piece truly unique.

How To Paint A Metal Building? Detailed Guideling

How To Paint A Metal Building

None of us likes the sight of old rugged metal buildings; Metals rust with time and if you use metal to build a house, then bear in mind that various environmental factors may significantly affect your adored metal building. In the modern world, metal is widely used in the building industry. You have probably seen both residential and commercial houses made of metal.

The metals used are prone to wear and tear, which is why you should repaint them to keep them in good condition. Most contractors prefer to use aluminum metal over other metals because it is not affected by rust and corrosion. However, aluminum metal is pretty expensive, which is why most contractors opt for cheaper metals that require maintenance at given intervals to keep the metal building in good shape. Such maintenance activities essentially involve repainting and recoating the metal building. So, is there a way to paint your metal building? Continue reading to find out.

Why paint your metal building?

There are numerous justifications as to why you might want to paint your metal structure. You may decide to paint your metal building to change its color or do the renovation. Be it as it may, chances are, you have not done any painting to your facility before.

So you require all the available help on how to paint your metal building. Both experienced and amateur painters may find it challenging to paint a metal building which is why this article will come in handy. Keep reading for more insight.

Before you begin any painting on your metal building, you need to understand the basics and the materials you need for the job. The most important thing to keep in mind is that the day you choose to paint your building must be conducive to weather conditions; It should not be a rainy day, and doing the painting in the morning hours is a good pick. Are there specific materials you need for the job?

Yes, check out the list below:

  • Water
  • Bleach
  • Paint
  • Wire brush
  • Ladder
  • Paint sprayer

Steps to follow on painting a metal building.

With that in mind, let’s jump right into the steps you must follow on how to paint your metal building. Won’t we?

How To Paint A Metal Building 1

step 1: Prepare the metal surface

There could be several ways to paint your metal building, but it is essential to start with surface preparation by cleaning it and removing particles and dust. Mix the bleach with water and apply on the metal surface to get rid of any growth of mold or mildew

Use your wire brush to exfoliate any loose paint if you are changing the color of your metal building by scrubbing the surface. You don’t want your final painting to come off quickly, and as such, you should clean the surface thoroughly.

You might find rust on the surface, in which case you need to get rid of it by scraping the surface,  then clean the area with warm soapy water to remove any contaminants that might affect the adhesive properties of your paint.

Wipe the metal surface of the building using a piece of cloth and examine it closely for any unwanted particles. If any particles are left, repeat the above step to achieve a clean surface ready for painting.

If the building is prominent, consider using a high-pressure washer to save you time and energy. Ensure there is no soap residue on the building’s surface by rinsing it thoroughly and leaving the metal surface to dry accordingly.

Allow for a maximum of two days drying time, and remember to be cautious while trying to get to the upper part of the building by whatever means to mitigate any injuries.

step 2: Shield the doors and windows

You don’t want to apply paint all over your building for reasons better known to you. There are parts that you must exclude, such as doors and windows. You shield windows and doors by covering them with an appropriate cover.

step 3: Application Of The Primer

The primer is an initial application to the surface to make the surface and the paint bond accordingly. The primer also acts as a shield for the surface being painted, metal in this context.

Your building might be enormous with an extensive surface to be painted. In this case, consider using a paint sprayer or a roller to cover large areas and save time.

You Should always use a primer if you are painting your metal building for the first time or where the old painting has been dramatically affected by rust and corrosion. It will help if you Choose a solvent-based primer that applies to your metal surface, and apply two coats of the primer before finally applying your desired paint.

step 4: Painting

Now you have come to the final stage of your job, if it is big enough, you should use paint sprayers and rollers to save you time and energy. Before painting, ensure the primer is completely dry and also clean the sprayer before using it.

It is highly recommended to use appropriate acrylic-latex paint for metal surfaces to protect your building from weather conditions that might erode the surface of your structure. However, this is only possible if the color used previously was oil-based.

Precautions to take

  • Do not walk on  the painted surface if it is still wet
  • Before placing your feet on the ladder, ensure it is well-supported
  • Watch your step  when walking along the edges
  • Do not move your feet too fast.

Conclusion

And that’s how simple it can be to paint your metal building! Remember, there are just do-it-yourself steps you should try out whenever you want to build your metal building. There are numerous justifications as to why you might want to paint your metal structure. You may decide to paint your metal building to change its color or do the renovation. Be it as it may, chances are, you have not done any painting to your facility before, and it is time to do it right the first time.

How To Paint A Light Bulb?

How To Paint A Light Bulb

Illumination is very important when it comes to brightening your spaces. For that reason, in this article, we will share some tips on how to paint a light bulb.

Introduction: The Art of Painting Light Bulbs

You may want different lighting options for different areas of your home or work office and there are different options you can choose from. Although getting creative with your lights is fun many people do not care about the type of lights they are using and would prefer lights with low environmental impact such as LEDs which also consume less energy. Light bulbs can help you express your style and add warmth to your environment; they are not just the traditional lights anymore. They are also available in different shapes and designs and some are trendier than others. You also have the option to customize them to your style and paint them especially if you’re doing the interior decoration.

Supplies Needed for Painting Light Bulbs 

When painting light bulbs, it’s important to use the right tools and materials to ensure safety and achieve a clean, vibrant finish. Here’s a list of the tools and materials you’ll need:

Tools:

  • Paintbrushes
  • Painter’s Tape
  • Protective Gloves
  • Newspaper or drop cloth

Materials:

  • Acrylic Glass Paint
  • Glass Cleaner
  • Primer

These materials and tools will help you get started on painting light bulbs, whether for functional purposes or decorative art!

Steps To Paint A Light Bulb

How To Paint A Light Bulb

Step 1: Choosing The Paint

Not all paints are the same and there are paints specifically designed for different types of surfaces. Although some may consider it not safe to paint your light bulbs, it is safe if the right paint is used. In this case, you will need to use heat-resistant glass paints, this type of paint allows heat to escape and prevent the bulb from getting too hot which can cause it to explode. It is recommended to not use water-based paints on light bulbs as they don’t last long because of the color evaporating off the bulb because of the heat, so if you’re looking for a long-lasting solution, avoid these types of paint. Glass paints, are much like acrylic paints are water-based, the difference is that glass paint is heat resistant which means the paint will last longer.

Step 2: Cleaning The Light Bulbs

There are several ways of cleaning your light bulbs to free them from dust and dirt so that the paint is easier to apply and adheres better. You can choose to clean the light bulbs with rubbing alcohol, use a cotton ball or paper towel, and gently clean the bulb with the alcohol. Light bulbs can also be cleaned with soap and water instead of alcohol, simply dampen a cloth with soap and water and gently clean the bulb, making sure the cloth is not soaking wet to not damage the bulb, you can let it air dry for a couple of minutes for it to dry well or use a clean towel to dry it.

Step 3: Prepping The Bulb

Once the bulb is dry, you can choose to sand it or add primer based on your desired result. Sanding the bulb can soften the light, reducing its brightness. Alternatively, you can lightly sand it with fine grit (like 320), which helps the new paint stick without diffusing the light. Use bulbs of at least 40 watts for adequate brightness, and clear bulbs are better than frosted ones for color visibility. LEDs are a good choice too, as they generate less heat, making modifications easier.

Adding primer is helpful as it improves paint adhesion and durability. You can spray primer on it for easy application. First, secure the bulb in place to avoid damaging wet paint. A small piece of tack can hold the bulb steady; just press the base into it on a smooth surface. Then, apply 1-2 thin coats of primer, waiting 5-10 minutes between each coat for drying. After priming, let it dry for 1-2 hours.

Step 4: Painting The Light Bulb

Once the primer is added you can proceed with painting the light bulb. The paint can be sprayed on or brushed on depending on what’s easier for you to work with, although both methods can be used if you’re planning to add some decorating ideas. Use a small brush so that painting your light bulb is easier and you can reach every area of the bulb use smaller brushes to apply details and decorate as desired. Apply 1-2 thin coats of your main color and allow 10 minutes for each coat to dry. Once the bulb is fully dry you can test it to check if you’re satisfied with the color, you can always apply more coats of paint if needed. Normally it can take 3-4 hours for the light bulb to fully dry.

Tips to stay safe during the process

When painting a light bulb, safety is key. Make sure you’re in a well-ventilated space to reduce exposure to any fumes from paint or solvents. It’s also a good idea to wear a mask and gloves to protect your skin and lungs from harmful chemicals during your project.

Always remove the light bulb from its fixture before painting. Using an unplugged bulb reduces the risk of electrocution. Choose non-toxic paints made for glass surfaces, as they stick better and produce fewer fumes than regular craft paint. Finally, cover your workspace with newspaper or plastic sheets to catch spills and keep your area clean and safe for future projects. This easy preparation can turn a risky task into a fun experience!

Conclusion: Get Creative with Painted Light Bulbs

Incorporating painted light bulbs into your decor is an innovative way to blend artistry with functionality. By exploring the diverse hues and patterns you can create, you can transform ordinary lighting into eye-catching focal points. Imagine a warm, amber glow filtered through a hand-painted design that adds texture and personality to your space. Not only is this an opportunity for creative expression, but it also allows for customization that reflects your unique style.

When painting light bulbs, use heat-resistant paints for safety and durability. Try different techniques like sponging or stenciling for eye-catching results that enhance your decor. Consider how the colors match your room’s palette; a bright bulb can liven up a dull corner, while soft pastels can create a calm reading area. By painting light bulbs creatively, you’re not just lighting your home; you’re creating an atmosphere that reflects your personality.

How to paint cardboard? Step By Step Instructions

How to paint cardboard

Painting cardboard will be difficult if you don’t understand how to do it. Many people have resorted to cardboard as an alternative to paint on, especially since it is considered a great low-budget canvas for learning to paint or simply experimenting.

Introduction: Importance of Painting Cardboard

Painting cardboard is often overlooked, but it offers many creative possibilities. With the right techniques, cardboard can become an artistic canvas that sparks innovation. The appeal of painting on cardboard lies in its accessibility and eco-friendliness; reusing this everyday item reduces waste and allows artists to explore ideas without the limits of traditional materials.

Painting on cardboard also encourages experimentation. Whether making bright art pieces or decorative items, different painting methods can create unique textures and effects. Techniques like sponging or splattering can add depth, revealing new layers with each stroke. Overall, using cardboard as a medium opens up opportunities for art projects and promotes sustainable practices in creativity.

Preparing the Cardboard Surface Properly

Preparing a cardboard surface is important for a smooth paint finish. First, make sure the cardboard is clean and dry since dirt or moisture can cause paint to stick poorly, leading to streaks or peeling. Lightly sand the surface with fine-grit sandpaper to create a texture that helps the paint adhere better.

Next, use a primer made for porous surfaces like cardboard. This improves adhesion and seals the fibers, reducing warping when the paint is applied. If you want bright colors, tinted primers can give your shades a more even base and enhance their depth. Finally, don’t rush the process; allow enough drying time between layers to ensure a professional look and increased durability.

How to paint cardboard 1

tools and Materials Needed for Painting Cardboard

To paint cardboard well, you need the right tools and materials. Here’s what you might need:

Tools

  • Paintbrushes
  • Painter’s Tape
  • Drop Cloth or Old Newspaper
  • Utility Knife or Scissors

Materials

  • Acrylic Paints
  • Cardboard Sheets or Boxes

Choosing the Right Type of Paint

When choosing paint, think about the surface and the effect you want. For cardboard projects, acrylic paints are a good option because they dry quickly and are versatile. Unlike oil-based paints, which can soak into cardboard and cause damage, acrylics stick well without weighing it down. They also come in many colors and finishes, turning plain cardboard into attractive art.

For those looking for a more playful approach, washable markers or craft spray paints offer bright colors without damaging the material. These options make it easy to fix or change designs, perfect for new artists learning to paint cardboard. Remember to put down protective layers under your project to avoid messes and see how different paints work on various textures. Choosing paint is about balancing durability and creativity; think about mixing textures or layering techniques to enhance your cardboard art!

painting on cardboard step by step

To paint on cardboard effectively, begin by carefully selecting a sturdy piece of cardboard that is appropriate for your project. It’s essential to choose a type of cardboard that will hold up well under paint and not warp or bend easily.

How to paint cardboard 2 1

Step 1: Sand the surface lightly

When preparing cardboard for painting, one often overlooks the importance of surface smoothing. Sanding the surface lightly can be a game changer, transforming rough and fibrous textures into a canvas that welcomes paint beautifully. Use fine-grit sandpaper, preferably around 220 grit that allows you to gently buff away imperfections without compromising the integrity of the cardboard. This simple step not only enhances adhesion but also minimizes the risk of unsightly warping.

Step 2:  Apply a layer of white acrylic gesso as a primer

Applying a layer of white acrylic gesso as a primer is an essential step in painting cardboard. This versatile medium not only helps to seal the porous surface of the cardboard but also provides a smooth, uniform base for your paints, allowing colors to pop and reducing the risk of absorption. Imagine transforming that reclaimed box into a vibrant canvas; gesso acts like a magic gateway, enhancing both texture and vibrancy.

Step 3: Using spray paint or acrylic paints

Painting cardboard can be easy and transformative with spray paint or acrylic paints. Spray paint gives a smooth finish and covers large areas quickly, making it great for big projects or outdoor use. Just be sure to work in a well-ventilated area to avoid fumes and use a primer designed for cardboard to prevent warping or absorbency issues.

On the other hand, Acrylic paints offer versatility and bright colors. They are water-based and dry quickly, allowing you to layer colors without long waits. You can mix gloss or matte varnish into acrylics for unique textures and finishes. Acrylics can also be diluted with water for softer washes or richer tones, making them adaptable to your creative ideas while learning to paint cardboard effectively!

Step 4: Proper drying

Properly drying your painted cardboard is crucial for achieving a professional finish that not only looks great but also lasts. One common mistake many make is rushing the drying process. Instead of placing your cardboard in a too-warm environment like direct sunlight or near heaters, consider air drying in a well-ventilated area. This allows moisture to escape naturally and prevents warping or bubbling, which can occur when heat is applied too hastily.

Fixing Common Painting Problems

When tackling the challenge of painting cardboard, many beginners encounter issues like uneven surfaces and warped structures. To fix these common problems, start by ensuring your cardboard is clean and dry; a thorough dusting can work wonders in helping paint adhere. For warped pieces, consider applying a light coat of primer or gesso to even out the surface before adding color this not only helps with adhesion but also creates a smoother finish.

Another frequent issue arises when using acrylics that tend to bleed through. A valuable tip is to use spray sealants on your base coats, allowing them to dry fully before you add additional layers. This not only prevents bleeding but also enhances the vibrancy of colors applied afterward. Finally, patience is key: allow adequate drying time between layers as rushing can lead to unsightly drips or cracks, a simple reminder that good things come to those who wait in the creative process!

Conclusion: Enjoying Your Finished Artwork

After carefully painting your cardboard masterpiece, stepping back to admire it brings great joy. It’s not just the colors or techniques that satisfy you; it’s the story behind each brushstroke, reflecting many choices made during your creative journey. This moment turns your artwork into a true expression of your thoughts and feelings.

Displaying your finished piece is also rewarding. Whether it’s hung on a wall or set on a table, sharing your art with others sparks conversations about its meaning and process. Take time to see how your artistic choices resonate with viewers; their interpretations might reveal new aspects of your creation. Remember, enjoyment doesn’t end with display. Think about how you can include friends or family in activities around your art, turning appreciation into shared creativity. Ultimately, enjoy the process as much as the final result; both are important in making art truly fulfilling.

How To Paint A Cooler? Step by step guid.

How To Paint A Cooler

Coolers are known for their durability and the possibility of keeping items cool, they are hard, somewhat light, and a great item to have and carry around. Today, we’re going to explore how to paint a cooler.

Coolers are also known for their multiple uses, you can basically store anything in them, they are very handy and available in many shapes, brands, sizes, colors, and styles. They might make you nostalgic, or bring you to recall fun memories from the past. They have actually been around for a while and are a necessity.

Many make sure they always have one around in the home, you never know when you may need one, it’s also like a staple or a must-have in the household. It’s good to always have one around just in case, they can be used for the cookouts in the backyard or the front yard or for those parties you plan ahead for, they are on your checklist and you always make sure to have one available.

Why Paint Your Cooler?

Painting your cooler is a great idea if you’re bored of your old cooler and just want it to look new and vibrant instead of having to buy a new one. Also, if you’re into arts or just like to stand out from the rest, it’s a great opportunity to put your magic at work and make something that will make you and others happy with something like a joke or a trendy topic. Maybe you’re the creative type of person who likes to try fun and exciting things and will be able to display that awesome personality by adding some great designs to your cooler, plus kids love it.

This is definitely something anyone with a bit of spare time can try so let’s list some steps to get started.

Gather Necessary tools and materials for Painting.

To paint a cooler, whether it’s a plastic cooler or a metal one, you’ll need specific tools and materials to ensure a smooth finish and durability. Here’s a list of the necessary items:

Tools

  • Sandpaper (220-400 grit)
  • Painter’s Tape
  • Drop Cloth or Old Newspapers
  • Paintbrushes and Foam Brushes

Materials

  • Cleaner/Degreaser
  • Primer
  • Acrylic Paint or Spray Paint
  • Clear Sealant
  • Paint Thinner (if using oil-based paints)
  • Rags or Paper Towels

With these tools and materials, you’ll be ready to paint and customize your cooler for personal or decorative purposes!

Steps To Paint A Cooler

There are five simple steps to follow when painting your cooler: sanding, spackling, priming, painting, and sealing. These steps will guide you through the painting process, so let’s take a look at them.

How To Paint A Cooler

1. Sanding

The sanding process of the cooler is not optional; sanding is necessary so that the paint you add to your cooler can adhere better. This process will remove the plastic that is already attached to the cooler and will allow the new paint the be added.

Sand the cooler until it’s left with a rough surface or until there’s no plastic left, the rougher the texture of the cooler the better the new paint will adhere. You can use 1 or 2 types of sandpaper to remove the plastic, coerce grit, and fine-grit sandpaper. Use the coerce grit sandpaper first then use the fine one to finish it off. You can also use a power sander if you have one available but most people prefer to sand by hand.

2. Spackle

Spackle is a putty with which you can fill any logos or indents on the cooler to get a smooth surface before painting. Once the spackle is dry, scrape any edges off or use sandpaper to smoothen the entire cooler out.

3. Primer

The process of adding a primer is important. A Primer is a flat coat of paint added to a surface before adding the actual intended paint. Its purpose is to increase better paint adhesion. It is recommended to add at least 2 coats of primer before painting for better results. Priming increases paint durability and blocks moisture and stains. Primer can be added either with a brush or with spray paint and takes around 24 hours to dry.

4. Paint

This is the designing process, what do you actually want to add to the cooler, as we mentioned before, you can get creative and wow everyone with a creative piece of art or you can choose to add a basic color paint of your choice to brighten the cooler. You can choose anything from a picture, flowers, sports, cities, or just anything you can think of to make your cooler look original and fun, especially during the summer. You can decide to paint one side of it or the entire cooler. It is recommended to wait for at least 24 hours for the paint to completely dry.

5. Sealing

What does the sealant do? Sealants are used to protect the entire painting process and you’ll be able to waterproof your cooler, so your hard work isn’t wasted. They provide paint durability and a beautiful shine, without it, the paint may crack or peel off. Apply a thin coat of sealer to the paint and once dry, repeat if necessary. It is recommended to wait for at least 24 hours for the seal to dry.

Once you’ve completed the painting, you’ll be able to fill it up with whatever your heart desires. You will also be able to gift this to someone or just make something enjoyable for the kids. If you’re on a budget and don’t want to spend too much on your cooler project then we recommend you to check and see if you already have some of these materials available, also check with friends, maybe someone you know may already have some of these items available.

Tips for Maintaining Your Painted Cooler

To keep your painted cooler looking fresh, apply a protective sealant after the paint dries completely. This helps enhance the colors and protects against scratches and moisture. Regularly check your cooler for wear; fixing small chips or faded spots with touch-ups can help maintain its appearance.

When cleaning, avoid abrasive cleaners that can dull the finish. Use a gentle soap solution and a soft cloth instead. For stubborn spots, use a toothbrush to clean crevices without harming the paint. Store your cooler in a cool, shaded area when not in use, as excessive sunlight can cause fading over time. Following these tips will help you maintain its look and prolong its life for many fun outings!

Conclusion: Enjoy Your Customized Cooler!

In conclusion, enjoying your custom cooler is more than just using a functional item; it’s a way to show your personality and interests. Imagine being at a picnic or beach party, pulling out a cooler that reflects your style. When it’s not just an ordinary container, it sparks conversations and shares stories that bring smiles and laughter among friends.

As you sip your favorite drink from your personalized cooler, feel proud that you made something special with your own hands. Painting a cooler encourages creativity and offers a chance for mindfulness and relaxation. Each brushstroke can bring joy as you turn an everyday object into a striking piece of art filled with memories. So grab your paints, let your imagination flow, and let your custom cooler remind you to enjoy life’s little pleasures!

How To Paint Leather Seats?

How To Paint Leather Seats

Leather seats are considered to last longer and are easy to clean but they can also be customized in this article, we will share some steps on how to paint leather seats and you can customize your leather seats.

Introduction: Importance of Painting Leather Seats

Many choose to customize their leather seats as they may look dull over time caused by normal wear and tear which might cause the color to fade out or look unattractive. By painting your leather seats, you’ll be able to restore some shine to your seats, change the look by changing the color, and fix the discoloration all at once. Leather seats are considered to be durable and easy to clean plus, the products needed to renovate your seats are considered to be inexpensive, all you’ll need to do is follow some simple techniques to achieve a professional look while saving money.

Choosing the Right Paint for Leather

Choosing the right paint is key for painting leather seats to get a polished finish. Use paints made specifically for leather, like acrylic-based or water-based options. These paints are flexible, allowing the material to breathe and preventing cracking and peeling which often happens with regular paints. A good leather preparer and finisher can improve adhesion and durability, making your work both attractive and long-lasting.

Before starting the project, try a swatch in a hidden area of your seat. This lets you check the color and texture without a full makeover. Preparation is important; clean the surface with alcohol or a leather cleaner to remove oils and dirt that can affect adhesion. When painting, use thin layers instead of thick coats. This helps prevent drips and gives better control over color. With patience and care, you can turn worn leather seats into attractive features of your vehicle’s interior.

How to paint leather seats in 4 steps?

Things you’ll need

  • Safety goggles, masks, and gloves
  • Leather filler
  • Primer and paint
  • Newspaper or drop cloth
  • 600 grit sandpaper
  • Leather cleaner
  • Microfiber cloth/tack cloth
How To Paint Leather Seat

Step 1: Cleaning Your Seats

This is a very important step to do before painting your leather seats as the surface of the seats needs to be cleaned and degassed so the new paint can adhere better. In this case, a leather cleaner can be used to clean the seats but there are also homemade products that can be used to do so and are considered to be cheaper. Clean the seats to remove dirt and grime and to prep the surface for the new paint. Use a brush if necessary, to scrub the area to remove the dirt, then use paper towels or a microfiber cloth to remove dirt and wipe off the entire surface of the seats

Once the seats are clean, it is recommended to use a leather solvent cleaner, which is a chemical solution to remove old finishes from the seats and create a bond for new finishes to be applied, it will also get rid of any stains that may be available on your seats. As with any chemical product, make sure you follow product safety instructions such as using products in well-ventilated areas. Apply the product to a microfiber cloth then wipe the area thoroughly.

Step 2: Sanding The Surface

Sanding your seats will also aid in prepping the surface for the new paint. Sanding is important as it will sand down any scuffs and scratches from the surface of your seats, especially in brittle areas, it will even it out to ensure a smooth finish, which is the ultimate goal. To sand the surface of your leather seats, use a leather sanding pad and start by sanding the area in a circular motion focusing on cracks your leather seat may have, this will allow the new paint to seep better into the leather. 600-grit sandpaper can be used as well to smoothen out the area and prevent additional scratches. You can use a sanding block for easier and faster application.

Once you finish sanding the area, use a tack cloth to clean off all dust and any other leather particles. Tack cloths are recommended since they tend to remove all dust and clean the surface. A microfiber cloth can be used as well to wipe away the sanding dust. Use some alcohol cleaner on either cloth to wipe down the area.

Step 3: Adding Filler To Your Leather Seats

Sometimes the sanding won’t be enough to remove the scratches on your leather seats, in this case, a leather filler may be required. If your leather seat has small or big cracks or scratches that are visible, then a leather filler compound can be used in this case to fill out those cracks before you paint it. The filler will help your leather seat look brand new. After you’ve finished sanding and cleaning your seat, check

the surface to find out if a leather filler may be required. Different fillers can be chosen based on the size of the cracks if any. Leather filters are specifically designed for scratches and holes, they provide great strength and flexibility and are easy to apply.

There are many ways to apply a filler, the easiest method is to apply thin coats of the filler to the damaged area using a palette knife, apply until the surface is leveled using the palette knife to really fill in the paste into the cracks, and let dry in a ventilated room, this may take several hours unless a hairdryer is used to speed up the process. Once the filler is dry, sand the area once again to smoothen out the surface then use the microfiber cloth to clean the area from the sanding

Step 4: Painting The Leather Seats

Spray paints are recommended for easy application. Before painting, you need to use a primer. Primers act as basecoats for the paint. They help the new paint stick better to the leather seat and make the color last longer. Without primer, the paint may peel off. Choose a primer made for leather. Before painting, cover the area to prevent paint from splattering on other surfaces using newspapers or drop cloths. Shake the primer well for about 20 seconds and apply 1-2 coats, allowing 10-20 minutes between coats for drying. Let it dry fully for 1-2 hours.

Allowing Proper Drying Time

Allowing enough drying time is an important step when painting leather seats, but it’s often neglected. Many people rush, wanting to see their refreshed interiors quickly, but being patient is worthwhile. Leather needs proper airflow and time to bond with new paint. If it doesn’t dry enough, colors can smudge or textures can become uneven, ruining the hard work put into restoring the seats.

Moreover, varying environmental factors can influence drying times significantly. If you’re working in a humid or cool environment, your optimized drying period might extend beyond what you’d expect making it essential to consult product-specific recommendations for ideal conditions. This meticulous attention not only ensures durability but also enhances the overall finish of your project. By embracing patience and understanding how different elements affect drying time, you give yourself the best shot at a professional-looking result a striking upgrade that will turn heads every ride!

Common Mistakes to Avoid While Painting

One common mistake many DIY enthusiasts make when painting is skipping the preparation phase. Proper surface cleaning, sanding, and priming are essential to ensure that the paint adheres well. For instance, if you’re wondering how to paint leather seats, it’s crucial to use a specific leather preparer that removes oils and grime without damaging the material. Neglecting this step may lead to peeling or uneven coloration down the line, ruining what could have been a stunning transformation.

Another pitfall often overlooked is choosing the wrong type of paint for your project. When it comes to surfaces like leather, using standard acrylic or latex paints can result in cracking and wear quickly. Instead, opt for specialized leather paint designed for flexibility and durability; these products breathe new life into your seats while ensuring long-lasting results. Lastly, don’t underestimate the importance of applying thin layers rather than globs of paint this technique not only avoids drips but also allows for better control over color saturation and finish quality.

Conclusion: Enjoy Your Revitalized Leather Interior

Revitalizing your leather interior not only improves the look of your vehicle but also enhances your driving experience. By learning to paint leather seats, you can personalize your space and give it a fresh start. Bright colors and a professional finish add luxury and style, making every trip feel special.

It’s important to remember that maintaining those newly painted surfaces requires commitment. Regular cleaning with gentle products designed for leather ensures longevity, while periodic conditioning helps retain the softness and luster of the material. By learning this skill, you’ve invested time not just in beautifying your ride but also in understanding its maintenance needs creating an opportunity for deeper engagement with your vehicle as you cherish both its appearance and durability. Enjoy every moment behind the wheel as you soak in the ambiance of your revitalized interior; it’s more than just a car it’s an expression of you!

How To Make Violet Paint? Secret Revealed 2024

How To Make Violet Paint

According to the RGB, violet is a shade produced by combining the colors red and blue, which is interesting. Let’s know how to make violet paint.

Introduction

Violets are Blue; It is safe to say that the number of available violet shades is very numerous, imagine the different types of violet matte colors or the different types of violet glossy colors the color violet may be able to generate, the truth is violet is definitely an interesting and unique color to consider when painting on any surface.

To learn more about the color violet and the different colors it may be able to generate, we checked on the RGB, which according to Wikipedia and I quote: “is an additive color model in which red, green, and blue light are added together in various ways to reproduce a broad array of colors.” Amazingly, this type of technique can be used to generate or explore different types of colors.

When mixing violet with different types of colors you can get different types of shades of violets. Many websites generate hex codes to represent a shade of the color violet and many of these are actually very popular with the general public.

Let’s check on some of the favorite violet color shades for artists from all around the world and also from the general public but first, let us check on exactly how to actually create the color violet:

How To Mix Violet Paint?

According to a variety of tests and experiments, you actually need to mix 2 parts of blue and one part of red to produce the color violet. Purple is sometimes associated with violet but they are different shades of color. Violet colors are mostly used for art paintings, clothes and accessories, and home décor ideas. It is also naturally found on objects such as flowers, fruits and vegetables, and a wide variety of products.

Have you always been a fan of violet or is this interest recent? Many people are fond of violet colors and are bold enough to make a statement using different shades, whether it means a fun hair color or a chick violet living room, it definitely offers a great wavelength of cool, warm, and dark shades which you can combine in so many ways, violet is a pleasant color to look at after all and it provides you with a unique personality.

Others like what it stands for, and some believe the color has some type of special meaning, for example, if violet is your favorite color then it supposedly means that you’re a compassionate and supportive person, violet is also considered to be a spiritual color which represents imagination and the future. In general, it’s great that colors may symbolize something and have meanings in it, and that they can be used to express ideas, and emotions and make statements.

Shades of Violet Colors

As mentioned before, we will list some of the most popular shades of the violet color of many artists from the painting world, violet is used in contemporary arts and overall paintings, some of these are bold colors, and others are considered to be modest. Many websites allow you to mix violet with other colors so that you may get an idea of what the actual color would look like. You may or may not have heard of these colors before but these are definitely some of the most popular shades of violets mostly used nowadays:

  • Lavender: Too many, Lavender is the color of vitality and its color is definitely very popular around the world. To create this color, you’ll need to mix purple and white by adding a small amount of white into the purple hue. The color is associated with wealth and royalty.
  • Magenta: Some may say it has a pinkish-purple tone but magenta is actually a shade of violet. It is considered a very expressive color and is often used to make bold statements. You can create the color by mixing red and blue then add some white to get the desired color.
  • Mauve: Some say mauve looks like a pale purple, but actually it’s a combination of pink and purple with a little bit of white. It’s considered a classy and nostalgic type of color and is mostly used in the fashion world. You’ll be able to create this color by mixing purple with white until you acquire the desired color.
  • Fuchsia: This color is known as the color of confidence and sophistication, also used to make a bold statement in the fashion world and home decor. To create this color, you need to mix purple and white then add some red to get the desired color you’re looking for.
  • Periwinkle: Many confuse this color with lavender but there’s a difference in the tone in that periwinkle has a pale bluish color into it, it’s also considered a variant of lilac. To some, it symbolizes friendship and delicateness. To create this color, you should mix violet with blue and then add white until the desired color is achieved.
How To Make Violet Paint 1

Different Violet Tones

Violet colors come in different tones and variants also, we list a few below:

  • Color Wheel Violet
  • Web Color Violet
  • Electric Violet
  • Violet Flower
  • Grape

Are you able to perceive these colors at a simple glance? A little bit about the history of the color violet, it found its place in fine arts in the 1800s and it is integrated into today’s popular culture, especially in the art world. It became a part of modern culture with the French Impressionist popular movement, was mostly used in impressionist works and no other color experienced such usage in artwork in such a short period. Nowadays its usage varies and can be seen everywhere. It is said that Violet belongs to the blue family of colors.

Violet is definitely a color worth experimenting with because of its wide array of shades. The color has so much to offer and can be used in different areas of life, whether it is fashion, interior decoration, or artwork. We hope you found these tips helpful.

Conclusion

Making violet paint is not just about mixing colors; it’s a blend of creativity and patience. By combining blue and red in specific amounts, we open up many possibilities that can enhance any artwork. Trying out different shades helps artists find their unique style, showing that each color can express various emotions and stories.

As you embark on this colorful adventure, consider the materials you use both the pigments and the medium play crucial roles in achieving your desired outcome. Whether you’re a seasoned painter or a curious beginner, taking time to explore variations can lead to delightful surprises. Embrace the process without fear; after all, every stroke adds depth not just to your canvas but also to your artistic identity. So pick up those brushes and let the world see your new creations in vibrant violet!

How To Get Spray Paint Off Carpet?

How To Get Spray Paint Off Carpet

Spray paint dries faster when sprayed on any surface, so you may consider cleaning it as fast as possible. Continue reading to learn how to get spray paint off the carpet.

Introduction: Understanding Spray Paint on Carpet

Spray paint can change surfaces and inspire creativity, but it can be a challenge when it gets on the carpet. The bright colors that enhance walls and furniture can create unsightly stains on soft fibers, turning a simple DIY project into a stressful task. Homeowners and artists need to understand how spray paint affects carpets to make the cleanup easier.

To tackle this problem, it’s crucial to act fast. Fresh spray paint is easier to remove since it hasn’t fully settled into the fibers. You can use common items like rubbing alcohol or specialized carpet cleaners to lift those stubborn stains without harming your flooring. Learning these methods not only helps you but also encourages you to be creative in future projects while being aware of your environment!

Gather Necessary Cleaning Supplies

Here are some necessary cleaning supplies to help remove spray paint from a carpet:

  • Mild dish soap
  • Rubbing alcohol or acetone
  • Hydrogen peroxide (3%)
  • Soft-bristle brush or toothbrush
  • Bucket or bowl

Always test cleaning products on a small, hidden section of the carpet to ensure they don’t cause discoloration or damage.

7 Sure Methods To Get Spray Paint Off from Carpet

Aerosol paint comes in handy whenever you want to apply paint on your home fixtures and fittings, such as cupboards, countertops, and all sorts of furniture. Spraying paint on such surfaces is essential to restore their fading look and shield them from the effects of molds.

Working with spray paint is a little faster than other forms of painting. Nevertheless, it is not proper to use aerosol paints in your home due to health concerns.

While spraying your furniture with paint at home, by accident, you may spray other items you may not have intended, such as the carpet. So, how do you get spray paint off your carpet? In this article, you will learn seven sure ways to remove paint overspray from your carpet.

How To Get Spray Paint Off Carpet 1

1. Removing Spray Paint  From The Carpet Using Dish Soap

Soapdish contains active additives that act on the fabric of your clothes to remove any unwanted dirt. The ingredients in soapdish work in the same way as paint thinner. Prepare a water and soap dish mixture and use a suitable rag to clean the paint stains off your carpet.

You can achieve the best results with your soap dish cleaner if the spray paint in question is oil-based. Add a suitable proportion of your soap dish solution to warm water and apply the contents to the paint stains on the carpet.

Let the solvent sit on the fabric of your carpet for a couple of minutes before moving to the next step. Use a suitable cloth to wipe the dried-in stains from your carpet.

2. Removing Spray Paint From The Carpet Using Alcohol

Alcohol is a good cleaner for tough stains. It can dissolve oil-based paint on carpets, making it easier to remove, and helps break down paint stains in fabric. Always do a patch test on a small area first to check for fading. If there is fading, use a gentler cleaner. Use a soft cloth; dip it in alcohol or your chosen cleaner and rub it on the paint spots. Do this as many times as needed to get rid of the stains. Afterward, wipe the carpet with a clean, dry towel to soak up any extra alcohol. You might need to repeat the process until all the paint stains are gone. Alcohol-based cleaners can also remove acrylic paint from fabrics.

3. Removing Spray Paint From Carpet Using Hydrogen Peroxide

Consider using Hydrogen Peroxide if you don’t have access to turpentine to remove dried spray paint stains. The peroxide dissolves the paint stains; thus, you can effortlessly remove them from the carpet.

Note that your hydrogen peroxide may discolor dull-colored carpets, so be sure to apply it on light-colored carpets to avoid unwanted patches on your carpet.

Add equal portions of both water and hydrogen peroxide into a sprayer. Spray the solution directly on the paint stains on your carpets and let the solution react with the stains for a couple of minutes before proceeding.

4. Removing  Spray Paint From Carpet Using Acetone

Acetone is commonly used on nails to remove polish. It is a powerful detergent to use on dry spray paint on your carpet. Acetone, just like other detergents, dissolves paint in your carpet fabric to give you an effortless removal of the stains.

On a positive note, acetone is way cheaper compared to other commercial detergents. Use a small amount of acetone on the affected parts of your carpet and allow it to dry out.

Start removing the paint stains on the surface of your carpet using a suitable rag. You might want to repeat the procedure up to two times to remove stubborn paint stains on your carpet.

Dip your rag in cold water and rub around the paint stains in circular motions until the stains begin to come off the carpet. To improve the efficiency of acetone, you might want to add a given proportion of a suitable laundry detergent to your acetone solution. Note that acetone can help you effortlessly remove paint stains from your carpet and achieve a spot-free fabric on your carpet.

Note that you can access the supplies mentioned in this procedure since some are commonly used in our homes. However, be sure always to carry out a patch test to determine the effect of such detergents on fabric to avoid damaging your carpet. The most common effect is fading and discoloration of surfaces.

5. Removing Spray Paint Off Carpet By Scrape And Rinse Method

Note that you must be dealing with water-based paints on your carpet for this method to be effective. Scrape the paint stains on your carpet using a stiff brush. Use a wet rag to wipe off the residue from the surface of your carpet. Be sure to dip your cloth in a soapy solution.

6. Removing Spray Paint From A Carpet Using  Turpentine

Turpentine works best if the spray paint on your carpet is still fresh. Use a mixture of soap and turpentine solvent on the paint stains. Use a dry tag to wipe over the dissolved paint stains.

Always work on the paint sprays as soon as you notice them. Waiting until the stains dry on your carpet will be more challenging whenever you want to remove them. Be sure to work on the stains gently to avoid damaging your carpet.

7. Removing Spray Paint From Carpet Using A Paint Thinner

Paint thinners work similarly to acetone and alcohol cleaners. However, the mode of application might differ slightly. Put a few drops of your thinner using a clean towel and rub it around the paint stains.

Common mistake to avoid when cleaning

One common mistake people make when cleaning is using the wrong tools or products for specific tasks. For example, scrubbing a carpet with a stiff brush can damage the fibers, especially when trying to remove stubborn stains like spray paint. Instead, opt for a gentle approach using a soft cloth or sponge, coupled with appropriate cleaning solutions designed for carpets. This not only preserves the integrity of your carpet but also improves your chances of completely removing the stain.

Another frequent oversight involves directly applying cleaning solutions onto stains without pre-treating the area. Before diving into how to get spray paint off the carpet, it’s essential to first test any cleaning agent on an inconspicuous part of the carpet. Moreover, always blot rather than rub this absorbs excess paint and prevents it from spreading further into the fibers. Embracing these thoughtful techniques enhances your overall cleaning effectiveness while safeguarding your home furnishings in the process.

Conclusion: Restoring Your Carpet Successfully

Restoring your carpet goes beyond just removing stains; it’s a chance to refresh your home. For tough stains like spray paint, being patient and using the right methods is key. Instead of harsh chemicals, try household items like vinegar or rubbing alcohol, which can dissolve paint without harming the fibers. This approach keeps your carpet intact and is better for the environment.

Moreover, don’t overlook preventive measures once you’ve restored your carpet. Using protective sprays or keeping furniture coasters handy can help shield against future mishaps. Regular maintenance through vacuuming and spot cleaning will keep your carpet looking fresh for years to come. Embracing these proactive habits ensures that what was once a frustrating disaster transforms into a testament to resilience in your home decor journey. Remember, every stain tells a story; learning how to manage them adds character and charm to your space!