As time passes, your car’s hood tarnishes, and it would help if you consider restoring it to its former glory. Read on for more details on (How To Paint a Car Hood).
Introduction: Overview of Painting a Car Hood
Painting a car hood can be a fun DIY project that freshens up your vehicle and lets you show your creativity. Start by preparing the hood, which involves cleaning and sanding to help the paint stick. A well-prepared surface leads to a smooth finish, improving the look and durability of the paint.
Choosing the right paint is important. While traditional automotive paints work well, you might want to try specialty finishes like metallic or matte for something different. When applying the paint, using the right spray distances and angles can affect the final result. Whether you want a sleek factory finish or a bright custom design, painting your car hood is an easy way to enhance your car and learn new skills.
Choosing the Right Paint Type
When it comes to painting your car hood, the choice of paint type can make or break the final look. For home DIYers, understanding the differences between acrylic enamel and urethane is key. Acrylic enamel offers a glossy finish that’s easy to apply but might be less durable over time. On the other hand, urethane paints provide better resistance against wear, fading, and chipping, making them ideal for long-lasting results. Choosing high-quality automotive paint not only enhances your vehicle’s aesthetics but also protects against environmental factors like UV rays and acid rain.
Additionally, consider whether you want a spray-on or brush-on application. While spray paints generally provide a smoother finish without streaks – perfect for large surfaces like car hoods – they require proper ventilation and safety precautions due to their strong fumes. Conversely, if you’re comfortable using brushes or rollers and have an eye for detail, using high-quality brushes can give you more control over intricate designs or touch-ups around edges. Ultimately, it’s about balancing durability with application technique; when you choose wisely, you’ll not only elevate your car’s appearance but also ensure that it withstands the test of time on busy roads.
3 Steps Guide on How to Paint Car Hood
Things You Will Need for Your Painting Project
- Water
- Car wash soap
- Sanding material
- A medium-grained sandpaper
- Piece of cloth
- Primer
- Paint
- Clear paint
- Spray gun
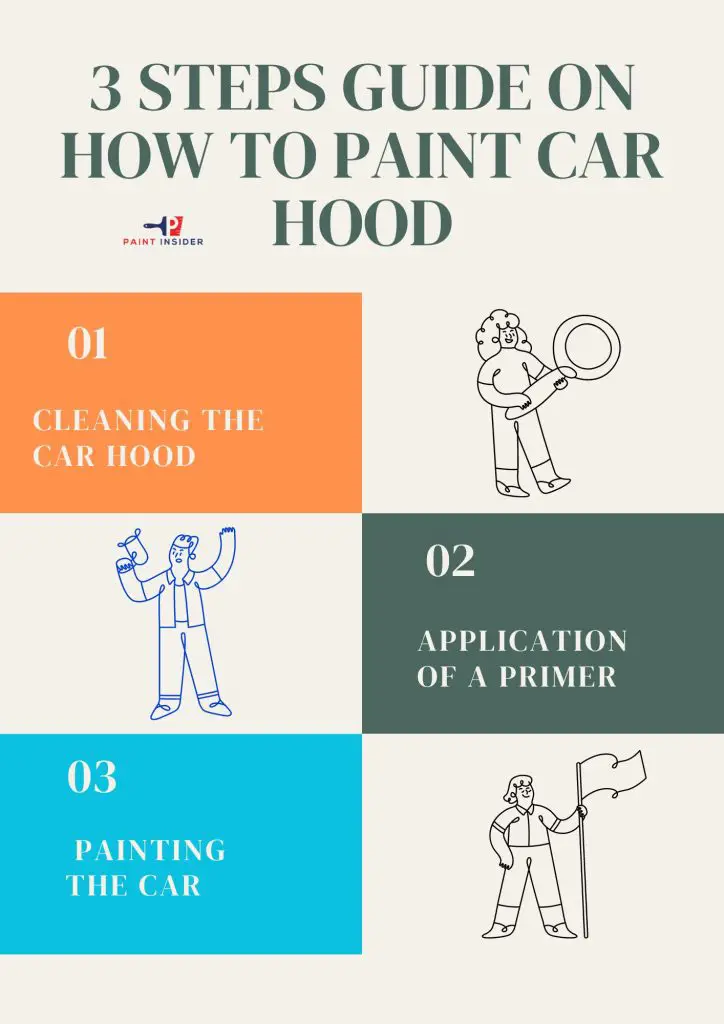
Step 1: Cleaning The Car Hood
By now, it is clear that you must clean all before applying any coat of paint. In the case of a car hood, consider using soap and a sufficient amount of water to clean the surface. Be sure to wash away any form of dirt on the surface of your hood. Be sure to use a recommended car wash soap to minimize the chances of damaging the surface of your hood.
Sanding The Surface Of The Hood: Use a soft sanding material and work on the surface of your hood thoroughly before the surface dries completely. Note that sanding the hood when it is a little bit wet will increase the bonding properties of your new paint.
Allow The Car To Dry: Leave your car in the open so that it can dry before you move on to the next phase of your painting exercise. Ensure not a single trace of moisture remains on the surface of the hood, as this might interfere with your paint.
Allow your car sufficient time to dry; otherwise, your new coat of paint will not stick properly.
Light Sanding: Because you want to apply paint on a smooth and clean surface, it would be helpful to do light sanding to remove any unwanted particles and spots. Ensure you have bare metal before you can start painting your hood. Be sure to use medium-grained sandpaper to carry out this exercise.
Tips To Note At This Point
- Be sure to get rid of the rust that might otherwise damage your car in later stages.
- Note that users can use a grinder instead of sandpaper to achieve a clean finish.
- Wipe the surface with a wet towel. Use a damp towel or any rug to wipe the surface of your hood. Be sure to clean every spot of the hood to remove unwanted dust particles.
Step 2: Application of a Primer
Since you are not applying paint on the whole surface of your car, consider masking other surfaces of your car with an appropriate covering material.
Before you begin spraying your primer on your hood’s surface, you must protect yourself from the harmful chemicals in the paint. Consider wearing proper protective gear. Alternatively, you may carry out your painting project in an open space if you cannot access good protective gear.
Consider wearing specialized goggles and hand gloves to protect your body. You want to take the shortest time to complete painting your hood, so consider using spray paint. All you require is the primer, paint, and a spray gun.
When you have assembled all the supplies you need, you can start by spraying the primer on your hood. Be sure to hold the spray gun steadily while spraying. Additionally, maintain a distance of about 39 Centimeters between the hood and the nozzle of your spray gun.
A good alternative to spraying your primer is using a plastic spreader to apply the primer on the surface of your hood manually.
Allow the first coat of your primer a sufficient amount of time(preferably 5 minutes) before adding subsequent layers to your hood. It is advisable to read the instructions on your can to be sure of the exact amount of drying time.
When the first coat of your primer is dry, add up to three other layers of the primer for better bonding to the surface. Employ even sprays of your primer to get a clean and smooth finish.
Let the primer dry before you can apply the paint of your choice. To be exact, let the primer dry for one day; Be sure to cover your hood with an appropriate cover because you don’t want contaminants on the surface of your hood.
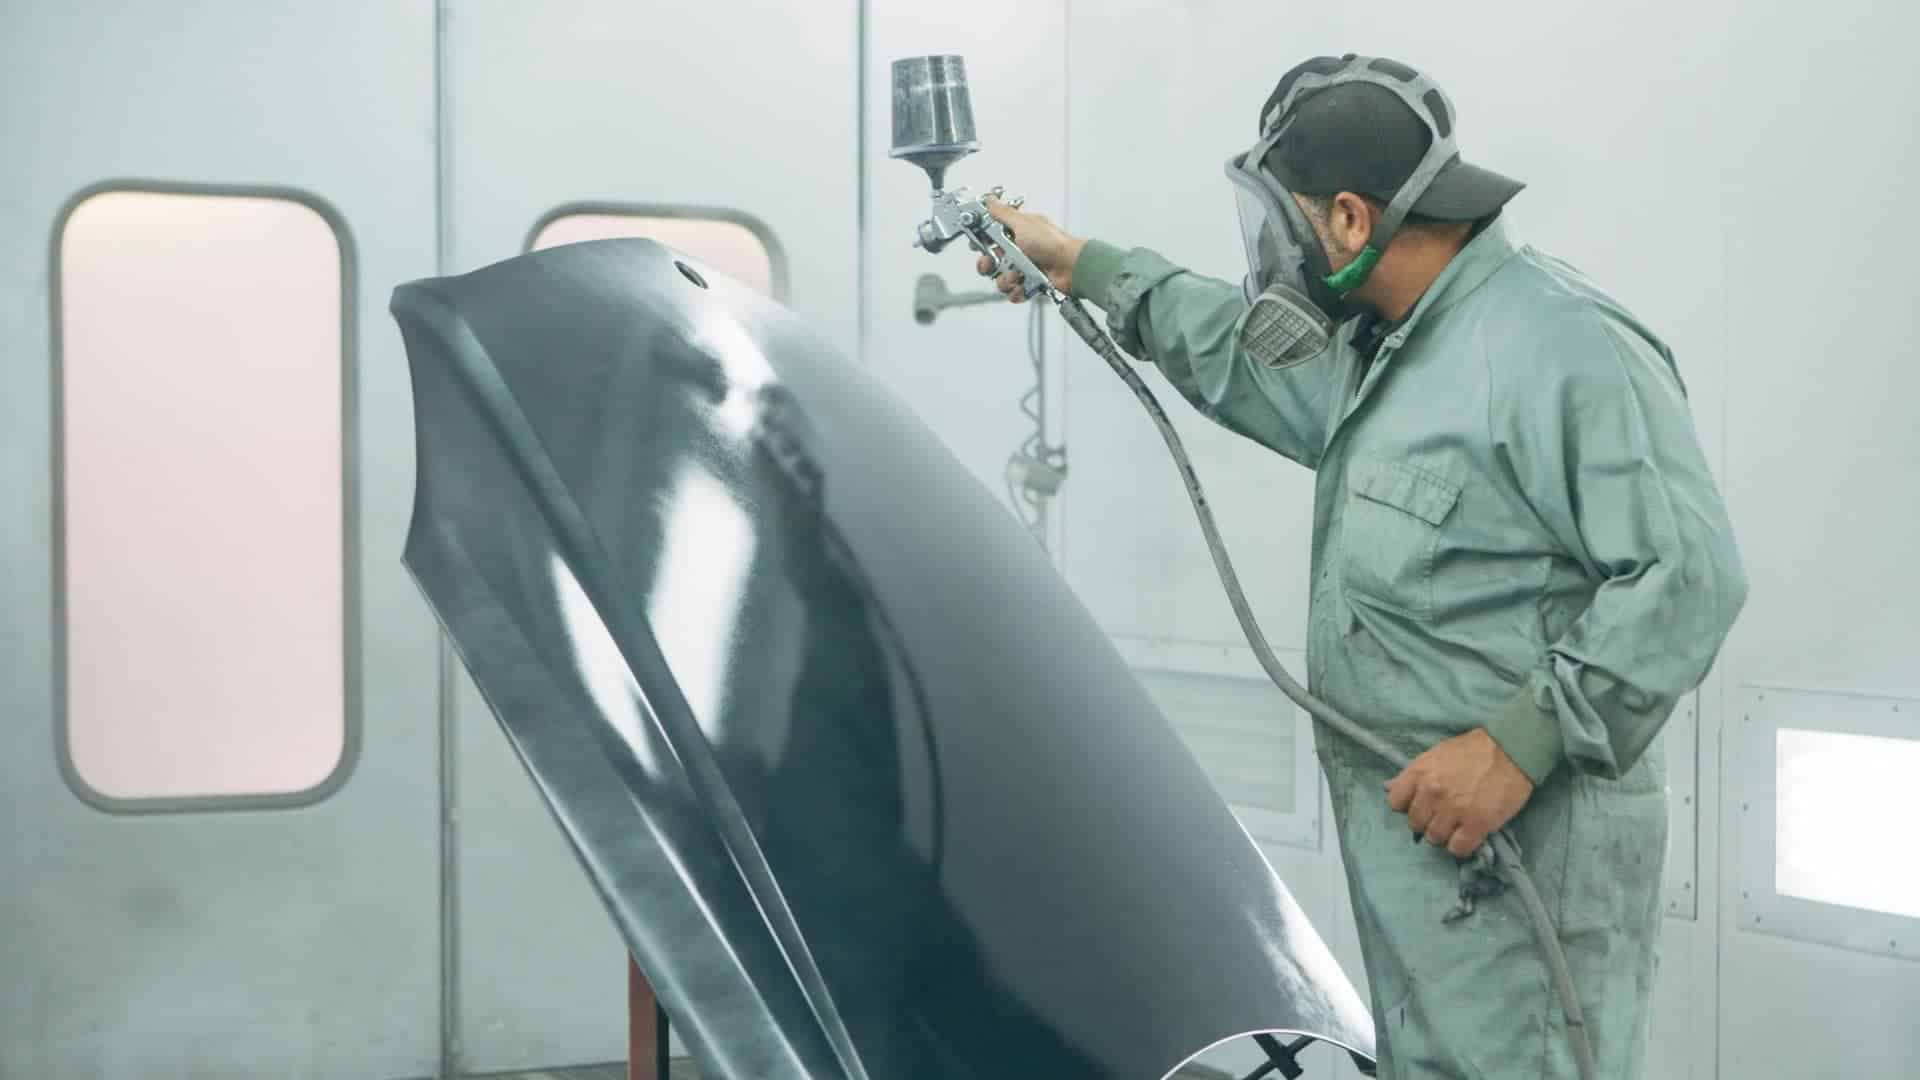
Step 3: Painting the Car
When applying your paint, be sure to start from one end and make uniform and even spray on the surface of your hood. Note that applying paint is more or less the same as applying a primer. Maintain an appropriate distance between the surface of your hood and the nozzle of your spraying gun.
Flex your hand so you can make slow motions while spraying paint on your hood. You don’t want bumps and unwanted spots, so ensure your hand is steady to achieve desired and professional results.
As was the case with the primer, you will need to apply up to three coats of paint on your hood. Be sure to allow a sufficient amount of drying time in between coat applications. A fifteen to twenty-minute interval is more appropriate. Be sure to apply the coats in an even manner because you want to achieve a professionally painted hood.
Note that paint dries out more quickly than the primer, so you can give your paint a maximum of four hours to be sure it has dried properly. However, you can leave your car to dry for up to 24 hours but be sure to cover it properly.
Since you Want a perfect finish on your hood, you can decide to customize the hood to suit your needs. Consider using different colors to make decorations and drawings for your hood. At this point, what you require is your creative abilities.
Avoid the coloring effect by spraying your paint on a coat of clear polish.
Tips Worthy Noting When Painting Your Car Hood.

- Consider using an aqueous paint to achieve professional painting results.
- You need to maintain uniform and even sprays for a consistent finish on your hood.
- Apply several coats of both your primer and your paint to achieve a smooth and even finish. Additionally, be sure to let the coats dry properly for better results.
Conclusion:
In conclusion, painting a car hood can transform not only the appearance of your vehicle but also spark a sense of pride in your handiwork. This process demystifies what may seem like an intimidating task, allowing anyone to achieve professional-looking results with patience and practice. Beyond aesthetics, applying a fresh coat offers protection against rust and deterioration, enhancing the longevity of your investment.
Moreover, this experience fosters creativity and personal expression; think of each stroke as a therapeutic journey that reflects your style. For those considering selling their vehicles or simply wanting to refresh their drive, investing time into such projects can yield impressive returns both visually and in terms of value. Whether you’re looking for a vibrant pop of color or a sleek matte finish, don’t underestimate the power of DIY endeavors; you’ll find that immersing yourself in tasks like these often leads to newfound skills and unexpected fulfillment. Enjoy your painting!