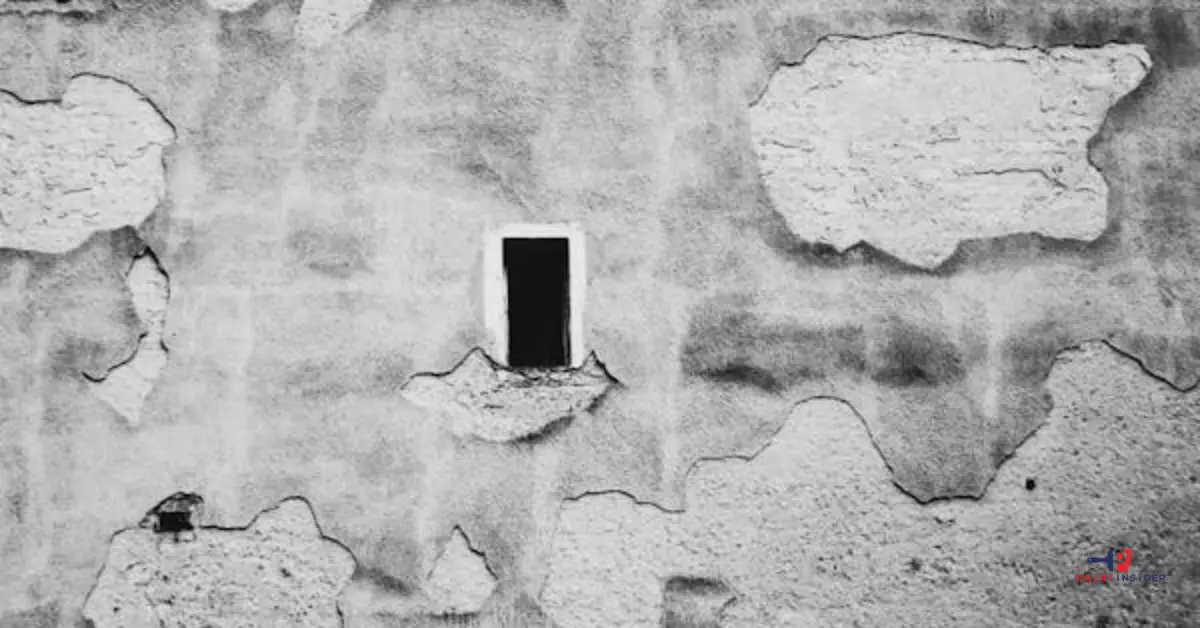
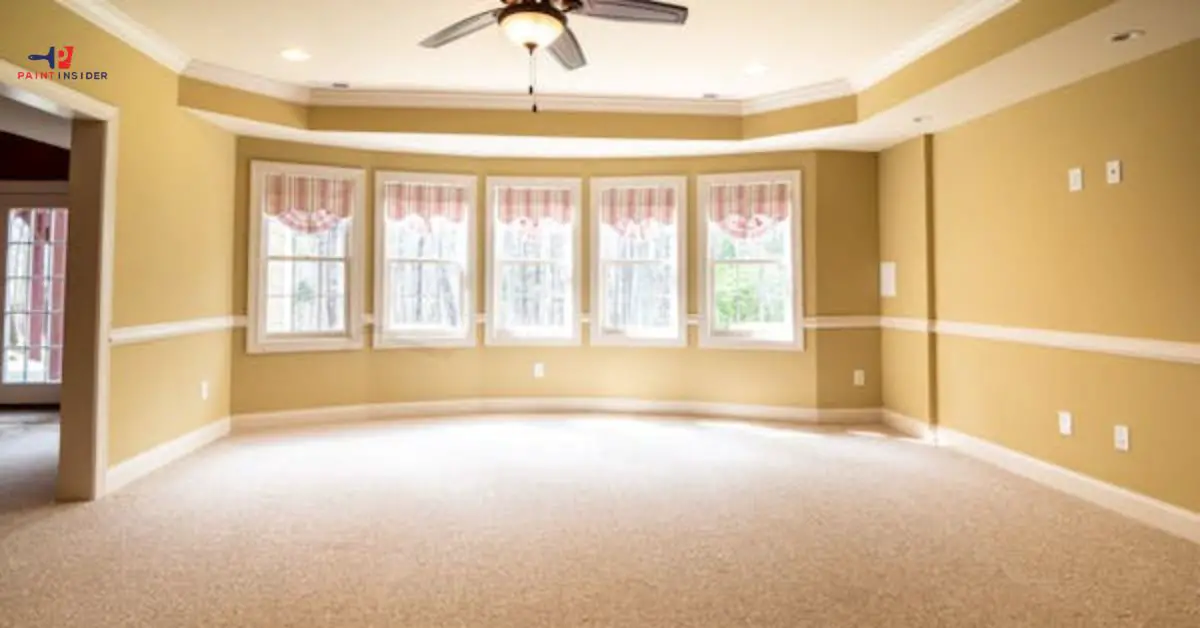
Why Does Stucco Crack? Key Reasons Explained

Why Does Stucco Crack Key Reasons Explained

Learn why stucco cracks and the key reasons behind this common issue. Explore expert insights and tips to prevent and fix stucco cracking effectively.

Introduction: Understanding Stucco Cracking Issues

Stucco cracking is a common issue that homeowners often confront, but understanding its underlying causes can transform how we approach repairs. One of the key reasons for stucco cracks is the material’s inherent nature it expands and contracts with temperature fluctuations. This movement can create stress points, leading to fissures if not properly managed during installation. Additionally, inadequate curing or moisture retention within the stucco mix contributes significantly to long-term cracking issues.

Another critical factor is structural settlement; homes naturally shift over time due to soil conditions or changes in load-bearing structures. If stucco isn’t flexible enough to accommodate these shifts, it will crack under pressure. Homeowners should also consider environmental factors like heavy rain or freeze-thaw cycles that exacerbate existing vulnerabilities in their stucco walls. Understanding these key reasons behind why stucco cracks can empower homeowners, enabling them to take proactive steps for maintenance and repair before minor issues transform into costly undertakings.

Common Causes of Stucco Cracks

One of the most common culprits behind stucco cracks is inadequate moisture management. When water infiltrates the surface and is unable to escape, it can lead to swelling and subsequent shrinkage as it dries. This cycle weakens the stucco integrity, resulting in unsightly fissures over time. Installing proper drainage systems is crucial for maintaining a healthy exterior.

Another key reason why stucco might crack relates to structural movement. Homes settle naturally as they age, but significant shifts caused by foundation issues or extreme temperature fluctuations can exacerbate this problem. Additionally, poor installation practices like not applying enough layers or using low-quality materials can create vulnerabilities that manifest as cracks down the line.

Lastly, external factors such as tree roots pushing against foundations or seismic activity in certain regions shouldn’t be overlooked. Even small tremors can cause subtle yet impactful shifts that compromise your stucco finish. Understanding these underlying causes empowers homeowners to take proactive measures be it regular inspections or timely repairs to safeguard their property’s exterior aesthetic and durability.

Improper Installation Techniques

Why Does Stucco Crack Key Reasons Explained 3
  • Inadequate Surface Preparation: Proper installation begins long before the stucco mixture ever touches the wall. Failing to clean, prime, or repair the surface can lead to poor adhesion and increase the likelihood of cracks forming. Dust, dirt, and moisture trapped beneath the stucco create a breeding ground for future issues.
  • Layering Errors: Stucco is typically applied in multiple layers that need adequate curing time between each application. Rushing through this process can weaken the bond and result in unsightly fractures over time. Each layer has its own role and neglecting to follow established guidelines compromises both aesthetics and durability.
  • Environmental Factors Ignored: Recent weather conditions should influence installation techniques significantly. For instance, applying stucco during extreme heat or dampness not only impacts drying times but also increases the risk of cracks developing as materials expand or contract unevenly.

Understanding these improper installation techniques provides valuable insight into maintaining your home’s exterior. Employing proper methods from start to finish will not only enhance appearance but also extend the life of your stucco, preventing costly repairs down the line.

Climate and Weather Impact on Stucco

Why Does Stucco Crack Key Reasons Explained 2

Moisture Sensitivity:

One of the primary reasons stucco shows wear is due to climate-induced moisture levels. In areas with high humidity or heavy rain, water can seep into cracks and crevices, leading to significant damage over time. This moisture infiltration can exacerbate existing vulnerabilities in stucco, causing it to crack and blister.

Temperature Fluctuations:

Rapid changes between extreme heat and cold can create tension within the stucco surface. As temperatures rise, stucco expands, but when they drop sharply at night, it contracts. This cyclical expansion and contraction may lead directly to cracking a common problem in regions with unpredictable weather patterns.

UV Exposure:

Prolonged exposure to ultraviolet (UV) rays from the sun break down the chemical structure of many materials including stucco. Over time, this leads to fading colors and deterioration of its protective exterior. Choosing an appropriate paint or sealant that offers UV protection can drastically increase your stucco’s lifespan.

Wind Erosion:

Strong winds carrying debris or sand can wear away at a stucco’s surface finish over time. This abrasive action not only diminishes aesthetics but also exposes sub-layers vulnerable to the elements, increasing susceptibility to cracking.

By understanding these impacts on performance durability especially why stucco cracks you’ll be able to make informed maintenance decisions that protect your investment against nature’s whims.

Foundation Settling and Movement Effects

Foundation settling and movement can cause unnerving damage to your home, particularly evident in exterior materials like stucco. As the ground beneath shifts, it exerts pressure that leads to cracks and gaps in your walls, making you wonder, Why does stucco crack? These fissures often serve as telltale signs of underlying issues such as moisture infiltration or improper drainage that could escalate into more significant problems if left unaddressed.

One key reason your home’s foundation may settle is soil composition. Expansive clay soils, for example, swell when wet but shrink during dry spells, creating an unstable environment that challenges even well-constructed foundations. Regular soil maintenance and ensuring adequate drainage around your property can be proactive steps towards mitigating these effects. Sometimes simple adjustments like directing downspouts away from the foundation can make a big difference in preserving the integrity of stucco surfaces and preventing costly repairs down the line. Understanding how these dynamics work not only equips homeowners with knowledge but also empowers them to take charge of safeguarding their investments.

Use of Poor Quality Materials

Using poor-quality materials is a leading factor in why stucco cracks, often undermining the integrity of a structure over time. When subpar aggregates, binders, or additives are employed in stucco mixes, they lack the strength and resilience needed to withstand environmental stressors. For instance, low-grade lime or sand can lead to weak adhesion and an ineffective moisture barrier. As seasons change and temperatures fluctuate, these weaknesses manifest as cracks that not only mar the appearance of a building but also expose it to further damage.

Moreover, the impact of poor-quality materials extends beyond just immediate structural concerns; they can result in long-term costs for homeowners. Repairs may be frequent and expensive if you begin with inferior products. Investing initially in high-quality materials promotes durability and minimizes future maintenance needs a far more economical approach than dealing with repairs triggered by material failure. So next time you consider your stucco choices, remember: cutting corners on material quality may save money upfront but could ultimately result in substantial headaches down the line.

Aging and Wear Over Time

Aging and wear over time can manifest in various forms, notably in materials like stucco. While its aesthetic appeal makes it a popular choice for many homes, even the most robust stucco can develop cracks as it ages. One primary reason for this is the natural settling of a house; as the foundation shifts and settles over decades, stresses are placed on exterior materials, leading to vulnerabilities. Furthermore, temperature fluctuations cause expansion and contraction that contribute to cracking especially in regions with extreme climates where freezing nights give way to blistering days.

Moisture is another culprit behind stucco’s deterioration. Water infiltration from rain or snow can weaken the structure beneath the surface layer, while poor drainage exacerbates these issues. Over time, if small cracks are left untreated, they enable further water intrusion and lead to more extensive damage thus becoming not just an aesthetic concern but a significant structural one as well. Understanding these key reasons behind why stucco cracks allow homeowners to take preventive measures or act early when signs of wear first appear ensuring their home remains both beautiful and sound for years to come.

Prevention Tips for Stucco Cracking

Regular Maintenance:

Inspect your stucco surfaces regularly for any signs of wear or damage. Look for hairline cracks, which may seem minor but can signal larger issues if left untreated. Promptly addressing these small problems can prevent costly repairs down the line.

Control Moisture Levels:

One of the leading causes of stucco cracking is moisture infiltration. Ensure proper drainage around your home by maintaining gutters and downspouts to divert water away from the foundation walls. Additionally, consider landscaping that slopes away from your house to minimize water accumulation against stucco surfaces.

Choose Quality Materials:

Investing in high-quality stucco materials and professional installation can pay off significantly over time. Inferior products may not withstand environmental stressors as well, leading to increased cracking. When upgrading or building new structures, ensure you collaborate with reputable contractors who understand the nuances of stucco application.

Incorporating these tips into your routine will not only preserve the beauty of your home’s exterior but also enhance its longevity. By understanding why stucco cracks occur such as temperature fluctuations and improper installation you empower yourself to take proactive steps in safeguarding your investment.

FAQs about Why Stucco Cracks

1. What are the main reasons stucco cracks?
Stucco cracks are primarily due to settling, temperature changes, moisture issues, and poor installation practices.

2. How does temperature affect stucco?
Extreme temperatures can cause expansion and contraction in the stucco material, leading to cracks over time.

3. Can water damage cause stucco to crack?
Yes, excessive moisture from leaks or poor drainage can weaken the stucco, causing it to crack as it dries out or freezes.

4. Is poor installation a common cause of stucco cracking?
Absolutely! Improper mixing, application thickness, or inadequate curing can all contribute to premature cracking.

5. Are there different types of cracks in stucco?
Yes, there are hairline cracks (which are usually minor), shrinkage cracks (from drying out), and structural cracks (which may indicate serious issues).

6. How can I prevent cracking in my stucco?
Proper installation, regular maintenance, ensuring good drainage around your home, and choosing quality materials can help prevent cracking.

7. When should I be concerned about stucco cracks?
If you notice large gaps or vertical/horizontal cracks wider than 1/8 inch, it’s best to consult a professional for assessment.

8. Can cracked stucco be repaired easily?
Many small cracks can be repaired with patching compounds; however, larger issues may require professional repair services for a lasting fix.

Conclusion: Addressing and Preventing Cracks

Addressing and preventing cracks in stucco requires a multifaceted approach that balances immediate remedies with long-term strategies. Understanding Why Does Stucco Crack? Key Reasons Explained gives homeowners the insights necessary to make informed decisions. Cracks often emerge from factors like improper installation, moisture issues, or temperature fluctuations. By conducting regular inspections and maintenance, such as ensuring proper drainage systems are in place and avoiding direct contact with soil, homeowners can significantly mitigate the risk of damage.

Prevention doesn’t stop at routine checks; it also involves selecting high-quality materials and working with skilled professionals to install your stucco correctly from the start. Investing time in education about local climate challenges can empower homeowners to choose appropriate finishes that enhance durability while reflecting their aesthetic preferences. Remember, the goal isn’t just to patch cracks when they appear but rather foster a proactive mindset around home care that recalls preventative techniques used by seasoned homeowners throughout generations.

Who Invented the Paint Roller and When? The history of Paint Roller

Who Invented the Paint Roller and When Was It Invented

The paint roller was invented in 1940 by Richard Croxton Adams and Norman Breakey. They came up with the idea to create a tool that would make painting more efficient and less time-consuming than traditional brushes. Norman’s design featured a cylindrical roller covered in fabric, which allowed painters to cover larger areas quickly with a smooth, even coat of paint. The invention of the paint roller revolutionized painting, making it more accessible and practical for both professionals and DIY enthusiasts.

Introduction: The Evolution of Painting Tools

The history of painting tools is a fascinating journey that mirrors the evolution of artistic expression itself. From the simple ochre pigments smeared on cave walls to today’s sophisticated synthetic brushes and rollers, each innovation has transformed how we bring color into our lives. Among these tools, the paint roller stands out as a game-changer for both professional and amateur painters alike.

But who invented the paint roller and when was it invented? The modern paint roller is credited to Richard Croxton Adams and Norman Breakey in 1940, sparking a revolution in efficiency that allowed artists and homeowners to cover large surfaces quickly with an even layer. This invention dramatically shifted the landscape of painting, making it accessible for those who may have once felt intimidated by traditional brushes. Today, creativity flourishes as people experiment with texture and technique using these once-simple tools showcasing how innovation can breathe new life into age-old crafts.

The Birth History of the Paint Roller

The paint roller, a staple in modern painting, owes its invention to a creative spark in the mid-20th century. While many struggle with the cumbersome task of laboriously applying paint with brushes, it was in 1940 when Norman Breakey, a Canadian inventor, sought to revolutionize this process. He conceptualized a cylindrical design that allowed for faster and more even application of paint onto surfaces. His invention came about during World War II when personal time for home improvement projects was scarce; Breakey’s innovation catered perfectly to those eager to refresh their homes quickly.

However, despite his ingenious design, Breakey struggled to commercialize the paint roller effectively. It wasn’t until the late 1950s that an American company recognized its potential and began mass production. This pivotal moment not only transformed DIY home renovations but also redefined how professional painters approached their craft. The simple yet effective solution drastically reduced both time and effort while increasing productivity setting new standards in the painting industry as we know it today.

Key Inventor Behind the Paint Roller

The paint roller, a staple in the world of home improvement, traces its origins to 1940 when Norman Breakey, a Canadian painter, first conceived this ingenious tool. Frustrated by the inefficiencies of traditional brushes and labor-intensive methods, he sought a quicker way to apply paint to surfaces. Breakey’s innovative design incorporated a cylindrical fabric cover that allowed for seamless application over large areas a game-changer for both professional painters and DIY enthusiasts alike.

Interestingly, while Breakey is often credited with the invention of the modern paint roller, his idea underwent various adaptations before it became mainstream. Initially faced with skepticism from suppliers who doubted its practicality, the concept didn’t immediately take off. It wasn’t until after World War II that manufacturers began recognizing its potential and mass-producing it. This shift not only revolutionized painting techniques but also sparked interest in home renovations across North America and beyond transforming how people approached their living spaces and ultimately weaving itself into the fabric of modern culture.

The Origins of Painting Techniques

The evolution of painting techniques reflects humanity’s quest for expression, with origins tracing back to prehistoric times. Early artists used natural pigments obtained from minerals and plants to create vivid murals on cave walls. These primitive methods laid the foundation for more sophisticated approaches, culminating in innovations like oil paints during the Renaissance, which allowed for greater detail and depth.

Fast forward to the 20th century, a pivotal moment arrived with the invention of the paint roller. It was introduced by an innovative American painter named Richard Drew in 1940. This simple yet revolutionary tool transformed how we approach painting making it quicker and more efficient while ensuring even coats across surfaces. The paint roller not only democratized home improvement but also changed professional practices, allowing artists and homeowners alike to unleash their creativity without the laborious task of using brushes alone.

Early Innovations in Paint Application

The landscape of painting experienced a significant transformation with the invention of the paint roller in the mid-20th century. While brushes and traditional methods were long considered standard, it was Joseph McGuffey in 1940 who patented this ingenious tool, revolutionizing how we apply color to surfaces. The paint roller’s design featuring a cylindrical core covered with absorbent material allowed for even distribution and efficiency that brushes could scarcely match. This simple yet transformative innovation enabled amateur painters to achieve professional results, democratizing access to home improvement projects.

Beyond just convenience, the paint roller paved the way for a surge in creativity among homeowners and artists alike. It encouraged experimentation with textures and techniques that had previously been challenging or time-consuming to accomplish. The ability to cover large areas quickly not only made painting more accessible but also ignited an explosion of color choices in interior decor during the post-war years a period marked by optimism and bold design choices. Thus, while its origins may seem humble, the impact of McGuffey’s creation extends far beyond mere functionality; it became a symbol of self-expression that inspired generations to embrace art right within their living spaces.

Patent History and Development Timeline

The paint roller, a seemingly simple tool that revolutionized the painting industry, can be traced back to the early 20th century. Invented in 1940 by an innovative entrepreneur named Richard S. Smith, this device forever altered the way we approach home and commercial painting. Before its introduction, brush application was the norm an arduous task that required time and skill. Smith’s design featured a cylindrical roller covered with fabric, allowing for speedier application and a smoother finish. 

This invention not only made painting more accessible but also marked a significant shift in DIY culture; it empowered everyday people to take on home improvement projects with newfound ease. The evolution of the paint roller didn’t just end there; variations including extension handles and sponge rollers emerged, catering to diverse needs over time. Observing how such a simple item has influenced trends in art, design, and even color usage offers deep insights into our cultural relationship with aesthetics each roll of paint telling its own story through homes across generations.

Impact on DIY and Professional Painting

The invention of the paint roller in 1940 by Norman Brabant revolutionized both DIY and professional painting, making it more accessible and efficient. This ingenious tool allowed homeowners to transform their spaces with ease, erasing the labor-intensive brush-and-tray method from everyday life. As a result, DIY enthusiasts discovered a newfound confidence, empowered to tackle home improvement projects that once seemed daunting. The sleek design paired with ergonomic handles brought speed to painting tasks, encouraging even novice decorators to explore their creativity.

For professionals, the paint roller not only improves productivity but also enhances finish quality. With the ability to cover large areas quickly while maintaining a smooth surface, painters could take on bigger projects without compromising craftsmanship. Moreover, the evolution of rollers has led to an array of specialized options designed for various textures and finishes. This advancement means contractors can now tailor their choice of tools specifically for each job leading to better results and more satisfied clients. In this way, the legacy of the paint roller continues to shape how we envision our living spaces and enhances our relationship with color in interior design.

Modern Variations of the Paint Roller

Who Invented the Paint Roller and When Was It Invented

The evolution of the paint roller has sparked a wave of modern variations that cater to both DIY enthusiasts and professional painters alike. Initially invented in 1940 by Milton Birnbaum, the paint roller revolutionized the way we apply color to our walls, making it quicker and more efficient than traditional brushes. Today’s innovations give rise to mini rollers for tight spaces, foam rollers for achieving smooth finishes, and even programmable rollers designed to automate painting tasks and each variation is tailored to specific needs.

What truly stands out is how modern technology intersects with this classic tool. Some contemporary paint rollers now come equipped with built-in paint reservoirs that dispense liquid as you roll eliminating frequent dips into trays and reducing mess dramatically. Additionally, smart paint rollers equipped with sensors can gauge wall texture and adjust pressure accordingly, ensuring an even coat without any guesswork. These advancements not only save time but also enhance precision, allowing everyone from novices to professionals to achieve stunning results with ease.

Tips for Using a Paint Roller Effectively

  1. Choose the Right Nap: The nap of your roller cover affects the finish of your paint job. A thicker nap works best for textured surfaces, while a shorter nap is ideal for smooth walls. By selecting the appropriate nap, you ensure even coverage and reduce the need for multiple coats.
  2. Load Your Roller Properly: To minimize drips and achieve smooth application, dip your roller only halfway into the paint tray. Roll it along the ribbed edge to remove excess paint before applying it to your wall. This technique promotes an efficient painting process and helps maintain control.
  3. Employ a “W” Technique: Instead of rolling straight up and down, use a W motion when applying paint to walls. Start at one corner and create a W shape without lifting the roller; this distributes paint evenly over large areas. Not only does this method enhance coverage, but it also prevents streaks that often occur with traditional rolling techniques.
  4. Prioritize Edges First: Before tackling broader sections with your roller, address corners and edges with a brush or trim tool first. This approach ensures that those tighter spots are neatly painted and allows for smoother transitions when you transition to using larger tools.

Using these tips enhances not just the quality of your project but also gives you insights into optimizing efficiency making each stroke count! Interestingly enough, while you’re enhancing your painting skills today, it’s worth noting that the modern paint roller was invented by Richard Adams in 1940, revolutionizing how we approach projects like these!

Conclusion: The Legacy of the Paint Roller

The legacy of the paint roller is far more than just a tale of an efficient painting tool; it embodies the spirit of innovation that transforms creativity into practicality. Invented by Norman Breakey in 1940, the paint roller revolutionized how we approach surface finishing and home decor, allowing amateur DIYers and professional painters alike to achieve smooth, even coats with remarkable ease. This simple yet transformative invention helped democratize art, enabling countless individuals to express their style without necessitating elaborate skill or time investment.

As we look back on its impact, we recognize that the paint roller symbolizes a shift toward accessibility in craftsmanship. Its introduction sparked not just efficiency but also inspired a myriad of color choices and techniques that have shaped contemporary design trends. Today, as we select bold hues or intricate patterns for our walls, it’s crucial to acknowledge how Breakey’s invention laid the groundwork for this vibrant exploration of personal expression. The paint roller stands as a testament to human ingenuity turning mundane tasks into opportunities for creativity while leaving an indelible mark on homes worldwide.

Choosing the Perfect Caulk for Your Baseboards | Seal the Deal

Perfect Caulk for Your Baseboards

Are you remodeling your home or just looking to give it a little facelift?

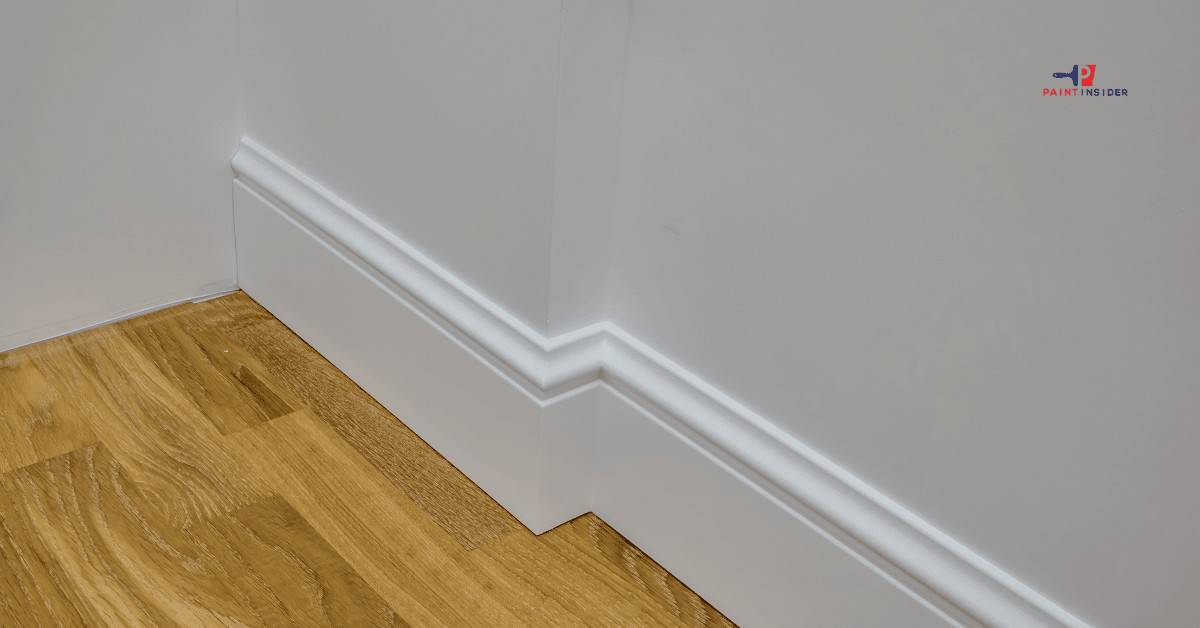
These trim kings do not just hide the seams between the wall and floor; they’re the silent protectors of your home’s aesthetic integrity, providing that finishing touch that turns a house into a haven. But achieving that flawless look is more than paint color – it’s about caulk!

Caulk is the superhero sidekick for your baseboards, ensuring they stand strong against the forces of time, wear, and tear. So, what caulk is best for baseboards?

Different types of caulk are available for baseboards; each one has its benefits and drawbacks, but not all caulk is ideal to use on baseboards.

How do you find what caulk is best for baseboards?

To discover that you have to be with me. It’s a journey where every detail matters, and today’s star player is caulk. Here, we’ll cover all aspects of baseboard caulking, from understanding different types of caulk to selecting the caulk that not only protects but also adds that wow factor to it.

Importance of Using the Right Caulk for Baseboards

You’ve spent hours selecting the ideal baseboard style, color, and texture to complement your home. It’s a masterpiece in the making. But, and it’s a big but, without the right caulk, it’s like having the perfect recipe without the secret sauce. So, before we dive into the different types of caulk for baseboards, let’s know what caulk is and why using the right caulk for baseboards is essential.

What is Caulk for Baseboards?

Caulk for baseboards is a sealant to fill gaps and cracks between baseboards and walls or floors. Its primary purpose is to create a seamless, airtight, and watertight seal, preventing drafts, moisture, and dust from infiltrating the gaps. It also serves an aesthetic function by providing a smooth and finished appearance. Available in different types, caulk ensures seamless integration with various baseboard colors. Proper application enhances durability and longevity.

Why Caulk is Important for Baseboard? (Baseboards & Caulk Relationship)

White Modern Simple Table of Contents

Shield Against the Elements

Baseboards are the frontline defenders against the elements, and the right caulk forms an impenetrable barrier, keeping moisture, drafts, and unwanted critters at bay. Say goodbye to pesky drafts and unexpected water damage with the right caulk.

Flexible Friendships

Your baseboards are like flexible acrobats, gracefully bending with the twists and turns of your house. The right caulk? It’s their trusty sidekick, moving seamlessly to prevent cracks or gaps from stealing the show.

Aesthetic Harmony

Have you ever seen a beautiful baseboard ruined by a mismatched caulk color – a real home fashion blunder? It’s like a fashion faux pas for your home. The right caulk not only seals the gaps but does so seamlessly, blending in with your baseboards like a chameleon. Nail the aesthetic with a perfect caulk color match!

Durability Dynamo

Your baseboards face daily battles – foot traffic, bumps, and furniture shuffles. The right caulk acts as a bodyguard, adding an extra layer of protection. It’s the secret to baseboards aging gracefully, not throwing in the towel too soon. 

DIY Delight

DIY projects are the heartbeat of a happy homeowner, and caulk is a DIY darling. Even a novice can transform into a home improvement maestro with the right caulk. It is easy to apply, forgive minor mistakes, and the results? Nothing short of a DIY delight!

Understanding Different Types of Caulk

Silicon Latex Caulk

Silicon latex caulk is a versatile and popular option for sealing and filling gaps in various surfaces. It is a high-quality sealant that combines the benefits of both silicone and latex. This means it offers excellent adhesion, flexibility, and durability like silicone caulk while also being paintable and easy to clean up like latex caulk. Whether you’re sealing gaps in wood, drywall, or other porous surfaces, silicon latex caulk provides a reliable barrier against air and moisture infiltration. 

This caulk is ideal for indoor projects such as sealing gaps in windows and doors, as it doesn’t emit strong odors. It can’t withstand varying temperatures, heavy wear, or harsh weather.

Pure Silicone Caulk

Silicone caulk is made from a silicone-based gel, providing a durable and long-lasting seal. It’s very tough, making it hard to apply, but it can withstand harsh conditions, widely-ranging temperatures, and any type of heavy wear. It’s water, discoloration, fading, and mold resistant, making it perfect for areas prone to water exposure, such as bathrooms and kitchens. It’s also great for sealing plumbing fixtures (faucets, sinks) and joints in tiles, glass, and metal.

However, it’s not paintable, so if you want to color match with the baseboard, that is not possible. It’s not easy to clean up with water and has a foul odor that demands good ventilation.

Acrylic Latex Caulk

Acrylic latex caulk is a versatile, water-based acrylic polymer. It’s a combination of latex and acrylic resin.  It has acrylic that makes it strong and flexible. Acrylic latex is the most common and cheapest caulk than other caulk type. You can use it for minor tasks like small holes or cracks. So, along with indoor use, you can use it for outdoor services as well. It can endure sunlight exposure to higher temperatures and withstand wear and tear. This caulk can seal gaps in trim, baseboards, and window frames. It’s also useful for exterior projects due to its weather resistance.

Polyurethane Caulk

If you need a robust sealant, polyurethane caulk is the way to go. This durable caulk is designed to endure extreme weather conditions, making it perfect for outdoor use. Whether facing scorching heat or freezing cold, polyurethane caulk stands strong, providing reliable protection. Its versatility extends to sealing gaps in trim, baseboards, and window frames, offering a steadfast barrier against the elements. With weather resistance as a key strength, this caulk maintains its integrity in the face of rain, snow, and temperature fluctuations.

Hybrid Caulk

Hybrid caulk is the best of both worlds, combining silicone’s flexibility and acrylic’s adaptability. This fusion results in a caulk that flexes with movements while offering enhanced durability. Hybrid caulk is a versatile solution for indoor sealing projects and outdoor ventures. Its seamless integration with the surroundings ensures an aesthetically pleasing finish. Combining silicone and acrylic in hybrid caulk enhances durability, making it a long-lasting choice for various sealing needs.

Butyl Rubber Caulk

Butyl rubber caulk excels in strong adhesion and specialized applications. Designed for situations where specific material compatibility is crucial, this caulk adheres well to various surfaces. Its versatility allows it to find a place in different sealing projects, adapting to different surface types. Whether you need a secure seal for unconventional surfaces or have specialized material requirements, butyl rubber caulk provides a reliable solution that stands the test of time.

What Caulk is Best for Baseboards

After carefully exploring the benefits and drawbacks of various baseboard caulk options, I’m convinced that acrylic latex caulk stands out as the clear winner. With the flexibility to adapt to environmental changes, quick drying time, and the bonus of being paintable, acrylic latex caulk is the go-to solution for ensuring long-lasting protection and a polished finish for your baseboards. Let’s know in detail why it’s the best choice.

Benefits of Using Acrylic Latex Caulk for Baseboards

Firstly, acrylic latex caulk adheres well to both wood and painted surfaces. It can expand and contract with the natural movement of your baseboards without cracking or peeling from the surface over time. It also prevents moisture and air from seeping into wall and baseboard gaps. This not only helps maintain the baseboard integrity but also helps improve energy efficiency by reducing drafts.

As a result, you get a durable and long-lasting seal. And let’s remember its water resistance! Acrylic latex caulk is highly resistant to moisture, so there is no need to worry about humidity causing damage or mold growth!

Use it for bathrooms and other areas prone to dampness without thinking twice. Not limited to moisture-prone areas alone, acrylic latex is a jack-of-all-trades!

Its adaptability makes it suitable for indoor and outdoor applications. Whether sealing indoors or braving the great outdoors, this caulk has your back. It’s the easy solution for all your baseboard needs.”

So, if you want a reliable and versatile option for sealing your baseboards, acrylic latex caulk is your go-to choice for sealing and finishing baseboards with confidence and ease.

What Caulk to Use for Trim

What caulk to use for trim depends on the specific demands of your project. If it’s an exterior trim project, silicon caulk is suitable. With outstanding water resistance, flexibility, and durability, it forms a watertight seal that endures structural movement, UV exposure, rain, and temperature variations. It excels in sealing exterior trim around outdoor windows, doors, and other elements.

Yet, the ideal choice is acrylic latex caulk for indoor trim projects like windows or interior doors. This versatile caulk is perfect for sealing gaps between trim and walls, addressing small cracks, and ensuring easy color matching with the trim for a pleasing finish. Its user-friendly nature makes it particularly suitable for DIY projects.

So, when it comes to what caulk to use on trim, the power is in your hands. You can choose silicone caulk for exterior trim, where it shines with its stellar water resistance and durability, or acrylic latex caulk for indoor trim, where its versatility, flexibility, and ease of use make it a top contender.

FAQs

What type of caulk is best for baseboards?

Acrylic latex caulk is best for baseboards. It offers excellent adhesion, is highly flexible, and is easy to use. It has a smooth consistency that makes it simple to apply and shape into the desired form, providing a tight seal between the baseboard and the wall.

Are You Supposed to Caulk Baseboards?

Yes, you should caulk baseboards to fill the gaps between the baseboard and the wall, creating a seamless and finished look. It will improve the appearance and functionality of your home. 

Should I Use White or Clear Caulk for Baseboards?

It depends on your personal preference and the specific aesthetic you’re trying to achieve in your space. If you want a less noticeable, clean, and polished look on light surfaces, white color is best. However, if you want to focus on the baseboard and invisible caulk finish, clear caulk is the go-to solution.

Can I Use Caulk as Glue For Baseboards?

You shouldn’t use caulk as glue for the baseboard. Caulk is designed to seal gaps and joints, not attach baseboards with surfaces. It can’t provide the same strength and durable bond a glue can.

Verdict

When considering the best caulk for baseboards, selecting the right type depends on specific requirements. Evaluate your project’s unique demands, weigh each caulk type’s benefits, and confidently choose the one that aligns with your vision. A pure silicone sealant is ideal for filling large gaps and wet areas due to its durability and water resistance. When dealing with small holes, opt for acrylic caulk for easy application and long-lasting performance. 

Will Masking Tape Damage Wall Paint? Everything You Need to Know

Will Masking Tape Damage Wall Paint

Wondering if Masking tape can damage your wall paint? Discover tips on safely using tape on painted surfaces, avoid peeling paint, and learn which tapes are wall-safe.

Introduction: Will Masking Tape Damage Wall Paint?

Many people use Masking tape to hang decorations or stick items to walls. A common worry is whether this tape will damage wall paint. The answer is not straightforward. Masking tape is usually safe for most wall finishes, but it can cause damage depending on the type of paint and how long it stays on the wall.

Removing Masking tape after a short time usually leaves no marks for water-based paints, which are common in modern homes. However, if the tape is too long, especially in different climates, it might stick more strongly and cause peeling or fading when removed.

If you have older oil-based paints or less durable finishes, be careful. These surfaces might react differently and get marks or lose paint when the tape is removed. Always test a small area first before decorating!

Understanding Masking Tape Composition

Masking tape is more than just a handy tool; it has a complex design that is key to how it works. The tape is made of a long strip of plastic film, usually polyethylene or polypropylene, which makes it strong and flexible. One side is coated with pressure-sensitive adhesive (PSA), allowing it to stick without needing heat or water. This feature lets it work on many surfaces but raises concerns about its effect on sensitive materials like wall paint.

When deciding if Masking tape will harm wall paint, consider the type of paint and how long the tape stays on. Most modern paints are tough and can handle some sticking, but leaving the tape on for too long can leave residue or even peel the paint, especially with older or lower-quality paints. To avoid damage, apply Masking tape carefully and use a low-tack version. This way, you can protect your walls while still enjoying the benefits of this common adhesive.

How Adhesives Work on Surfaces

Adhesives bond surfaces at a molecular level. When you stick tape, like Masking tape, to a wall, the adhesive spreads out to cover more area. This is important because more contact means better adhesion. As the tape’s solvent dries or gets absorbed, the bond strengthens due to forces between the adhesive and the wall paint.

Many DIY enthusiasts worry about whether tape will damage wall paint when removed. Most tapes are made to avoid peeling paint, but the effect can depend on how long the tape stays on and the type of paint finish. A wall with strong sealant can usually handle tape removal well, while older or poorly applied paint may be more at risk. It’s a good idea to test a small area first; this can save you from a lot of touch-up work later!

By knowing how adhesives work with different surfaces, you can make better choices and find creative solutions for your projects without causing damage.

Testing Masking Tape on Painted Walls

When it comes to using Masking tape on painted walls, the question on many minds is whether this seemingly innocuous adhesive will cause any damage. Surprisingly, the answer often hinges on several factors, including the type of paint and how long the tape remains in contact with the wall. For fresh paint, especially if it hasn’t fully cured for at least a couple of weeks, even low-tack tape can lift away some color when removed.

However, there are ways to mitigate potential damage while still enjoying the versatility that Masking tape offers. One technique is to gently press the adhesive against fabric or your skin first before applying it to the wall; this removes some stickiness without compromising its hold. Additionally, testing a small piece in an inconspicuous area can save you from unwanted surprises later on. With mindful application and removal techniques, you can explore creative options like hanging lightweight decorations without fearing unsightly peels or scratches in your paint.

Factors Affecting Paint Damage Potential

  • Surface Preparation: The state of your wall before you apply paint is crucial. If the surface is dirty, oily, or already damaged, new paint may not adhere well, increasing the likelihood of peeling or chipping later on.
  • Type of Paint Used: Choosing high-quality paint can make a world of difference. While cheaper paints might seem tempting, they often lack durability and resistance to wear and tear. Investing in premium options like satin or semi-gloss can provide better protection against common damage.
  • Environmental Conditions: Humidity and temperature play pivotal roles in how paint behaves over time. High humidity can lead to moisture buildup beneath the surface, resulting in bubbling or flaking—especially if you live in areas with extreme weather variations.
  • Application Technique: How you apply your paint affects its longevity. Brushing vs. rolling can yield different results; air bubbles trapped during rolling could cause issues down the line. Moreover, layering too thickly might not allow for proper drying between coats.

Many homeowners ask if Masking tape can damage wall paint. The answer depends on the type of tape and how old the paint is. If your walls are newly painted and still drying, Masking tape can peel the paint more easily than if the paint has been on for a few months. If you’re unsure about using any tape, always test it on a small area first!

Alternatives to Masking Tape for Hanging

Will Masking Tape Damage Wall Paint

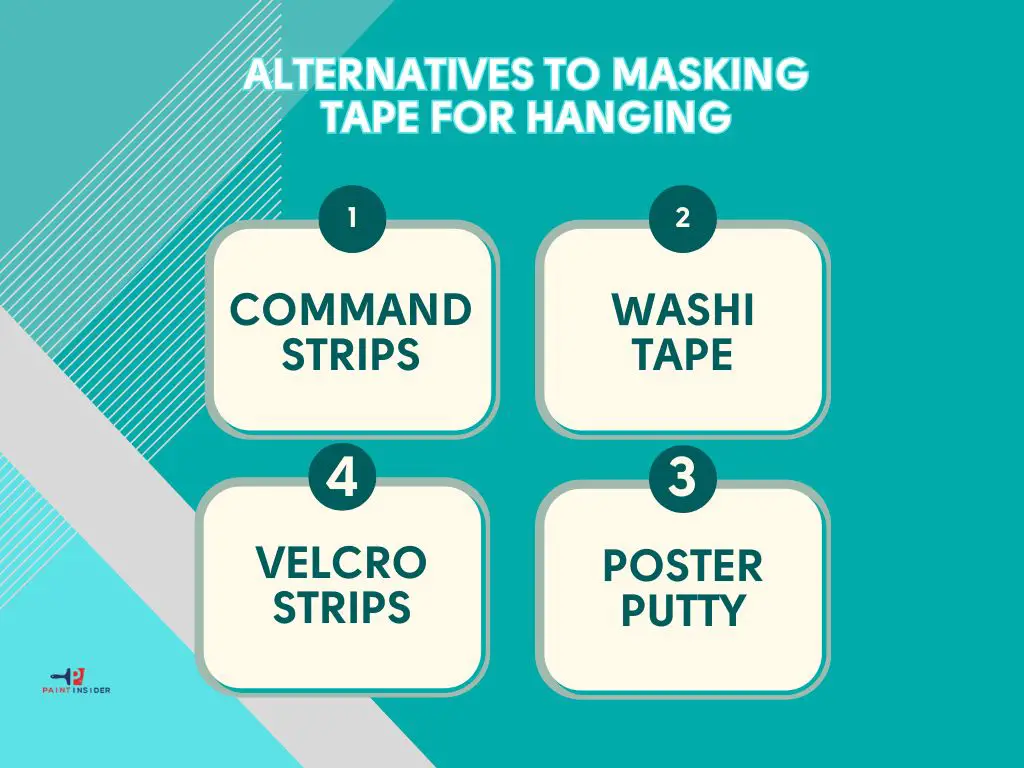
1. Command Strips: These versatile adhesive strips offer a strong hold without the commitment. They are designed to come off cleanly, preventing any unsightly damage or paint removal, making them ideal for renters and those who frequently change their decor.

2. Washi Tape: For a creative twist, consider using washi tape. This decorative paper tape is available in various colors and patterns, adding flair to your hanging projects while being gentle on wall surfaces ideal for lightweight items like photos or artwork.

3. Velcro Strips: If you’re looking for something that allows flexibility, Velcro strips can be a great alternative. They offer an adjustable way to hang items and can withstand heavier weights compared to traditional tapes without tearing off the paint when removed.

4. Poster Putty: An often overlooked gem, poster putty can securely attach lightweight posters or artwork without risk of damage to your walls. Plus, it’s reusable! Just roll it into small balls and stick them behind your objects for secure placements that won’t harm painted surfaces.

Using alternatives like these not only safeguards your walls but also opens up inventive ways to express your creativity in home décor without worrying about Masking tape damaging wall paint.

Tips for Safe Removal Techniques

  • Assess the Surface: Before using any adhesive, take a moment to examine the wall surface. Different paints and finishes react differently to adhesives like scotch tape. If you’re worried about damage, it might be best to test a small area first.
  • Use Heat for Easy Removal: Applying gentle heat can make adhesive removal much simpler. A hairdryer on a low setting can soften the tape’s bond with the paint, making it easier to peel off without leaving residue or causing paint damage.
  • Opt for Painter’s Tape: If you’re frequently adhering items to walls but are concerned about damage, consider using painter’s tape instead of regular scotch tape. Designed specifically for masking surfaces during painting projects, it is less likely to strip paint when removed.

Taking these steps not only minimizes the risks of damaging your walls but also leaves your living space looking fresh and polished. Always prioritize wall safety; after all, no one wants a peeling wall as an unwanted reminder of past decoration attempts!

FAQs about Masking Tape and Wall Paint

What should I do if the paint gets damaged after using Masking tape?
If you experience peeling or damage, touch up with matching paint as soon as possible for the best results.

Does Masking tape damage paint walls?
Generally, Masking tape is designed to be safe for most surfaces, but it can sometimes peel off paint, especially if the paint is old or not well-adhered.

What type of paint is more likely to be damaged by Masking tape?
Flat or matte paints are more susceptible to damage compared to glossy or semi-gloss finishes, which tend to hold up better.

Can I use Masking tape on freshly painted walls?
It’s best to wait at least two weeks after painting before using any adhesive like Masking tape, as the paint needs time to cure.

Are there alternatives to Masking tape that are safer for walls?
Yes! Consider painter’s tape or washi tape, which are specifically designed to minimize damage during removal.

How can I remove Masking tape without damaging the wall?
Gently pull it away at a 45-degree angle; if it sticks, use a hairdryer on low heat to soften the adhesive before removing it.

Will using too much Masking tape cause damage?
Excessive use can increase the risk of damaging your wall, so it’s best to limit how much you apply and avoid leaving it up for long periods.

Is there a way to test if my wall will be damaged by Masking tape?
Yes! Try applying a small piece in an inconspicuous area first and see how easily it comes off without pulling any paint.

Conclusion: Final Thoughts on Wall Damage

When checking for wall damage, it’s important to remember that taking preventive steps can save you time, effort, and money later. Many people think about using Masking tape to hang decorations, but it’s important to know how it can affect your walls. Even though tape seems harmless for quick fixes, it can cause paint to peel and damage finishes over time. This simple adhesive can ruin your carefully designed space. Instead of using tape next time you want to decorate, try alternatives that protect your walls and allow for creativity. Command strips are a great option; they hold well and won’t damage paint when removed. You can also use wall-safe hooks or clips for more versatility without harming your interiors. Taking care of your walls is not just about fixing damage, it’s about creating a stylish and functional environment.

Is acrylic paint good for outdoors? The Ultimate Guide

Is acrylic paint good for outdoors?

Learn if acrylic paint is good for outdoor use in this ultimate guide. Learn about its durability, weather resistance, and tips for long-lasting outdoor applications.

Understanding What  Is Acrylic Paint? 

Acrylic paint is a versatile medium loved by artists for its quick-drying properties and vibrant colors. Made from pigment suspended in a polymer emulsion, it can be used on various surfaces, including canvas, wood, and even concrete. One of the fascinating aspects of acrylics is that they can mimic both watercolors and oils depending on how much water or medium you use. This flexibility allows artists to explore different techniques without needing multiple supplies.

Now, when considering outdoor projects, you might wonder: Is acrylic paint good for outdoors? The answer is yes! While standard acrylics may fade over time with prolonged exposure to sunlight and moisture, many brands offer specially formulated outdoor acrylic paints designed to withstand the elements. These outdoor-friendly versions are more resistant to fading and weather damage, making them ideal for murals or decorative items like garden sculptures. So if you’re inspired to create art that lasts beyond four walls, acrylics could be your go-to choice!

Is it Suitable for Outdoors?

When considering whether acrylic paint is suitable for outdoor use, it’s vital to understand its unique properties. Acrylic paint is water-based, which means it dries quickly and can create vibrant colors that stand out in nature. However, exposure to the elements can take a toll on your artwork over time. While acrylics are moderately resistant to fading from sunlight, they need some extra protection to withstand rain and humidity.

To enhance the longevity of your outdoor projects, applying a UV-protective varnish after painting is a smart move. This can help shield your art from harmful rays and moisture damage. Additionally, choosing high-quality acrylic paints specifically formulated for outdoor use will make a significant difference. With the right preparation and care, such as selecting durable surfaces and using proper sealing techniques, you can create stunning outdoor pieces that feel fresh every season. So yes, with thoughtful choices and protective measures, acrylic paint can indeed shine brightly outdoors!

Benefits of Using Acrylic Paint Outdoors

  • Durability Against Weather Elements: One of the standout features of acrylic paint is its superior durability. Unlike other types of paint, acrylic is water-resistant once dry, making it a great choice for outdoor projects subject to rain or humidity.
  • Vibrant Colors and Quick Drying Time: Acrylic paints offer vivid colors that remain vibrant over time, ideal for brightening outdoor spaces. Plus, their quick drying properties mean you can complete large projects faster than traditional oil-based paints.
  • Flexibility and Adherence: This medium possesses excellent adhesion qualities on various surfaces like wood, metal, and masonry. Such versatility allows artists to explore different materials without worrying about paint flaking or cracking.
  • Non-toxic Options Available: For those concerned about environmental impact, there are non-toxic acrylic paints available that minimize harmful emissions. This makes them safer for use in gardens or areas frequented by children and pets.

By utilizing acrylic paints outdoors, creators can enjoy these benefits while transforming any environment into an engaging masterpiece that’s not only beautiful but also enduring through the seasons.

Types of Acrylic Paint for Outdoor Use

AD 4nXcQeDPWWyhAIKOrBbRAXDblJnQ6YZf ts9RPFm6SgrZuDhsFzCo8LYuqOfcYEVwhh8XRiAteT1ij5S49dFe7iUi5lXK7Nq6skSjbyVrybSG5DdPBgzbvCO8oZ5lca9st7POGF
  • Water-Based Acrylic Paint: Ideal for outdoor projects, water-based acrylics are easy to clean and maintain. They have good color retention and flexibility, allowing them to withstand changes in temperature without cracking.
  • Acrylic Latex Paint: This type combines the durability of latex with the vibrant colors of acrylics. It’s perfect for wooden surfaces like fences and decks, as it offers excellent adhesion and resistance to moisture critical factors when exposed to the elements.
  • Acrylic Enamel Paint: For those seeking a glossy finish on outdoor metal objects or furniture, acrylic enamel is your go-to choice. It’s incredibly durable and resistant to fading from UV rays, making it suitable for long-lasting outdoor art.
  • Exterior Acrylic Primers: Don’t underestimate their importance! A good primer ensures that your topcoat adheres properly while also enhancing its longevity. Using an exterior-grade primer can significantly boost the performance of any subsequent paint layer.

Exploring these options allows artists and DIY enthusiasts alike to choose paints tailored to specific environmental conditions. When asked if acrylic paint is good for the outdoors, consider not just aesthetics but also functionality; each type serves distinct purposes that elevate your projects’ success in facing nature’s challenges.

Surface Preparation for Outdoor Projects

AD 4nXdvScGHAYJQOZ0f4aFz3xJQ7gc347gFKo0anP IwLqozzLfSHSJbXyP7wO2RRHado3DAM2Zr3KT
  • Choose the Right Time: Consider the weather conditions before starting your outdoor project. Rain or high humidity can compromise paint adhesion, so aim for a dry day with moderate temperatures. This will ensure optimal conditions for your surface preparation and enhance the longevity of the finish.
  • Clean the Surface Thoroughly: Before applying any paint, cleaning is crucial. Remove dirt, grime, and biological growth like mold or mildew with a power washer or scrubbing brush. A clean surface not only improves adhesion but also helps prevent future peeling or chipping, making your project last longer.
  • Sand and Smooth: If you’re working on wood or metal surfaces, don’t underestimate the power of sanding! Use sandpaper to create a smooth base that eliminates rough spots and splinters. This step is particularly important if you’re considering using acrylic paint outdoors; achieving a flawless finish ensures that colors will pop vividly while preventing wear due to environmental exposure.

By keeping these steps in mind during surface preparation, you’ll set yourself up for success when painting outdoors ultimately leading to results you’ll be proud of as you enjoy your new space.

Weather Conditions Affecting Acrylic Paint Longevity

  1. Temperature Fluctuations: Extreme temperature swings can severely impact the longevity of acrylic paint. When temperatures drop at night and rise during the day, it can cause the paint to expand and contract, leading to cracks over time. Therefore, understanding regional climate patterns is crucial for outdoor projects.
  2. Humidity Levels: High humidity can hinder the drying process of acrylic paint, making it susceptible to mold and degradation. Conversely, very dry conditions may lead to rapid evaporation of water content, resulting in a compromised finish. Optimal humidity levels typically range between 40-60%, so consider local weather when planning your painting.
  3. UV Exposure: Prolonged exposure to sunlight accelerates the fading and deterioration of acrylic pigments. While some acrylic paints come with UV protection additives, their effectiveness diminishes over time. Utilizing a clear UV protective coat after application can significantly enhance both vibrance and lifespan.

In summary, if you’re contemplating whether Is acrylic paint good for outdoors? it’s critical to take these weather elements into account before diving into your project. Understanding how external conditions influence your artwork will help you make informed choices that maximize durability while keeping that vibrant aesthetic intact!

Tips for Applying Acrylic Paint Externally

  • Choose High-Quality Acrylic Paint: Investing in premium-grade acrylic paint specifically formulated for outdoor use ensures durability against the elements. Look for brands that highlight weather resistance and UV protection, which can prevent fading and peeling over time.
  • Prep Your Surface Thoroughly: Proper surface preparation cannot be overstated. Clean the surface of dirt, grime, or loose paint to create a solid foundation. Using a primer suited for outdoor applications boosts adhesion and extends the life of your paint job.
  • Consider Weather Conditions: Timing your painting project with favorable weather is crucial. Aim for mild temperatures without extreme humidity; this allows the paint to dry evenly and adhere properly, reducing the likelihood of bubbling or cracking later on.
  • Seal It Right: Once your masterpiece is complete, seal it with a clear acrylic varnish designed for outdoor use. This layer adds extra protection from moisture and enhances color vibrancy while providing an easy-to-clean surface.

By adopting these strategies, you’ll not only boost the longevity of your artwork but also transform external spaces into beautiful reflections of personal style and creativity!

Sealing and Protecting Your Artwork

  1. Choose the Right Sealant: Not all sealants are created equal, especially when it comes to outdoor artwork. Look for products specifically designed for exterior use that offer UV protection. This will help shield your vibrant colors from fading in harsh sunlight.
  2. Test Before Applying: Before you commit to sealing an entire piece, conduct a patch test on a small section of your artwork. This will not only reveal how the sealant interacts with your acrylic paint but also allow you to see any potential changes in texture or finish, ensuring you maintain the integrity of your work.
  3. Consider the Environment: If you’re positioning your art outdoors, think about its exposure to elements like rain and humidity. A waterproof clear coat can protect against moisture damage while adding extra durability.
  4. Regular Maintenance Matters: Even sealed artwork requires some level of upkeep. Every few months, inspect your pieces for wear and tear. Resealing may be necessary after severe weather conditions or if you notice any signs of deterioration.

By following these guidelines, you’ll enhance the longevity of your outdoor acrylic paintings and ensure they remain a striking focal point for years to come!

Common Mistakes to Avoid When Painting

  1. Skipping Surface Preparation: One of the most common mistakes is neglecting to properly prepare the surface before painting. Whether you’re using acrylic paint outdoors or indoors, clean and smooth surfaces ensure better adhesion and a longer-lasting finish.
  2. Ignoring Weather Conditions: When planning an outdoor project, it’s crucial to consider the weather. Painting on a hot day can cause quick drying, leading to cracks or uneven texture. Conversely, painting in high humidity can impede proper drying and cure time.
  3. Overloading the Brush or Roller: Beginners often dip their brushes too deeply into the paint, leading to drips and uneven coverage. Instead, opt for a light load; this encourages more control and precision in your strokes.
  4. Forgetting About Primer: Many DIYers skip primer thinking it’s unnecessary; however, it plays a vital role in sealing porous surfaces and enhancing color vibrancy especially when working with outdoor materials exposed to varying elements.

By avoiding these pitfalls, you’ll not only improve your technique but also ensure that your artistic endeavors withstand the test of time whether they’re gracing interior walls or brightening up an exterior façade.

Maintenance and Touch-Ups for Outdoor Art

  1. Regular Inspections: Check your outdoor art pieces every few months for signs of wear, fading, or damage. Look out for any discoloration or peeling, especially if you’ve used acrylic paint. While acrylics are durable and water-resistant, they can fade due to prolonged sun exposure.
  2. Proper Cleaning Techniques: Dust and dirt can accumulate over time, dulling the vibrancy of your artwork. Use mild soap and water on a soft cloth to gently clean surfaces without scratching them. Avoid harsh chemicals that could accelerate the degradation of the materials.
  3. Sealing Enhancements: Applying a UV-resistant clear sealant can extend the life of your outdoor pieces significantly. This additional layer not only protects against moisture and debris but also helps maintain color saturation. Choose a sealant specifically designed for use with acrylic paint to ensure compatibility.
  4. Timely Touch-Ups: Don’t wait until your artwork looks worn down before making repairs! Small touch-ups using compatible acrylic paints can reinvigorate faded areas and restore the original beauty without needing full repaint. Keeping some leftover paint handy will facilitate this process.

By integrating these maintenance practices into your routine, you can keep your outdoor art looking vibrant year after year while enjoying its aesthetic contribution to your space fully!

FAQs about Using Acrylic Paint Outdoors

1. Can I use acrylic paint on outdoor surfaces?

Yes, acrylic paint can be used on outdoor surfaces, but it’s important to choose a type specifically labeled for exterior use.

2. How does acrylic paint hold up against weather conditions?

Acrylic paint is water-resistant once dry but may not withstand extreme weather without proper sealing or a topcoat.

3. Do I need a primer before using acrylic paint outdoors?

Using a primer is recommended for better adhesion and durability, especially on porous or uneven surfaces.

4. Is there a specific type of acrylic paint for outdoor projects?

Yes, look for exterior or outdoor acrylic paints that are specially formulated to resist fading and moisture.

5. Will sunlight affect the color of my acrylic paint over time?

Yes, prolonged exposure to direct sunlight can fade colors; using UV-resistant acrylics can help minimize this effect.

6. Can I mix different brands of acrylic paint for outdoor use?

Mixing brands is generally fine as long as they are both water-based or solvent-based; just test a small area first.

7. How long does it take for outdoor acrylic paint to dry?

Drying times can vary, but most outdoor acrylic paints will be touch-dry in 1-2 hours; full curing may take longer.

8. Is it safe to use acrylic paint around plants outdoors?

While many acrylic paints are non-toxic when wet, it’s best to avoid overspray and clean up spills promptly to protect your plants.

Conclusion: Making the Right Choice

When deciding if acrylic paint is good for outdoors, it’s essential to weigh your options carefully. While acrylics are versatile and easy to use, outdoor conditions can be tough on any paint. If you choose acrylic, go for a high-quality exterior variety that offers better durability against sun and rain. Remember, investing in the right materials can lead to a longer-lasting finish.

Consider your project’s location and purpose as well. For items exposed to heavy weather or UV rays, look into specialized outdoor paints designed for those challenges. Also, think about how much time you’re willing to spend on maintenance; some finishes require touch-ups more frequently than others. By making informed choices based on your specific needs, you can ensure that your artwork remains vibrant and beautiful for years to come.

The 10 Best Lightweight Ladders For Making Your Work Easier In 2024

Best Lightweight Ladders

Are you searching for a perfect lightweight ladder for your work projects? If yes, this is the right place to get proper suggestions and choose the accurate one.

Ladders are very important in our everyday work purposes. However, heavy ladders are too boring and quite hassles to move from one place to another. Also, it is hard to take a heavy ladder in higher positions. That’s why we’re here to give reviews about the 10 best lightweight ladders in the industry.

Lightweight ladders make the work easier and give more comfort in the working period. Moreover, some ladders have some eye-catching features that provide more advantages. We believe you will get a full solution from the top ten ladders in this guide. These ladders will become suitable to make your workday smooth.

Our Considerable Top 10 Best Lightweight Ladders Review

There are so many brands and models for ladders in the market. We choose these top ten products from our best research by considering various reviews. Again, all these lightweight ladders have amazing features for different work fields. You can choose one according to your projects. So, let’s go to dive in-depth!

1. HBTower 3 Step Folding Ladder: Best for regular usage

HBTower 3 Step Ladder, Folding Step Stool with Wide Anti-Slip Pedal, 500 lbs Sturdy Steel Ladder, Convenient Handgrip, Lightweight, Portable Steel Step Stool, Green and Black
Check Latest Price

Technical Features:

  • Brand: HBTower
  • Color: Green
  • Material: Polypropylene, Iron
  • Product weight: 11.5 pounds
  • Product dimensions: 45.25× 21.75× 2.75 inches

With 3 steps and sufficient large platforms, this ladder performs well for various regular purposes. With a 500-pound weight capacity, this 3-step stool ladder is perfect for regular household, office, and garage work. You can also try the upgrade version, designed with 4-step for high climbing purposes. This lightweight ladder is only 11.5 pounds. Also, the opened dimension is 20.1× 26.8× 40.9 inches, and the folded is 44.5× 20.1× 1.6 inches. You can carry it anywhere easily.

Horse-shaped rubber feet give the ladder a firm position while working. Again, an anti-slip rubber handgrip provides extra support. The pedals are extra spacious and have anti-slip stages to feel more safe and comfortable. These pedals have a steel frame and an additional safety option with a metal buckle. There is a back cross brace system to make the basic structure strong.

For its folding feature, the ladder is called a space-saving tool. You can keep the ladder in any narrow space where you want. The ladder can be used as a chair for its spacious pedal platform. All the paddles are quite thick to one another. That’s why it is effortless to use for everyone.

What we like:

  • Anti-slip handgrip for safety.
  • Sturdy, light, and easily unfolded system.
  • Perfect for 400 or 450-pound users.
  • Easy to use for everyone.

What we don’t like:

  • It can’t be suitable for up to 400 or 450 pounds users.

2. Little Giant Aluminum Ladder: Best for the lightest structural pattern

Little Giant Ladders, Velocity with Wheels, M22, 22 Ft, Multi-Position Ladder, Aluminum, Type 1A, 300 lbs Weight Rating, (15422-001)
Check Latest Price

Technical Features:

  • Brand: Little Giant Ladder systems
  • Color: Gray
  • Material: Aluminum
  • Product weight: 39 pounds
  • Product dimensions: 67× 27× 9 inches

This two-person ladder has the lightest structure to move. Though this aluminum ladder has many configurations, it is the lightest one in the industry. In narrow and hard-to-reach places, the ladder is perfectly compatible. You can utilize it as a multi-tasking harrow in your various projects. Moreover, you can get this with multiple accessories like a cargo hold, project tray, trestle bracket, etc. It is a type IA harrow that can hold 300 pounds maximum weight load.

A-frame, extension, and other versions are available in this paddle. It can easily convert to different configurations by a rock lock adjuster system. Dual pin grips also help in this task. With two extra sliding wheels, the paddle features a great portability system. Two-person compatibility gives the ladder an additional advantage. The maximum reaching point of the tool is 13.2 feet, and the width is 1.6 feet.

The spacious feet of the ladder provide more support and safety while working in a narrow space. The ladder is OSHA and ANSI-certified. Trestle bracket helps to convert in trestle-and-plank scaffolding method for various purposes. Therefore, this multi-configured paddle will perfectly match your multi-position projects.

What we like:

  • Ultralight structure.
  • Multi-type configurations in a single ladder.
  • More flexible and secure to use.
  • Two-person capacity ladder.

What we don’t like:

  • The rock locks can induce an accident with your finger. Be aware of it.

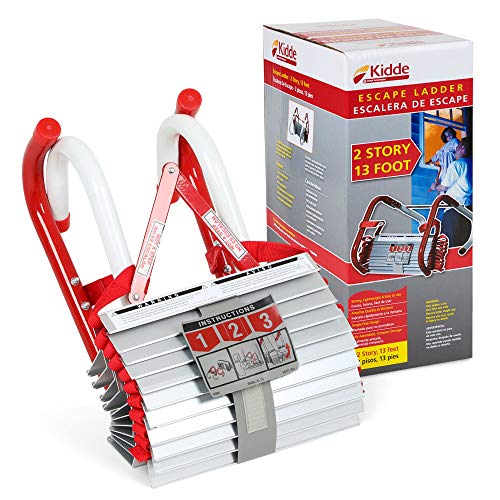
3. Kidde Fire Escape 2-Story Ladder: Best for fire escaping

Kidde Fire Escape 2-Story Ladder, Escape Ladder, 13-Foot Anti-Slip Rungs, Rope Ladder
Check Latest Price

Technical Features:

  • Brand: Kidde
  • Color: Red
  • Product weight: 7.7 pounds
  • Material: Metal
  • Product dimensions: 6.25× 16.38× 8.25 inches

Fire-escaping anti-slip rugs make the ladder suitable for fire-catching areas. Homeowners should always keep a fire-escaping ladder. If you’re looking for this type of ladder, it would be a good choice with various features. Anti-slip rugs can give you a secure climb of 13 feet max. 2-story handles provide more support and comfort in critical situations. The side rails are nylon material that can prevent slipping. It can be set in any common house window and unfold easily with the folding strap.

The retention of the ladder is nearly up to 1000 pounds which is more than enough. It can rescue more people easily in an emergency. Paddles and rugs are quite wide to climb up and in. Also, steel rugs protect from slip and fall. It is suitable for 2 to 3-story homes as it has two models of 13 feet and 25 feet. The hooks are quite strong enough to obstruct any general window.

With a folding strap, the paddle folds without any knot. You can use it effortlessly and keep it anywhere in your home. Again, the paddle can resist fire, so you can use it in emergency fire situations. No other extra accessories are needed for setting and deploying. A year’s warranty is available with the ladder. For saving your family from fire, this tool is a must-have!

What we like:

  • Easy deployment.
  • Sturdy, safe, and fire-resistant.
  • Long enough to rescue in an emergency.
  • Lightweight to carry the paddle anywhere.

What we don’t like:

  • The paddle is suitable only for one-time use.
  • Not comfortable for little children.

4. Ohuhu Upgraded Telescoping Ladder: Best for home decor and repairing

Telescoping Ladder, Ohuhu Upgraded 12.5 FT Aluminum One-Button Retraction Extension Ladder Retractable Collapsible Ladders, ANSI Certified Telescopic Compact Ladder for Home RV, 330 Pound Capacity
Check Latest Price

Technical Features:

  • Brand: Ohuhu
  • Color: Silver
  • Product weight: 25.3 pounds
  • Material: Aluminum
  • Product dimensions: 35.25× 20.2× 4.5 inches

Homeowners become thankful for this ladder as it is designed for various home usages. When you’re looking for a telescopic ladder for your various household works, this lightweight telescoping ladder is the best. With the 12.5-foot model (though it has other 8.5 and 10.5 feet), you can reach the highest pick of your house ceilings. The red-colored monitoring light provides signals while retracting. Also, its various amazing features allow using in-home décor and repairing projects.

The most eye-catching feature of the ladder is single button withdrawal. You just have to press the button for this feature, and the whole ladder will retract automatically. Moreover, the aluminum base makes the ladder lightweight and carries it away without any trouble. The wide paddles give more comfort to lift upper sections than other extension ladders. There are locking pins to prevent your finger and hold up the rugs carefully.

If there is a shortage of areas to store the paddle in your home, don’t worry! The paddle becomes quite short after retraction and fully fits for narrow spaces. It is an EN131 and SGS-certified ladder so don’t worry. Multipurpose functionalities give more opportunities to work. It is a type IAA ladder that can hold 330 pounds maximum load. You can utilize it for decorating walls, cleaning the ceiling, etc.

Lastly, homeowners will become grateful for this one-button withdrawal ladder.

What we like:

  • Easiest withdrawal method.
  • Durable, light, and too good for transporting.
  • Ideal for exalted areas.
  • Safe from finger pinching.

What we don’t like:

  • The extension system is quite boring.

5. Little Giant Flip-N-Lite Ladder: Best for budget-friendly

Little Giant Ladders, Flip-N-Lite, 6-Foot, Stepladder, Aluminum, Type 1A, 300 lbs Rated (15270-001)
Check Latest Price

Technical Features:

  • Brand: Little Giant Ladder Systems
  • Color: Gray
  • Product weight: 17 pounds
  • Material: Aluminum
  • Product dimensions: 74.75× 21.25× 5.25 inches

Get this lightweight stepladder at an affordable rate already in our budget-friendly top pick. The affordable price gives a chance to the budget-concern people! With a comfortable platform, the ladder can be used in various simple construction and other projects. The ladder structure is quite heavy to use for a longer work period. Though the highest altitude model can reach 6 feet, you can also climb up a maximum of 10.3 feet.

Users can place their feet firmly and work longer on a wide platform. Again, a tool tray is at the top of the ladder to put your tools near your hand. It can be utilized as a hand clutch as well. A discharge handle is available to fold and set the device in the platform. Moreover, the rubber feet can keep the ladder standing smoothly. It does not produce too much sound while setting up.

As it is a lightweight aluminum ladder, you can transport it comfortably. The ladder is considered an IA-type ladder certified by OSHA and ANSI. It is a type IA harrow that can hold 300 pounds maximum load capacity. You can work with the ladder on the stairs as well. Lastly, if you have too many projects to do and your budget is low, you can choose it unworriedly.

What we like:

  • Budget-friendly.
  • Extra-large platform to prevent foot labor.
  • Gives smooth standing.
  • Extra secure and comfortable.

What we don’t like:

  • Not suitable for heavy commercial work purposes.

6. Best Choice Products 3-Step Ladder: Best for painting

Best Choice Products 3-Step Ladder, Portable Folding Anti-Slip Step Stool w/ Utility Tray, Hand Grip, Rubber Feet Caps, 330lb Capacity
Check Latest Price

Technical Features:

  • Brand: Best Choice Products
  • Color: Black
  • Product weight: 15.2 pounds
  • Material: Alloy Steel
  • Product dimensions: 28.7× 17.7× 52 inches

Without a tool, tray painting would be difficult through a ladder. However, with this 3-step ladder, you can get this advantage. An accessory tray and anti-slip feature make the ladder painting worthy. It is 52 inches in height, and you can lift with it about 27 inches max. You can paint your walls or various spaces through this tool. Also, each anti-slip paddles have two grips to keep the user’s balance.

The rust-defended high-quality materials make the ladder more durable for a long time. With two metal rods, the ladder provides extra secure service. There are three wide steps, and a wide tool tray consists of the whole ladder. Moreover, the last and top paddle is larger than the very first two paddles of the tool.

A comfortable handgrip attaches to the top handle of the tool so the user can manage his balance. This ladder allows for quick folding and transportation by providing an easy locking system. It is a type IAA ladder that can hold 300 pounds maximum weight capacity. Lastly, this lightweight step ladder is perfectly designed for painting and other projects with hand tools.

What we like:

  • Stable structure.
  • Strong, safe, and suitable for household use.
  • Ultra-safe anti-slip paddles.
  • Easy to manage.

What we don’t like:

  • The accessory tray area is a little weak to hold too many tools.

7. Delxo 3-Step Folding Ladder: Best for user friendly

Delxo Aluminum Step Ladder 3 Step Folding Lightweight Heavy Duty Step Stool with Anti-Slip Sturdy and Wide Pedal Ladder Invisible Connection Design Ladder 330lbs 3-Feet
Check Latest Price

Technical Features:

  • Brand: Delxo
  • Color: Silver
  • Product weight: 12 pounds
  • Material: Aluminum
  • Product dimensions: 40.2× 20.4× 2.3 inches

Like other step stools, this 3-step ladder is not annoying to use. Easy-going and durable materials make it a user-friendly and heavy-duty ladder. Without any screw appearance, the tool is designed as home accessories. Again, you can use it as sitting equipment at your house for its large paddles. The lightweight tool can move anywhere, making it more user-friendly.

Between the three steps, the top one is wider and larger to provide the user with more support while working. It is 10.2× 13.4 feet and comfortable to stand. The paddles are made with a wave pattern technique. Again, users can feel pleased with it as it prevents foot pain. Moreover, both the feet and shafts have rubber grips so that the ladder gains more sturdiness. Also, there are three rubber straplines to prevent falling and slipping.

It is a type IAA ladder that can hold 300 pounds maximum load. A two-inch diameter body shape can stay in any narrow space at your home. You never face any scratch marks on your hardwood floors for the rubber feet. The ladder is too good for older people and little children.

What we like:

  • Too effortless to utilize for everyone.
  • High-quality materials.
  • Safe for sensitive floors.
  • Best ladder for heavy-duty at home and shop.

What we don’t like:

  • Not compatible with too high areas.
  • Not perfect for a small RV.

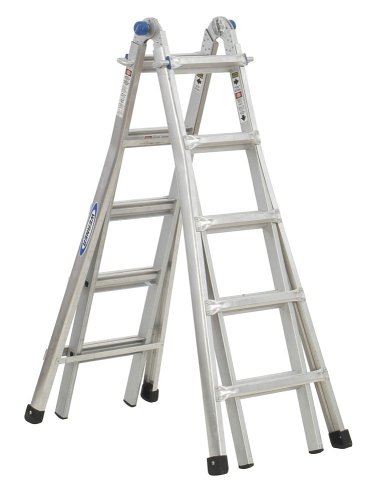
8. Werner MT-22 Aluminum Telescoping Ladder: Best for multipurpose

Werner MT-22 telescoping-ladders, 22 feet, Aluminum
Check Latest Price

Technical Features:

  • Brand: Werner
  • Color: Aluminum
  • Product weight: 42 pounds
  • Material: Aluminum
  • Product dimensions: 8× 20× 69 inches

Converting into 28 different heights, the Werner telescoping lightweight ladder can perform in versatile projects. Including extension, scaffold, and step ladder, the tool provides more flexibility during the work period. Various working positions define it as a ladder of multi-purposes. For doing different projects with one ladder, this multipurpose one is ideal to choose. It is a type IA harrow that can retain 300 pounds maximum load capacity.

The double-riveted formula prevents the user from falling and slipping. Also, this telescoping ladder is a professional-grade ladder. All professional heavy-duty works are suitable with this ladder. Some soft-touch knobs are the principal of the multi-configuration of the tool. It is quite effortless to convert the ladder into various configurations using these knobs. Two people can work simultaneously lifting from both sides of the ladder.

Some spring-dependent J-locks and hooks are available to adjust the ladder’s height for a different configuration. You can use it on stairs safely for its anti-slip feet. The bottom section is overly wide to give more comfort and flexibility. It has semi-conductive feet to use in various fields. Also, the side rails are quite curved and good for lifting. With all the features of a multipurpose ladder, this tool is durable and long-lasting.

What we like:

  • Multipurpose usage.
  • Professional grade.
  • Easy to use.
  • Sturdy and affordable at a price.

What we don’t like:

  • Quite heavier than other lightweights as it is a multipurpose ladder.

9. Little Giant King Kombo Professional Ladder: Best for overall

Little Giant Ladders, King Kombo, Professional, 6 Ft. A Frame, 10 Ft. Extension, Fiberglass, Type 1AA, 375 lbs Weight Rating, (13610-001)
Check Latest Price

Technical Features:

  • Brand: Little Giant Ladder Systems
  • Color: Green
  • Product weight: 0.01 ounces
  • Material: Fiberglass
  • Product dimensions: 61× 24× 6.5 inches

This 3-in-1 designed ladder is forcing us to take as best overall! Non-conductivity makes this ladder a perfect pick for electricians. The heavy and sturdy structure gives the ladder smoothness for professional, industrial, and technical projects. Moreover, different types of configurations provide more advantages and work facilities. Fiberglass is the principal ingredient of the harrow. Fiberglass makes the tool more enduring and long-lasting. Again, the feet are wide and large to keep their stability strong. The ladder is OSHA and ANSI-certified, which is safe to use.

With 375 pounds holding capacity, this harrow allows flexibility in working with tools. Besides, the narrow structural pattern supports slender spaces of your work field. Even you can use it between the studs safely. As a result, you can work in rear areas as well. The most significant characteristic is the ground replacement feet. Through this feature, you’re able to change the feet according to your project field.

The top rotating wall pad helps the toolset perfectly in four different situations. Also, this pad supports the user during work. Moreover, this ladder is familiar for its safe learning feature. With a sturdy extension, it reaches the excess narrow places. It is a type IAA ladder that can hold 375 pounds maximum weight capacity. When the ladder stays in extension mode, the V-bar is used as grips in both inside and outside corners.

What we like:

  • Flexible for different work fields.
  • Replaceable feet.
  • Non-conductive.
  • Best ladder for narrow places.

What we don’t like:

  • Not suitable for usual residential use.

10. Telesteps Automatic One-Touch Release Telescoping Ladder: Best for construction work

Telesteps 1800EP Fully Automatic Telescoping Ladder, with Patented One-Touch Release, OSHA Compliant, 14.5 ft Extended Height, Up to 18 ft Reach may be possible, Wide Pro Step, Telescoping Extension Ladder
Check Latest Price

Technical Features:

  • Brand: Telesteps
  • Color: Silver/ Black
  • Product weight: 30.5 pounds
  • Material: Aluminum
  • Product dimensions: 20× 4× 36 inches

Industry award winner Telesteps ladder is flexible for construction sites, industrials, and homeowners. Three hundred pounds holding capacity makes the ladder sturdy. The extension mode can reach up to 18 feet higher than other extension ladders. It is also an automatic one-touch release ladder that can retract with one click. The tool can be set nicely for its stable feet on construction sites.

For climbing in such high places, this automatic-release ladder will be a perfect choice. There are slip-resistant rubber grips and handles available with the tool. When it is all about climbing up to the top, this lightweight ladder is suitable for the job. The aluminum alloy structure makes the device more light and portable. After usage, you can retract it and give it a small size for storing in narrow places. You can get multi-position and height by setting its extension mode at various heights.

The paddles are silicone patterns to prevent falling and slipping. Some elliptical reeds are available with the steers to make the formation more stable and strong. For keeping the balance position, there are molded serrated paddles. You can open and retract the whole tool with a single click of intuitive touch. It is a type IA harrow that can retain 300 pounds maximum load capacity. The maximum reaching point is 18 feet for this ladder.

What we like:

  • One-touch release and withdrawal.
  • Easy to transport.
  • Easy to store.
  • Best ladder for climbing higher.

What we don’t like:

  • Not compatible with heavy-duty.

How do make secure the ladder with the best process?

For any ladder, security is one of the most significant concepts. Also, in most cases, users will face some common issues. Top and feet sliding is one of them. The inappropriate positioning of the ladder is the main reason for these issues. Again, the rough work field can be responsible for the top and feet sliding.

While setting the position, make the feet more strong with additional support. You can give consent on the top by following this method as well. An extension ladder, this type of support is a must-have. Sometimes, your ladder’s feet can’t prevent the slip. You can tie the feet with an additional structure. If you’re on a deck or boat, use cleats or nails to support your ladder.

What is the right climbing method for a ladder?

Most users don’t know how to climb a ladder correctly. That’s why it is quite possible that various unexpected accidents. And this information also helps those users who are already facing accidents through their ladder.

You have to notice strongly in three or four climbing points for climbing a ladder. Your two legs, two hands, and most often one hand are these three or four points. Press your legs on the paddles and keep your eyes on them. Always use the larger paddle ladders for safe climbing. Grab the handgrips with your two hands tightly. If you want to climb with some hand tools, it is better to take a helping hand to put the things upper. Never climb up on the top three paddles in an extension ladder.

How to fix the ladder’s position?

A ladder’s position makes a great impact on a user’s security. There is a 4 to 1 rule to set the placement with the wall. A ladder should always remain away an extra foot from a wall for every 4 feet of the ladder’s height. That means if you’re using an 8-foot ladder, your ladder should be 2 feet far away from the wall. Otherwise, it can fall back.

What to regard while buying a lightweight ladder?

It is quite cumbersome to select the accurate one for your projects among too many models and types. Again, the best quality material, suitable height, additional features, etc., are also considered for choosing a ladder. Most customers do not have much knowledge about these things. As a result, they pick the wrong one and can’t make the ladder fruitful for their jobs. Here we will give you a useful guide for choosing the right one.

Structural pattern and material:

Material is the most important for any type of ladder. The heft of the ladder depends on the ingredients. Generally, fiberglass is the main material for heavy ladders, and aluminum for lightweight. Both types of materials have advantages and drawbacks. However, nowadays, many alloy metals are used for making ladders that are light and sturdy. Structural patterns are also responsible for the sturdiness and stability of a ladder.

Loading tolerance and capacity:

For choosing any ladder, you have to ensure the loading capacity of the tool first. If you put more load than its actual tolerance, it may break or hold any accident. According to the loading capacity, ladders are divided into five categories.

1. Type IAA ladder- loading capacity is 375 pounds.

2. Type IA ladder- loading capacity is 300 pounds.

3. Type I ladder- loading capacity is 250 pounds.

4. Type II ladder- loading capacity is 225 pounds.

5. Type III ladder- loading capacity is 200 pounds.

Height measurement:

Height measurement is a considerable topic in buying a ladder. Always buy a longer ladder than your necessary reaching point. In extension ladders, height measurement should always be kept in mind. Otherwise, you may have faced many issues like falling or less standing.

Security and other features:

Don’t buy a ladder without observing the safety and security. Before buying, check the durability, stability, and sturdiness, if the ladder fully fits your project or not. Again, the harrow, feet, handles, and other parts should be observed deeply. Never buy electric conductive harrows for electric projects. Other features should keep in touch as well.

Frequently Asked Questions (FAQs):

1. Is a fiberglass ladder lighter than aluminum?

Answer: A fiberglass ladder is quite weighty compared to an aluminum ladder. For a portable ladder, choose an aluminum ladder.

2. What kind of ladder is the lightest?

Answer: Aluminum ladders are the lightest ladders. These plows are so weightless and easier to move.

3. Which ladder is intended for household use?

Answer: There are many types of a ladder. Among the types, three are designed for household use and various purposes.

4. Should electricians use aluminum ladders?

Answer: Aluminum is an electrically conductive element. That’s why electricians shouldn’t conduct aluminum harrows.

5. What is the safest ladder to use around electricity?

Answer: Fiberglass is a material that has a non-conductivity feature. For this cause, a fiberglass harrow is an out-of-danger tool to use around electricity.

Final Thoughts:

People want a great ladder within the best budget price. In these cases, we highly recommend picking out the Little Giant King Kombo and Little Giant Flip-N-Lite ladders. These are perfect for homeowners and shopkeepers for their regular usage.

On the other hand, heavy-duty professionals using ladders are also available in our top pick list. Among the ten best lightweight ladders, Werner MT-22 and Little Giant King Kombo remain on our full suggestion list.  

How To Paint Your Bike? Step By Step Guide

How To Paint Your Bike

Do you want to repaint your old bicycle but don’t know how to start? If you answered yes, this article will give you insightful tips on how to paint your bike.

Introduction: Why Paint Your Bike?

Giving your bike a new coat of paint can refresh your ride, making it a unique reflection of your personality. Painting not only enhances its look but also protects it from rust and wear, keeping it looking good for years. Imagine riding a bike in colors that represent you, it’s more than just transportation it’s a statement.

Additionally, painting your bike can be very rewarding. This creative activity promotes mindfulness and self-expression, boosting your confidence in DIY projects. Completing this task brings a sense of achievement; you’re not just repainting metal, but reclaiming your bike and its story. This connection makes every ride more meaningful, creating lasting memories with each brushstroke or spray. So why not explore this vibrant opportunity? Your bike is ready for a change!

Prepare Your Bike for Painting

Before starting the paint job, it’s important to take apart your bike properly. Removing parts like the wheels, handlebars, and accessories protects them from overspray and gives you a clear area to work. Use this time to check for any wear or damage that needs fixing; small repairs can improve both the look and performance after painting.

After disassembly, preparing the frame is crucial. Clean it thoroughly with soap and water, then scrub gently to remove dirt and grease that could affect the paint. For a smoother finish, sand down any flaws or rusted spots, and remember to wear a mask to avoid inhaling dust! Finally, applying a good primer helps the paint stick better and makes colors stand out while protecting chips and scratches. With these steps done, you’ll be set for an exciting change to your bike!

3 Easy Steps To Repaint Your Bike

How To Paint Your Bike

Supplies needed

  • Hand tools, e.g. wrenches and screwdrivers
  • sandpaper
  • Scalpel
  • Painters  tape
  • Suspender
  • Primer
  • Paint if desired
  • Clear finishing coat

Step 1: Preparation

  • Firstly, you need to separate the parts of your bike which you don’t intend to paint. Such parts may include the seat, handlebars, chain, and cables if there are any. Be sure to store your screws properly for use when assembling your bicycle.
  • Peel any visible stickers on your bicycle frames. You might consider employing a source of warm air to remove permanent stickers. Use your scalpel to scrape stubborn stickers.
  • Use a suitable agent to remove any traces of glue from the surface of your bicycle frames. Use fine-grained sandpaper to remove stubborn stickers, and then wipe your bike frames with a wet cloth.
  • Work on your bicycle frames using medium-grained sandpaper. You want your paint to stick properly, so be sure your bicycle frames’ surface is smooth and clean for easy application of your paint.
  • After sanding your bicycle frames, wipe any dust particles from the surface of your bicycle frames using a damp cloth. Let the frames dry before you start your painting exercise.
  • Be sure to mask any area of your frames which you do not wish to paint. Avoid spraying paint on movable parts such as the ball bearings and parts around your bike’s braking system.

 Step 2: Positioning Your Bicycle Frame for Painting

  • Pick a suitable location for your project. The place selected should be spacious enough for a free flow of air. If you are working in an enclosed space, be sure to open windows to allow for proper air circulation. The paint contains harmful chemicals which may affect your breathing system.
  • Use a suitable drop cloth beneath your painting project. You want to do a professional painting, so be sure to take all the necessary precautions to avoid doing a messy job.
  • Suspend your bicycle using a suitable material preferably, a string wire. Since you will be spraying your bicycle with paint ensure, that you position your bike frames to spray every part of the frames comfortably.
  • A good alternative would be to place your bicycle frames on a flat surface but be sure the frames are not in close contact with the surface. It will help if you use suitable mountings to fix your bicycle frames on the surface.
  • Ensure that while positioning your bicycle for painting, you can apply the paint evenly without any obstructions. You want to produce a smooth and consistent finish, so be sure to mount your bicycle frames properly.

Step 3: Painting

Painting is the most critical part of the whole exercise on how to repaint a bike, so you should follow the necessary instructions to Letter if you want a clean and even finish.

  • Note that you can choose to leave your bike intact whenever you are painting it. However, disassembling your bicycle has proved to be a viable approach.
  • At this point, be sure to select a paint color of your choice. You don’t want to blame yourself for wrongfully choosing a color you don’t like.
  • When choosing suitable paint for your bicycle, you may consider the opinion of experts and professional painters. Alternatively, you can source useful recommendations from paint dealers in your locality.
  • Having selected the most suitable color for your bicycle, you can go ahead and start painting. It is advisable to apply a suitable primer before applying the coats of your selected paint. However, if you use quality paint, you may forgo the use of a Primer.
  • Spray a thin layer of your paint and let it dry properly before applying subsequent coats. Hold the nozzle of your spray can at an appropriate distance from your bicycle frames. Work your way around the frames with continuous motions of the sprayer to achieve an even look.
  • To avoid a bumpy look on the surface, avoid emphasizing the spray on a single point. After applying the first coat, you might notice the initial color beginning to appear. Additional coats of paint will eventually clear away the original color on your frames.
  • Allow up to a maximum of a 30-minute interval between coats for proper drying. Be sure to apply thin coats for a consistent and even finish on your bicycle.
  • Apply your clear coat on the bicycle frames after ensuring that the last coats of paint are completely dry.
  • The clear finish is important because it will shield your bicycle from scratches and other harmful environmental conditions. Be sure to apply at least three coats of protective paint to protect your frames and make them more durable.
  • Allow your bicycle a maximum of one day drying time before assembling the parts if you took them apart.
  • Remove masks that you put on your frames during the preparation stage and avoid touching the painted parts. 

Tips worthy noting

  • Allow your bicycle a maximum of one day drying time before assembling the parts if you took them apart.
  • Consider the prevailing weather conditions and relocate your bicycle to an appropriate point for proper drying.
  • Wipe your bicycle with a dumb cloth and let it dry before you begin painting.
  • Remember to cover areas on your bicycle that you don’t want to be polished. Areas you might exclude from painting include brakes, ball bearings, and other movable parts.
  • Peel any visible stickers on your bicycle frames. You might consider employing a source of warm air to remove permanent stickers. Use your scalpel to scrape stubborn stickers.
  • Be sure to apply at least three coats of protective paint to shield your bicycle frames from scratches and other harmful environmental conditions.
  • The clear finish is important because it will shield your bicycle from scratches and other harmful environmental conditions. Be sure to apply at least three coats of protective paint to protect your frames and make them more durable.

Frequently Asked Questions (FAQs)

1. What materials do I need to paint my bike?
You will need spray paint, primer, sandpaper, masking tape, a clear coat, and tools like screwdrivers and a wrench.

2. How do I prepare my bike for painting?
Start by cleaning your bike thoroughly, then disassemble parts you don’t want painted. Use sandpaper to roughen the surface for better paint adhesion.

3. Can I paint my bike without removing the components?
Yes, but removing components like the wheels and chain is best to avoid overspray and ensure clean lines.

4. What type of paint should I use for my bike?
Use enamel or acrylic spray paint designed for metal surfaces; these are durable and can withstand outdoor conditions.

5. How long does it take to paint a bike?
The entire process can take a few hours to a couple of days, depending on the drying times between coats and how intricate your design is.

6. Do I need to apply primer before painting?
Yes! Applying primer helps the paint stick better and improves the overall finish of your bike’s color.

7. How can I protect my bike’s new paint job?
After painting, apply a clear coat for extra protection against scratches and UV rays; store your bike indoors when not in use.

8. Is it safe to use spray paint indoors?
No, it’s not recommended as spray paints can release harmful fumes; always work in a well-ventilated area or outdoors.

Conclusion:

In conclusion, painting your bike is not just about looks; it’s a chance to express yourself and be creative. This DIY project helps you connect with your bike, making it a unique reflection of your personality. The process can also be calming, as each brushstroke improves the bike’s appearance and lets you focus on the moment, turning your creativity into real art.

Custom paintwork can also make your bike last longer by protecting it from rust and wear. Using good materials ensures durability and allows you to try different colors, patterns, or textures that fit your style. This care can create a sense of pride, making every ride a statement as you cruise on your uniquely upgraded bike. Embrace this creative challenge and see how it changes both your bike and your cycling experience!

Best paint color for hiding imperfections | A detailed guide

Best paint color for hiding imperfections

Find the best paint colors for hiding wall imperfections! Our guide explores top shades and finishes that minimize flaws, ensuring a smooth, polished look for your walls. Perfect for any room refresh or home makeover.

Understanding Paint Colors for Imperfections

When picking the best paint color for hiding imperfections in your walls, think about how light affects colors. Lighter shades, like soft whites or pale grays, can make tiny bumps and dents less noticeable because they reflect light evenly. On the other hand, darker colors might show off those flaws even more since they absorb light, making shadows stand out.

Also, consider using a satin or eggshell finish instead of flat paint. These finishes can help hide small mistakes without being too shiny. If you’re still unsure what will work best, try painting a small section of your wall first. This way, you can see how the color looks in different lighting throughout the day! It’s all about finding a color that works for you while keeping your walls looking smooth and clean.

Why Color Choice Matters for Walls

Choosing the right paint color for your walls is super important because it can totally change how a room feels. If you want to make a space feel cozy and warm, soft colors like light beige or pale yellow can make anyone feel at home. On the other hand, if you’re looking for something more energetic, bright colors like blue or green can boost your mood and keep you motivated!

One of the best secrets in painting is that certain colors are better for hiding imperfections on walls. For example, colors with a bit of gray in them can mask small bumps and scratches much better than very bright or dark shades. So if your walls aren’t perfectly smooth, choose a medium tone instead! This not only makes your room look nicer but also helps save time and money by needing less prep work before painting. In short, picking the right color isn’t just about looks; it’s about making your home feel just right!

Top 5 color ideas that can hide imperfections properly

Choosing the right colors is essential for hiding imperfections. Here, we discuss five colors that effectively conceal flaws.

Best paint color for hiding imperfections 2
  1. Soft Gray: This trendy hue is a favorite among designers for its ability to soften the impact of flaws. Gray’s muted tone creates depth and can mask surface blemishes while adding a modern twist to any room.
  2. Dove White: Don’t underestimate this classic color! Dove white isn’t just fresh and airy; it also reflects light beautifully, which can visually diminish imperfections. Its understated warmth makes spaces feel inviting without drawing attention to less-than-perfect walls.
  3. Warm Beige: This versatile shade offers a cozy vibe while being incredibly forgiving on surfaces. Warm beige’s subtle undertones help blend minor cracks and uneven patches, making it one of the best paint colors for hiding imperfections in homes filled with character.
  4. Muted Blue: A soft, muted blue has a calming effect and the ability to distract from flaws with its serene palette. Consider using it in smaller rooms where shadows may play tricks on the eye, effectively hiding wear or damage.
  5. Sage Green: A soothing choice that brings nature indoors, sage green provides much-needed tranquility while concealing uneven textures. Its earthy tone allows it to seamlessly complement various decor styles without compromising elegance.

The Role of Light in Perception

Light plays a big role in how we see things around us, including our walls and the colors we choose to paint them. When we pick a paint color, it’s important to think about how light will interact with it. For example, if you want to hide imperfections on your walls, lighter shades can help make those flaws less noticeable. A soft beige or light gray might be the best paint color for hiding imperfections because they reflect more light and create an open feeling in a room.

However, it’s not just about picking any light color, the way natural or artificial light hits your walls changes everything! In a room that gets lots of sunlight, a warm cream could look inviting and cozy. But in darker spaces where there is little natural light, a cooler shade like very pale blue can brighten things up and still camouflage bumps or cracks on the surface. By understanding how different lights change colors throughout the day, you can make smarter choices that not only blend with your style but also keep your space looking fresh and polished!

Darker Shades: Pros and Cons

Darker shades can really change the mood of a room, making it feel cozy and inviting. They’re great for hiding imperfections on walls, which means if you have any bumps or scratches, they won’t stand out as much. This makes darker colors like navy blue or deep green some of the best paint choices for creating a smooth look in your home. Plus, these colors can add elegance and style to a space that lighter colors sometimes can’t achieve.

However, there are some downsides to using dark paint. Darker shades can make a room feel smaller or more enclosed, especially in spaces with little natural light. They might also show dust and fingerprints more easily than lighter hues, meaning you’ll need to clean them often to keep them looking fresh. So while dark shades have their perks in hiding flaws and adding flair, it’s important to think about how they will fit into your home environment!

Gloss vs. Matte Finish Considerations

When thinking about paint finishes for your room, gloss and matte options both have their perks. Glossy finishes are shiny and reflect light, which makes them great for hiding small imperfections on walls. They can make colors pop, giving a modern feel to any space! However, the high shine can sometimes show fingerprints or dust more easily.

On the other hand, matte finishes are soft and smooth to the touch. These types of paints do a fantastic job of hiding flaws like bumps or scratches on the wall because they don’t reflect much light. This means if you’re looking for that perfect paint color for hiding imperfections, going with a matte finish might be your best bet! Plus, it’s super easy to blend different colors if you want something unique. Just remember to think about what kind of look you want in your room, shiny or flat? Choose accordingly!

Tips for Preparing Walls Before Painting

Before starting the painting process, having well-prepped walls can significantly improve the outcome.

  1. Clean the Walls: Start by removing any dust, dirt, or grease from your walls. A solution of mild detergent and water works wonders simply wipe down the surfaces and let them dry completely.
  2. Repair Imperfections: Inspect for holes, cracks, or dents and fill them using spackle or joint compound. Once dry, sand these areas smooth to create an even surface.
  3. Prime When Necessary: If you’re dealing with a drastic color change or repairing patchy spots, applying a primer can make a significant difference. It enhances adhesion and can help you achieve the best paint color for hiding imperfections.
  4. Sanding: Lightly sanding your walls not only smoothens rough spots but also aids in paint adherence. Use fine-grit sandpaper, especially on previously painted surfaces.
  5. Check for Millwork Quality: For those with moldings or trims that need attention, ensure they are clean and free from peeling paint or chips to keep everything cohesive.
  6. Masking Tape Magic: Use painter’s tape along edges to create crisp lines while preventing drips on adjacent surfaces this small detail elevates your overall finish significantly.
  7. Select Your Paint Wisely: Choose a quality paint that complements light rather than hides it; matte finishes tend to mask imperfections better than glossy ones but require careful application for evenness.

Executing these steps will prepare your walls beautifully before painting, they set the foundation for a professional-looking finish you’ll appreciate every time you walk into the room!

Maintenance Tips for Lasting Results

To achieve lasting results in your painting projects, maintenance is key.

  • Choose the Right Paint: Start by selecting the best paint color for hiding imperfections, such as light gray or beige. These neutral tones not only disguise flaws but also create an inviting atmosphere.
  • Prepare Your Surfaces: Ensure walls are clean and smooth before painting. Fill in holes and cracks with spackle, then sand down rough spots to achieve a flawless finish that enhances the effect of your chosen color.
  • Use Quality Tools: Invest in high-quality brushes and rollers. Premium tools distribute the paint evenly, minimizing streaks and ensuring the final appearance is polished ideal for showcasing subtle hues.
  • Apply a Primer: Use a primer tailored to your wall type, especially if you’re switching colors drastically or painting over stains. A good primer can significantly improve coverage, making it easier to achieve those sleek results you desire.
  • Implement Proper Techniques: Adopt a consistent roller technique work in manageable sections using overlapping strokes to blend effectively and reduce visible lines between applications.
  • Schedule Regular Touch-Ups: After completing your project, keep some leftover paint for touch-ups down the line, this ensures any wear-and-tear doesn’t unveil hidden imperfections unexpectedly.
  • Maintain Your Painted Surfaces: Clean walls gently with mild soap and water periodically; this protects your work while keeping each shade vibrant without causing damage to both color and surface texture.

By following these steps diligently, you’ll not only enhance the aesthetics of your space but also ensure that those aspects of the best paint colors paired with excellent maintenance transform into lasting results that stand up against time.

Frequently Asked Questions (FAQs)

1. What is the best paint color for hiding imperfections on walls?
Soft, neutral colors like light gray or beige are often the best for hiding imperfections as they reflect light evenly.

2. Are darker colors better at concealing wall flaws?
Darker colors can sometimes highlight imperfections, so it’s usually better to stick with lighter shades for better camouflage.

3. Should I consider paint finish when hiding imperfections?
Yes! A matte or eggshell finish is generally more forgiving and can help hide surface flaws compared to a glossy finish.

4. Can textured paint help in hiding imperfections?
Absolutely! Textured paints can disguise uneven surfaces well by creating visual interest that draws attention away from flaws.

5. Is there any specific paint brand recommended for covering up wall blemishes?
Many brands offer quality options; look for those marketed as high-hide or stain-blocking, such as Behr or Sherwin-Williams.

6. How many coats of paint do I need to hide imperfections effectively?
Typically, two coats are recommended for the best coverage and to ensure that any underlying issues are less visible.

7. Does the type of surface affect how well paint covers imperfections?
Yes, smooth surfaces tend to show fewer flaws than rough ones, so prepping your walls before painting is essential for the best results.

8. Can primer help with hiding wall imperfections before painting?
Yes, applying a good-quality primer can create a uniform base, which helps improve coverage and reduces the visibility of flaws after painting.

Conclusion: Choosing the Right Paint Wisely

Choosing the best paint color for hiding imperfections is all about balance and strategy. Light colors can brighten a room while making small flaws less noticeable. On the other hand, darker shades can create a rich atmosphere, but they might highlight any imperfections instead of hiding them.

Also, consider the texture of your walls. If you have rough spots or uneven surfaces, using a matte finish can help hide those areas better than shiny paints that reflect light and reveal every bump.

Lastly, remember that lighting plays a crucial role too! The way natural light shines in your space can change how colors look on your walls. Try testing different shades at various times of day to see which one makes your room feel cozy without bringing attention to its flaws. This way, you’ll find the perfect color that combines beauty with practicality!

What is the best exterior paint for wood? A complete buying guide

What is the best exterior paint for wood

Find the best exterior paint for wood with our complete buying guide! Explore top-rated options for durability, weather resistance, and long-lasting color to keep wood surfaces protected and looking fresh.

Introduction: importance of Exterior Paint for Wood

When it comes to caring for wooden surfaces outside your home, exterior paint plays a vital role. It not only brings color and personality to your property but also acts as a protective shield against the elements. Sunlight, rain, and temperature changes can cause wood to crack, warp, or fade. A good quality exterior paint keeps these dangers at bay, ensuring your wood remains beautiful and sturdy for years to come.

Choosing the best exterior paint for wood goes beyond just picking a nice color. Look for paints specifically made for outdoor conditions that feature mildew resistance and UV protection. This ensures that your wooden surfaces stay vibrant longer while reducing maintenance costs over time. Remember, investing in high-quality paint now means less hassle later on your wood will thank you!

What do you learn from this article?

By reading this article you will learn about the best exterior paint for wood, and you will gain a deeper understanding of not only product features but also the broader implications of material longevity and aesthetic appeal. The article delves into essential aspects like durability, weather resistance, finish options and buying guide, highlighting how these factors contribute to preserving your wood surfaces against harsh elements while maintaining their visual charm.

Moreover, it emphasizes the importance of selecting paints formulated specifically for outdoor use. Such paints often incorporate advanced technology that promotes better adhesion and protects against fading and peeling over time. This insight encourages homeowners to invest in quality materials. A decision that ultimately saves money on frequent repaints and repairs in the long run. By grasping these vital points, readers are empowered to make informed choices that enhance their home’s curb appeal while ensuring lasting results.

here are Our top picks for exterior wood paint

1. DWIL Wood Paint, Outdoor Paint for Wood


DWIL Wood Paint, White Paint for Wood, No Sanding& Fast Dry Outdoor Paint for Wood, Water Based& Low Odor Furniture Paint for Door Paint, Cabinet Paint, Perfect for Indoor/Exterior White, 50-60sq.ft

Check Latest Price

When considering the best exterior paint for wood, DWIL Wood Paint stands out with its impressive balance of durability and aesthetics. Designed specifically for outdoor applications, this paint not only enhances the natural beauty of your wooden structures but also provides robust protection against the elements. With its unique formulation, DWIL Wood Paint resists fading from UV rays and repels moisture, ensuring that your surfaces remain vibrant and intact year after year.

Features:

  • DWIL Wood Paint is specially formulated to withstand harsh outdoor conditions, ensuring your wooden surfaces remain safe from moisture, UV rays, and temperature fluctuations.
  • DWIL Wood Paint is crafted with environmentally conscious ingredients that are low in VOCs (volatile organic compounds).
  • Experience hassle-free painting with DWIL’s smooth application process that glides effortlessly onto wood surfaces. With a quick drying time.
  • Choose from an extensive palette of rich colors designed to enhance the natural beauty of your wooden surfaces.
  • Designed for durability, DWIL Wood Paint ensures a long-lasting finish that resists wear and tear while maintaining its vibrant appearance over time.

Pros:

  • Durability
  • Water Resistance
  • Variety of Finishes
  • Easy Application
  • UV Protection

Cons:

  • Cost
  • Odor During Application

2. Primer White 1 Gallon Deck Coating, Wooden Surfaces


Deckote Primer White 1 Gallon Deck Coating – UV Protection, Water proof Deck Paint, High Performance Acrylic Deck Paint - Great for Patios, Stairs, Porches, Balconies, Wooden Surfaces, (Primer White)

Check Latest Price

Primer White 1 Gallon Deck Coating stands out as an exceptional choice for protecting and enhancing wooden surfaces. Its durable formula not only provides a striking, clean finish but also acts as a shield against the elements, ensuring that your deck remains both beautiful and resilient over time. Whether you’re revitalizing an old deck or preparing a new one, this coating binds effectively to wood, creating an optimal base for subsequent topcoats.

Features:

  • Primer White Deck Coating is designed to provide exceptional adhesion on all wooden surfaces.
  • This deck coating acts as a protective barrier against moisture, UV rays, and other environmental factors.
  • Easy Application for Effortless DIY Projects With its smooth consistency and easy spreadability, applying our Primer White is a breeze perfect for both seasoned professionals and DIY enthusiasts alike. Simply brush or roll it on, and enjoy a hassle-free painting experience.
  • Versatile Use on Various Wooden Surfaces
  • Primer White is formulated with eco-friendly ingredients that are safe for both you and the environment.

Pros:

  • Excellent Adhesion
  • Moisture Barrier
  • Enhanced Coverage
  • Stain Blocking
  • Ease of Application

Cons:

  • longer Drying Time
  • Limited Color Options

3. Styleonme Waterbased Wood Paint Beige


styleonme Waterbased Wood Paint Beige, Repair Kit Paint Household Self Brushing Paint, Furniture Renovation, Wood Door Paint Color Change,Furniture Paint (0.5kg/17oz, 25-40 sq.ft, with tools)

Check Latest Price

Styleonme Water-based Wood Paint in Beige represents a fresh evolution in exterior finishes, seamlessly blending aesthetic appeal with practical durability. This eco-friendly option stands out not only for its sophisticated hue but also for its ability to protect wooden surfaces against the elements.

Features:

  • Styleonme Water-based Wood Paint is crafted with an environmentally conscious approach, ensuring that you can enhance your wood surfaces without compromising on safety
  • Transform your wooden decor with the beautiful beige hue of Styleonme Water-based Wood Paint. I
  • Experience hassle-free painting with our user-friendly water-based formula, designed for easy application with minimal prep work.
  • Protect your wooden surfaces from wear and tear with Styleonme’s durable water-based wood paint. Formulated to withstand daily use, this paint not only beautifies but also forms a tough barrier against scratches and stains, ensuring that your projects remain stunning for years to come.
  • Versatile Use for Any Project Whether you’re revamping old furniture or adding color to new pieces, Styleonme Water-based Wood Paint in beige is versatile enough for all your woodworking needs.

Pros:

  • Eco-Friendly
  • Easy Application
  • Quick Drying Tim
  • Durable Finish
  • Versatile Color

Cons:

  • Requires Multiple Coats
  • Susceptible to Moisture Damage

4. Kilz 1682863 1 gal Oil & Water-Based Siding Fence & Barn Paint Exterior 


Kilz 1682863 1 gal Oil & Water-Based Siding Fence & Barn Paint Exterior White - Pack of 44

Check Latest Price

When it comes to protecting and beautifying outdoor surfaces, the Kilz 1682863 1 gal Oil & Water-Based Siding Fence & Barn Paint stands out as a versatile option for homeowners. This unique formula combines the durability of oil-based paints with the easy cleanup advantages of water-based options, giving you an exceptional balance between performance and convenience. Ideal for various wood surfaces such as siding, fences, and barns, it promises long-lasting protection against harsh weather elements while enhancing your property’s curb appeal.

Features:

  • Kilz Siding Fence & Barn Paint is formulated to withstand harsh weather conditions, ensuring your surfaces remain protected year-round. Its durable finish resists peeling, cracking, and fading, so you can enjoy a vibrant look for longer.
  • This versatile paint can be used on a variety of surfaces including wood, vinyl, and metal. Whether you’re refreshing your fence or sprucing up a barn, Kilz provides excellent adhesion for flawless results on multiple substrates.
  • With its oil and water-based formulation, this paint offers easy application with smooth coverage. Plus, clean-up is a breeze just soap and water will do the trick after you’re done!
  • Available in a variety of colors, Kilz allows you to achieve the perfect look for your outdoor spaces.
  • Designed specifically for exterior use, this paint boasts exceptional durability against UV rays and moisture. Invest in Kilz to ensure your outdoor projects stand the test of time while maintaining their beauty!

Pros:

  • Versatile Formula
  • Durable Finish
  • Easy Application
  • Quick Drying Time
  • Mildew Resistance

Cons:

  • Strong Odor

Recommended Colors for Different Wood Types

When it comes to choosing the best exterior paint for wood, understanding the unique characteristics of various wood types can unlock a world of color possibilities. Here’s a quick guide to recommended colors that resonate well with different woods:

  1. Cedar: This naturally reddish wood pairs beautifully with earthy tones like barn red or sage green, enhancing its warm hues while providing a rustic charm.
  2. Pine: Light and versatile, pine often looks striking in crisp whites or soft pastels such as light blues or pale yellows. These colors highlight its delicate grain and enhance brightness.
  3. Mahogany: The rich, dark tones of mahogany are complemented by deep jewel shades such as emerald green or royal blue, offering an elegant contrast that accentuates its opulence.
  4. Oak: Known for its durability and classic appeal, oak shines in muted grays or charcoal shades which bring out its grain patterns without overwhelming them.
  5. Teak: With its golden undertones, teak can be paired with warm neutrals like beige or tan to create a cozy ambiance that complements outdoor settings.

Selecting the right color not only enhances the beauty of your wooden surface but also aligns with environmental factors like sunlight exposure and weather resistance. Thoughtful choices ensure your painted wood will maintain both style and longevity for years to come.

Application Techniques for Long-lasting Results

When it comes to achieving long-lasting results with exterior paint for wood, the application technique can be just as important as the product chosen. Here are essential techniques that elevate your painting:

  1. Surface Preparation: Start by thoroughly cleaning and sanding the wood surface. Removing old paint and debris not only promotes adhesion but also ensures a smooth finish. Consider using a pressure washer for stubborn dirt or mildew before sanding.
  2. Choose Quality Tools: Invest in high-quality brushes and rollers designed specifically for exterior use. Synthetic bristles work best with water-based paints, while natural bristle brushes are ideal for oil-based options. A good roller cover will help distribute paint evenly on larger surfaces.
  3. Use Thin Coats: Applying multiple thin coats rather than one thick coat can drastically enhance durability. This allows each layer to dry properly, which minimizes drips and runs while creating an even finish that resists peeling over time.
  4. Mind the Weather: Timing matters when painting outdoors; aim for a dry day with mild temperatures. Avoid windy conditions which can lead to uneven application and dust settling on wet paint—both of which jeopardize long-lasting results.

By mastering these techniques alongside selecting the best exterior paint for wood, you ensure that your project not only looks beautiful but stands up to wear over time, adding value and protection to your home’s facade.

Maintenance Tips for Painted Wood Exteriors

To maintain the beauty and longevity of painted wood exteriors, regular inspections and touch-ups are essential. Start by examining your surfaces for any signs of peeling paint or wood rot; addressing these issues promptly can prevent further damage. Consider creating a seasonal maintenance schedule this could be as simple as a quick visual check every few months followed by deeper assessments at least once a year.

When it comes to choosing the best exterior paint for wood, opt for high-quality acrylic latex paints that offer excellent adhesion and flexibility, allowing them to expand and contract with temperature changes without cracking. Additionally, applying a primer can enhance durability and improve color retention. Don’t forget about caulking gaps where water might enter; this helps protect against moisture damage while giving your home a polished look.

Lastly, consider power washing your painted surfaces annually to remove dirt and mildew buildup a clean surface is key for optimal paint adhesion during touch-ups or re-coating. By following these maintenance tips, you not only extend the life of your wood exteriors but also keep them looking fresh and inviting year-round.

Buying Guide for the Best Exterior Wood Paint

What is the best exterior paint for wood
  1. Consider the Weather: The best exterior paint for wood will depend largely on your local climate. If you live in an area with heavy rainfall or humidity, look for paints that are specifically formulated to resist moisture and prevent mold growth. In contrast, regions with extreme sun exposure benefit from UV-resistant formulations that can protect the wood from fading.
  2. Pick the Right Finish: The finish of your paint can dramatically influence both aesthetics and durability. A flat finish offers a matte look that hides imperfections but may require more frequent reapplications, while a high-gloss finish provides long-lasting shine and improved resistance to wear and tear. Semi-gloss is a happy medium, striking a balance between durability and visual appeal.
  3. Quality Ingredients Matter: Always opt for paints made with high-quality ingredients such as acrylics known for their flexibility and adhesion properties. These usually come at a slightly higher price but pay off in the long run by extending the life of your paint job and reducing maintenance effort over time.
  4. Test Samples First: Before committing to a color, purchase sample pots of your top choices and apply them on small areas of your wood surface. Observe how they interact with light throughout different times of day to ensure you’ll be satisfied with the final result in various conditions.
  5. Check VOC Levels: For eco-conscious homeowners, selecting low-VOC (Volatile Organic Compounds) paints not only contributes to better indoor air quality but also reflects a commitment to environmental responsibility even when painting outdoors! This ensures that harmful emissions are minimized during application while still achieving great results.

By keeping these tips in mind, you’re well-equipped to select the best exterior paint for wood surfaces that will enhance both longevity and visual appeal while making informed consumer choices you’ll feel good about!

FAQs About the Best Exterior Paint for Wood

1. What type of paint is best for exterior wood surfaces?
The best exterior paint for wood is typically 100% acrylic latex paint, as it provides excellent durability, flexibility, and resistance to fading.

2. Should I use oil-based or water-based paint on wood exteriors?
Water-based paints are generally recommended for exterior wood because they dry faster, have lower VOCs (volatile organic compounds), and are easier to clean up.

3. How do I prepare wood before painting it?
Proper preparation involves cleaning the surface, sanding any rough areas, repairing damage, and applying a good-quality primer if necessary.

4. Can I skip priming my wood before painting?
While it’s possible to skip priming with some self-priming paints, using a primer can enhance adhesion and provide better overall coverage and longevity.

5. How many coats of paint should I apply?
Typically, two coats of paint are recommended for optimal coverage and protection against the elements.

6. Is there a specific finish that works best for exterior wood?
A satin or semi-gloss finish is ideal for exterior wood as it offers a nice balance between sheen and durability while allowing easy cleaning.

7. How long will exterior paint last on wood surfaces?
Quality exterior paint can last anywhere from 5 to 10 years, depending on factors like climate conditions and maintenance practices.

8. When is the best time to paint outdoor wooden surfaces?
The ideal time to paint is during mild weather preferably in spring or fall when temperatures are between 50°F and 85°F (10°C – 29°C) with low humidity levels.

Conclusion: Selecting the Right Paint

Choosing the right paint for your wooden surfaces is not just about color, it’s about ensuring longevity and protecting your investment. When considering what is the best exterior paint for wood, remember that high-quality paint forms a barrier against moisture, UV rays, and other environmental factors that can accelerate wear and tear. Opt for a product specifically designed for outdoor use these paints often contain advanced polymers that enhance durability while resisting mildew and weather damage.

But don’t overlook the significance of finish type in your selection process. A satin or semi-gloss finish can add an appealing sheen while making surface cleaning easier, offering both aesthetic value and practicality. Moreover, consider the application method; some paints work better with spray application than brush strokes or vice versa. Ultimately, investing time into understanding your specific needs will ensure you choose a paint that not only beautifies but also fortifies your wooden surfaces against nature’s challenges.

What Finish for Trim? A Complete Guide to Selecting the Perfect Finish

What-Finish-for-Trim

Wondering what finish to use for trim? Discover the ideal finishes for every style in our complete guide, from glossy to matte. Get expert tips for a polished, durable look that enhances your home’s aesthetic.

Trim Types and Materials

To choosing trim for your home, both the type and material you select can make a huge difference in how your space looks. Different finishes can give trim a shiny, matte, or even textured appearance, so picking one that matches your style is important. For example, a high-gloss finish reflects light and makes rooms feel brighter, while a matte finish gives off a more cozy vibe. Think about what mood you want to create!

There are many materials to choose from when picking trim too. Wood is classic and offers warmth but requires regular maintenance like painting or staining. On the other hand, PVC and MDF trims are easier to install and don’t often need as much upkeep. They come in various styles that mimic wood but resist water damage and pests better than traditional wood does! By understanding these options, you can find the perfect fit for your home whether it’s sleek and modern or warm and inviting.

The Best Finish Options for Every Room

  • Living Room: Satin Finish
    The living room is often the heart of the home, so why not choose a satin finish for your trim? This versatile option balances subtle sheen and durability, making it easy to maintain while also enhancing natural light. It offers warmth without being too glossy, allowing for an inviting atmosphere perfect for gatherings.
  • Bathroom: Semi-Gloss Finish
    In spaces with high humidity like bathrooms, a semi-gloss finish is essential. This water-resistant option provides both shine and protection, ensuring that mold and mildew stand less chance against your walls. The reflective surface can also amplify light in smaller areas, creating a more expansive feel.
  • Bedroom: Eggshell Finish
    For bedrooms where tranquility reigns supreme, consider an eggshell finish on your trim. Its soft texture adds just a touch of elegance while minimizing glare perfect for those cozy evenings. Plus, eggshell finishes are easier to clean than flat options, keeping your tranquil space looking fresh.
  • Kitchen: High-Gloss Finish
    When it comes to kitchens that see heavy traffic and activity, high-gloss finishes are unbeatable. They offer maximum durability and resistance to stains and spills; cleaning becomes a breeze! Moreover, their reflective quality makes small kitchens feel larger and adds a modern flair that complements stainless steel appliances beautifully.

Choose what finish best complements your vision; every option serves a unique purpose beyond mere aesthetics!

Factors to Consider When Selecting Finish

What Finish for Trim A Complete Guide
  1. Durability: Consider the lifespan you expect from your trim finish. High-traffic areas and outdoor trims require finishes that can withstand wear and tear, moisture, and UV exposure. Water-based polyurethanes or exterior-grade paints are often preferable for their resilience.
  2. Sheen Level: The sheen of a finish affects not just aesthetics but also practicality. Glossy finishes reflect more light and are easier to wipe clean, while matte finishes may conceal imperfections better. For trim work, semi-gloss options can strike a balance between rigidity and easy maintenance.
  3. Color Compatibility: Selecting a color that complements your overall decor can enhance the visual appeal of a room. It’s essential to test samples in various lighting conditions; colors may appear differently throughout the day due to natural light changes.
  4. Application Method: Different finishes come with various application techniques like spraying, brushing, or rolling and each has its pros and cons. A finish with longer drying times might be easier for novices to work with since it allows more time for adjustments before it sets permanently.

Considering these factors will lead you toward selecting the perfect finish for your trim that meets both aesthetic desires and practical needs. Balancing functionality with style is key to creating a polished look that lasts.

Matching Trim Finish with Room Style

  • Understand the Room’s Style: Before deciding on a trim finish, take a moment to assess your room’s overall aesthetic. A modern, minimalist space may benefit from sleek, satin or matte finishes that create clean lines and subtle elegance. On the other hand, traditional or rustic environments shine with warm, semi-gloss options that add richness and highlight intricate detailing.
  • Consider Color Harmony: The finish is not just about the sheen; it also plays a vital role in color dynamics. Light-colored trims can open up spaces in darker rooms, while bold hues against deeper walls can create stunning contrasts. Choosing a trim finish that resonates with the dominant colors of your furnishings ensures cohesion throughout your design scheme.
  • Functional Aspects: Don’t overlook practical considerations when selecting your trim finish. Glossy finishes are more durable and easier to clean ideal for high-traffic areas like hallways or homes with kids and pets. Conversely, if you prefer something warm and soft in texture and low maintenance opting for an eggshell or matte finish could complement cozy living areas or bedrooms perfectly without showing every scuff mark.

Maintenance Tips for Different Finishes

Satin Finish: This versatile finish strikes a balance between matte and gloss, perfect for walls or trims. To maintain its beauty, regularly dust surfaces with a microfiber cloth to prevent buildup, and use a mild soap solution for any stubborn stains. Avoid abrasive cleaners that can dull the sheen.

Semi-Gloss Finish: Known for its durability, semi-gloss is ideal for spots like kitchens and bathrooms. To keep it looking new, clean with a gentle sponge and warm water to eliminate grease without damaging the surface. Mix baking soda with water for tougher grime to create a safe yet effective scrub.

Eggshell Finish: With its soft texture, the eggshell finish is prone to scuffs but offers an appealing look in living spaces. A quick wipe-down once every month will keep surfaces fresh. Use touch-up paint on any noticeable marks instead of full repaints; this approach ensures your space remains cohesive and inviting.

High-Gloss Finish: Perfect for accents or trim work, high-gloss requires special attention due to its reflective nature. Fingerprints are more visible here, so consider using glass cleaner followed by a soft polishing cloth for shine without streaks. Be cautious around corners; they may need extra care to avoid wear over time while retaining that eye-catching luster you adore!

FAQs for What Finish for Trim?

1. What types of finishes are available for trim?
There are various finishes including paint, stain, varnish, semi-glossy, eggshell, glossy and lacquer. Each offers a different look and level of protection.

2. Should I use a glossy or matte finish for my trim?
Glossy finishes are more durable and easier to clean, while matte finishes provide a softer look but may be harder to maintain.

3. How do I choose between paint and stain for my trim?
Choose paint if you want a solid color with full coverage; opt for stain if you want to enhance the natural wood grain.

4. Can I use exterior trim finishes indoors?
While it’s not recommended due to potential fumes and durability issues, some exterior finishes can work indoors if properly ventilated.

5. How often should I reapply to finish my trim?
This depends on your environment generally every 3-5 years is a good rule of thumb, but high-traffic areas may need more frequent attention.

6. Is it necessary to sand before applying a new finish?
Yes, sanding helps remove the old finish and creates a smoother surface for better adhesion of the new product.

7. Can I mix different finishes on the same trim piece?
It’s best to avoid mixing different types of finishes as they can react poorly with each other; stick with one type per piece.

8. What tools do I need to apply to finish the trim?
You’ll typically need brushes or rollers, sandpaper, rags, and possibly sprayers depending on the type of finish you choose.

Conclusion: Achieving a Flawless Trim Look

To achieve a flawless trim look, finishing is key. Choosing the right finish for your trim makes all the difference in how your space feels. Generally, there are three popular options: paint, stain, and clear coats. If you want a smooth and clean look, paint can give you that bright pop of color. On the other hand, stains can highlight wood grain and bring warmth to your room.

To make your decision easier, think about the overall style of your home. A high-gloss finish can add a modern touch but might not fit with a cozy cottage vibe. An eggshell or satin finish offers a good balance between durability and beauty. Remember to consider how much wear and tear the trim will face! In bustling areas like hallways or kitchens, a tougher finish might be best to withstand dings and scratches while still looking great. With these tips from our guide on selecting the perfect finish for trim, you’ll create an inviting space everyone loves!