Want to buy a paint roller to make your ceilings attractive? Among too many options, it is hard to pick the best one. Check out our 4 best paint rollers for ceilings.
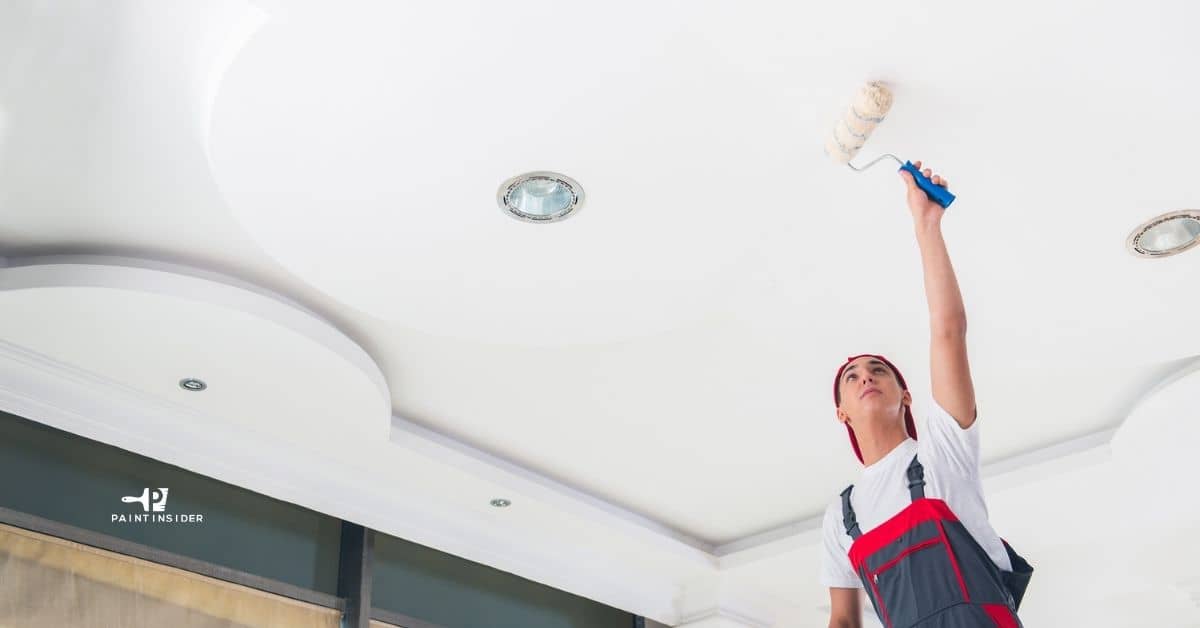
On large surfaces, painting is a challenging task. Especially when it is about to paint on the ceiling, homeowners become too worried. Also, even many professionals couldn’t give it a perfectly smooth look when dealing with a vast surface. Please read our reviews and tips about the 4 best paint rollers for ceilings to get excellent guidance.
Paint rollers are an amazing tool for painting projects, including ceilings. Though professionals know different rollers very well, it is also possible to paint ceilings by yourself. Most of the painting projects ruin because of the wrong paint rollers. So it is quite necessary to pick out a quality roller at first. Even you can paint your ceilings like a professional if you have the right paint roller.
You can find out thousands of models and brands of paint rollers. Each roller has a specification about its usage. Here we present a prominent description of the top four products of the Wagner brand. Again, for an effective result, we’ll also give you various wholesome techniques and methods. So, go through and learn more about paint rollers!
What Are the Different Types of Paint Rollers for Ceilings?
A paint roller is an essential tool for making your walls and ceilings attractive. Ceilings become quite annoying to paint with the wrong paint roller. As ceilings are a large surface and situate above, it needs different paint rollers to paint perfectly. You can find out a variety of rollers in the market. However, all those are not suitable for painting ceilings.
There are almost ten types of paint rollers available in the industry. Among them, only a few can paint ceilings meticulously. Moreover, roller length is also a significant thing to consider. Almost 8 ft longer roller with handles and extension pole is perfect for painting ceilings. Long paint rollers with an extension pole or handle give more flexibility while working.
Besides rollers, roller covers also play a vital role in painting. Thick nap roller covers are the best for ceilings. You can use 1/2″, 1/4″, 3/8″ nap rollers for your roofs. These types of naps prevent paint dripping issues. Again, long roller covers are more favorable for a large surface. The roller cover length should be long as you have to work on a vast surface. There are four types of rollers that are ideal for ceilings.
Manual roller:
Manual rollers are the traditional version of paint rollers. These are typically used for ceilings and large surfaces like drywall. Its large area coverage feature is used to consider an ideal roller for ceilings. However, this roller feed paint too much. That’s why it creates dripping and spattering issues while painting.
Textured roller:
If you want to paint your ceiling with an eye-catching texture or print, these rollers are for you. A textured roller applies paint by following a specific texture or pattern. A foam nap cover uses with this roller. You can get an amazing artificial finishing touch on your ceiling surface with this roller.
Thick nap roller:
Generally, 3/4″ and 3/8″ nap covers consider thick nap rollers. These rollers are helpful with heavy paint that can feed more paint. The biggest advantage of this roller is its thickness. It can contain more paint but never drip or splatter.
Long roller:
The 9″ length rollers are familiar with a long roller. Long rollers can cover more area while painting, whereas a normal roller can’t. Again, this roller can become a time saver for you for its extended surface coverage. That’s why long rollers are always on our suggestion list for painting on ceilings.
Which roller cover is the best for ceilings?
To get an effective result, you have to choose the roller covers carefully. The roller cover gives the surface a smooth finish. It feeds paints and splatters the paint on the surface. Besides, there can remain cracks or shafts on the ceilings. A roller cover can also work on this issue.
These covers are made of different kinds of fibers and materials. Each roller cover has a specific advantage of using on other surfaces. Always try to choose the best quality roller covers for your ceilings.
Natural roller cover:
Natural roller covers are made with different natural fibers. These fibers are generally from lamb’s skin or other domestic animal skin. Again, these covers can give a soft texture a smooth touch on the surface. Moreover, it can contain more heavy paints to don’t have to worry about paint feeding. These types of roller covers are so easy to clean and store. However, natural roller covers are quite expensive than other covers. For a big-budget project, these roller covers are highly recommended!
Synthetic roller cover:
Nylon, polyester, or other artificial materials are the main ingredients of these roller covers. Synthetic roller covers are suitable for oil or water-based latex paints. Also, these covers can paint on both smooth and hard rough surfaces successfully. Moreover, for synthetic materials, these covers are durable and affordable to use. In short, you can call it an all-rounder roller cover for your interior decoration.
Microfiber roller cover:
Microfiber roller covers are just the same as traditional roller covers. However, these rollers have an extra coat of miniature contexture that makes the roller cover unique. Because of this texture, the microfiber roller cover becomes stable for so long. Again, a heat adhesive gives additional support to the body. Microfiber rollers have good sustainability in absorbing paint. For this reason, you don’t have to take the hassle of extra color dripping. To get a smooth surface, you can use it to give a final coating on your ceiling.
Foam roller cover:
You can get an idea about the roller cover by its name that foam is the main material of this roller cover. Foams are too good at absorbing liquids. After painting the ceiling completely, you can give a finishing touch with a foam roller cover. Besides, these roller covers can remove the extra paint from the surface. Light colors are good for this type of roller cover.
How to Paint With a Roller & Get a Smooth Finish?
You can paint your interior surfaces on your own like a professional if you have the right tools. After that, it turns to the painting method with a paint roller. For painting your surfaces like a pro, do follow our guidance below.
Necessary equipment:
The first and foremost thing that you have to do is collect the necessary equipment for the painting.
- Face mask: For security caution, use a face mask while painting.
- Hand gloves: Hand gloves are a necessary item for working with paint.
- Dropcloth: It helps you to wipe spatter of paints.
- Paint roller: Choose the best paint roller according to your project.
- Paint Brush: Keep a paintbrush with you if necessary.
- Paint spray: You should keep a paint spray to remove the roller marks after painting.
- Paint tray: A paint tray needs for normal rollers. If you’re using a roller with a paint feeding tube, a paint tray is optional for you.
- Paint stirrer: It needs when you mix the paint for painting.
- Extension pole: Extension pole requires for ceiling or higher place projects.
- Paint: Necessary paint that you want to apply to your surface.
- Painter’s tape: For protecting the areas where you don’t want to apply paints.
Safety and security:
Wear your hand gloves and face mask before you start working. A face mask protects you from toxic smells and gases. Paints may have harmful chemicals that can harm your skin and health also. So, hand gloves keep your hand away from direct contact with the color.
Ready the paint:
Paint is a combination of pigments and other materials. Most of the time, paints remain mixed well for a few days after buying from the store. However, you need to stir the paint if you’re using the paint after so many days of purchasing. Then pour the paint in a pail. Always try to run the paint slowly as it creates bubbles.
Painting processes:
Step-1: Preparation
At first, remove the furniture and other things from the room and make the space fully empty. Cover all the areas with the painter’s tape that you don’t want to paint. Wrap the edges or corners with plastic sheets or adhesive tape. Try to keep off the fans and air conditions until the paint dries.
Step-2: Fill the roller with paint
Loading a roller with color may vary from roller to roller. Some rollers need a tray; some can automatically load and hold paint. This will depend on the roller’s feature. We suggest you choose the latest roller over the traditional one.
Step-3: Start rolling
After filling the roller, roll the paint roller on the surface from a specific direction. Embed the paint again before the area becomes dry. For a finishing touch, apply a second coat on the first coat. If you found any roller marks on the surface, use paint spray on these areas. You can also use a microfiber or foam roller cover for this job. Now let your work ground becomes fully dry!
How to Paint a Ceiling?
As ceilings are quite difficult to paint with a roller, we guide you to make it easier. Remember, with the right tools and proper planning, your ceilings project can succeed.
- Make your room empty and cover the floor, corners, and edges with plastic sheets or tapes.
- You need a paint roller, ladder, paintbrush, extension pole, and five-gallon of paint bucket for this project.
- Use the paintbrush to paint the borders of the ceilings.
- Now load the roller and start painting from an accurate direction.
- Apply two-time coats of paint to make the ceiling perfect.
- Always choose the thick and 9″ or 12″ length nap roller covers for ceilings. Also, rollers with extension poles and paint holder tubes are best for painting ceilings.
How to Clean a Paint Roller?
A paint roller will serve you for years if you store and clean it properly. After every use, you should clean the roller and dry it up with proper care.
- First, detach the excess material from the roller cover. You can use a putty knife.
- Put off the cover from the frame and clean it with a brush.
- Take a bucket full of warm water and give some dishwashing liquid or cleaning agent. For latex or oil-based paints, use mineral spirits instead of the dishwasher. After that, drown the roller in water and rub it with your hand until it becomes fully clean.
- Rinse the roller with clean, warm water and let it dry perfectly.
- Store the roller with an extra cover or tapes.
Which Paint Roller Should I Use For ceilings?
Paint rollers have a specification according to the various projects. You should choose the right roller that matches your work demand.
For ceilings, you should use long and thick paint rollers. With extra pole system rollers, create more comfort while painting. You can use foam rollers to coat the last layer of the paint.
Our Considerable Top Picks The 4 Best Paint Rollers For Ceilings Review
1. Wagner Spraytech Sidekick Paint Roller: Best for large and multi-room projects

Technical Features:
- Manufacturer: Wagner Spraytech
- Model Number: 0530010
- Size: SMART SideKick
- Product weight: 5.28 pounds
- Item dimension: 6.38 × 13.09 × 9.3 inches
Direct-feed technology makes the roller a perfect fit for multi-rooms and residential projects. This smart sidekick roller can easily paint surfaces for various large and multi-room projects. With a long extension hose, you can reach the higher areas without effort. The roller is suitable for 32 ft work areas. You don’t need to carry any roller tray as it has a great technology of direct paint feeding. Again, you can connect the paint container or cans directly with the roller with a large extension hose.
A click attaches the arm with the roller that can fit with all types of containers and paint cans. An intake hose is available with this electric-powered roller. This intake hose is quite long to dive into the container and pull the paint. Moreover, the extension hose is 16 ft long as it allows you to work in the 32 ft workspaces. Another fascinating feature of this roller is its 9″ × 3/8″ nap roller. Through this nap roller, the surfaces get more smooth painting.
On the handle point, there is a controller for direct paint feeding. Also, it has a hose strap to store the roller with its long hose anywhere, including in narrow places. Again, you will get a pulling adapter for pulling paints from a 5 gallon can or container. It is too easy to paint on two-story houses and ceilings with an extension pole. Without any extra paint-feeding hassle, this lightweight roller will save your time.
What we like:
- Direct paint feeding technology.
- Time-saving features.
- Easy, portable, and safe.
- Long extension pole and hose.
- Perfect for one color in multi-room and ceiling projects.
What we don’t like:
- Not suitable for single room painting.
- It takes time to clean the roller properly.
2. Wagner Flow Paint Roller: Best for medium size projects

Technical Features:
- Manufacturer: Wagner Spraytech
- Model Number: 0530004
- Size: SMART Flow Roller
- Product weight: 1 pound
- Item dimension: 46 × 12.5 × 4 inches
With this battery-powered roller, you can paint medium size projects like bedrooms, kitchens, etc, without any hassle as traditional ones. With a 22 oz paint holder, you can paint faster than a manual paint roller. Again, this extended paint holder can easily help you paint 8 feet ceiling. If you’re a medium-size project, you can choose this flow roller for your job. Besides, you can save time and effort in painting your house as it doesn’t need any manual paint filling. However, you can use it manually in versatile projects as well.
The roller runs through the battery power with four AA batteries. That’s why there is no need to connect directly with electrical cords while working. Moreover, the paint holder can contain sufficient paints in one fill for painting 70 square feet area. The roller cover can feed the color automatically for this paint holder can. Also, a 9″ × 3/8″ nap roller can give a finishing touch to the surface. This nap roller’s core cap is removable and renewable.
Within only six minutes, you can paint the 8′ × 8′ surfaces with less effort and hard work. It serves for painting projects without any roller tray and ladder. Oil and water-based latex coatings are quite suitable for this paint roller. The easy filling valve allows the paint to fill the cover can smoothly. There are two switches on the handle. One is to control the paint flow rate, and the other is manual control. You will get more comfort and flexibility with this smart flow roller.
What we like:
- It works faster than a typical paint roller.
- Battery-powered roller and easy to clean.
- Can paint more surfaces within less time.
- Innovative paint-feeding technology.
- Suitable for both automatic and manual modes.
What we don’t like:
- It becomes a little bit heavier after loading paint.
- Quite hard to reach in narrow edges and corners.
3. Wagner Spraytech HomeRight PaintStick Paint Roller: Best for overall

Technical Features:
- Manufacturer: Homeright
- Model Number: 284041
- Size: PaintStick EZ-Twist
- Product weight: 2.59 pounds
- Item dimension: 9.25 × 36 × 3 inches
This overall best pick paint roller can reach in too narrow places to draw your various home surfaces. It is an upgraded version of the original PaintStick roller. You can paint with it on the hard-to-reach areas with a twisted handle. The handle can expand about 64 inches according to your work basis. Also, this twisted version will allow you more to control paint flow. You can fill 18 oz paints in the paint holder at a single refill. Time-saving features give you more comfortable and relief for painting your house and ceilings.
Most of the traditional rollers have a hassle with roller trays and paint-feeding. However, if you have this EZ-twisted roller, you won’t take tensions about that. With more compatibility with controlling the paint flow rate, you can fill and feed paint easily. Moreover, the paint handle tube is clear to understand the time of refill. Again, the fill tube clips are universal to fit any type of paint container. You can paint the 8’× 8′ wall within only one minute.
If you want a shed-covering roller cover, this one is perfect for you. The fibers of the roller cover never come out from the core. Besides, you can change the cover alternate with a 3/8″ or 3/4″ nap roller any time based on your demand. Again, there are various little holes in the nap that helps to absorb the paint faster. It is quite easier to paint on the hallways and stairways quickly for the long twisted handle.
What we like:
- Long twisted handle to reach in difficult spaces.
- More flexible and comfortable to control paint flow.
- With a durable paint roller nap.
- It prevents color dripping and mess.
- Too easy to clean after using.
What we don’t like:
- Need more roller-cover for big projects.
- Not suitable for large projects.
4. Wagner Paint N’Roll Plus Paint Roller: Best for budget-friendly

Technical Features:
- Manufacturer: Wagner Spraytech
- Model Number: 284026
- Size: Paint N’Roll
- Product weight: 1.24 pounds
- Item dimension: 33 × 2.5 × 8 inches
In a budget-friendly way, this roller will give you more flexibility in your home painting. People who have a budget concern can choose the best budget roller for their project. With a splatter shield, this paint roller can paint without any drips and spots of the paint on the surface. You can hold stains inside the paint holder tube while working. Also, the line can contain up to 18 oz colors at a single time. You will get a perfect roller for your ceiling projects without spending too much money.
Moreover, this roller is reusable as you can use it repeatedly. The cleaning method is also easier than other paint rollers. There are loading valves in the tube. That’s why you can reload paints effortlessly thousands of times. A switch plunger is available to feed the roller cover within a click. By using a ladder, you can paint your ceilings, though there is no need to use ladders in most cases.
A 9″ × 3/8″ nap roller installs with the roller. You can use oil and water-based latex coating liquids with this nap roller. It provides a long-reach handle so that you don’t need to carry an extension pole or hose. You only need water and soaps for cleaning the whole paint roller. It gives you two times faster results than a traditional old paint roller.
What we like:
- Easy to clean and rewash able.
- With an affordable price serves more.
- Too easy to reload the paint again and again.
- No dripping and tray are messing.
- Works on ceilings without any support.
What we don’t like:
- Only suitable for a one-gallon paint container.
- Need support to reach in narrow spaces.
Buyer’s Guide To Choosing the Best Paint Roller for Ceilings
It is quite normal to be worried for a newbie to choose the right paint roller. For buying the right one, there are many things to consider. Before buying, always try to understand the features of the roller and compare it with your project. We try to give here some notable things which are essential for choosing any paint roller.
1. Frame:
A paint roller has two parts- frame and roller cover. The roller frame holds the roller cover. Also, a roller frame should be sturdy, strong, and flexible. Also, long roller frames like 9″ or 12″ are best for ceilings, stairways, hallways. While purchasing, try to choose a long roller frame. You can buy the stand separately or with a roller cover. However, we recommend purchasing a roller frame separately. It allows you to choose a roller cover according to your needs.
2. Roller cover’s material:
There are different types of materials for roller covers. Each material has some advantages and drawbacks. Natural, synthetic, microfiber, and foam roller covers are popular. However, natural woolen roller covers are quite expensive to use. If you have a budget issue, synthetic or foam roller covers can become an all-rounder for you.
3. Roller cover’s nap:
A roller cover nap is the most significant thing for painting on any surface. Your painting quality much depends on the roller cover nap. On a smooth surface, use thinner naps for painting. On the other hand, thick naps are the best choice to paint for rough surfaces.
4. Roller cover’s length:
The roller cover’s length should belong according to your project. A long roller cover is efficient if you are doing a big project. Again, a small roller cover is perfect for narrow edges and corners, toilets, kitchens.
5. Paint feeding system:
Painting with a paint roller is a time-consuming job. However, it depends on the features and technologies of your roller. Traditional rollers need a paint tray to load and feed the paint. This job is quite annoying and time-consuming. Nowadays, there is a drastic change in the paint feeding system. Many rollers have direct-feed options and portable pain tubes. With the roller handle control; these rollers take less time than a traditional one.
Frequently Asked Questions (FAQs):
1. Do you need a special roller for painting ceilings?
Answer: Ceilings should paint in grid-like sections. In this method, you can know your work progress in coatings. For painting ceilings, medium and small nap cover rollers are best. Always use these nap rollers for ceilings to bring a smooth look.
2. How do you prevent roller marks when painting a ceiling?
Answer: Roller marks can ruin your ceiling projects. There are many techniques and tips for removing roller marks. Try to use a thicker roller nap and a flat paint sheen for painting ceilings. Always take less paint on the roller cover. Also, paint the roof in the opposite direction with a new coat. Lastly, if all the above tips become a failure, spray on the roller mark areas of the ceiling.
3. Why does my foam roller leave bubbles?
Answer: Foam rollers leave bubbles for many reasons. When it drives too rapidly, the additional air enters the film. Besides too glossy or semi-glossy paints, the wrong thickness of the naps can also create bubbles.
4. Does the quality of the paint roller matter?
Answer: Yes, it is. A paint roller can paint faster than a painting brush and create fewer mix-ups than painting sprays. However, there remains combat with the quality of a paint roller. Best quality rollers will serve you the best service. You can work smoothly with the roller and roller covers. On the other hand, low-quality rollers can skip and leave marks on your surface. Also, bad nap covers can ruin your paintings as well.
5. Should you get a foam roller before painting?
Answer: Before painting, it is unnecessary to wet the foam roller with water. If your roller soaks fully with water, it can’t absorb the paint. Again, a too dry roller is not suitable for drinking paint. So, use a damp roller but not fully saturated with water.
Final Thoughts:
Paint rollers are the most common and easier way to paint ceilings than other options. Though this option is a little time-consuming, it results significantly. You have to choose the right roller cover for your project. Otherwise, it is possible to ruin your projects before starting.
Among the four best paint rollers for ceilings, we like to suggest you the Spraytech and Flow roller for your roofs and another big project. PaintStick and N’Roll rollers are more suitable for walls and cabinets.