
You are not alone if you are wondering how to paint over spackle effectively without spending a fortune. Preparing the spackle will bring about a dull surface where the paint isn’t mixed in as you expected.
Introduction: Understanding Spackle and Painting
Utilizing some unacceptable kind of base paint may cause sparkling spots in the completed paint. The equivalent goes for outside spackle. Because a spackle fix is more permeable than the encompassing surface, it should be prepared before applying the completion coat.
Spackle is a key tool for homeowners and DIYers aiming for smooth walls. This adaptable compound fills cracks, holes, and flaws, providing a perfect surface for painting. Knowing how to use spackle can greatly improve the final paint job. It’s not only about hiding imperfections but also about helping the paint stick better and last longer making your space look amazing.
Steps To Paint Over Spackle
Perhaps there was a miscalculation while moving a significant machine. Or on the other hand, maybe somebody hung a few pictures as our forefathers would have done it by (heave!) pounding nails instead of depending on harm-free divider mounting strips. Whatever the reason, you’re currently confronting little dings, marks, and gouges to your mortar or gypsum board dividers.
Fast Surface Preparation Before Painting over Spackle
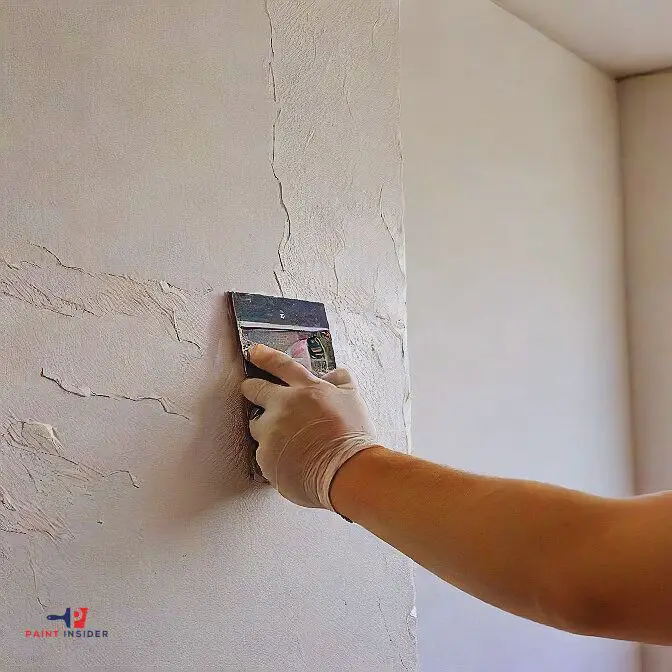
The spackle should be flush with the wall. To do this, spread the spackle out past the edges of the maintenance during the application, and afterward sand it down after it dries. Utilize your fingers to check for flushness, as they’re more dependable than your eyes.
Prime the zone for bigger fixes. On the off chance that you just have a couple of little spackle spots, you can skirt the preliminary and head directly to the subsequent stage.
Before getting out the roller, utilize a little brush to cover the zone that has been fixed with a spackle in a meager layer of customary paint. On the off chance that you don’t do this progression, the influenced zone will have an unexpected surface in comparison to the remainder of the divider once the work is finished.
Now, you’re prepared to utilize your roller to paint the whole divider. Go over the fixed territory similarly as you would some other region. The surface and shading should coordinate consummately, whenever everything has dried. Do attempt to utilize matte paint; the glossier your paint, the more obvious any defects will be. There is no compelling reason to utilize an extraordinary groundwork; any water-based universally useful or drywall preliminary will do.
Sealing a moist spackle
You can fudge a little yet you would prefer not to cover up a wet surface. Splashed surface dividers look best if backrolled.
That assists with working the paint into every one of the breaks/fissures in the surface giving a superior-looking completion. If it was only a preliminary, that was showered without backrolling it very well may be alright.
Waiting time before you cover the spackle
While a quick-drying spackle can require a couple of only minutes to dry, an ordinary spackle requires 1-2 hours to dry to the touch. Stand by another 1-2 hours before sanding, and stand by 24 hours before painting.
Easy way to cover the spackle glue
Apply drywall groundwork to the fixed region with a paintbrush or roller, contingent upon the size of the maintenance. The groundwork seals the spackle or joint compound and readies the zone for painting. Without groundwork, the fixed region would absorb different layers of paint.
Smoothening sparkle before painting
The sandpaper smoothens the surface and hems to allow for proper fixing. The surface dries up and gets rattled from the walk flash way before it has been roughed up smoothened and then painted. The spackled zone requires sanding.
Using spackle when necessary
Spackling glue is one of a few kinds of filler. Others incorporate joint or drywall compound, wood clay, plaster, and workmanship fix and mortar of Paris. Spackle arrives in an assortment of structures. Lightweight spackling is generally utilized for the insides.
It dries rapidly, doesn’t therapist, and sands without any problem. Stress breaks or joints that extend and contract are best loaded up with adaptable elastomeric spackle. Vinyl spackle can be utilized on outside siding and trim.
Applying paint on the inner side of the spackle
If the spackle fix is on a smooth surface, it should be sanded exceptionally flush so there are no edges. Feel for harshness by running your hand over the maintenance. If the spackle fix is on a finished divider, you might not need to sand by any means.
Since a spackle fix is more permeable than the encompassing surface, it should be prepared before applying the completion coat, else it will show as a dull spot.
There is no compelling reason to utilize an uncommon base coat; any water-based primer will do the trick. Utilize whatever paint you are utilizing to complete the paintwork. Permit it to dry for around four hours before recoating. Rather than bringing about a dull spot, you may wind up with a sparkly spot.
To accomplish a mixed, consistent completion for a final detail, utilize the very application technique that was utilized for the first surface. All in all, utilizing a roller for a moved divider, or a brush for an entryway that has been brushed. Expand the work of art, finish up well past the edges of the fixed region, and gently plume the edges so it mix consistently.
Applying Paint on the outer part of the spackle
Since the outsides are dependent upon direct daylight and more temperature and dampness limits, materials utilized for fixing and painting the outside of your home must be more adaptable and impervious to the components. Typical slip-up individuals make when utilizing spackle outside is failure to prime uncovered wood before spackling.
Uncovered wood is permeable and will filter dampness from the fix, making it dry out and break. Take action, let it dry, and afterward apply the spackle. To paint over the outside spackle, utilize two layers of the completion paint, permitting four hours of drying time between coats.
Conclusion
There’s no motivation to fear covering up a divider that has been fixed with spackle! Whenever done appropriately, covering up the spackle can be a very satisfying encounter. All spackle is expected uniquely for more modest fixes and limited breaks. Utilizing the correct spackle will guarantee an enduring fix and satisfaction.