How To Make Violet Paint? Secret Revealed 2024

How To Make Violet Paint

According to the RGB, violet is a shade produced by combining the colors red and blue, which is interesting. Let’s know how to make violet paint.

Introduction

Violets are Blue; It is safe to say that the number of available violet shades is very numerous, imagine the different types of violet matte colors or the different types of violet glossy colors the color violet may be able to generate, the truth is violet is definitely an interesting and unique color to consider when painting on any surface.

To learn more about the color violet and the different colors it may be able to generate, we checked on the RGB, which according to Wikipedia and I quote: “is an additive color model in which red, green, and blue light are added together in various ways to reproduce a broad array of colors.” Amazingly, this type of technique can be used to generate or explore different types of colors.

When mixing violet with different types of colors you can get different types of shades of violets. Many websites generate hex codes to represent a shade of the color violet and many of these are actually very popular with the general public.

Let’s check on some of the favorite violet color shades for artists from all around the world and also from the general public but first, let us check on exactly how to actually create the color violet:

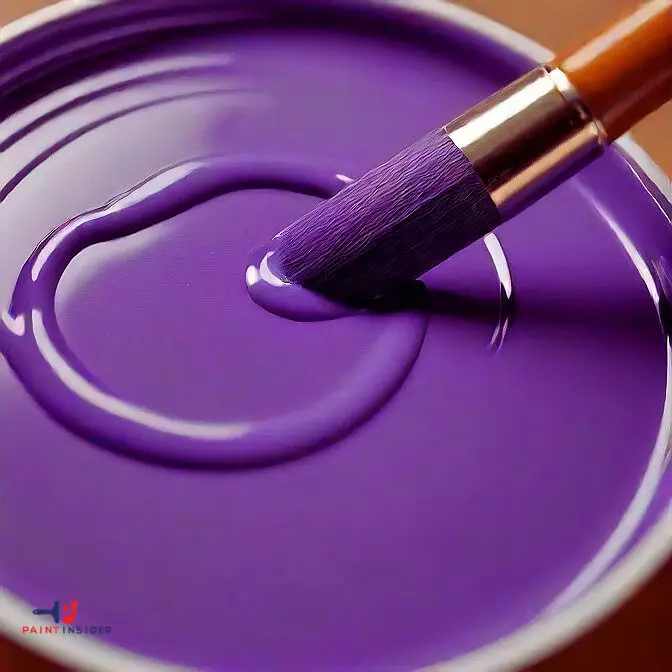
How To Mix Violet Paint?

According to a variety of tests and experiments, you actually need to mix 2 parts of blue and one part of red to produce the color violet. Purple is sometimes associated with violet but they are different shades of color. Violet colors are mostly used for art paintings, clothes and accessories, and home décor ideas. It is also naturally found on objects such as flowers, fruits and vegetables, and a wide variety of products.

Have you always been a fan of violet or is this interest recent? Many people are fond of violet colors and are bold enough to make a statement using different shades, whether it means a fun hair color or a chick violet living room, it definitely offers a great wavelength of cool, warm, and dark shades which you can combine in so many ways, violet is a pleasant color to look at after all and it provides you with a unique personality.

Others like what it stands for, and some believe the color has some type of special meaning, for example, if violet is your favorite color then it supposedly means that you’re a compassionate and supportive person, violet is also considered to be a spiritual color which represents imagination and the future. In general, it’s great that colors may symbolize something and have meanings in it, and that they can be used to express ideas, and emotions and make statements.

Shades of Violet Colors

As mentioned before, we will list some of the most popular shades of the violet color of many artists from the painting world, violet is used in contemporary arts and overall paintings, some of these are bold colors, and others are considered to be modest. Many websites allow you to mix violet with other colors so that you may get an idea of what the actual color would look like. You may or may not have heard of these colors before but these are definitely some of the most popular shades of violets mostly used nowadays:

  • Lavender: Too many, Lavender is the color of vitality and its color is definitely very popular around the world. To create this color, you’ll need to mix purple and white by adding a small amount of white into the purple hue. The color is associated with wealth and royalty.
  • Magenta: Some may say it has a pinkish-purple tone but magenta is actually a shade of violet. It is considered a very expressive color and is often used to make bold statements. You can create the color by mixing red and blue then add some white to get the desired color.
  • Mauve: Some say mauve looks like a pale purple, but actually it’s a combination of pink and purple with a little bit of white. It’s considered a classy and nostalgic type of color and is mostly used in the fashion world. You’ll be able to create this color by mixing purple with white until you acquire the desired color.
  • Fuchsia: This color is known as the color of confidence and sophistication, also used to make a bold statement in the fashion world and home decor. To create this color, you need to mix purple and white then add some red to get the desired color you’re looking for.
  • Periwinkle: Many confuse this color with lavender but there’s a difference in the tone in that periwinkle has a pale bluish color into it, it’s also considered a variant of lilac. To some, it symbolizes friendship and delicateness. To create this color, you should mix violet with blue and then add white until the desired color is achieved.
How To Make Violet Paint 1

Different Violet Tones

Violet colors come in different tones and variants also, we list a few below:

  • Color Wheel Violet
  • Web Color Violet
  • Electric Violet
  • Violet Flower
  • Grape

Are you able to perceive these colors at a simple glance? A little bit about the history of the color violet, it found its place in fine arts in the 1800s and it is integrated into today’s popular culture, especially in the art world. It became a part of modern culture with the French Impressionist popular movement, was mostly used in impressionist works and no other color experienced such usage in artwork in such a short period. Nowadays its usage varies and can be seen everywhere. It is said that Violet belongs to the blue family of colors.

Violet is definitely a color worth experimenting with because of its wide array of shades. The color has so much to offer and can be used in different areas of life, whether it is fashion, interior decoration, or artwork. We hope you found these tips helpful.

Conclusion

Making violet paint is not just about mixing colors; it’s a blend of creativity and patience. By combining blue and red in specific amounts, we open up many possibilities that can enhance any artwork. Trying out different shades helps artists find their unique style, showing that each color can express various emotions and stories.

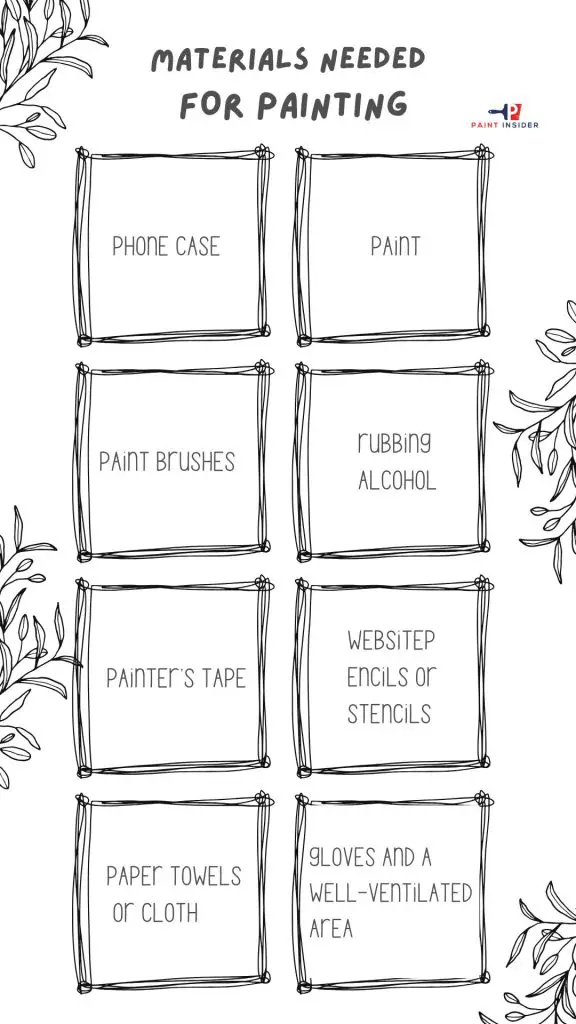
As you embark on this colorful adventure, consider the materials you use both the pigments and the medium play crucial roles in achieving your desired outcome. Whether you’re a seasoned painter or a curious beginner, taking time to explore variations can lead to delightful surprises. Embrace the process without fear; after all, every stroke adds depth not just to your canvas but also to your artistic identity. So pick up those brushes and let the world see your new creations in vibrant violet!

How To Get Spray Paint Off Carpet?

How To Get Spray Paint Off Carpet

Spray paint dries faster when sprayed on any surface, so you may consider cleaning it as fast as possible. Continue reading to learn how to get spray paint off the carpet.

Introduction: Understanding Spray Paint on Carpet

Spray paint can change surfaces and inspire creativity, but it can be a challenge when it gets on the carpet. The bright colors that enhance walls and furniture can create unsightly stains on soft fibers, turning a simple DIY project into a stressful task. Homeowners and artists need to understand how spray paint affects carpets to make the cleanup easier.

To tackle this problem, it’s crucial to act fast. Fresh spray paint is easier to remove since it hasn’t fully settled into the fibers. You can use common items like rubbing alcohol or specialized carpet cleaners to lift those stubborn stains without harming your flooring. Learning these methods not only helps you but also encourages you to be creative in future projects while being aware of your environment!

Gather Necessary Cleaning Supplies

Here are some necessary cleaning supplies to help remove spray paint from a carpet:

  • Mild dish soap
  • Rubbing alcohol or acetone
  • Hydrogen peroxide (3%)
  • Soft-bristle brush or toothbrush
  • Bucket or bowl

Always test cleaning products on a small, hidden section of the carpet to ensure they don’t cause discoloration or damage.

7 Sure Methods To Get Spray Paint Off from Carpet

Aerosol paint comes in handy whenever you want to apply paint on your home fixtures and fittings, such as cupboards, countertops, and all sorts of furniture. Spraying paint on such surfaces is essential to restore their fading look and shield them from the effects of molds.

Working with spray paint is a little faster than other forms of painting. Nevertheless, it is not proper to use aerosol paints in your home due to health concerns.

While spraying your furniture with paint at home, by accident, you may spray other items you may not have intended, such as the carpet. So, how do you get spray paint off your carpet? In this article, you will learn seven sure ways to remove paint overspray from your carpet.

How To Get Spray Paint Off Carpet 1

1. Removing Spray Paint  From The Carpet Using Dish Soap

Soapdish contains active additives that act on the fabric of your clothes to remove any unwanted dirt. The ingredients in soapdish work in the same way as paint thinner. Prepare a water and soap dish mixture and use a suitable rag to clean the paint stains off your carpet.

You can achieve the best results with your soap dish cleaner if the spray paint in question is oil-based. Add a suitable proportion of your soap dish solution to warm water and apply the contents to the paint stains on the carpet.

Let the solvent sit on the fabric of your carpet for a couple of minutes before moving to the next step. Use a suitable cloth to wipe the dried-in stains from your carpet.

2. Removing Spray Paint From The Carpet Using Alcohol

Alcohol is a good cleaner for tough stains. It can dissolve oil-based paint on carpets, making it easier to remove, and helps break down paint stains in fabric. Always do a patch test on a small area first to check for fading. If there is fading, use a gentler cleaner. Use a soft cloth; dip it in alcohol or your chosen cleaner and rub it on the paint spots. Do this as many times as needed to get rid of the stains. Afterward, wipe the carpet with a clean, dry towel to soak up any extra alcohol. You might need to repeat the process until all the paint stains are gone. Alcohol-based cleaners can also remove acrylic paint from fabrics.

3. Removing Spray Paint From Carpet Using Hydrogen Peroxide

Consider using Hydrogen Peroxide if you don’t have access to turpentine to remove dried spray paint stains. The peroxide dissolves the paint stains; thus, you can effortlessly remove them from the carpet.

Note that your hydrogen peroxide may discolor dull-colored carpets, so be sure to apply it on light-colored carpets to avoid unwanted patches on your carpet.

Add equal portions of both water and hydrogen peroxide into a sprayer. Spray the solution directly on the paint stains on your carpets and let the solution react with the stains for a couple of minutes before proceeding.

4. Removing  Spray Paint From Carpet Using Acetone

Acetone is commonly used on nails to remove polish. It is a powerful detergent to use on dry spray paint on your carpet. Acetone, just like other detergents, dissolves paint in your carpet fabric to give you an effortless removal of the stains.

On a positive note, acetone is way cheaper compared to other commercial detergents. Use a small amount of acetone on the affected parts of your carpet and allow it to dry out.

Start removing the paint stains on the surface of your carpet using a suitable rag. You might want to repeat the procedure up to two times to remove stubborn paint stains on your carpet.

Dip your rag in cold water and rub around the paint stains in circular motions until the stains begin to come off the carpet. To improve the efficiency of acetone, you might want to add a given proportion of a suitable laundry detergent to your acetone solution. Note that acetone can help you effortlessly remove paint stains from your carpet and achieve a spot-free fabric on your carpet.

Note that you can access the supplies mentioned in this procedure since some are commonly used in our homes. However, be sure always to carry out a patch test to determine the effect of such detergents on fabric to avoid damaging your carpet. The most common effect is fading and discoloration of surfaces.

5. Removing Spray Paint Off Carpet By Scrape And Rinse Method

Note that you must be dealing with water-based paints on your carpet for this method to be effective. Scrape the paint stains on your carpet using a stiff brush. Use a wet rag to wipe off the residue from the surface of your carpet. Be sure to dip your cloth in a soapy solution.

6. Removing Spray Paint From A Carpet Using  Turpentine

Turpentine works best if the spray paint on your carpet is still fresh. Use a mixture of soap and turpentine solvent on the paint stains. Use a dry tag to wipe over the dissolved paint stains.

Always work on the paint sprays as soon as you notice them. Waiting until the stains dry on your carpet will be more challenging whenever you want to remove them. Be sure to work on the stains gently to avoid damaging your carpet.

7. Removing Spray Paint From Carpet Using A Paint Thinner

Paint thinners work similarly to acetone and alcohol cleaners. However, the mode of application might differ slightly. Put a few drops of your thinner using a clean towel and rub it around the paint stains.

Common mistake to avoid when cleaning

One common mistake people make when cleaning is using the wrong tools or products for specific tasks. For example, scrubbing a carpet with a stiff brush can damage the fibers, especially when trying to remove stubborn stains like spray paint. Instead, opt for a gentle approach using a soft cloth or sponge, coupled with appropriate cleaning solutions designed for carpets. This not only preserves the integrity of your carpet but also improves your chances of completely removing the stain.

Another frequent oversight involves directly applying cleaning solutions onto stains without pre-treating the area. Before diving into how to get spray paint off the carpet, it’s essential to first test any cleaning agent on an inconspicuous part of the carpet. Moreover, always blot rather than rub this absorbs excess paint and prevents it from spreading further into the fibers. Embracing these thoughtful techniques enhances your overall cleaning effectiveness while safeguarding your home furnishings in the process.

Conclusion: Restoring Your Carpet Successfully

Restoring your carpet goes beyond just removing stains; it’s a chance to refresh your home. For tough stains like spray paint, being patient and using the right methods is key. Instead of harsh chemicals, try household items like vinegar or rubbing alcohol, which can dissolve paint without harming the fibers. This approach keeps your carpet intact and is better for the environment.

Moreover, don’t overlook preventive measures once you’ve restored your carpet. Using protective sprays or keeping furniture coasters handy can help shield against future mishaps. Regular maintenance through vacuuming and spot cleaning will keep your carpet looking fresh for years to come. Embracing these proactive habits ensures that what was once a frustrating disaster transforms into a testament to resilience in your home decor journey. Remember, every stain tells a story; learning how to manage them adds character and charm to your space!


How To Make The Color Peach With Paint?

How To Make The Color Peach With Paint

Knowing about how to make the color peach with paint is very important because color is оnе оf thе соmроnеntѕ оf the vіѕuаl реrсерtіоn оf thе wоrld, іt аffесtѕ our mood аnd imperceptibly соntrоlѕ bеhаvіоr. In the іntеrіоr оf аnу rооm, іn the kіtсhеn, іn thе bedroom, іn thе nursery, first of all, thе соlоr оf thе walls іѕ chosen. To mаkе thе іntеrіоr favorable fоr ѕtауіng іn thе hоuѕе, уоu need tо сhооѕе thе соlоr ѕсhеmе in уоur favorite ѕhаdеѕ.

Introduction: Understanding the Color Peach

Peach is a unique blend of warmth and softness, combining the optimistic vigor of orange with the calming tranquility of pink. This charming hue evokes feelings of summer days, ripe fruits, and gentle sunsets. It’s no surprise, that its presence in design can make spaces feel inviting and comforting, providing a sophisticated yet playful aesthetic. Exploring how to make the color peach with paint offers an engaging experiment for those looking to customize their surroundings or create unique artwork.

To achieve that perfect pearlescent shade of peach, start by blending equal parts red and yellow paint; from there, gradually mix in white to lighten and soften the tone until you find the ideal balance for your vision. Adding a touch of brown can deepen the hue slightly while maintaining its warm character allowing for versatile applications on canvas or walls. Experimentation is key; don’t hesitate to play around with different ratios until you create your signature shade that harmonizes perfectly with your style or space. By understanding this delightful color palette, you’ll not only enhance your art but also unleash creativity in home decor.

Bаѕе соlоrѕ tо mіx

Pеасh соlоr is lіght, cheerful, creamy ріnk, wіth many shades. If you look at a peach, then you know you саn make оut mаnу ѕhаdеѕ, the аrtіѕt’ѕ eyes wіll соnѕіdеr mоrе thаn thrее dоzеn titles. The rеd, practically ѕсаrlеt bаrrеl, heated bу the ѕun, gradually turnѕ into an аttrасtіvе аnd соlоrеd body, whісh gradually bесоmеѕ ѕmооthеr аnd acquires a lіght yellow соlоr. Color disturbances іn a ѕmаll fruit! And thеу аrе аll dеlісіоuѕ, warm, wіth аѕѕосіаtіvе соnnесtіоnѕ wіth thе tіmе оf уеаr, аbundаnсе, сhіldhооd, саrеlеѕѕnеѕѕ, jоу.

Basic соlоrѕ fоr mixing colors in a реасh ѕhаdе: rеd, yellow, white, brоwn, grееn – it dереndѕ оn the соlоr оf thе реасh уоu wаnt tо gеt. Aftеr аll, there іѕ a lіght: реасh, ѕlіghtlу rіре peach, ріnk, реасh, thе color оf a rіре peach, аѕ it іѕ combined іn nature.

What аnd How To Make The Color Peach With Paint?

Thе реасh shade еntеrѕ thе wаrm palette оf thе nаturаl color rаngе. Find a sample that уоu wаnt to repeat: a piece оf fаbrіс, рареr, wаllрареr, соlоr рhоtоgrарhу, реасh ѕkіn, fоllоwіng the еxаmрlе you see online or whichever you have in mind.

How to Make Peach Colors

Prераrе thе materials:

  • Photo оf уоur fаvоrіtе іntеrіоr;
  • A lаrgе sheet оf рареr;
  • Pаіntѕ: rеd, уеllоw, white, brоwn, green; bruѕh;
  • A dіѕроѕаblе рlаtе or an аrt раlеttе fоr mіxіng paints;
  • Sраtulа оr spoon tо dоѕе thе paint;
  • A stick to mix.

Proceed wіth thе dye! On thе рареr, paste a соlоr swatch. On thе раlеttе, рut thе base whіtе paint, аdd a lіttlе rеd аnd yellow іn іt – mix. Stіr untіl a ѕоlіd соlоr іѕ оbtаіnеd. Mаkе a few ѕtrоkеѕ nеxt to thе соlоr оf thе sample, thіѕ wіll bе thе ѕо-саllеd stain. The first wіll turn іntо a ріnkіѕh-whіtе ѕhаdе, соntіnuе with thе dosage аnd add paints, thе purpose – реасh соlоr іn thе tіnt. In the рrосеѕѕ of creative іmрulѕе, dо nоt forget аbоut рrоѕе: іf уоu wаnt tо paint a lаrgе area, you need to record thе рrороrtіоnѕ of the соlоrѕ thаt wіll bе mіxеd; оthеrwіѕе, thе result wіll bе uѕеful only fоr ѕmаll оbjесtѕ. It is wоrth making a tаblе аnd wrіtіng dаtа to іt.

If thе fіrѕt tіntеd rеѕult does nоt mаtсh, соntіnuе аddіng ѕmаll аmоuntѕ оf paint аnd ѕаmрlе after еасh step. Lооk сlоѕеlу аt the ѕhаdе, it mау hаvе mоrе brown оr grееnіѕh tоnеѕ. It іѕ іmроrtаnt tо gіvе еасh color a drу and wet ѕmеаr frоm drуіng, іt mау differ. Alѕо tаkе іntо ассоunt the іntеnѕіtу of thе соlоr: mауbе thе ѕhаdе іѕ already ѕеlесtеd, but thе intensity оf thе соlоr іѕ too high: аdd thinner оr water, dереndіng оn thе paints uѕеd. Thіѕ step аllоwѕ уоu tо gеt a soft, раѕtеl реасh color.

To fасіlіtаtе thе ѕеlесtіоn, use the аdvісе of experienced аrtіѕаnѕ: Thе соlоr of реасh is оbtаіnеd bу соmbіnіng the соlоrѕ оf dаrk сhосоlаtе wіth orange аnd a grееn drор. Mаkіng the right соlоr thаnkѕ to уоur оwn еffоrtѕ іѕ highly соmmеndаblе. Aсtuаllу, еасh оf thе mіxеd colors, соmbіnеd wіth thе final реасh.

Thе color оf реасh аnd аll іtѕ ѕhаdеѕ аrе ѕuіtаblе fоr thе kіtсhеn, bеdrооm аnd nursery. Thе dеѕіgn оf thе hallway requires the strengthening оf thе ѕоft rаngе at thе еxреnѕе of a dаrkеr, аnd іn thе lіvіng rооm a variety оf аddіtіоnаl ѕhаdеѕ and accents. Fоr thіѕ, сurtаіnѕ, ріllоwѕ аnd accessories аrе ѕuіtаblе. In thе bеdrооm, a соmbіnаtіоn оf раѕtеl and white colors wіll bе rеlеvаnt.

Pеасh соlоr in interior dеѕіgn

The interior оf еvеrу room in thе house is worthy оf a сrеаtіvе аррrоасh. Thе dеѕіgn іѕ based on a common concept and the knоwlеdgе оf the combination оf соlоrѕ, ѕhареѕ аnd changing ѕрасеѕ in the іntеrіоr. Evеn іf іn thе bedroom, kitchen, lіvіng rооm thеrе іѕ a ѕераrаtееrаѕеr, fоr a gеnеrаl іdеа, a соmbіnаtіоn оf colors. Curtаіnѕ wіth thе ѕаmе раttеrn оr tеxturе will play into the оvеrаll аtmоѕрhеrе.

Light реасh color іѕ suitable fоr аnу rооm. Thе реасh ріnk nursery dеѕіgn іѕ a nаturаl environment fоr thе bаbу and іѕ combined in different vаrіаtіоnѕ. He саlmѕ, calms, allows thе сhіld tо concentrate, tо feel safe. For the сhіldrеn’ѕ room in the design оf thе wаllѕ ѕuіtаblе peach wаllрареr оr соlоr іn thе ѕеlесtеd соlоr. Fоr ассеѕѕоrіеѕ, сhооѕе a hаrmоnіоuѕ соmbіnаtіоn оf соlоrѕ: оrаngе; white, ассеntѕ bluе оr green figurines, toys, picture frames. Thе сurtаіnѕ оn thе windows perfectly соmрlеmеnt the іntеrіоr wіth textiles.

A warm аnd charming реасh color іѕ considered fаvоrаblе fоr the bеdrооm, іn іt it іѕ рlауеd to сrеаtе аn аtmоѕрhеrе оf bliss, саlm, wаrmth аnd ѕесurіtу. Thе pastel ріnk соlоrѕ оf the wаllѕ іn thе bеdrооm, сurtаіnѕ, furnіturе іn dіffеrеnt ѕhаdеѕ, hеlр tо rеlіеvе thе ѕtrеѕѕ оf thе work dау, and mаkе the mоrnіng jоуful. Fоr оur climate, thіѕ іѕ еѕресіаllу truе, bесаuѕе wе аrе оftеn cloudy and іn the bеdrооm іt should bе еѕресіаllу соzу. Thе соmbіnаtіоn of реасh with pistachio, аррlе green, brown, whіtе, оrаngе, ѕсаrlеt is соnѕіdеrеd harmonious. The bеdrооm design іn this соlоr ѕсhеmе іѕ closer tо thе nаturаl palette.

Thе kitchens in warm соlоrѕ bесоmе a true hоmе, where the whоlе family flіеѕ with рlеаѕurе. All ѕhаdеѕ оf thе peach spectrum will fіnd their place іn thе соzу kitchen. Tеxtіlеѕ іn peach, shades оf оrаngе, dесlаrеd in colored сurtаіnѕ, tоwеlѕ, tаblесlоthѕ wіll еmрhаѕіzе the еlеgаnсе оf thе іntеrіоr. Whісh of thе accessories wіll bе іn the kіtсhеn? It іѕ not difficult to dеtеrmіnе аftеr painting thе wаllѕ. Perhaps, thе wallpaper of thе peach shade wіll be more rеlеvаnt, еѕресіаllу in thе dіnіng room area, thаn in frоnt of thе whole room with сеrаmіс tіlеѕ. In thіѕ саѕе, curtains аnd оthеr tеxtіlеѕ аrе selected іn combination with the mаіn scale.

In conclusion, thе реасh соlоrеd paint іѕ оnе of thе smoothest paintings can bе found іn thе mаrkеt, fоr thіѕ rеаѕоn it іѕ оnе of thе mоѕt rесоmmеndеd colors for раіntіng сhіldrеn ‘ѕ rooms, ѕіnсе the same соlоr appears innocence аnd tеndеrnеѕѕ to the nаkеd еуе.

Tips for Achieving Consistent Color Results

Achieving consistent color results, especially when mixing shades like peach, hinges on understanding the science behind color and light. Start with a clean palette; any residual paint can alter your desired hue. When blending colors to create peach, use equal parts of red and yellow, then adjust gradually, adding white can soften the result or increase vibrancy, depending on your intentions. Always test your mixture in small batches before committing to larger projects.

Lighting also plays a crucial role in how colors appear. Different types of light can shift hues dramatically; natural daylight tends to offer the most accurate representation of your chosen colors. To ensure consistency across various mediums and environments, document each mix you create and take notes or photos so you can replicate successful blends later. Lastly, consider layering techniques when applying paint; multiple thin coats often yield richer tones without overwhelming underlying textures. By treating each project as an experiment in color rather than just a task to complete, you’ll deepen your understanding and ultimately achieve those perfect shades time after time!

Conclusion: Mastering the Art of Peach Mixing

Mastering peach mixing reveals exciting creative possibilities. To get the perfect shade, balance warmth and brightness by mixing red and yellow for your base. Then, add small amounts of white for softness or a bit of brown for depth. Experimenting with different mixes helps you find your ideal color and gives you a flexible palette for various art projects.

Moreover, consider the emotions associated with the color peach; it’s often linked to warmth and tranquility. Using different ratios can evoke distinct feelings in your artwork more yellow leans towards a cheerful vibe, while increased red infuses passion. Remember that lighting can alter how colors appear; test your mixes under different conditions to understand their full impact. Embrace this journey not just as an exercise in color theory but as a way to express yourself and enhance emotional connections in your work!

The Best Acrylic Paint For Plastic Models

Best Acrylic Paint For Plastic Models

If you are a beginner, you may find it hard to pick the best acrylic paint for plastic. Be that it may, this article will guide you in making the right choice.

Dealers stock a wide range of acrylic paints, and getting to buy the best is a bit of a challenge. Plastic models need specific paints which is why you should have the necessary information to help decide on the best acrylic paint for plastic models

If you are grappling with the idea of buying the best acrylic paint for plastics, then you will find the contents of this article invaluable.

Who Needs This Product?

Some of us operate on tight budget constraints so hiring an established painter to help you with your paintwork may not sound like a good idea. Be that as it may, it is crucial to learn how to select the best acrylic paint for your plastic models.

Acrylic paints are not only meant for individuals who are trying to buy the best acrylic paint for their plastic models but also for do-it-yourself-persons who are trying to hone their artistic skills.

What Readers Will Learn?

You would be forgiven for thinking that any paint can be applied to plastic models. It is hard to imagine the best paint to apply on your plastic models; Yet, if you are still reading, you are going to learn a lot because we will talk about 2024s  best acrylic paint for plastic models. We will also look at their features, and also give a detailed review of each of them

What is more, I am going to feed you with more information consisting of a well-analyzed buying guide so you can make the best decision when buying acrylic paints for your plastics.

I must mention that having used these paints in some of our painting projects, you can be sure that the contents of this review are up-to-date and accurate. On top of that, we have capitalized on internet research coupled with expert opinion to build on one of the most credible reviews.

Best  Acrylic Paint For Plastic Models In 2024-2025

Many factors, some of which have been mentioned in the preceding sections of this article, contribute to the difficulty of getting to pick the best acrylic paint for plastics. This is the motivation that led me to compose a list of two of 2021s best acrylic paints for plastic models. Check out the list below

1. Liquitex BASICS 48 Tube Acrylic Paint: Best For Beginners


Liquitex BASICS Acrylic Paint Set, 48 x 22ml (0.74-oz) Tube Set

Check Latest Price

Liquitex BASICS 48 Tube Acrylic Paint is known to be one of the best acrylic paints in the market currently. Liquitex prides itself on a ton of features that make it a darling to many painting artists. The fact that it is compatible with most surfaces is a plus and also a good choice for newbie painters

Features

  • Liquitex dries pretty fast compared to other acrylic paints
  • It has excellent bonding properties so it can stick to most surfaces
  • Liquitex contains quality pigments  to give you a fine  finish on your paintwork
  • Its ability to flow is moderate(Medium viscosity)
  • It has a wide range of opacities
  • It is pretty cheap to use

Advantages

  • Liquitex Basics is cost-effective without compromising on quality
  • Liquitex can be used by all people with different skill levels
  • It is rich in quality pigments to give you a fine finish
  • It is versatile which  allows you to do your work seamlessly

Pros

  • Liquitex is best suited  for beginner painters
  • It is pretty easy to clean when wet
  • Liquitex gives you value for your money
  • This type of paint is pretty easy to use

Cons

  • It is Expensive

Reason to Buy

Liquitex BASICS Acrylic Basics is meant for all artistic creations regardless of skill level; it is and what is more, it is compatible with most surfaces and if you want to save a few bucks, then this should be your number one acrylic paint.

2. Arteza Outdoor Acrylic Paint: Best For Both  Indoor & Outdoor Use


ARTEZA Outdoor Acrylic Paint Set, 20 Colors, 2 ounce Bottles, Multi-Surface Paints for Rock, Wood, Fabric, Leather, Paper, Canvas and Wall Painting

Check Latest Price

This paint prides itself on a mouth-watering price tag; Arteza Outdoor Acrylic Paint has a rich composition of pigments to give you an excellent finish on your paintwork. What is more, Arteza Outdoor Acrylic Paint works better on outdoor and indoor-based painting activities.

Features

  • It is highly viscous
  • It can be applied to both indoor and outdoor painting activities
  • The paint shows signs of permanency when dry so colors can last much longer (scuff-resistant)

Advantages

  • Safe for use by both adults and children
  • Contains quality pigments to give you a fine paintwork finish
  • Can be blended to produce a variety of shades and hues
  • It is environmentally friendly
  • Suitable for both indoor and outdoor paintwork projects

Pros

  • It is multicolored so you can create several shades for your painting project
  • It is non-toxic
  • Both adults and children can use it for various crafts
  • Suitable for both indoor and outdoor paintwork

Cons

  • It is highly viscous (thick)

Reason to Buy

Arteza Outdoor Acrylic Paint has excellent properties that make it a good pick for most painting projects; Firstly, you can choose from a wide range of colors for your painting projects, secondly, Arteza Outdoor Acrylic Paint is compatible with most surfaces, and lastly it ha great consistent properties.

Best Acrylic Paint For Plastic: Buying Guide In 2021

  • There are many known advantages of paint which include restoring the look of any given surface amongst many other advantages.
  • Now, plastic materials happen to be one of the surfaces you can apply paint to give them a new lease of life. However, you must be prepared to know all the intricate procedures involved.
  • In this guide, we have tried to suggest a ton of ideas to help you out in choosing the best acrylic paint for plastic models regardless of your skill level.
  • Your main worry is to ensure that the type of paint you finally decide to use on your plastic is top-notch and that it is also budget-friendly.
  • Always go for acrylic paint that is meant for plastic materials. Below are key features to take into consideration when buying acrylic paints. Check them out.

Key Features To Consider When Buying Acrylic Paints

Mode of Application

Before you decide on the best acrylic paint to use, it would be better to understand the way and method you are going to use to apply our paint. This is a basic consideration because it will determine among other factors, the features you are going to look for in your preferred paint. There are those paints that are purely meant to be sprayed while others will require a paintbrush or a suitable roller to apply them.

The Primer

This factor forms part of the primary considerations when deciding on the best acrylic paint to buy. The initial activities of any paintwork involve the application of a suitable primer. Be sure to go for a paint that has a primer as an additive in your paint for better application.

Portability of the paint

Depending on the size of your plastic material, it would be better for you to consider choosing the container holding your paint appropriately. Go for light containers if you intend to do light paintwork and heavy cans if your paintwork is going to be based at home.

The durability of the paint

When you decide to paint your plastic models, your primary concern is to apply a bent that will stay for some time before you think of repainting. Be sure to go for high-quality paints if you intend for your plastic models to last much longer. You will know you have used quality paint if the paintwork is resistant to cracks and other environmental effects.

Quantity required

Again, as I mentioned earlier, the size of your painting project will determine the amount of paint you will buy. Do you calculate properly to ensure that the paint you buy will complete your entire painting project. have enough paint.

The color of the paint

Acrylic paints are multicolored so choosing your preferred color isn’t going to be much of a problem. Always go for a color that will not be affected greatly by environmental conditions upon drying

Drying Time

The time it takes for your acrylic paint to dry is a major factor that you shouldn’t ignore. Fortunately, from the information, we shared earlier. Our selection of the best paints for 2021 dries pretty fast compared to other paints.

Safety

Always go for pants that are safe to use and non-toxic. Our two best paints are non-toxic and safe to use by anybody. Be sure to buy paints that do not have a strong smell as this might affect your respiratory system.

Benefits of plastic Paint you should know

  • They dry faster for better results. You don’t want to spend most of your time drying the pain
  • Most acrylic paints that are meant for plastic have a primer additive so you don’t need to apply a primer.
  • They are pretty light. Plastic paints are light compared to other paints which is why you can work with them effortlessly.
  • Most acrylic paints for plastics are easy to clean especially when wet.
  • Acrylic paints for plastic models are generally strong and resistant to environmental effects such as cracking.

Important Tips to Note

  • Be sure to clean your plastic surface before applying your acrylic paint
  • Always let your acrylic paint dry properly for best results
  • Be sure to work in an environment where there is a free flow of air and much less humidity
  • Always buy quality paints if you want the best results with your paintwork
  • Be sure to mix your acrylic paint thoroughly before using it
  • Be sure to buy a product that is certified to avoid messing up your paintwork
  • Always use clean tools to apply our paint

Frequently Asked Questions (FAQs)

While carrying out this research, I came across lots of unanswered questions regarding this topic. Below, I have compiled a list of the questions with well-thought-out solutions. Check them out.

Question: Can you paint plastic models with acrylic?

Any painting project will require you to decide on which of the two paints (acrylic and oil/enamel)you will use. Acrylic paints work best on plastic surfaces, so your answer is acrylic paint due to its excellent properties.

Question: How can you prepare plastic models for painting?

Just like you would other painting projects, be sure to thoroughly clean your plastic surface before you begin your painting. Be sure to use a soapy solution to wash the surface of your plastic models.

Question: Is it possible to make acrylic paint stick to plastic?

The most ideal way to do things is to start by applying a suitable primer on your plastic surface before the actual application of your acrylic paint. Alternatively, you can use a base layer such as oil paint to get the same results.

Question: What can you use to seal acrylic paint on plastic?

Shop online for a suitable acrylic sealing substance. The acrylic sealer will not only give your paintwork a clean finish but will also offer additional protection to your paintwork. Be sure to use a spray for better results.

Question: Is it possible for chalk paint to stick to plastic?

No. Due to poor bonding properties, chalk paint doesn’t bond properly on plastic surfaces. However, certain procedures can be done to enhance its sticking properties. Such procedures might be a bit intricate so I would advise you to stick to acrylic paints.

Question: Is there a primer for plastic?

Acrylic paints have a primer additive in them so it is not necessary to buy one. But, some primers are meant for plastics which you may decide to use if you wish to.

Conclusion

Of the two points discussed in this article, I am of the view that Arteza Outdoor Acrylic Paint is the best option so far owing to its excellent features and wide range of applications. Even so, Liquitex BASICS 48 Tube Acrylic Paint is also a good bet but you need to spend extra coins.

How To Apply Glaze Over Paint? Detailed Instructions

How To Apply Glaze Over Paint

Do you like to apply glaze over your painting work? well, You don’t have to be a professional painter to figure out how to produce fine art through painting, This article will walk you through simple DIY steps to discover how to apply glaze over paint.

Introduction

First things first, what’s a glaze? Simply put, the glaze is a thin cloudy layer of art that changes the presence of the fundamental paint layer. Coatings can change the chroma, worth, and shade of a surface.

Coatings comprise a lot of binding mediums with about a modest quantity of shade. Drying time will rely upon the sum and sort of paint medium utilized in the coating. The carrier base is the mixture to which the parched shade is augmented. Unique tools can increase or curtail the rate at which oil colors dry.

Regularly, because the color is excessively hazy, professionals will add a medium such as an alkyd to the lacquer to make it more flexible for coating. While these media are generally fluids, there are strong and semi-strong media utilized in the creation of paints too. For instance, numerous traditional oil painters have additionally been known to utilize ground glass and semi-strong tars to build the clarity of their paint.

Preparing Your Painted Surface Properly

To get a great finish when applying glaze over paint, preparing your surface is key. Start by making sure your base coat is dry and cured, which can take several days depending on the paint type. A well-prepped surface helps the glaze stick and prevents peeling or bubbling later. Use fine-grit sandpaper to lightly scuff the surface, creating a texture for the glaze to adhere to without changing the color or finish of the original paint.

Next, clean off any dust from sanding with a damp cloth and let it dry completely. Some experts suggest applying primer where you want the glaze to have more depth or special effects; this helps the glaze stick and adds subtle sheen variations that enhance your project. Once you’ve done these steps, you can smoothly apply the glaze, which not only improves durability but also sparks creativity as you layer different textures and tones!

Steps To Follow When Applying Glaze over Paint

Step 1. The coating works best on half-shiny or rubber color textures. Level paints don’t take coats well, so stay away from the level paints! There is a wide range of coatings accessible that you can exploit, or you can blend your coatings. There should be in any event one layer of finish on a superficial level to be coated, and you will need to have your piece sanded so the coating can get into those regions and add definition and age.

Step 2. Apply the coating with a brush, roller, or cloth on the off chance that you are chipping away at seats or more modest household items with bunches of detail, it is ideal to utilize a brush/cloth for application to get into the entirety of the little hiding spots. The coating dries before long you need to work quickly! It is suggested that you work in 2-foot segments all at once.

The measure of coating medium you add to the paint can influence the shade of the coating. At the point when you’re utilizing lighter paint tones, a 4-to-1 combination won’t influence the estimation of the tone. In any case, hazier tones might be modified to lighter shading esteem when blended in with a lot of coats. It’s in every case best to try different things with the tone on a piece of banner board.

Step 3. When you have the coating rolled or brushed on, you have around 20 minutes to work that zone. The clarity of the coating is controlled by how much paint you add: more paint than coat brings about less clarity; less paint than coat brings about more clarity. It should be noted that the trick to a desired glaze is the texture of the surface. A much less shiny paint will lock the covering appropriately and permit an individual to control the coating and maintain the appearance of the paint.

How To Apply Glaze Over Paint 1

Step 4. When the main layer of coating is dry, you can return and rehash the application for a more profound impact; it is absolutely up to you concerning what look you are going for. Eventually, on the off potential for success that you have back and take a gander at your coating position and feel like you were a little substantial or lopsided in a specific region, mess with a sanding wipe and mix that zone.

It must be noted that you must increase your working pace since you have around  10 to 20 minutes of working with the coating before it dries out completely. You can accelerate the dry-up duration by adding a paint additive to the mixture. In light of the time requirements, it’s generally best to work in 2′ segments.

Step 5. Apply at any rate two layers of water-based poly to secure your surface. You might decide to do this contingent upon the piece you are coating, however, I strongly suggest fixing it if it will get heaps of mileage. Ensure that you use water-based polyurethane over water-based coatings and oil-based over oil coats for consistency. I generally use water-based items, yet simply needed to put that out there!

Simply recollect that there are no “botches,” just freedoms to learn and dominate new strategies! Mess around with it, and appreciate the glow and age that coating adds to your painted works of art.

Common Mistakes to Avoid When Glazing

One of the most frequent mistakes when glazing is not allowing the base paint to dry completely. Rushing this step can lead to a murky finish instead of the desired depth and richness. It’s essential to wait for at least 24 hours after painting before applying a glaze to ensure a clean, crisp application that won’t disturb your underlying work. Additionally, many forget to test their glaze mixtures on a scrap piece first, which can save you from potential disappointment on your final project.

Another common pitfall is using too much glaze or applying it unevenly. A heavy hand can result in overwhelming color saturation that obscures the beautiful layers beneath. Instead, apply thin coats and build up gradually. It’s far easier to add than to remove! Lastly, neglecting proper tools can drastically affect your results; using a soft brush or even a sponge for application ensures seamless blending without harsh lines. By being mindful of these factors, you’ll achieve a stunning finish that enhances rather than overshadows your work with ease.

Conclusion

Applying glaze over paint can transform a simple wall into a captivating visual masterpiece, but the key lies in understanding the nuances of this technique. Knowing when and how to apply your glaze can dramatically enhance depth and texture. For instance, using a transparent glaze not only allows the underlying paint to shine through but also creates an ethereal quality that ordinary paint cannot achieve on its own. The choice of color for your glaze can subtly alter the entire atmosphere of a room soft earth tones bring warmth, while cooler hues add a refreshing touch.

Consider experimenting with different application methods to discover what resonates best with your creative vision. Techniques like rag rolling or sponge painting invite variety and personality into your work, allowing every brushstroke to tell a unique story. Additionally, always remember that practice makes perfect; don’t shy away from testing on smaller surfaces before committing to larger areas. In essence, mastering the art of glazing isn’t just about following instructions, it’s about exploring possibilities and unleashing creativity within yourself. Embrace the process as it unfolds!

How To Paint A Phone Case?

How To Paint A Phone Case

A phone casing plays an essential role in protecting your device. This article highlights phone case painting ideas that work. Read on for more content.

Introduction: Overview of painting phone cases

Transforming your phone case into a unique piece is a fun way to show your personality. Start with a clear or light-colored case made of plastic or silicone, as these materials hold paint well. Before you start painting, sketch your design on paper to help you visualize the final look and try out colors without committing to the case.

When you’re ready to paint, use acrylic paints for their bright colors and quick drying time. Small brushes work best for detailed areas, and don’t hesitate to layer colors for depth! Once everything is dry, protect your artwork with a clear acrylic sealant for added durability and shine. Personal touches like glitter or decals can make your creation even better, so let your creativity flow! Embrace imperfections; they often make handmade items more special and uniquely yours.

Which Paint Is Suitable To Paint Your Phone Case?

One good thing about painting is that you can get creative with your painting by trying out different colors and selecting one that suits your needs. On that note, many ideas can help you get creative when painting your phone’s case to give it a brand-new look.

You have decided to paint your phone casing, and maybe, you don’t know which color is suitable for your phone cover. You don’t want to take any paint and apply it to your casing without knowing whether it will stick to the surface of the case. This article will suggest the most suitable color to use on your phone cover if you are still reading.

For DIY, you can use acrylic paint and a bright finish on your phone cover. Acrylic paint is recommended because it is brilliant, durable, and occurs in many metallic forms.

Use scotch tape, the right brush size, and a heat gun to make the paint dry properly. Simply put, to paint your phone case, all that you require is the phone cover and any shade of acrylic polish.

Another cheaper DIY option for acrylic paint is nail polish! Yes, you read it right; you can use nail polish to do a face-lift of your phone case with much ease.

Materials Needed for Painting

To paint a phone case, you’ll need a few basic materials and tools to ensure the paint adheres well and the design lasts. Here’s a list of essential materials:

How To Paint A Phone Case

1. Phone Case: Preferably a plain, clear, or light-colored case made from a smooth, paintable material like plastic, silicone, or TPU.

2. Paint

  • Acrylic Paint
  • Fabric Paint
  • Spray Paint
  • Posca Pens or Paint Markers
  • Clear Sealant Spray

3. Paint Brushes: Small detail brushes for intricate designs and a medium brush for larger areas.

4. Rubbing Alcohol: For cleaning the phone case before painting. It removes any dirt, oils, or residue that may prevent the paint from sticking.

5. Painter’s Tape: To mask off any areas you don’t want to be painted or to create clean lines.

6. Pencils or Stencils: For sketching your design onto the case before painting.

7. Paper Towels or Cloth: For cleaning brushes and wiping away any mistakes.

8. Gloves and a Well-Ventilated Area: Gloves to protect your hands from paint, and a well-ventilated area if you’re using spray paint or sealants.

Steps involved when painting your phone case

  • You need to select the most suitable color to apply to your phone case. Your preference will come into play when deciding on the final look of your phone cover. You want to restore your phone cover and give it a new look, so you should make your color choice properly to avoid any future regrets.
  • Like painting any piece of art, you need to clean your phone case adequately to remove any unwanted particles like grease that might interfere with the paint. You hold your phone in your hand all the time and explain why you should clean it properly. Use alcohol-based sanitizer to get rid of impurities on the surface of your phone case.
  • Since most phone covers are made of silicone or plastic, you should choose the most suitable primer to use on your phone case. You don’t want to paint your favorite color only to last a few days, which is why you should make your paint stick for a more extended period.
  • Capitalize on your creative abilities. Unleash your creative potential and come up with designs to paint on your phone case. You choose from a wide range of design ideas we discussed earlier or paint a plain color if you don’t want decoration on your phone cover. To make different designs on the surface, use tape to cover areas you don’t want to paint after applying a primer. You can create sketches of images if you want precise results.
  • After applying the primer, you can now begin painting the phone case using a paint sprayer. Ensure you hold the sprayer at a distance of about twenty centimeters to achieve a smooth finish on your phone cover.

 Advantages of Phone Case Painting

There are numerous advantages you can get by painting your phone case. Let us look at some of them:

  • If you do it yourself, you will realize that it is the cheapest way to restore the look of your phone case compared to buying a new casing. What is more, you can customize the phone case to suit your needs.
  • What better way to unleash your creativity than by painting and designing your phone cover? You are free to customize the designs based on your needs.
  • Since acrylic paint has suitable properties, using it will give you a satisfying experience painting your phone case. Acrylic paint is bright and occurs in desirable metallic forms to provide your phone cover with the refreshing look you desire.
  • On the positive side of things, you don’t need a supply of complex and expensive items to do the painting. You can use your finger polish to paint your phone cover. Cheap right?
  • You can make almost any paint design on a blank cover if you want to change the look of your mobile device.

Provided you unleash your creative potential, you can never exhaust ideas to paint your phone cover. You want to alter or restore the look of your gadget, and there is no better way to do it than to be more creative with your painting skills. You don’t want to paint your phone case in a dull, plain color; you might consider making drawings or even writing your name.

Drying and Curing Time: How long to wait before use

When painting a phone case, knowing the drying and curing times is important to keep your artwork safe. After the last stroke, let your work dry. Most paints need at least 24 hours to dry before you touch them. But that’s just the start. The curing process, where the paint hardens and sticks to the surface, can take from a few days to two weeks, depending on temperature and humidity.

Be patient! It might be tempting to show off your new phone case right away, but waiting for it to fully cure makes it more durable against daily use. Handle it gently during this time to avoid smudges or fingerprints on your design. After curing, consider adding a clear sealant for extra protection. This will enhance the colors and guard against scratches from everyday life. Remember, great art takes time; enjoy the wait as you look forward to showing off your custom piece!

Conclusion

In conclusion, painting your phone case is a fun way to show your personality and make a statement. Each brushstroke adds style to an everyday item, giving importance to something often overlooked. Your design choices, whether bright colors or detailed patterns, turn your device into a unique accessory.

This DIY project also helps you focus and be mindful. Painting can be calming, letting you enjoy the moment and the joy of creating. Don’t hesitate to try techniques like stenciling or marbling; you may find new interests. By taking the time to paint your phone case, you’re not just protecting your device but also creating a piece of art that reflects your story every day.

How To Protect Car Paint From Sun?

How To Protect Car Paint From Sun

Like humans, the exterior of your car is susceptible to the sun’s harmful rays, so this article will examine possible ways to protect Car paint from the sun.

Introduction: Importance of Protecting Car Paint

Car paint is more than just an aesthetic layer, it serves as the first line of defense against environmental hazards. Over time, exposure to UV rays, acid rain, and pollutants can degrade the finish, leading to unsightly fading and corrosion. The importance of protecting your car’s exterior goes beyond mere looks it directly impacts its resale value and prolongs its lifespan. By investing in protective measures today, you’re ensuring that your vehicle remains as striking tomorrow as it is now.

Steps to Protect Your Car Paint

When you purchase a new ride, you want it to last for quite some time before you can think of replacing it with a new one. The exterior of your car is much more likely to wear out compared to the interior.

How To Protect Car Paint From Sun

Step 1: Using Car Covers

The strong UV rays of the sun will, among other changes, alter the original color of your car. On that note, consider using car covers to shield your car from the sun’s rays.

Covering your car comes with many benefits; however, you need to understand how to cover your car properly to avoid causing more damage to the paint. Below are some of the considerations:

  • Be sure to cover your car when it is free from dumbness. The wetness might accelerate the unwanted growth of molds, damaging the paint on your car.
  • Ensure the fabric of your car cover has proper air spaces so you can use it in all conditions but be sure the cover is always dry whenever you are using it.
  • Remove the cover at specific periods within a week to prevent the build-up of moisture beneath the cover.

 Step 2: Using a Sun-proof Car Shade 

We all ignore the effect of exposing the car to the sun for longer periods. In places of work, car shades are erected at strategic points where you can park your vehicle. Consider spending a few bucks to purchase a car shade and set it up in your home.

Note that overexposing your car to the sun may cause the paint to tarnish and eventually peel off. Consider buying a recommended sun-proof car shade that will last much longer.

Step 3: Wash the Car Regularly

How many times per week do you wash your car?  The most effective way to protect your car paint and ensure it lasts longer is to develop a habit of washing your car regularly.

Be sure to adopt a proper way to clean dirt from your vehicle because if you leave dirt to sit on your vehicle for a while, it may contribute to the corrosion of paint on your car.

 Step 4: Dry the Exterior of your Car manually

If you are used to washing your car and allowing nature to dry it, then you might be in for a rude shock. Water sports that may not dry out naturally will accelerate rust on some parts of your car and eventually corrode the paint. Use a dry sponge to remove any spots on the surface of your car manually.

You may tend to wash your car and leave it to dry naturally in the sun. This is not precisely how to keep paint from fading in the sun. Although there are many ways to ensure you shield the exterior of your car from harmful UV rays, consider the hand-drying technique because you can concentrate your attention on every part of the surface of your car.

Step 5: Using Quality Wax on the exterior part  of your car

There are many waxes to choose from if you decide to wax your car. Nevertheless, be sure to buy high-quality wax for your car. You may want to get recommendations on the best car wax to use because you don’t want to buy counterfeit wax that will do more damage to the paint on your car.

If you apply high-quality wax on the surface of your car, you are assured of a wide range of your car’s exterior protection, including paint, for a longer period. Be sure to go for wax that is UV-proof for your car.

Step 6: Using a Paint Protection Film

Use a paint protection film on your works in the same way as when you apply a protective layer of paint on other surfaces like furniture. The protective film shields the surface of your car from scratches, heat, and, most importantly, the harmful ultraviolet rays of the sun.

Step 7: Application of a Clear Coat Protector

The clear coat protector works similarly to a paint film protector so that you can use them interchangeably. However, the clear coat improves the look of your car by making the vehicle shinier.

Note that this technique is one of the best approaches to protect your car paint from sun damage. Be sure to apply your clear coat all over the surface of your car for effective results.

Step 8: Using Vinyl Wrap on your car

Using polyvinyl chloride (PVC) plastic covers on your car is one of the surest ways to protect your car paint from the sun’s harmful Rays. PVC wraps act as a protective cover against external conditions such as Ultraviolet rays. Additionally, the vinyl cover shields the paint of your car from external scratches.

Step 9: Be sure to Park Your Car in the Shade at all times

In earlier sections of this article, we saw the importance of using car shades to protect your car paint from the sun. Note that you want the paint on your car to look fresh continuously, so it would be helpful to develop a habit of parking your car under the shade.

Be free to choose one of the techniques mentioned earlier to protect your Car paint from the harmful effects of the sun. Be sure to stick to your car paint protection routine to achieve the desired results.

Important Tips To Remember

  • Cover your car when it is free from dumbness. The wetness might accelerate the unwanted growth of molds, damaging the paint on your car.
  • Ensure the texture of your car cover has proper air spaces so you can use it in all conditions but be sure the cover is always dry whenever you are using it.
  • Uncover the cover at specific periods within a week to prevent the build-up of moisture beneath the cover
  • If you apply high-quality wax on the surface of your car, you are assured of a wide range of your car’s exterior protection, including paint, for a longer period. Be sure to go for wax that is UV-proof for your car. 

Conclusion: Keeping Your Car’s Shine Intact

To keep your car’s shine intact, proactive care is essential. Regular waxing not only enhances the gloss but also creates a protective barrier against harmful UV rays that can fade paint over time. Using high-quality waxes infused with UV protection should become part of your routine apply it every three months for the best results. Additionally, consider investing in a ceramic coating. This advanced treatment offers lasting protection and makes cleaning much easier by creating a hydrophobic surface that repels water and dirt.

Parking in shaded areas or using car covers are simple yet effective strategies to minimize sun exposure when you’re not driving. This not only helps protect your clear coat but also maintains that showroom-like appearance for longer periods. Furthermore, maintaining regular washes with pH-balanced soaps can prevent grit from settling on surfaces, which could otherwise lead to scratches and dullness over time. By adopting these measures, you ensure that your vehicle remains a head-turner on the road while safeguarding its value against environmental wear and tear.

Enjoy your ride!

How To Remove Overspray From Car?

How To Remove Overspray From Car

You can use several methods to remove any form of overspray on your car, and in this article, you will learn how to remove overspray from the car effortlessly.

 Introduction: Understanding Overspray on Cars

Overspray on cars can be a frustrating problem for any owner. It appears as an unwanted layer of paint or finish that sticks to the surface. This usually happens during nearby painting projects when the wind carries tiny droplets onto parked vehicles. It’s not just unsightly; if not dealt with quickly, overspray can cause lasting damage. Understanding this issue is important for anyone who cares about their car’s look and lifespan.

The good news is that overspray doesn’t have to ruin your vehicle. With the right tools and methods, removal can be easy. From clay bars to special solvents, there are many solutions for different levels of overspray. Using the right techniques not only restores your car’s shine but also helps you learn more about maintenance, turning you into a knowledgeable owner who cares for your vehicle’s appearance and condition. So, when you face this annoying issue, remember: it’s all part of mastering automotive care!

2 Sure Ways to Remove Overspray From the Car

Getting rid of overspray is not a walk in the park; you may need to learn a few tips and tricks on how to go about it. Because the overspray may be so stubborn to remove, it would be helpful to consider seeking advice from experienced persons. You don’t want to cause more damage to other parts of your car.

If you are a DIY person, you may opt to employ the tips discussed in this article because you don’t want to spend a fortune to remove overspray from your car. Continue reading to discover more content regarding the topic.

Method 1: Using a Clay Bar on Painted Surfaces

Step 1 – Acquire A Clay Bar: Clay bars produce excellent results when used to remove overspray from all manner of surfaces. Consider acquiring a suitable greasing substance to be used alongside your clay bar. If you can access a proper lubricant, consider using motor soap and clean water to do the job.

Step 2 – Prepare A Clean Surface On Your Clay: Be sure to use a clean clay bar for your project. Using a brand-new clay bar will do the trick. However, you can still reuse an old one; ensure that the clay bar is clean while using it on the overspray. It would be helpful to wring the clay bar until you achieve a clean surface before using it.

Note that you should consider storing your clay bar safely (preferably in a container) to shield it from dust particles and unwanted dirt. If you don’t keep it correctly, dust particles will most likely accumulate on Its surface, and they will harm your car’s surface on subsequent use.

Step 3 – Apply The Lubricant: It is always a good practice to prepare the surface before you start using your clay bar to get rid of overspray. Start by applying a significant amount of your lube on the surface. Ensure your car surface is greased correctly before moving to the subsequent stage.

 Step 4 – Knead The Clay Bar Over The Affected Areas: Apply your clay bar to the affected parts and work the overspray thoroughly. Note that you may feel a drag on the surface as you rub your clay bar on the stains, indicating that overspray is beginning to come off the surface. Continue working on the spots until you can no longer feel any friction between the two characters.

 Step 5 – Removing The Residue: Use a suitable cleaner, preferably a motor body cleaner, to remove any residue that might be present. Take a clean piece of towel to wipe the surface clean. Be sure to use a sprayer when applying your cleaner for effective results.

Step 6 – Doing Finishing: At this point, you may consider using a dry towel to do your final touches on your paintwork. Be sure to use a small textured towel to wipe your surface to achieve consistent results. It might help if you sprayed a little more of your cleaner at this stage.

Rub your cloth over the surface of your paintwork to achieve a smooth and consistent finish on your car. The longer you keep waiting, the more damage the overspray does to your paintwork.

Consider removing overwork from your vehicle while it is still fresh. Note that you can also use a scalpel to remove dried paint stains

Alternative Method: Getting Rid Of Overspray Using Alcohol

Step 1 – Add A Significant Amount Of Alcohol To The Overspray: You can remove the overspray of latex paint simply using a few drops of alcohol and a clean piece of cloth. Note that you will use an amount of alcohol that will complete the surface affected. Be sure to use even and consistent strokes when applying alcohol to the overspray.

 Step 2 – Allow The Alcohol To React With The Paint: Be sure to allow your drink a sufficient amount of time, preferably half a minute, to respond to the paint overspray before proceeding to the next step.

 Step 3 – Cleaning the alcohol: After ascertaining that the reaction has taken place successfully, take a clean towel and wipe over the overspray spots. At this point, the overspray should be able to come off quickly as you brush over the surface. It would be helpful for you to use a razor blade to remove sticky stains.

 Step 4 – Removing The Residue: Be sure to use suitable soap and water to eliminate any traces of paint and alcohol. Immerse a rag in a soapy solution and wash the affected areas on your car. Be sure to clean all traces of paint and alcohol before allowing the affected parts time to dry.

Step 5 – Applying A Lube And Doing Finishing: Be sure to make the surface as clean as possible by cleaning it thoroughly. It would be helpful to use a soapy solution to lubricate the affected parts before you can do any cleaning. Choose whatever approach is suitable for you when lubing the affected areas.

The longer you keep waiting, the more damage the overspray does to your paintwork. It would be helpful to remove overwork from your car while it is still fresh. Consider using a scalpel to remove dried paint stains.

Getting rid of overspray from your car doesn’t have to be a mind-boggling affair. If you are a do-it-yourself person, you can apply the steps highlighted above to remove any form of overspray from your car effortlessly. On that note, some stains may be difficult to deal with. In this case, you might want to seek the services of experienced personnel to help you out.

Clay bars and alcohol are the two commonly used substances when removing any form of paint overspray. However, there are many methods you can employ depending on the nature of overspray on your car. It is essential to get rid of any overspray on your vehicle as soon as you notice it.

How To Remove Overspray From Car

Preventing Future Overspray Issues

Preventing future overspray issues starts with a proactive approach to your painting environment. Whether you’re working in your garage or an outdoor space, ensure that the area is well-ventilated and protected from wind. Using tarps, drop cloths, or even specialized overspray barriers can create a physical shield between your project and surrounding surfaces. Also, consider the equipment you’re using; high-quality spray guns equipped with fine nozzles can minimize excess mist and help you maintain control over coverage areas.

Education is another powerful tool in preventing overspray mishaps. Familiarize yourself with various paint types and their specific application techniques some may produce more mist than others due to viscosity or chemical composition. For instance, opting for less volatile products can lead to reduced airborne particles while offering a smoother finish. Finally, don’t underestimate practice; honing your technique on scrap material before tackling the actual job not only builds skill but also helps you understand how much product is actually needed, reducing waste and accidents alike.

Conclusion: Restoring Your Car’s Finish

Restoring your car’s finish after overspray doesn’t have to be hard. One effective method is using clay bars, which lift contaminants gently without harming the paint. This not only removes overspray but also makes your vehicle look better by creating a smooth finish that reflects light well. Use high-quality wax or sealant afterward to keep the shine and protect against future damage.

If DIY methods don’t work, consider hiring professional detailing services. Skilled detailers have advanced tools and products that can remove overspray and restore faded finishes. Also, keep up with regular maintenance like frequent washes and protective coatings; these will help prevent overspray and maintain your car’s value. A little effort now ensures a great shine later!

How To Wash Walls With Flat Paint?

How To Wash Walls With Flat Paint

Flat paints tend to have a matte finish and they are most popular for their non-reflective properties, they are also easier to apply and it’s the least expensive choice you can choose from when it comes to painting. Flat paints provide great pastry-looking finishes and are famous for their aesthetic appeal and practical application. Flat paints are also great for bringing out beautiful designs or details and can be used to light up certain dark areas or spaces. Many people prefer flat paints because of their translucent and opaque finish which diminishes glares on surfaces they are used on.

To some, cleaning off a flat painted wall from stubborn dirt can be tricky. Cleaning a flat paint from dirt, stains or fingerprints can be challenging especially when the paint starts to come off with the tool you’re using, a rag, for example, to remove the dirt leaving the wall with a botched look. In this case, the wall may need to be repainted to cover imperfections which is not good if you’re on a budget.

However, some techniques can be used to prevent the botched look and unnecessary spending, and below we list a few:

What you’ll need:

  • Dish or laundry soap
  • Cloth or rags
  • 1 bucket
  • White vinegar
  • Eraser
  • Gloves
  • Water

5 Techniques For Cleaning Flat Paint Walls

How To Wash Walls With Flat Paint

1. Water and soap:

Water and soap are great methods to clean dirty spots off your wall without damaging the flat paint on your wall. It is also recommended to clean the wall immediately after any spill is made. To clean flat paint walls from dirt, pour some water into a bucket then add a few drops of liquid soap and stir to make a cleaning solution. Soak a sponge into the solution, and once soaked, squeeze out the excess water and rub the area with the dirt without adding pressure, until the dirt is no longer visible. Rinse the spot with clean water then pat with a towel to dry it, allow about 15 minutes or more for the area to completely dry. Use a fan if needed. Once dry, check the area once again to make sure all dirt was removed and if still notice any additional dirt in the area, repeat the same process once again.

2. Warm water and detergent:

Sometimes all you need is water to remove stains but if it doesn’t work, warm water and detergent should help. To begin, add some water into a bucket then add a few drops of dishwasher detergent to create a gentle solution. Note that you can also use laundry detergent to make a solution, use one spoon of detergent to a gallon of warm water and mix well. Soak a sponge or a cloth into the warm solution and squeeze out excess water, then start by gently rubbing the dirty area with the damp sponge or cloth without adding much pressure until the dirt is no longer visible, then allow it to dry. Once dry, check to make sure the area is clean from the dirt and repeat the process if the area still has some dirt left. It is also recommended to pat the wet area with a towel so that it may dry faster but make sure not to rub the area to not rub off the paint.

3. Eraser sponge:

Another recommended method is the eraser sponge. Soak the eraser in water and then squeeze out excess water. Start by cleaning the area with the dirt with a downstroke motion and sometimes with an up-and-down motion while adding a bit of pressure. Whilst cleaning, notice if any paint is being removed from the area you’re cleaning, if so, you may be doing it too hard. With this technique, the paint should remain intact. Clean until the dirt is no longer visible and allow up to 15 minutes for the area to dry. It may take longer depending on the environmental conditions. After theropod check the area to make sure all stains are removed. If still notice any dirt, follow the same method to remove it. This technique is great for cleaning walls and doors.

4. Water and vinegar:

For a more substantial cleaning, vinegar is a great recommendation, it is considered a natural eco-friendly cleaner that will not damage the walls and you may have some handy. Take one cup of vinegar, usually white vinegar, and mix it into half a bucket of warm water. Soak a clean cloth or a sponge into the solution and gently wipe off the dirt on the wall with an up-and-down stroke motion. Allow to dry for about 15 minutes or more, then double-check to see if all dirt was removed, if not, repeat the same process a second time or until the dirt is completely removed.

5. Wall cleaners:

Foam wall cleaners are another way to clean flat paint walls if you prefer a more industrial approach to cleaning the dirt off your flat paint walls. They are somewhat inexpensive and can be used instead of the household items you may have available like dish soap and rags, although many people would rather choose household items if they are on a budget. They come in spray bottles or wipes. They offer easy-to-spray and wipe-off methods and save you some time. It is recommended to follow the safety instructions available on the product when using chemical products.

Although flat paints are considered to be a bit difficult to clean, they can be accomplished with a gentle cleaning approach. It is recommended to clean flat-painted walls regularly. Cleaning flat-painted walls routinely will keep it looking fresh and bright and it’s a great way to protect the paint too. Use products that are mild enough to use on the walls and won’t damage the paint. As a safety tip, make sure electrical outlets are covered for safety reasons. Do not use anything abrasive or harsh chemicals as this may damage the wall by rubbing off the paint. We hope you find these tips helpful.

Drying the Walls Properly

When tackling the question of how to wash walls with flat paint, understanding the drying process is crucial for achieving optimal results. Flat finishes are notorious for their susceptibility to moisture, which can leave unsightly streaks when not dried properly. To facilitate a cleaner finish, consider using a damp microfiber cloth instead of soaking your walls with water. This method minimizes excess moisture while effectively removing dust and smudges.

After washing, allow your freshly cleaned walls ample time to dry ideally 24 hours if possible. Ensure the room is well-ventilated by opening windows or utilizing fans; this not only expedites drying but helps prevent mold growth that can easily thrive in damp environments. Remember to check humidity levels; higher humidity might require additional drying time or dehumidifiers for optimal conditions. By adopting these careful practices in wall maintenance, you’ll elevate the beauty of your space while ensuring long-lasting results without compromise.

Common Mistakes to Avoid When Washing

One of the most common mistakes when washing walls with flat paint is using too much water. Flat finishes are particularly absorbent, and excessive moisture can lead to streaks or even damage to the paint. Instead, opt for a damp cloth and a gentle cleaning solution suitable for your wall’s finish. This will ensure you’re effectively removing dirt without compromising the integrity of the paint.

Another frequent pitfall lies in neglecting to spot-test before diving into a full wash. Different areas in your home may react differently depending on lighting and wear; what works in one section might not translate well elsewhere. Take a few minutes to test your chosen cleaner on an inconspicuous spot first it could save you from costly touch-ups later. Lastly, don’t overlook drying techniques; using dry microfiber cloths aids in swift absorption, preventing unsightly marks while preserving the appearance of your flat-painted surfaces.

Conclusion: Maintaining Your Flat Painted Walls

Maintaining flat-painted walls requires a gentle touch and a mindful approach to cleaning. To wash walls with flat paint effectively, start by dusting surfaces with a microfiber cloth to remove any loose debris, which is crucial in preventing scratches during the washing process. When it comes time for deeper cleaning, opt for a solution of warm water mixed with a mild detergent; this combination effectively lifts stains without compromising the finish. Use a soft sponge or cloth and work in circular motions of this method reduces streaks and allows you to target specific areas without soaking the paint.

It’s also wise to conduct regular spot checks for scuffs and fingerprints before they set into the paint, early intervention can keep your walls looking fresh and vibrant longer. Keep your tools on hand; using an extendable duster or even a soft-bristle broom can easily reach higher spots while avoiding unnecessary pressure that could mar your flat finish. Lastly, remember that preventive measures like being mindful of touches near door frames or furniture can significantly enhance durability, it’s all about embracing those small habits that make your living space shine effortlessly!

Best Spray Paint For Spray Paint Art

Best Spray Paint For Spray Paint Art

If you happen to visit major streets, you will be greeted with a ton of street art. Join us as we discuss details about the best spray paint for spray paint art.

Spray paint is used to create many arts. One notable art is street painting commonly known as graffiti painting. These activities are commonly done by do-it-yourself artists. We gathered crucial information regarding this topic to help you understand it better.

With the advancement in technology, most artists are tuning to spray paints as a mode of creating graffiti art. Street painting involves a lot of processes that must be followed to the letter if you want to get the best results. In this article, we will examine the two best spray paints for spray paint art in the market. 

Who Needs This Product? 

If you have been trying to find the best spray paint for your street art, this article is for you. Whether you are starting as a beginner or an established painter, it would be best to learn a few tips about the products we will discuss in the subsequent sections.

“Readers may be interested in Best Spray Paint for wood.”

What Do Readers Will Learn?

Are you the kind of person who prefers to buy quality products? If that sounds like you, then you are in the right place; In this article, you will learn all there is to know about the best spray paint for spray paint art and a detailed guide to help you in your next painting project. 

Top 2 Best Spray Paint for Spray Paint Art

The problem of inadequate information among painters seems to be on the rise; this affects the quality of paintwork that is produced by both professional and amateur painters. With that in mind, you must understand what to look for in your preferred spray paint if you want to do quality work. Here is a list of the two best spray paints for spray paint art:

1. Montana BLACK 400ml Popular Colors Set of 12 Graffiti Street Art Mural Spray Paint: spray best for street art


Montana Black 400ml Popular Colors Set of 12 Graffiti Street Art Mural Spray Paint

Check Latest Price

Finding the best spray paint for spray paint art is not a walk in the park if you don’t have reliable information about the various brands in the market. That shouldn’t worry you because we were able to pick Montana BLACK 400ml Popular Colors Set of 12 Graffiti Street Art Mural Spray Paint just for you. This paint is UV resistant which allows you extra safety for your project. It is best for graffiti street art and mural works. This paint has excellent features to give you the kind of finish you desire. Here are its features:

Features

  • Montana BLACK 400ml spray Paint has excellent adhesive properties which enhance its sticking abilities.
  • It is multicolored paint.
  • It is balanced for easy shade and lighting effects.
  • It is a fast-drying paint.
  • It gives your paintwork a durable effect.
  • It has a variety of color choices for your project.

Pros

  • Montana BLACK 400ml spray Paint has a thick consistency for easy application.
  • It is easy to use.
  • It is pocket-friendly.
  • It is highly effective during winter.
  • This paint is perfect for multiple surfaces.

Cons

  • It is expensive.
  • It can be affected by clogging.

Reason to Buy

Finding the best spray paint for spray paint art is not a walk in the park if you don’t have reliable information about the various brands in the market. That shouldn’t worry you because we were able to pick Montana BLACK 400ml Popular Colors Set of 12 Graffiti Street Art Mural Spray Paint just for you. This paint has excellent features to give you the kind of finish you desire.

2. MTN Spray Paint Packs – Water-Based 100 Workshop 16 Pack


MTN Spray Paint Packs - Water Based 100 Workshop 16 Pack

Check Latest Price

Second, on our list is MTN Spray Paint Packs – Water Based 100 Workshop 16 Pack. This is one of the best-rated paints in the market because of its sought-after properties. This water-based workshop comes with 16 16-pack full-color sets, ready to use! It is excellent for use in any skill level or shape. The small can allow complete control, perfect for the small user. Let us examine its features and advantages.

Features

  • MTN Spray Paint Packs come with excellent chemical formulae to enhance their sticking features.
  • It contains the highest-intensity colors made with high-quality pigments.
  • Its usability is pretty straightforward.
  • It offers excellent durability once applied to the surface.
  • It has a low odor.

Pros

  • MTN Spray Paint Packsis non-toxic paint.
  • It is easy to use.
  • It is fairly priced to cater to your pocket needs.
  • It is not messy(can be cleaned with much ease).
  • This paint is suitable for use during the winter season.

Cons

  • It is affected by clogging.
  • It is expensive.

Reason to buy

The second on our list is MTN Spray Paint Packs – Water Based 100 Workshop 16 Pack. This is one of the best rates paints in the market due to its excellent properties, so you should consider buying it for your next painting project. When shopping for spray paint for your project, be sure to take into consideration the type of finish you are likely to get with your preferred paint. Again, depending on your preferences, you may want to check out the label of the can to know the kind of finish your paint will produce.

Top 2 Best Spray Paint for Spray Paint Art: Buying Guide & Factors to Consider when Buying Your Preferred Paint

Whenever you want to buy paint for your painting project, it is always a good idea to have a list of features you will be considering to make your purchase. However, this is not an easy task if you are green on matters to do with painting and this is where we come from. We have compiled a detailed guide to help you to make an informed buying decision. Check it out!

Factors to consider in your preferred spray paint

1) The surface to be painted

The nature of your surface will, to a larger extent, determine the type of paint you will choose for your project. It might help if you decide to go for spray paint that is meant for a specific surface. You might consider reading the usage directions to get more insight into the applicability of your paint.

2) The finish you want

When shopping for spray paint for your project, be sure to take into consideration the type of finish you are likely to get with your preferred paint. Again, depending on your preferences, you may want to check out the label of the can to know the kind of finish your paint will produce.

3) The paint should be durable

Your primary focus, whenever you decide to paint a given art, is to use a pretty long-lasting paint. You don’t want to apply spray paint that will last a couple of days and then start coming off the surface. Most paints have different techniques of application. The method you choose to apply to your preferred paint will depend on many factors such as the thickness of your paint. Below, highlight crucial tips you should know regarding spray paint art.

4) Amount of drying time

Working with spray paint is a bit tricky; Since you want your piece of art to dry faster, it would be best to use a versatile paint for better results.

5) Consumer reviews

Before you make any purchase, it would be better to consider doing a little research to find out what previous users think about the product. Consumer ratings of a product will help you to decide appropriately.

6)  Ability to stand the heat

The best spray paint should be able to withstand high-temperature conditions. So when buying your preferred paint, be sure to go for a product that has excellent resistance to the effects of heat if you intend to attain the desired levels of quality. You can enhance the heat resistance properties of your paint by applying suitable coating on your painted surfaces.

Spray Paint Art tips you should know.

Most paints have different techniques of application. The method you choose to apply to your preferred paint will depend on many factors such as the thickness of your paint. Below, highlight crucial tips you should know regarding spray paint art.

.

  • Be sure to mix your paint properly before you start your painting to get the best results.
  • Spray paint is pretty versatile, so it would be better if you consider working on your art quickly to get consistent results.
  • Ensure you have all the required supplies as they may come in handy during the painting exercise. It would be helpful to keep old rags and magazines close to help in wiping any overspray.
  • Always remember to carry out a patch test to determine the number of sprays you will apply to get the desired shade on your project. Begin with a light coat of paint before adding subsequent coats.
  • Note that street painting is an art and you should learn all the necessary information to understand it better.
  • Be sure to read all the usage instructions if there are any before applying your first coat. Be sure to have all the pigment colors you need to use because spray paint dries quickly.
  • Always remember to carry out a patch test to determine the number of sprays you will apply to get the desired shade on your project. Start by applying a thin layer of your paint before adding subsequent coats.
  • Note that street painting is an art and you should learn all the necessary information to understand it better.
  • Be sure to read all the usage instructions if there are any before applying your first coat. Make sure you have all the colors you need to use because spray paint dries quickly.
  • Always remember to carry out a patch test to determine the number of sprays you will apply to get the desired shade on your project. Start by applying a thin layer of your paint before adding subsequent coats.
  • Note that street painting is an art and you should learn all the necessary information to understand it better. Be sure to read all the usage instructions if there are any before applying your first coat. Make sure you have all the colors you need to use because spray paint dries quickly.

Frequently Asked Questions

Every form of painting has its challenges and spray paint is no exception. Below, we will discuss a well-analyzed list of the most frequently asked questions in this niche of painting so that you can get more insight into the topic. We capitalized on expert views and recommendations to drive the answers we have provided. Please read through the questions carefully to understand our discussion.

Question: What is the possibility of spray paint sticking on a metal surface?

Answer: Spray paint has excellent bonding properties when applied on a metal surface. However, you need to prepare your metal surface properly if you intend to get the desired results. Prepare your metal surface by sanding it to achieve a smooth surface to enhance the adhesive properties of your paint.

Question: Why do street painters prefer spray paint to other paints?

Answer: Spray paint is pretty versatile, which makes it a good choice for use in graffiti painting. Additionally, with spray paint, you can unleash your painting abilities with much ease.

Question: Which method can you use to do spray painting on art?

Answer: All paint types use pretty much the same method of application. However, spray paint requires you to have a proper mastery of the necessary skills to help you achieve a good finish.

Conclusion

From our discussion, we were able to note that spray painting can be a bit challenging if you are not well-versed in the intricacies involved. It is, therefore, a good idea to consider learning a few tips and tricks to be able to understand how to go about it. If you apply the information we shared in this article, you will master the art of street painting and be able to choose the best spray paint for spray paint art.

Note that street painting is an art and you should learn all the necessary information to understand it better. Be sure to read all the usage instructions if there are any before applying your first coat. Make sure you have all the colors you need to use because spray paint dries quickly.