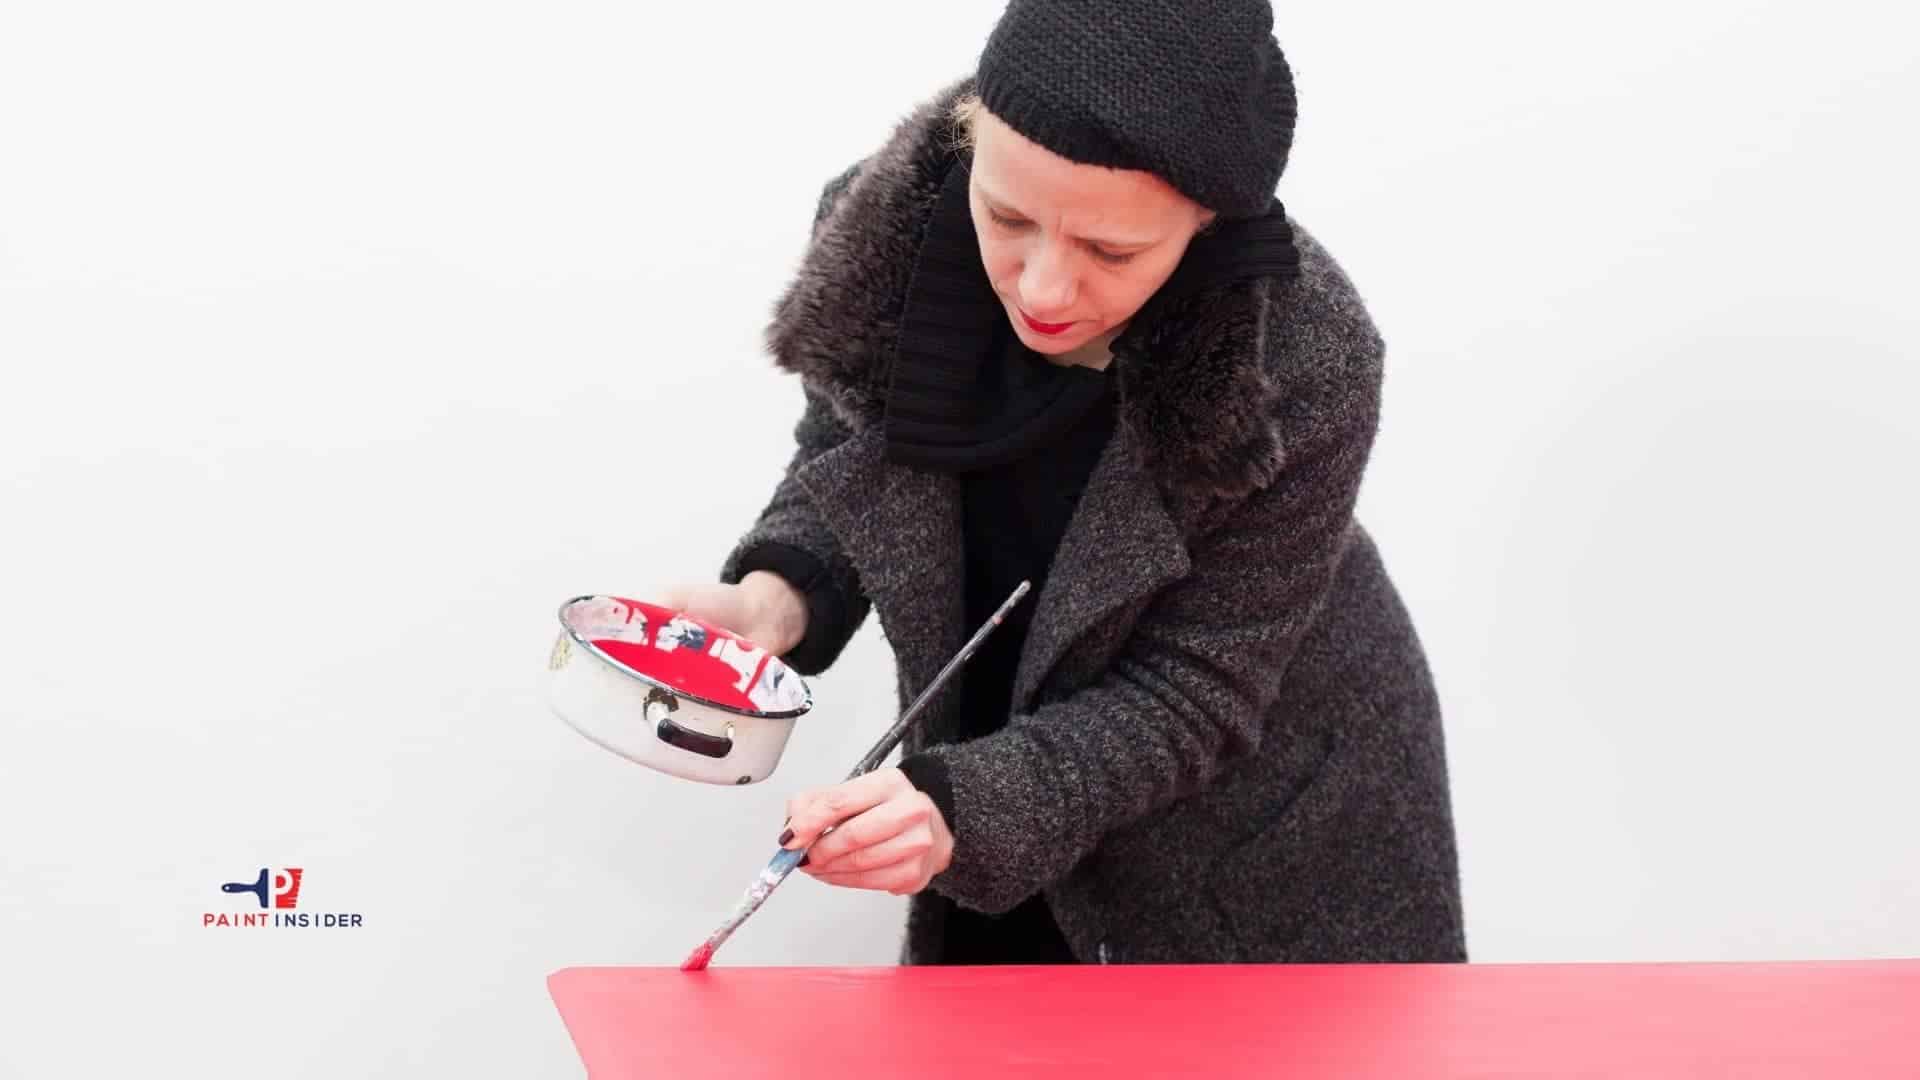
How To Paint Cedar?

How To Paint Cedar

You might have heard of the multiple benefits of cedar woods, so you may want to know how to protect them, in this segment, we will share some tips and tricks on how to paint cedar woods.

Introduction:

Cedarwoods are popular for their multiple uses, its aromatic qualities have allowed it to become a favorite of many, as it can be used to treat many different ailments and also, can be found in multiple beauty products. Cedar trees are available in various shapes and forms, and many varieties of cedar wood are used for different purposes. For example, if you’re planning on creating outdoor structures then you may want to choose a type of cedar wood that is resistant to the different environmental conditions. In the end, cedar woods last long and are easy to take care of.

When it comes to choosing water vs oil-based paint, you may encounter mixed opinions about this.

  • Cedarwood cleaner
  • Water / Brush
  • Stain paint
  • Regular Paint
  • Sandpaper /Rag

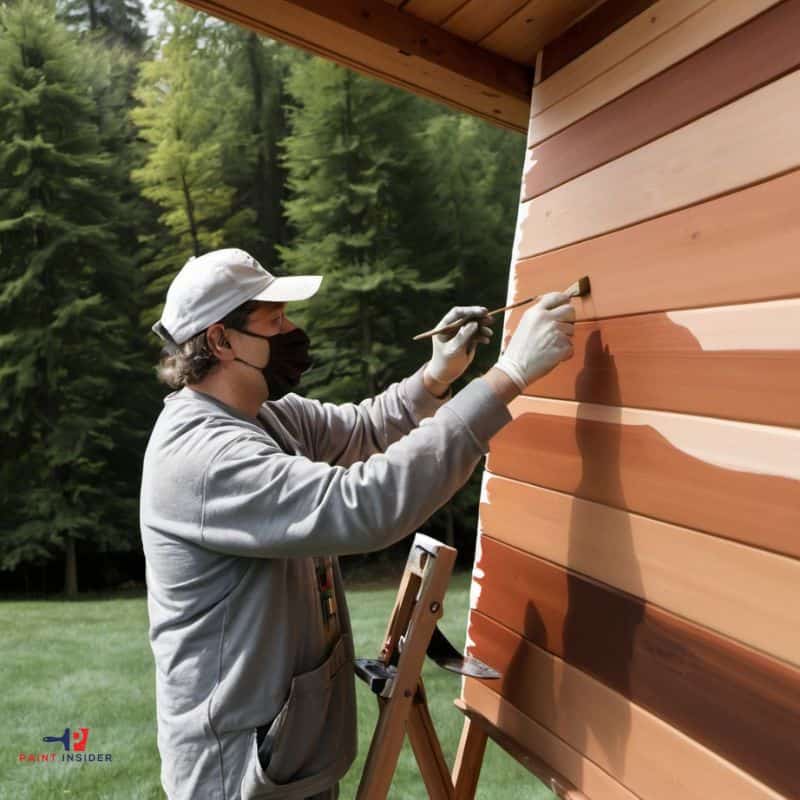
The painting process when it comes to cedar woods is similar whether you painting large or small objects, although it may take some time to complete so make sure you have some time available when painting cedar woods. Below are steps you can follow to paint your cedar woods

Preparing the Cedar Surface for Painting

  • Preparing your cedar surface for painting is a vital step that can make all the difference in achieving a smooth, long-lasting finish. Start by ensuring the wood is clean and free of contaminants such as dirt and grease. A simple mixture of mild soap and water can work wonders; just scrub gently to avoid damaging the grain. Once you’ve washed away any residue, dry thoroughly cedar tends to retain moisture longer than other woods.
  • Next comes sanding, which not only creates a better surface for paint adhesion but also reveals the beautiful character of the cedar. Use medium-grit sandpaper followed by fine grit for an ultra-smooth feel; this process allows you to eliminate rough patches while enhancing the rich texture inherent in cedar wood. Don’t forget to remove dust with a tack cloth before painting this small detail prevents imperfections that could mar your final look.
  • Lastly, consider applying a primer specifically formulated for cedar or exterior woods, it acts as both a barrier against tannins and a foundation that promotes paint durability. By taking these careful preparatory steps, you’re setting yourself up for painting success! Remember, patience during preparation will reward you with stunning results that highlight cedar’s natural beauty while ensuring your project stands the test of time.

Choosing the Right Type of Paint

When it comes to painting cedar, the choice of paint can significantly influence both the aesthetic and durability of your project. One option that often gets overlooked is using high-quality outdoor acrylic latex paint. This type not only adheres well to the natural oils in cedar but also allows for the wood to breathe, preventing moisture build-up which can lead to warping or peeling. Moreover, consider opting for a saturating oil-based stain if you desire a more natural look that enhances the wood grain while still providing protection against UV rays.

In addition to selecting the right paint type, don’t underestimate the impact of preparation on your final outcome. Thoroughly clean and sand your cedar surfaces before applying any product this ensures even application and longer-lasting results. Using a primer specifically designed for wood can further enhance adhesion and color fidelity, especially if you’re transitioning from a darker shade or treating previously unpainted cedar. Ultimately, understanding how these elements come together will not only transform your space but will also keep your beautiful cedar looking pristine for years ahead.

Essential Tools and Materials Needed

When diving into the enchanting world of painting cedar, having the right tools and materials is essential for achieving that flawless finish.

Here are the essential tools and materials you’ll need for painting cedar:

Tools:

  1. Paintbrushes – High-quality, natural, or synthetic bristle brushes for detailed work and edges.
  2. Paint Roller – A roller with a ¾-inch nap for smooth and efficient application on cedar surfaces.
  3. Paint Sprayer (optional) – For fast and even coverage, especially on large or rough cedar surfaces.
  4. Sandpaper (120-150 grit) – To sand the cedar surface for smoothness and better paint adhesion.
  5. Drop Cloths or Plastic Sheets – To protect the ground and surrounding areas from paint splatters.
  6. Painter’s Tape – For masking off areas you don’t want painting, such as windows or trim.
  7. Ladder – If you’re painting a high or vertical cedar surface, like siding or fencing.
  8. Stir Sticks – To thoroughly mix the paint before and during application.
  9. Bucket – For mixing or holding water/cleaning solution.

Materials:

  1. Exterior Primer – A high-quality primer designed for wood surfaces, especially one with mildew resistance for cedar.
  2. Exterior Paint – A 100% acrylic latex or oil-based paint, which works well on cedar and is weather-resistant.
  3. Wood Filler – To fill any gaps, cracks, or holes in the cedar surface before painting.
  4. Wood Cleaner – A solution to clean dirt, mildew, and grime from the cedar before painting.
  5. Caulk – For sealing any gaps or seams between cedar boards to prevent moisture infiltration.
  6. Paint Tray and Liners – For holding paint while using brushes or rollers.

These tools and materials will help ensure that your cedar surface is properly prepared and painted for a durable, beautiful finish.
How To Paint Cedar

Techniques for Applying Paint Evenly

When painting cedar, achieving an even finish is crucial to showcase its natural beauty. Start by investing in high-quality paint and tools; a good brush or roller can make all the difference in how evenly the paint spreads. Before you dip your brush, consider lightly sanding the surface of the cedar. This not only helps with adhesion but also creates a smoother canvas, allowing your paint to glide on effortlessly.

Using a technique called wet-on-wet can enhance your painting experience and help prevent unsightly streaks. Instead of letting each coat dry completely before applying another, work in sections and apply fresh paint over areas that are still wet. This allows for smooth blending and reduces watermarks or uneven patches. Additionally, be mindful of lighting painting in direct sunlight can cause the paint to dry too quickly, leading to lap marks. Working during cooler parts of the day or utilizing shade will give you more working time and result in a beautiful, uniform application on your cherished cedar surfaces.

Common Mistakes to Avoid When Painting

One of the most common mistakes when painting cedar is neglecting proper preparation. Cedarwood, known for its natural oils and tannins, requires thorough cleaning and sanding to ensure paint adheres properly. If you skip this step, you’re likely to end up with peeling paint or uneven coverage down the line. Take the time to remove dirt and grime with a gentle wash, followed by light sanding to create a smooth surface that allows your chosen paint to bind effectively.

Another pitfall involves using the wrong type of paint. Many assume that any exterior paint will work on cedar, but choosing a high-quality, specially formulated siding or deck paint can make all the difference in durability and appearance. Additionally, consider applying a primer designed for cedar, this not only helps block stains from bleeding through but also enhances color vibrancy and longevity. By investing in the right products from the start, you’ll be able to enjoy your beautifully painted surfaces longer without costly touch-ups or repeated applications.

Caring for Painted Cedar Surfaces

Caring for painted cedar surfaces goes beyond mere maintenance, it’s about preserving the natural beauty and longevity of this unique wood. When it comes to painted cedar, selecting the right paint is crucial. Opt for high-quality exterior water-based or acrylic paints that allow the wood to breathe while providing a durable layer against moisture and UV damage. Remember, even the best paint can only do its job if applied correctly ensure your surface is clean, dry, and properly primed beforehand.

As seasons change, lend extra attention to your painted cedar by inspecting it for peeling or fading every six months. A simple touch-up can often rejuvenate tired areas without requiring a full repaint. Don’t forget about sealing! Applying a clear protective sealant every couple of years enhances durability while illuminating the underlying grain patterns of the cedar, creating an attractive visual contrast with the paint. By nurturing your painted cedar surfaces with these thoughtful steps, you’ll not only enhance their aesthetics but also ensure they stand strong against time’s relentless passage.

Conclusion: Enjoying Your Beautifully Painted Cedar

After putting in the effort to paint your cedar, take a moment to truly appreciate the transformation. The vibrant colors will not only enhance the beauty of your outdoor space but also create a warm and inviting atmosphere that you, your family, and your guests can enjoy for years to come. Picture hosting summer barbecues or cozy evenings on the patio, surrounded by stunning woodwork that reflects your personal style.

Maintaining and enjoying your beautifully painted cedar is an ongoing journey. Regular touch-ups and protective coats ensure it remains a centerpiece of joy rather than a chore, making each glance at its rich hues a reminder of your creativity and dedication. Consider incorporating plants or outdoor decor that complement the color scheme these small touches can elevate the overall aesthetic even further. So grab a cup of coffee or tea, sit back in your favorite spot, and bask in the satisfaction of having turned ordinary cedar into an extraordinary showcase!

How To Paint A Sugar Skull?

How To Paint A Sugar Skull

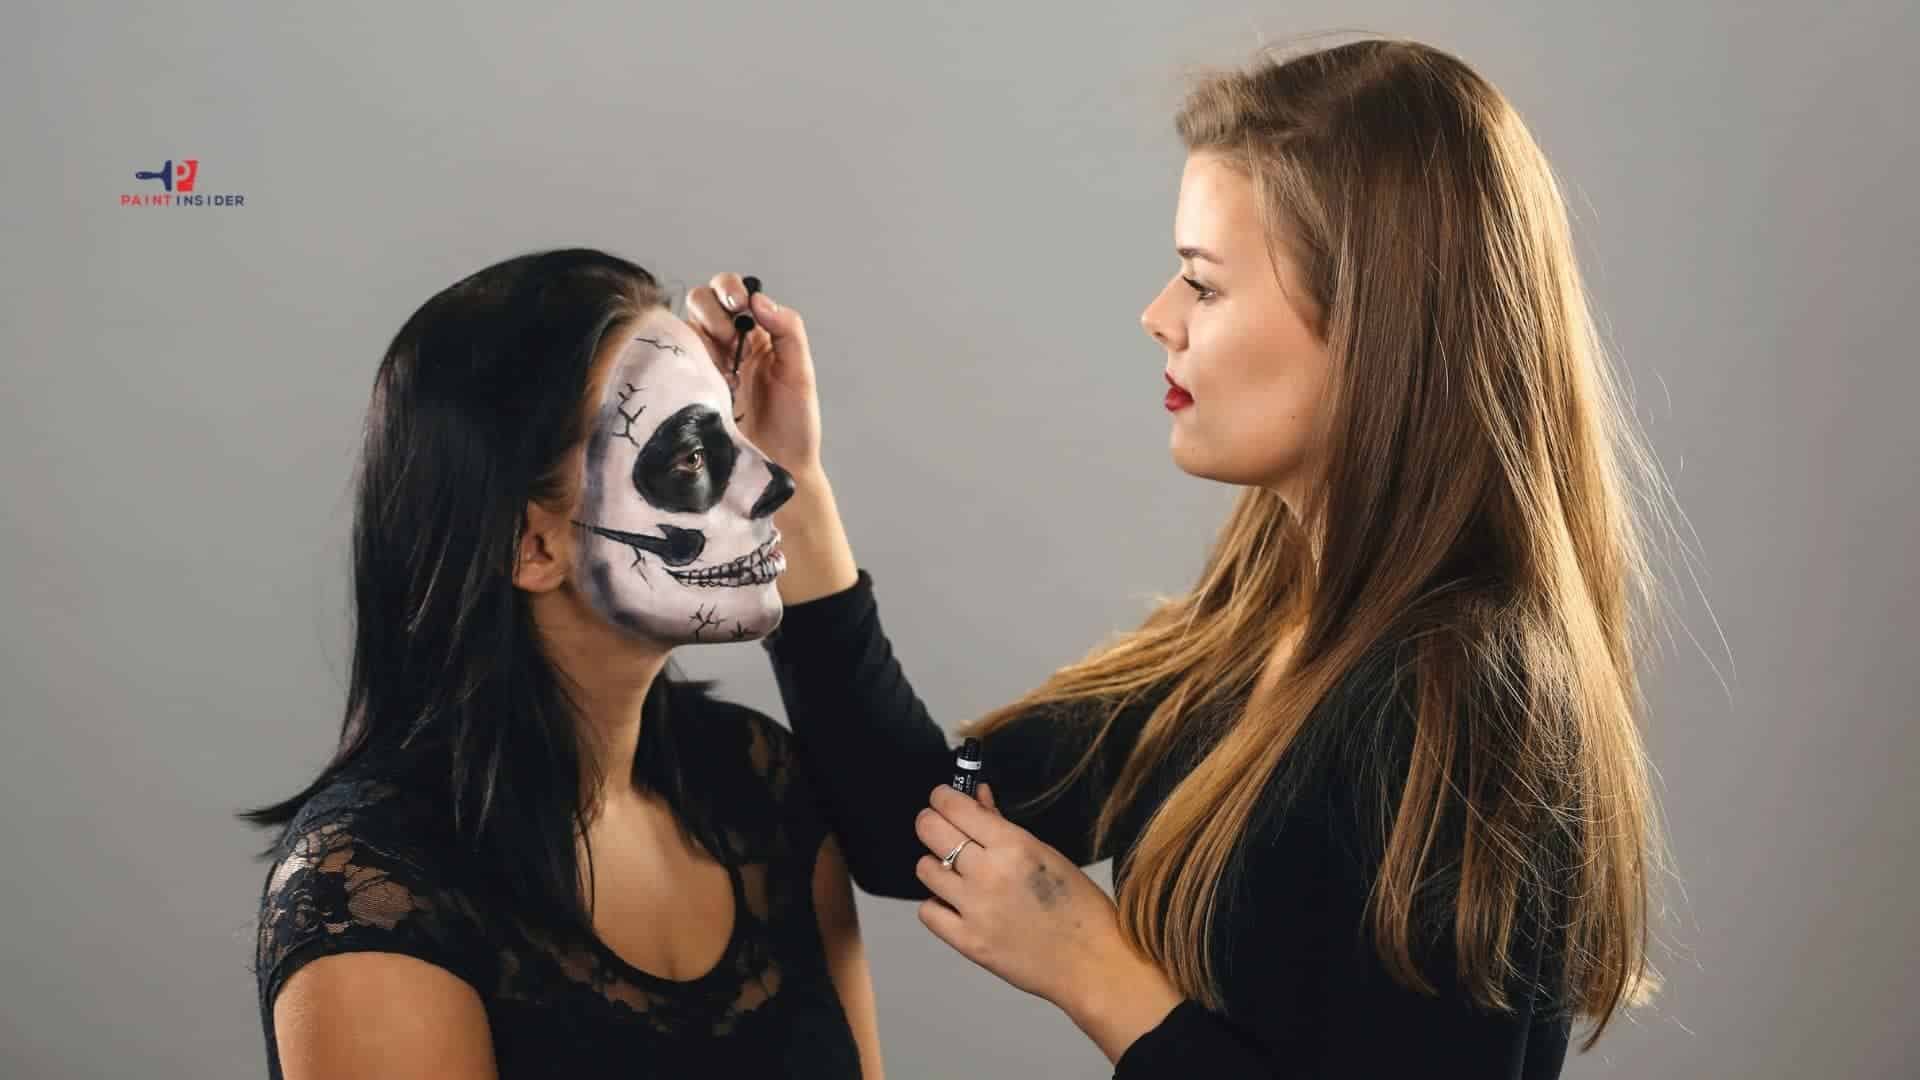
Sugar skulls are allowing you to get really creative when it comes to painting. Here, we will share some tips on how to paint a sugar skull.

Sugar skulls are an imitation of a human skull and actually known as a Mexican tradition used during a holiday called “Día de Los Muertos” or the day of the dead. The sugar skulls are the actual offerings offered during this holiday and the size of the skull represents a child or an adult. They are called sugar skulls because traditionally they have been made from sugar and other ingredients, but nowadays, they can also be made from other materials such as clays. Sugar skulls can be molded by hand or by using a skull mold and once completely dried, you can begin the painting process.

Things you’ll need to paint and decorate your Sugar Skull:

  • Royal Icing
  • Food Coloring
  • Acrylic Paints
  • Small Brushes
  • Mod Podge

There a so many colors and details that can be added to a sugar skull but traditionally the colors on a sugar skull have specific meanings, whether you add these colors are not, is optional and based on your style, so below we list some steps on how you can easily paint a sugar skull.

Step 1. Choosing the base paint for your sugar skull

The type of color you choose will be based on the type of material used to create the sugar skull, as different types of materials require different types of paintings. As mentioned before, sugar skulls can be made from different types of materials such as clay, plastic, concrete, so in this case, this post will focus on the most popular type of sugar skulls people prefer.

Sugar skulls made from Sugar: This sugar skull is considered very popular and very easy to make. The sugar is molded into a skull using a front head and a back head mold and then allowed 24 hours to dry. Once it’s dry, it is then sealed together with royal icing to form the skull, and once applied, it takes around 1 hour to dry, and once dry, you’ll be able to decorate or paint it.

Before painting the sugar skull, you’ll first need to create the colors using royal icing. Once the royal icing is made, it is then separated into small portions and mixed with different food colorings you’ve chosen to be applied onto the sugar skull. Use these colors to decorate the sugar skull, piping different colors unto it and getting as creative as you want. Different types of decorative items can be added such as feathers, beads, sequins, and glitter. Once the royal icing colors are applied, it can take from 7-8 hours for it to dry.

Although sugar skulls are considered unhealthy and made for decorative purposes only, they can be edible although it is not recommended, so if you are planning on eating them, make sure to remove all non-edible items before consuming.

Sugar skulls made from plastic: These sugar skulls are also very popular, they can be found at your local arts and crafts store together with any other item you may need to complete this process such as flowers and paints, and are considered to be inexpensive. You can actually paint the skulls in the color of your choice, and then get creative by adding different details.

Different types of paint can be used when painting plastic sugar skulls. Neon acrylic paints are a favorite as it allows the skulls to glow in the dark. In this case, if you would like to skip the sanding and priming process when painting your skull then a recommended paint you can consider is the white dixie belle paint. This paint will provide your skull with a chalk-white basecoat which will make your topcoat colors really stand out. When using white dixie belle paint, it is recommended to add 2 coats of the paint, allowing around 20 minutes in between coats for the paint to dry. Make sure you stir the paint well.

Note that spray paints can also be used, if you consider this option to be easier, adding 2-3 coats of paint and allowing around 10 minutes for the paint to dry will also help you achieve a great finish look for your sugar skull. Make sure you shake the spray paint well, that you’re in a well-ventilated area and that you’re using protective gear.

Step 2. Styling your sugar skull with different colors

Once the paint on the sugar skull is dry which can take a couple of hours, you can then proceed with adding details onto it. Use a pencil to draw out different types of designs onto the skull such as flowers, swirls, and different types of embellishment, add patterns and different shapes until you’re satisfied, you can definitely check sugar skulls designs online also, to have an idea of what to add to your sugar skull and get really creative.

Use acrylic paints to outline the drawing marks with a small brush, using different types of color as you go, normally the black color is used to outline most of the designs then different colors are used to fill them in. Although acrylic paints are the most used method to paint sugar skulls, other types of paint can also be used such as sharpies and neon puffy paints. Once the paint is added it can take about 30 minutes for it dry.

Step 3. Sealing your sugar skull designs

Your sugar skulls paint can definitely be sealed so that the paint may last longer. They are many sealants that can be used, in this case, you can choose to spray the sealant onto your sugar skull for a faster application then leave it overnight for it dry.

Another favorite sealer used by many sugar skull fanatics is Mod Podge. The sealer looks whites when first applied but then dries to a shone clear coat adding some gloss to your sugar skull. You can also choose to add some glitter to the mod podge before applying it so your sugar skull may dry with a glittery coat. We hope you find these tips helpful.

How To Paint A Ping Pong Table?

How To Paint A Ping Pong Table

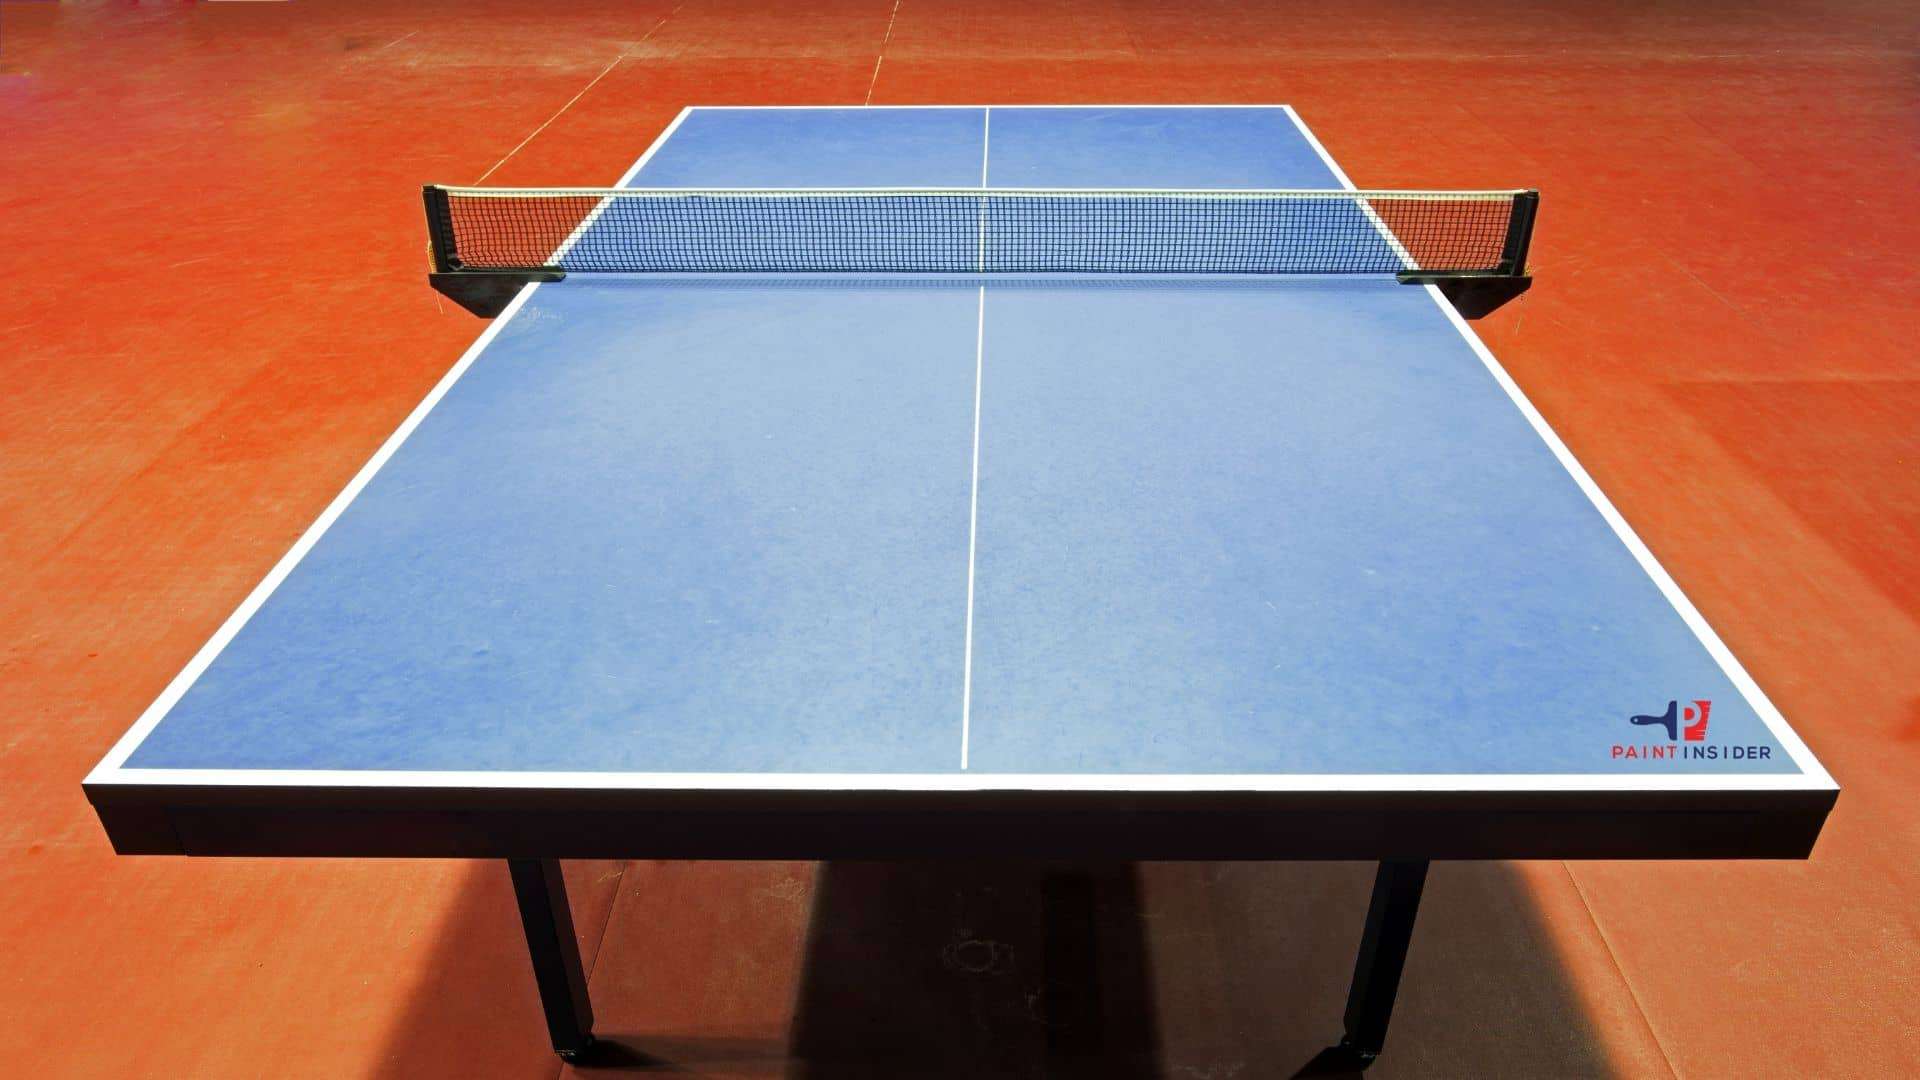
You can never exhaust ideas on how to paint a ping pong table. The article will try to uncover a suitable method on how to paint a pong table. Keep reading for more content.

9 Effective Steps to Paint Your Ping Pong Table

Regardless of whether you are a professional painter or an amateur, your main aim is to make sure that you produce the best paintwork as possibly as you can. Having the necessary supplies at your disposal does not necessarily mean you can perfectly paint on any piece of art. This is the reason why this article will walk you through a step-by-step guide on how to apply paint to your ping pong table with much ease. Highlighted below are the steps to follow.

Supplies Needed

  • Green/Blue and white alkyd, or chalkboard paint
  • Suitable paint brushes
  • Painters tape

 Step 1 – Gather the required Supplies

Any painting project requires you to have the right supplies at your disposal to achieve the painting results you want. Be sure to have essential supplies during the earlier stages of your painting project, like a suitable primer and paint. Another must-have tool is the painter’s tape to mask a specific area on your ping pong table when applying paint.

 Step 2 – Prepare your table for painting

Cleaning will form part of the most crucial part of your preparation exercise. Be sure to do a few repairs on your table if necessary. You can choose from a variety of products to conceal damaged parts of your table. Ensure the table is smooth and ready for paint application. It would be helpful to sand your table for a more nuanced and smooth texture.

 Step 3 – Cleaning your Ping Pong Table

After sanding your table, you can now use a suitable cleaning agent to eliminate dust particles that might hamper your painting exercise. Ensure you clean every part of your table. Be sure to clean every corner of your table before embarking on your paint application.

 Step 4 – Applying the primer

Like you would other painting projects, it is crucial to apply a suitable primer to enhance the bonding properties of your paint on your ping pong table. Be sure to use an even and thick coat of your primer for best results.

 Step 5 – Mask the lines on your Ping Pong Table

Your painter’s tape will come in handy to help you conceal specific lines on your ping pong table. Be sure to mask all the cables properly before applying the first coat of your paint.

Note that you will have to make the line bolder with color after you are done painting, so be cautious when applying paint to the other parts.

Ensure the primer is fully dry before applying your paint for better bonding properties between your color and the table.

 Step 6 – Applying the First Coat

Having gone through the most critical stages, here comes an equally important step, applying the first layer of paint on your table. Apply the first coat just as any piece of painting would let dry before adding a subsequent layer. Note that a maximum of two layers can give you the results you want. Allow each layer to dry before applying a subsequent one.

 Step 7 – Applying Paint on The Lines of Your Table

As mentioned somewhere in this article, you will apply suitable paint on the lines you covered earlier to make them more bold and visible. Ensure the color you applied earlier has adequately dried before taking off your tape. It must be remembered that you are supposed to apply paint on the strips using your hand, so a lot of care is needed on your part.

Step 8 – Remove your Masking Tape

We stated earlier that a lot of care is required on your part when removing the tape to avoid damaging your paintwork. Apply your white paint on the lines after carefully taking off the tape

Consider applying paint on the lines with much caution to avoid any damage. Rushing through the painting process will only give you regrettable results. None of us wanted to redo the whole exercise due to a mistake that could have been avoided. Be sure to use a suitable paintbrush for better results.

 Step 9 – Allowing your paint to dry

Once you are sure that you have followed the above steps to the letter, you can place your ping pong table in a suitable place and allow the paint to dry properly before using it.

Examine your table for any painting flaws and rectify them before the paint dries completely. You can always go over the whole exercise as many times as possible to attain the best standards possible.

 Tips To Keep In Mind

  • Masking tape/painter’s tape is a must-have tool before you embark on your painting project because you will use it to conceal the white stripes on your table.
  • Examine your table for any paint flaws and rectify them immediately before the paint dries out. You want nothing but a professionally painted ping pong table.
  • Always go through any instructions regarding the usage of your supplies before you begin your painting exercise; this way, you will minimize the occurrence of possible mistakes while painting your table. Reading instructions is also a great way to understand critical information about the most appropriate paint used on your ping pong table.
  • Ensure you study the initial coats properly on your ping pong table before applying fresh paint, and this is one way of avoiding substandard paintwork.
  • Always select the best paints for use on your ping pong table. It might help you seek professionals’ services before you erroneously apply any color to your table. Alternatively, you can pay a professional artist to do the work for you.

Applying paint on a ping pong table requires you to have more than the correct supplies. Strive to learn a few tips and tricks regarding this topic coupled with the information in this article, and within a short while, you will master the art of painting a ping pong table like a pro.

How To Paint A Hat?

How To Paint A Hat

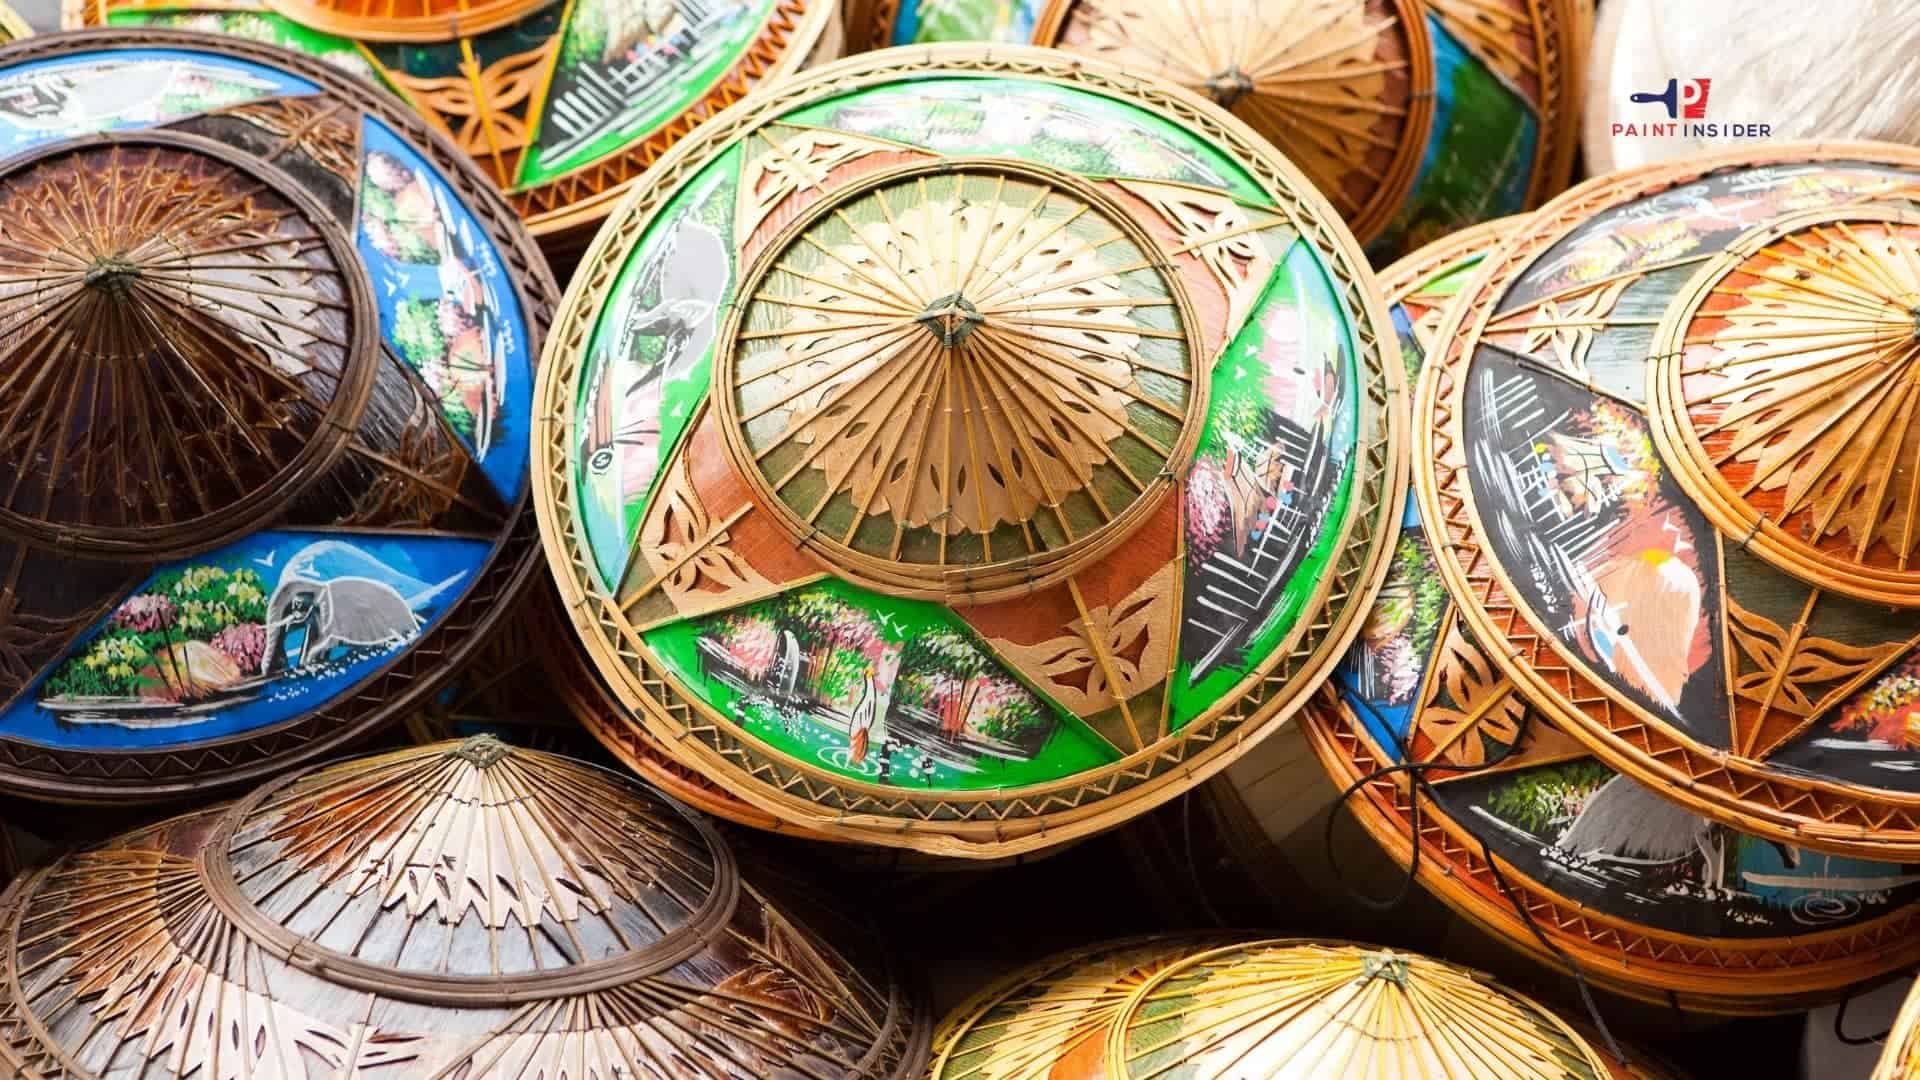
A few touches of paint on your hat is a  fulfilling venture. However, it would help if you learned a few tricks on how to paint a hat before you embark on your project.

3 Sure Methods To Paint A Hat

Although painting a hat is not much of an engaging exercise, learning a few tips and tricks might come in handy whenever you want to paint your hat. It would help you consider the nature of your hat’s material when deciding on the most suitable paint to use.

The fabric of your hat will determine the type of paint you will use. Note that you might want to do a few decorations on your hat, so be sure to select the perfect color for your project.

As always, carry out a simple patch test on your hat to determine the viability of your paint. Other factors that will likely influence your paint choice include the paint’s density of color and viscosity.

Supplies Needed

  • A suitable  hat
  • A bowl for mixing your fabric paint
  • Acrylic paints to blend with your fabric paint
  • The correct sizes of paint brushes
  • Dropcloth/old magazines
  • Painter’s tape/Stencils (you can improvise)
  • A suitable material to cover your workspace.

 1. Achieving a Perfect Look With a fabric Paint

If painting hats is your hobby, you may realize that the ease with which paint sits on a given material is entirely different. Smooth textured fabric will accept your fabric paint much easier compared to rough-textured fabrics.

It would be helpful for you to mix your fabric paint with other paints of your choice to enhance its adhesive properties. Be sure to go through usage instructions to be sure to paint your hat.

2. Dimensional Fabric Paint

Dimensional fabric paint has a wide range of uses, such as decorating household items, adding touches to jewelry, implements, and event decorations. Note that this type of paint has excellent sticking properties, which is why it is applicable on many surfaces, including hats.

Allow your first layer of paint to dry out properly (about twenty minutes ) before applying a subsequent layer. Depending on the consistency of your color, you might want to add another coat of paint or do finishes where you feel you didn’t paint properly.

One good thing about dimensional fabric paints is that you can bypass the preparation stage. Be sure to use the right paint brushes when using dimensional fabric paints.

3. Using Spray-Paint to Paint Your Hat

Painting your hat using this method involves making different patterns on the surface of your hat. Devise ways to create designs on your hat, and you may consider using painter’s tape to create patterns of your choice. When you are sure that all areas you don’t want to paint are adequately covered, start spraying your painting on the hat.

Because spray paint may fill your workspace with toxic paint fumes, it would be helpful to carry out your painting exercise in the open where there is free air circulation. You might consider opening your windows if you decide to do your painting exercise in an enclosed room.

As a rule of thumb, be sure to put on your protective gear to avoid damaging your respiratory system. You might want to use fabric-based paints if you want desirable results.

Select the most suitable paintbrush to apply your fast layer of paint. Be sure to paint all edges and corners of your hat. To avoid smearing paint on your fingers, it would be helpful to put on gloves. Alternatively, you can suspend your hat using your middle finger as you apply the paint.

Deciding on a Suitable Hat to Paint

Yes, you are right. Whenever you want to paint a hat, it is essential to choose the best because not all caps you lay your hands on will give you desired results. Again, if you have been painting for a long time, this will not sound surprising.

Consider selecting hats with smooth textured fabrics. The hat you decide to use for your project should be free from any form of dirt. Remember, dirt does not augur well with any paint.

Essential Tips to Keep in Mind

  • Always flip your hat in an upside-down position for proper paint application. Placing your hat in the correct position will help you to avoid being messy.
  • Squeeze a significant amount of paint onto your workspace to serve as your initial layer if need be.
  • Select the most suitable paintbrush to apply your fast layer of paint. Be sure to paint all edges and corners of your hat.
  • To avoid smearing paint on your fingers, it would be helpful to put on gloves. Alternatively, you can suspend your hat using your middle finger as you apply the paint.
  • Allow your first layer of paint to dry out properly (about twenty minutes ) before applying a subsequent layer.
  • Depending on the consistency of your paint, you might want to add another coat of paint or do finishes where you feel you didn’t paint properly.
  • You can use stencils or a printer’s tape to create patterns and designs of your choice.
  • At your heresy, you may decide to add more layers for excellent results
  • Allow your created patterns maximum time to dry before you can start wearing your stunningly painted hat.
  • The fabric of your hat will determine the type of paint you will use. Note that you might want to do a few decorations on your hat, so be sure to select the perfect color for your project.
  • It would help you consider the nature of your hat’s material when deciding on the most suitable paint to use.

By now, you should be able to appreciate the many advantages of any form of painting. On that note, consider learning all the necessary tips to enable you to perfect the art of painting. Factors that will likely influence your paint choice include the paint’s density of color and viscosity. Try to learn all information about hat painting if you want excellent results. If you follow the tips discussed in this article, you will be able to paint your hat with much ease.

How To Get Chalk Paint Off?

How To Get Chalk Paint Off

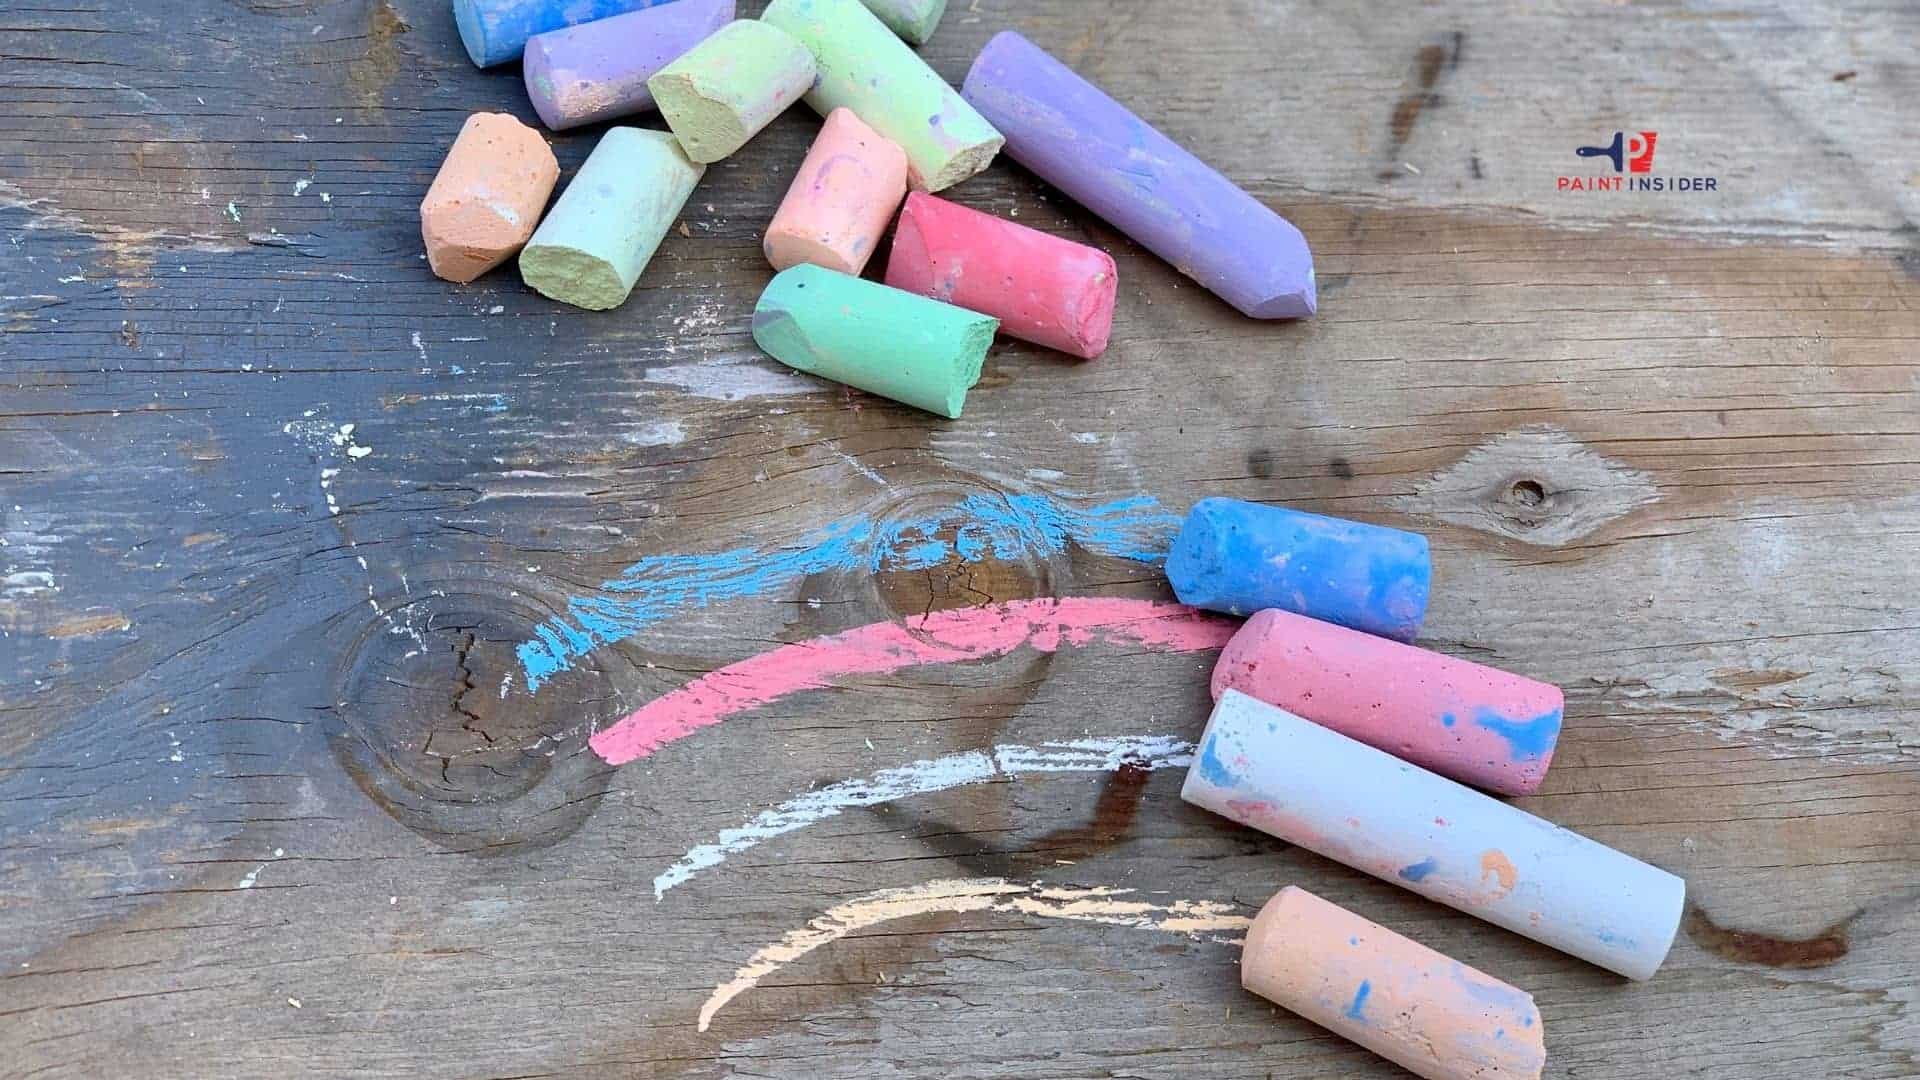
Getting rid of chalk paint is quite a challenge; It is essential to consume all the available knowledge on how to get chalk to paint off any surface effortlessly.

Detailed Steps On How To Get Chalk Paint Off

Doing away with chalk paint will depend on many factors; One such factor is the nature of the surface where the original chalk paint is applied. With that in mind, there are many methods you can use to get chalk paint on any surface quickly. We will examine some of the suitable ways you can use to get the best results.

Supplies Needed To Remove Chalk Paint

  • Sponge
  • Water
  • Sander
  • Suitable Sandpaper
  • Spirit
  • Steel filings
  • Container
  • Rug
  • Suitable Oil
  • Wax

 Removing Chalk Paint From A Wall

One surface where you will likely try to remove chalk paint is on a wall surface. If you follow the laid down steps, you will undoubtedly do a clean job. Below we have possible steps to follow whenever you want to remove chalk paint from a wall.

 Step 1: Cleaning Your Wall

Like you would prepare any surface, be sure to wash your wall thoroughly. Ensure you have enough water because you don’t want to leave any form of dirt on the wall. Let your wall dry properly before jumping onto subsequent steps.

 Step 2: Using a Sandpaper

Be sure to pick the correct sandpaper for use on your wall; medium-grained sandpaper will do the work perfectly. Your aim at this point is to remove as much chalk paint from the wall as possible through sanding, so be sure to do your sanding when the wall is completely dry.

 Step 3:Wiping Your Wall

Use a clean piece of towel to clean the surface of your wall thoroughly. Make sure to get rid of all debris and dust particles from the wall surface.

 Step 4: Applying A Suitable Primer

In this case, an oil-based primer will work best for you. Be sure to spray up to two layers of your primer and then let it dry before going to the next step.

 Step 5: Applying Paint (Optional)

As stated earlier, you can choose to proceed with your project and paint it if necessary. Follow all the steps applicable when applying paint on a wall.

 Getting Rid of Chalk Paint from a Glass

  • The procedure you will apply here is no different from the one described earlier. However, be sure to clean your glass surface with a warm and soapy solution.
  • Immerse a towel in your soapy solution and wipe over the surface of your walls to remove any greasy stains and dust particles.
  • It would help for you to go over the above step more than once for better results.
  • Use a chisel or a flat-edged tool to scoop the chalk ( a  scalpel will be a better choice at this point). Be gentle when digging the paint stains to avoid creating scratches on your glass surface.
  • Finally, wipe your gall using a clean and damp cloth before allowing it to dry.

 Removing Chalk Paint from Wood

The following three methods can be used to remove chalk paint from a wood surface. Please go through them to get detailed information.

 1. Using Stripping Method

  • Use a suitable paint stripping substance to get rid of chalk paint. Add a significant amount into a  bucket.
  • After applying the stripper, allow it to sit on Chalk paint for a moment before moving to the next step. Be sure to go through usage instructions to avoid doing messy work.
  • Take a scooper to dig up the chalk paint from the wood surface. Be careful with your scooping tool because you don’t want to scratch your wood surface.
  • In case of sticky paint stains, apply another coat of your stripper and let it dissolve the chalk paint.

 2. Using the Heat Gun

  • Direct your heat gun to the paintwork while maintaining a safe distance between the surface and the frame to avoid damaging your wood surface.
  • Be sure to work on the entire surface where you want Chalk paint removed
  • As you heat the chalk paint, it would be helpful to keep removing the already melted paint.

3.Using Sanding Method

Sanding is the most suitable method to work on most projects involving paint removal. Follow these tips  to get a glimpse of how to remove chalk paint through sanding:

  • As always, be sure to clean your wood surface using soap and warm water and then allow it to dry.
  • Use coarse-grained sandpaper to get rid of thick layers of chalk paint. Do your final sanding using fine-grained sandpaper for a smooth finish.
  • Use a damp cloth  to clean your wood  surface.

 How does the Paint Stripper work on Chalk Paint?

The following are the point to keep in mind whenever you are using your stripper to get rid of chalk paint:

  • Use a significant amount of your stripper on Chalk paint
  • Allow your stripper to dissolve the chalk paint properly before proceeding
  • Use a knife or a flat-edged tool to remove the paint stains from your surface.

 Getting Rid of Chalk paint Employing Home Based Products

  • Vinegar comes in handy in this case. Heat your vinegar over a gentle heat and apply it to chalk paint
  • It would be helpful to use sodium carbonate(baking soda) in place of vinegar
  • Wash your surface using soap and water.
  • Another invaluable product you can use is acetone.

 Sanding the surface

Use fine-grained sandpaper on the surface of your paintwork to remove chalk paint. Follow the following tips when sanding off chalk paint from your furniture.

  • Use soapy water to clean your given surface and allow it enough time to dry.
  • Consider using a mix of both large and small-grained sandpaper on your paintwork for better results.
  • Always be sure to clean the sanded surface using a clean and damp towel.

While applying chalk paint on a given surface brings about many gratifications, its removal is not easy. Depending on the nature of your surface, you can easily remove chalk paint with much ease, provided you follow the correct procedure to the letter.

How To Paint A Beer Pong Table Like A Pro?

How to Paint a Beer Pong Table

There’s nothing like a good game of beer pong to get the party started. But if you’re looking to take your game to the next level, painting your beer pong table might just be the way to go. With a few simple steps, you can turn that plain old table into a work of art – and make your opponents green with envy. So what are you waiting for? Read on to learn how to paint a beer pong table like a pro!

Steps you need to follow to paint Beer Pong Table are:

  1. Gather Supplies
  2. Tape Off The Edges
  3. Prime The Table
  4. Applying your first coat
  5. Applying  paint to the concealed parts
  6. Removing your masking tape
  7. Let It Dry

Supplies Needed

  • Be sure to have an alkyd color or chalkboard paint
  • Paintbrushes
  • Painters tape/suitable masking tape

Gather your supplies in readiness for painting

The common understanding is that any painting project will require you to have your supplies and tools ready for your project. Set up your working space and assemble everything you need before you start your painting project. Most of this project will require you to use masking tape because there are parts that you are not going to paint.

Tape Off The Edges of A Beer Pong Table

At the time of painting, always Tape Off The Edges of A Beer Pong Table to prevent paint from getting on the other side of the table. Also, it is very important to use the right kind of Tape. painter’s tape is the best choice because it is made to not damage surfaces and to come off cleanly. Also, be sure that before you Tape Off The Edges of A Beer Pong Table, you clean the surface really well. This will help the Tape adhere better and also help to avoid any paint bleeding under the Tape. When you are finished painting, carefully remove the tape and enjoy your new paint job!

 Applying a primer to your table

  • Like you would other painting projects, it is significant to apply a suitable primer to improve the sticking properties of your paint on your beer pong table.
  • Be sure to use an even and heavy coat of your primer for promising outcomes.

Applying your first coat

  • Apply the first coat just as any piece of painting would let dry before adding a subsequent layer. Note that a maximum of two layers can give you the results you want.
  • Allow each layer to dry before applying a subsequent one.

Applying  paint to the concealed parts

  • As indicated somewhere in this article, you will apply suitable paint on specific parts you covered earlier to make them more bold and visible.
  • Ensure the color you applied earlier has satisfactorily dried before taking off your tape.

Removing your masking tape

  • We stated earlier that a lot of care is required on your part when removing the tape to avoid damaging your paintwork.
  • Apply your white paint on the  taped parts after carefully taking off your painter’s tape
  • Be sure to use a suitable paintbrush for better results.
  • It would be helpful to be a little more cautious when applying paint on taped parts of your beer pong table because you want to minimize any damage to your paintwork.
  • Rushing through the painting process will only give you regrettable results.
  • None of us wants to redo the whole exercise due to a mistake that you can easily avoid. Be sure to use a suitable paintbrush for better results.

Allow your paint to dry

  • Once you are sure that you have followed the above steps to the letter, you can now place your beer pong table in a suitable place and allow the paint to dry properly before using it.
  • Examine your table for any painting flaws and rectify them before the paint dries completely. Then, of course, you can always go over the whole exercise as many times as possible to attain the best standards possible.

 Important Tips to note

  • Masking tape/painter’s tape is a must-have tool before you embark on your painting project because you will use it to conceal certain parts on your beer pong table.
  • Examine your table for any paint flaws and rectify them immediately before the paint dries out. Of course, you want nothing but a professionally painted beer pong table.
  • Always read all the instructions regarding the usage of your supplies before you begin your painting exercise; this way, you will minimize the occurrence of possible mistakes while painting your table.
  • Reading instructions is also a great way to understand critical information of the most appropriate paint use on your beer pong table.
  • Ensure you study the initial coats properly on your beer pong table before applying fresh paint, and this is one way of avoiding substandard paintwork.
  • Always select the best paints for use on your beer pong table. It might help you seek professionals’ service before you erroneously apply any color to your table.
  • Alternatively, you can pay a professional artist to do the work for you.

what types of paint is perfect To Paint A Beer Pong Table?

When choosing paint for a beer pong table, it is important to select a type that will be durable and easy to clean. Latex paint is a good option because it is resistant to water and staining. However, oil-based paints may provide more durability. If you are planning to use the table outdoors, be sure to choose paint that can withstand the elements. For added protection, you may want to apply a clear sealant after painting. When applying the paint, be sure to use several thin coats rather than one thick coat. This will help prevent drips and runs. Allow each coat of paint to dry completely before applying the next.

When it is a painting question, you may realize that some projects are quite demanding and engaging. On that note, applying paint on a beer pong table requires you to have more than the correct supplies.

It would be better to learn a few tips and tricks regarding this topic coupled with the information in this article, and within a short while, you will master the art of painting a beer pong table like a pro.

How To Heat Set Fabric Paint?

How To Heat Set Fabric Paint

Fabric painting can be such a fulfilling experience, so if you want to learn how to heat set fabric paint effortlessly, this article is specifically for you.

4 Methods to Heat Set Fabric Paint

The advantage of any form of painting is that each has specific methods and procedures that should be followed to get the results you want. When heat setting fabric paint, there are four particular methods to use, as discussed below.

1.Heat set Your Fabric Paint Using  an Oven

If you are wondering, you can use your oven to achieve a lot apart from preserving your dishes. Place your piece of garment in an already heated oven to preheat the fabric paint.

Be sure to use the required temperature range to avoid damaging your fabric paint. Let your piece of cloth sit in the oven for up to fifteen minutes before removing it.

2.Heat Set Your Fabric Paint Using a Clothes Dryer

Using a clothes dryer is much simpler; place your garment in the dryer. Be sure to set the temperature range to the maximum for effective results. For better results, leave your garment in the dryer for up to sixty minutes before taking it out.

3. Heat Set Your Fabric Paint Using A Printer’s Dryer

If you feel that accessing other sophisticated machines, then a printer’s dryer might come in handy. In this case, you need to set a temperature range of about 300 to 350 degrees.

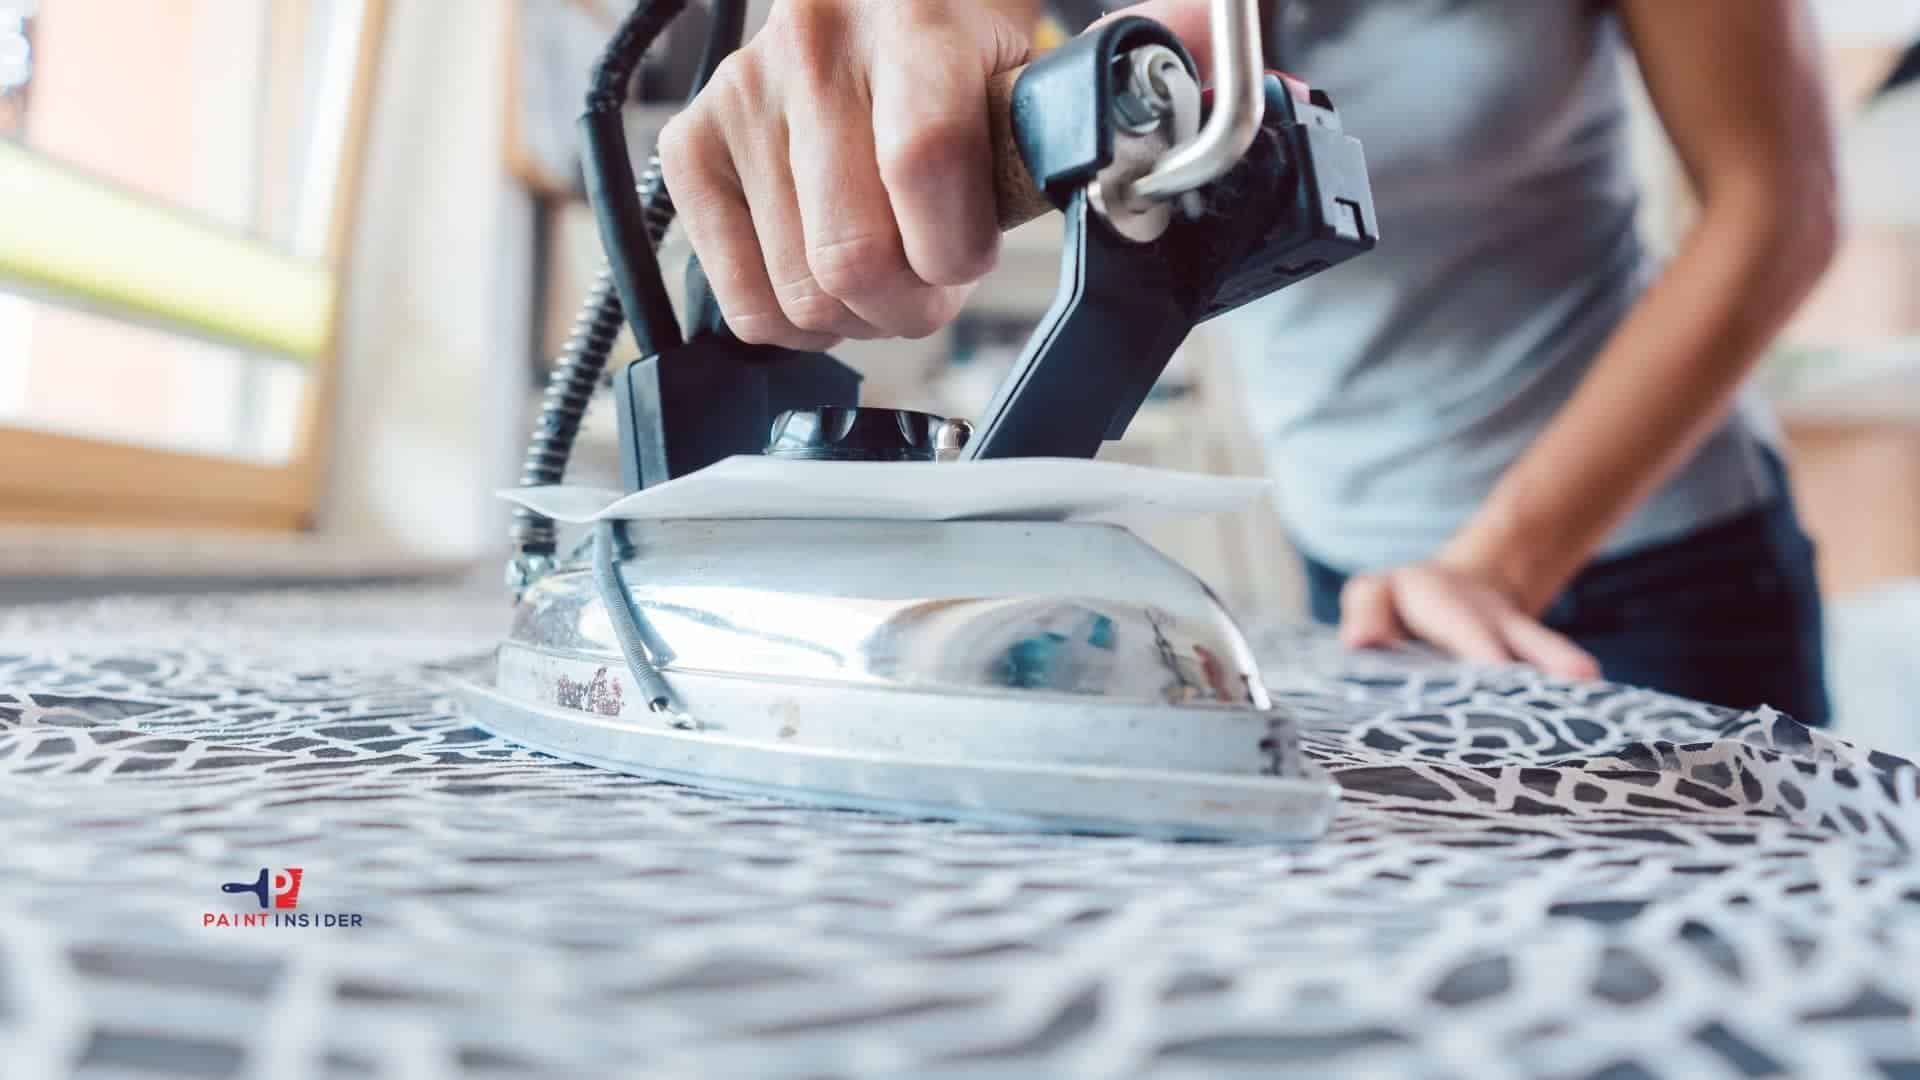
4. Apply Heat Press to Your Fabric Paint Using Iron Box

Having looked at three of the four methods, we will now concentrate on the last method involving iron. Go through the following sections for more content.

You have ironed your clothes in the past, and you will realize that the heat setting your fabric paint is no different. The only exception is that you Will let your iron box sit on your fabric a little longer.

Be sure to iron at least two more times on your fabric paint for effective results Because you want the fabric paint to stay on your garment for quite a while, and it would be helpful to keep ironing it for as long as you want but be cautious enough not to damage your garment.

Modern iron boxes come with a knob to enable you to set a temperature range of your choice. Be sure you know the type of fabric you are using for your painting project because each material requires a specific temperature for efficient results. You might consider ironing your fabric paint several times for the color to stick correctly.

Ensure you prevent the painting from coming into contact with the iron box using a suitable cloth. You want to do professional paintwork, so be sure to take all the necessary precautions. Note that if the iron box is left to touch the paint, the resultant effect is a burnt garment or, at the worst, ink transfer.

Modern iron boxes allow you to use steam when ironing your clothes. However, you will not need any steam on your fabric paint so, be sure not to squeeze that steam button. Consider the possibility of not using steam when ironing your fabric paint.

Although it might be a bit of a challenge, try to iron over your fabric paint a bit faster because you want an evenly ironed surface, this will also ensure that your paint dries simultaneously.

Possibility of Damaging your Iron Box

If you rush your project without following the laid down procedures, you will likely damage your iron. Ensure your fabric paint has sufficient time to dry appropriately before ironing. Note that wet paint may stick beneath your iron, thereby damaging it.

In a case where you have applied a heavy coating of fabric paint, you might consider allowing it up to a maximum of 24 hours drying time. Always read usage instructions on the can label to ensure the duration required for your fabric paint to dry. You might also feel the color to confirm whether it had dried.

Types of Fabric Paint to Use

With the many options of fabric paint to choose from, be sure you understand the nature of your garment. Each type of fabric paint can only give desired results if it is used on a suitable material. The list below highlights standard fabric paints.

  • Spray based
  • Puffy
  • Mark based
  • Brush based
  • Bead based

 Important Tips to Note

  • After applying your fabric paint to your garment, be sure to let it dry properly before doing any form of heat setting.
  • Always read usage instructions on the can label to ensure the duration required for your fabric paint to dry. You might also feel the color to confirm whether it had dried.
  • When you are confident that the fabric paint is fully dry, carefully take your garment and place it on a level surface as you prepare to heat it.
  • Depending on  how you want to carry out your project, be sure to set the temperature to the required range. If you are using an iron method, avoid using steam when ironing your fabric paint.
  • Proceed to iron the fabric paint when you are certain that all requirements have been met.
  • Be sure you understand the maximum amount of time you will heat set to avoid any damages to your paintwork.
  • Be sure to shield your paintwork from direct heat by using a suitable cover cloth.
  • You can only be sure to have achieved desired results if there is no paint drip beneath your garment.
  • The maximum time before washing your garment should be about five days.

From the article, you may have realized that heat-setting your fabric paint will enhance its durability. You can use four main methods to heat set your fabric paint. However, of the four methods, ironing is the easiest and cheaper method to use. To achieve desired results, it would be helpful for you to follow the tips described in this article. Be sure to research for more information regarding the settings to use on different methods. I hope this helps.

How To Dry Fabric Paint Fast?

How To Dry Fabric Paint Fast

Not all paintwork dries as fast as expected, and fabric paint is no exception. In the following sections, you will learn how to dry fabric paint fast.

3 Sure Methods On How To Dry Fabric Paint Faster

While fabric paint may be appealing to your eyes, a lot of input is required to get that final look you desire. One notable thing about fabric paint is that it takes quite a long time to dry. Knowing essential tips and tricks on making your fabric paint dry faster is what this article is about. The steps below will give you important tips on how to make fabric paint dry faster

1. Maintaining Warm Temperatures for Your Clothes

One sure way to make your fabric paint dry out quickly is by ensuring your clothes are always warm. Below are the steps involved

Step 1. Use a suitable dryer for your fabric your fabric

While it is okay to dry your clothes naturally, it is essential to use the temperature generated by a dryer to warm your fabric. Using a dryer will hasten the drying time of your fabric paint to a great extent.

Step 2:Drying in the sun

In some instances, accessing a drier might be a challenge to you, so consider capitalizing on natural heat generated by the sun to dry your fabric paint. If you dry your fabric paint using the sun, you are assured of an evenly dried surface.

Step 3:Place your cloth in a conditioned environment

With the availability of a range of gadgets, be sure to maintain a specific temperature so your fabric paint can dry quickly. Consider using a thermostat for this exercise.

2.Demoisturizing your workspace

Be sure to work in an environment with minimal or no moisture. The presence of moisture in the room will only prolong your drying time. Here are the steps you should follow

Step 1:Suspend your clothing on a hanger

 As stated earlier, you want to work in an area with a sufficient flow of air and minimal moisture content. Your fabric paint will dry quickly by hanging your cloth because air will flow through the fabric, thus drying it. Ensure that your fabric paint is adequately exposed to the air in the room for efficient results.

Step 2:Use fans

If you cannot access a drier, a good option would be fanning the room to remove moisture. The absence of moisture in the room will ensure faster drying of your fabric paint.

Step 3:Using  a hairdryer

You may start wondering how you will use a hair drying device to dry your fabric paint. When trying to decide on the best driver to use, you should consider using a hairdryer to accomplish your task. A hair drier can emit sufficient heat to dry your fabric paint faster. One advantage of using a hairdryer is adjusting the temperatures to avoid damaging your fabric paint.

3.Using a Faster-drying Fabric Paint

You can follow all the steps highlighted in this article, but you might not achieve the results you want if you don’t choose your paint correctly. Check out the following steps.

Step 1:Using the right fabric paint

The objective of this project is to ensure your fabric paint dries out in the shortest time possible. Amongst other factors, be sure to select a fabric paint with the right features, such as a short drying time. A fast-drying paint will ensure your fabric paint takes as little time as possible to dry.

Step 2:Consider blending our fabric paint with other paints

It would be helpful for you to blend your fabric paint with other paints, preferably acrylic paint, for effective results. Be sure to mix your two paints in a ratio of 1:2. Stir the mixture thoroughly to achieve a uniform hue. Mixing your fabric paint with acrylic paint will reduce drying time significantly.

Step 3:Use a fabric-based ink

Since fabric paint is relatively heavy, you might want to use a suitable fabric-based ink because it is lighter and dries out much faster than fabric paint.

Tips Worth noting

  • Be sure to apply your fabric paint on clean and dry clothes. It would be helpful to read the instructions tag on your clothes for father direction on applying fabric paint.
  • Ensure you use a drop cloth below your cloth to minimize the chances of doing messy work. Additionally, you don’t want your fabric paint to drip through and mess your whole cloth, so use a proper material in between the pieces of your cloth.
  • Be sure to dry your painted clothing by using the sun or any method of choice, as discussed elsewhere in this article. Note, it is proper to use natural heat from the sun because it dries your fabric paint evenly.
  • Use a hairdryer to dry your fabric paint, but adjust the buttons for a desired range of temperature. Ensure you hold your dryer at a suitable distance from the cloth to avoid causing any damages to your cloth. Note that a hairdryer comes in handy if clouds obscure the sun.
  • If you decide to carry out your project in one of your rooms, ensure the room you choose is free from moisture and dry for efficient outcomes. Note that working under humid conditions will only increase the amount it takes for your fabric paint to dry.
  • Be sure to use suitable material to press on the fabric paint once you are sure it is scorched. Avoid any form of ironing, as this might remove your beautifully painted fabric
  • Using a dryer will hasten the drying time of your fabric paint to a great extent.
  • Be sure you hold your dryer at a suitable distance from the cloth to avoid causing any burns to your cloth. Note that a hairdryer comes in handy if the weather can not allow you to use the sun.

If you apply the tips highlighted in this article, you will master the art of drying your fabric paint quickly. The tips discussed above will lessen the duration it takes for your fabric paint to dry. Be sure to incorporate all three methods for better results. Having the right supplies at your disposal will be a big plus in your project.

How To Dispose of Used Paint Thinner?

How To Dispose of Used Paint Thinner

If you are a painter, understanding how to dispose of used paint is essential. Read on for more insight on how to dispose of used paint thinner in an ideal way.

2 Effective Ways To Dispose of Used Paint Thinner

There are many ways to dispose of used paint thinner. However, two methods stand out, as will be discussed below. Depending on the land laws, you should dispose of any used substance such as paint thinner to avoid harming the environment. Keep reading to discover more information about this topic. To begin our discussion, we should try to understand the forms of paint thinners used.

  • Acetone: Which is a solvent that is readily available in dealer stores. Nail polish remover is one form of acetone.
  • Mineral spirits: They comprise petroleum products. Note that you can use mineral spirits in place of turpentine.
  • Toluene: This is a natural solvent that can also be available in petroleum. Note that toluene is highly toxic.
  • Turpentine: Our primary concern here is turpentine which is also a constituent product of petroleum used to thin paints;You can also harvest turpentine from trees.

“related topic: Acetone vs Paint Thinner.”

 Supplies Needed

  • Hosepipe
  • Piece of paper
  • Glass  container
  • Sawdust
  • Plastic bag

1. Getting rid of Used Paint Thinner:

If you have a lot of used paint thinner and you are wondering how to get rid of it, worry no more because the steps highlighted below will guide you through the whole exercise.

Step 1: Throw away used rags in a sealed container

It would be helpful if you considered discarding all the rags you used in your painting project. Note that the rags may contain traces of your paint thinner which catches fire quickly. If you want to bypass all these processes, consider drying your rags entirely in the sun until all the thinner is gone.

Step 2: Separate dirt from your thinner

Once you have used your paint thinner for the first time, you may think it has lost its value. However, you can salvage your thinner, though in smaller quantities, for future use. Devise a way to separate your paint thinner from the dirt so that you can use it in your future projects.

Step 3: Take out the thinner

  • One process you can employ to separate art from your thinner is decantation. Allow the dirt to settle on the bottom of your container before pouring your thinner into another container.
  • As a golden rule, always be sure to shield your hands from the harmful effects of paint thinner. Use suitable gloves preferably(rubber gloves)  to prevent your hands from contacting the thinner.

Step 4: Let the thinner dry

Place the container with used thinner in the open to dry. Ensure to carry out this process where there is a free flow of air. Because the painter catches fire quickly, ensure there are no flames nearby or anything that can cause a fire.

 Step 5: Put the dry paint thinner in a bin

Be sure to let the dirt solidify comp[letly before discarding using waste paper. If you seal the residue properly, you may then give it to waste collectors for disposal. Ensure you use plastic material if you don’t have an old magazine.

 Step 6: Dispose of empty cans

As part of conserving the environment, it would be helpful for you to consider throwing away empty cans. Not only are such cans an environmental hazard, but they can also cause forest fires if not correctly disposed of. Note that traces of paint thinner may trigger an inferno under extreme temperature, so always be cautious when disposing of them.

2. Disposing of Excess  Solvents:

Disposing of your paint thinner comes in different ways; you may decide to give your used paint thinner to a friend who needs it or capitalize on the services of waste collectors for disposal. The following tips will be helpful; check them out.

Give the paint thinner away. If you are done with your painting project and feel like you might not need your excess thinner, it would be a good idea to give it to someone else who needs it. Note that this is one of the best methods to get rid of excess and use paint thinner.

Consider hiring waste collectorsCapitalize on the services of the waste collector. If you are unsure of how to dispose of your paint thinner properly, it would be helpful for you to consider using the services of waste collectors to help dispose of the used thinner.

Note that disposing of used paint thinners ensures you are well protected from the harmful chemicals in thinners

Reusing Any  Excess Thinner

Because measuring the exact amount needed to finish your project is complicated, it would be helpful for you to consider reusing your paint thinner if you have it in excess. Take a suitable container and store your excess thinner.

  • Be sure to shield your hands from the harmful effects of turpentine by putting on protective gloves. After sealing the bottle properly, ensure you label it to avoid confusing it with another substance.
  • Note that if you store it properly, it will likely save you on your subsequent painting project.

Tips  Worthy of Mention

  • Always purchase the correct quantity of turpentine. It would be a good idea to buy a quantity that will be just enough for your project.
  • Avoid dumping your used turpentine on open ground
  • As a golden rule, keep any chemicals both used and used from the reach of children and pets
  • Do not store your thinner alongside your foodstuffs because you risk  contaminating your foodstuffs
  • Make sure to   use suitable gloves, preferably  to prevent your hands from coming into contact with the thinner

It is common knowledge that any used substance should be disposed of properly to avoid problems associated with harmful chemicals. Apart from keeping your workplace clean, disposing of used paint thinners ensures you are well protected from the harmful chemicals in thinners. One foolproof method you can employ to separate dirt from your thinner is decantation. Be sure to let the dirt settle on the bottom of your container before pouring your thinner into another container.

How To Clean Enamel Paints?

How To Clean Enamel Paints

Enamels paints are basically known as coating paints, they normally provide a glossy finish and are generally considered easy to clean. In this post, we’ll provide some easy tips on how to clean enamel paints.

First of all, enamel paints are paints that add some shine to the surface of an object and dries to a hard finish. They are normally oil-based but can also be water-based and are used as a protective coat to prevent scuffs and dirt on a surface while offering paint durability. Another aspect to consider about enamels is the finished look you would like to add to the surface of the object as they are many finishes to choose from when it comes to the enamel which can range from flat finish to high gloss sheen. Enamel paints are often used on metal surfaces.

Things you’ll need:

  • Water and dish soap
  • Mineral Spirits
  • Medium size bucket
  • Non-abrasive sponge
  • Rag or lint free cloth

As mentioned before, enamel paints are easy to clean although the cleaning process may differ based on the type of enamel paint used so below, we will list tips for each type:

Water-Based Enamel Paints

Water-based enamel paints are known for their fast-drying tendencies and easy to clean process but the higher the gloss, the higher the chances of the dirt and imperfections reflecting on the surface. Enamel paints are also mostly used in outdoor projects and offer strong protection against environmental elements or conditions which also makes them susceptible to dirt. To clean water-based enamel paint a mild solution is recommended instead of abrasive materials:

“Related Article: How to thin enamel paint.”

Warm water and dish soap: to clean water-based enamel paint, mix some warm water and dish soap together. Fill a medium-size bucket with warm water and add some dish soap to make a cleaning solution and mix well. You can also consider mixing the solution in a spray bottle instead of a bucket based on preferences or the amount of solution you’ll need to use, for an easier application.

Add the solution to the surface you’re planning to clean and wait 5 minutes to allow the solution to start dissolving the dirt. Next, dampen a sponge with the solution and scrub the entire surface in a circular motion, adding more solution if needed and rinsing the sponge if necessary, also. Once finish scrubbing, rinse the area thoroughly with water. Use the clean sponge to scrub the area once again to make sure no sticky residue is left on the surface and rinse once again.

Next is to allow the area to air dry completely although it’s possible to use a clean towel to remove excess water so that the surface may dry even faster. Once the area is dry, check to see if there’s any dirt left, if so, repeat the cleaning process once again. This process can be used on different surfaces where enamel paint is used, such as metal, plastic, walls, or glass for example, as these types of surfaces may require occasional cleaning.

Oil Based Enamel Paints

Oil-based enamel paints are considered better than water-based paints in that it provides a smoother finish when applied to a surface but may take longer to dry or cure, a couple of days actually depending on the weather conditions. Oil-based enamel paints are basically meant for outdoors surfaces or projects as the natural lighting can prevent discoloration or yellowing of the object over time, which mostly happens on indoor objects. To clean oil-based enamel paints a mild solution is also recommended:

Water and dishwashing soap: mix a solution of water and dishwasher to create a non-abrasive cleaning solution to make sure it doesn’t damage the enamel finish on your surface. Apply the solution to the surface using a sponge or a spray bottle for an easier application and allow 5 minutes for the solution to start dissolving any dirt and grime. Use a sponge to scrub over the entire area then rinse thoroughly with water. Rinse the sponge also to make sure it’s clean from any dirt and use to scrub the surface once again to remove any additional sticky residue that may have stayed on the wall then rinse with water. Allow to dry or use a towel to dry up excess water and speed up the drying process.

Mineral Spirits: Mineral spirits are known as paint thinners. Since oil-based enamel paints can be considered a bit more difficult to clean because of their oil-based properties, mineral spirits solution can be used in this case, if a stronger cleaning solution is needed. Mineral Spirits are most of the time used to dilute paint but because of their solvent properties, it is also recommended to use them on oil-based enamel paints because of their proven effectiveness to remove dirt and grime.

To use mineral spirits, pour out a bit of the solvent onto a rag or cloth until it’s a bit dampen then proceed to clean across the surface with gentle strokes until the item is completely covered. You will then notice that the cloth will begin to pick up dirt from the surface you’re cleaning while you’re swiping from side to side, in this case, turn the cloth to a clean side to continue cleaning the surface once one side of the cloth looks dirty.

Remember that Mineral Spirit is a solvent that can cause enamel peeling, so do not consider leaving it on to dry. So, once you’re finished cleaning the area with the solvent, the next is to wipe away all solvent residue by dampening a rag or cloth with some water and dish soap solution. Clean all areas previously cleaned with mineral spirits using gentle strokes cleaning from side to side or with an up and down motion then use another rag or cloth dampened with water to finish cleaning the area from soap residue. In this case, you can also choose to rinse the area with water and then use a lint-free cloth to dry to excess water and allow it to dry.

Cleaning enamel paint will become easy once you understand the types of enamels available and the different ways they can be cleaned. We hope you found these tips helpful.