How To Make Polymer Clay Stronger? The Most Effective Steps

How To Make Polymer Clay Stronger

Making polymer clay stronger is a common issue for crafters. So the often asked common question is how to make polymer clay stronger. Proper baking with the right temperature and time makes the clay strong even after so long.

Nowadays, polymer clay is preferable to crafters for its amazing crafting features. However, though it looks simple and easy to use, your project can ruin by not making the clay stronger. So, as a clay crafter you should learn how to make polymer clay stronger.

Polymer clay becomes stronger only by proper baking and balancing. For baking, you must maintain the right temperature while giving the heat. Besides, sometimes the material quality will become another issue. That’s why working with an accurate understanding of the ingredients is essential.
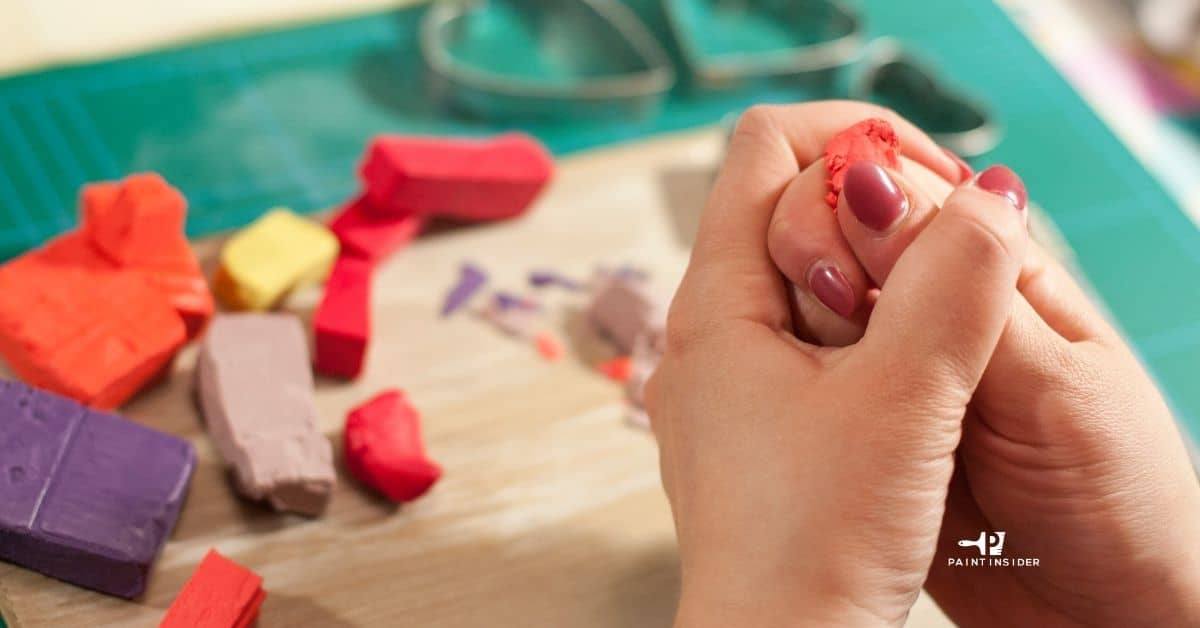
How To Make Polymer Clay Stronger

In this context, I will share the experiences of all types of polymer clays I learn in my crafting journey. Moreover, I have kept some do’s and don’ts for you while crafting with polymer clay. Finally, you will get some reward with my additional tips and tricks about this fabulous crafting product.

7 Easy Steps To Make Polymer Clay Stronger:

Generally, the main ingredient of polymer clay is a plastic material. And this material is known as Poly Vinyl Chloride (PVC). However, some different types of clay use different kinds of material. These crafting products are elastic-based and soft stuff. That’s why you must first make the clay stronger to get the solid designs.

Step-1: Make Your Workstation Cool Down

Polymer clays are quite picky. You can’t work with it if the cured clay starts melting. Again, when the baked clay melts, it becomes sticky and unsuitable for making original Sculpey. A little temperature difference can make your clay craft a big issue! That’s why you have to maintain the temperature strictly.

So, at the very beginning, make sure your workstation becomes cool. And you have to keep this temperature till the end of your work. Polymer clay can absorb the temperature quickly. Also, it can melt and spoil under the sun’s rays easily. That’s why to keep your work station away from the sun rays.

Step-2: Let Your Hand And Clay Stuff Cool

Before starting your baking, it is essential to keep both hands cool and dry. As the clay products are experts in heat absorption, you must keep all the stuff cool that remains directly in touch with the clays. Also, after every touch, you should check whether your hands are cool.

Besides, your clay products may become hot after buying from the craft shop. This extra heat can make your clay sticky. So, before you start the baking, make the clay stuff cool. You can keep the clay stuff in the cool place like fridge for a few minutes. Even you can try this trick whenever the clay becomes sticky. Moreover, the air inside the stuff can also remove by cooling the clay cutter.

Step-3: Follow The Product Instructions

Many different brands offer polymer clay. Each brand uses some particular ingredients and formulas with the base for making polymer clay. That’s why all the brands recommend specific temperatures and other baking instructions. Moreover, these instructions will help you get the strongest polymer clay for your craft project.

The product package provides all the instructions about using the clay. Before starting work, read out the whole instructions and baking process carefully. It will help you to set the right baking temperature and time. So, know well about your product at first and start your project!

Step-4: Right Types Of Ovens For Baking Polymer Clay

As polymer clay is sensitive, it becomes tough to make it stronger if you don’t choose the right baking equipment. And in this situation, ovens are the only easiest solution. You can use a regular and convection oven for baking the clay. Even regular toaster ovens are also suitable for polymer clay baking.

It would help if you used an oven thermometer in a regular and convection oven. After preheating, it will inform you if the environment is ready or not for baking. By applying this method, you can prevent burning. Besides, the convection oven has an automated fan that can maintain the heat in a great way. So, use these ovens for baking your clay.

Step-5: Prepare The Baking Tray And Preheat

Preparing the baking tray is a significant consideration for making the clay stronger. You must not use the empty baking tray for baking. You can use foil paper and parchment paper to cover the baking tray. Moreover, if needed, you should use the foil paper over the clay stuff to prevent the over burning.

Though both types of paper similarly serve you, foil paper may leave curve marks as the paper surface is a pretty curve. That’s why in this case, you should use parchment paper to avoid any marks after baking. When the tray sets, start the oven to give preheat. This preheating will give your clay the finest baking and strong structure.

Step-6: Set The Accurate Baking Temperature And Time

Accurate baking temperature and time are the most important for making the clay stuff strong. Again, the appropriate baking temperature can protect the creative paper clay from overburning and discoloring issues. So, you have to set the baking temperature according to your clay brand.

Many clay crafters think a long baking period will strengthen and strengthen the structure. However, this is a bad idea to bake the clay products for a long. It can make the structure fragile and unable to make designs. Also, the surface may lose its accurate color. That’s why baking the clay according to the package instruction will be the best decision.

Step-7: Left The Clay In Normal Temperature

After completing the baking, bring out the baking tray and leave it at normal temperature to become cool. This part is quite essential for crafters to get the final finishing. The clay can break down by outside force when you bring out the clay. That’s why never touch hot clay after baking in an oven.

Moreover, this situation can make your clay sticky and dull. So, let the clay become cool and dry for a while. After that, this polymer structure becomes so strong and suitable for making any design over it.

Reasons For Breaking Polymer Clay:

Polymer clay is a fragile compound. That’s why you must handle this sensitive element with huge care as a crafter. Over baking, inappropriate temperature, and many other issues can cause breaking polymer clay. However, if you want to keep your clay stuff strong, try to avoid the reasons for breaking polymer clay.

1. Over baking:

Over baking can lead your clay stuff to break. The proper temperature will give the material a strong structure. Meanwhile, the high temperature or over-baking spoils the strength inside the material. And this makes the clay fragile and dull.

2. Low Baking:

The clay remains humid and dull if you don’t bake the project at the right temperature. Also, the air stays inside the compound, making the stuff more sticky and brittle. That’s why low baking should avoid while getting a perfect structure of polymer clay.

3. High Or Less Baking Time:

Many crafters want to bake the project for a long to get more strong structure. However, this is the wrong idea. High baking time makes the compound dry and becomes fragile after cooling. Similarly, less baking time absorbs the humidity and breaks the structure.

4. Get In Touch With Sun Rays:

Sun rays are the biggest enemy of polymer clay. It can break down the compound and make the clay sticky and fragile. Moreover, some clay brands can melt by getting in touch with sun rays. That’s why, before baking, keep the clay far from the sun’s rays.

5. Thickness:

Sometimes the clay shapes become thinner. This thin compound can’t tolerate any outside force and heat. Also, thin shapes are not suitable for making different designs. That’s why it should have a suitable density to prevent sudden breakage.

Things That Should Avoid While Making Polymer Clay:

As a crafter, there are many things to know that you should avoid while doing dye projects with polymer clay. The wrong procedure can damage the clay compound. So, if you are a beginner-level crafter, you should remember this prohibited stuff.

  • To make a thin shape design, never use soft-structured polymer clay. It breaks immediately and spoils your project.
  • Never leave the clay after baking only one side. Always try to bake the two sides equally for a clay baking.
  • After using nail polish as clay glazer may become dangerous for the compound. That’s why to use clay sealer alternative to nail polish.
  • Avoid using the spray varnish on polymer clay. A spray sealer can fill your necessity to make your clay surface glossy.
  • Never use low-quality glue on the clay. It can harm the joints of the design.
  • After using the compound, store it in the right plastic pot. Wrong plastic can harm the color and material.

Additional Tips:

Now, it’s time to give the additional tips I mentioned before. These tips are highly effective and can reduce many issues in clay crafting. Moreover, to make your clay crafting project successful, you should follow these tips on your working days.

  • Tip-1: Make a loop in the eyepin before embedding it inside the raw clay. It prevents the eyepin from coming out after baking.
  • Tip-2: Before touching the clays with your hand, ensure your hands are clean and dry. Otherwise, the clay color may damage.
  • Tip-3: Never use a microwave oven for baking polymer clay. It is because this type of oven can’t maintain the temperature.
  • Tip-4: Keep the baking tray in the middle of the oven while baking. It bakes all the sides of the clay.
  • Tip-5: When the clay becomes too sticky, use old polymer clays to remove the stickiness.
  • Tip-6: If your design contains a lot of metal wires, keep the clay at normal temperature after baking. The metal wires are set with the clay permanently.

Frequently Asked Questions (FAQs):

1. Why Is My Polymer Clay Still Soft After Baking?

Answer: Your polymer clay can remain soft after baking if you don’t follow the proper method. The clay compound can’t bake properly when your baking temperature remains too low. Besides, baking for less time will be another reason to remain soft after baking.

2. What Happens If You Over Bake Polymer Clay?

Answer: Over-baking can create bubbles and dark spots over the clay. Moreover, if you overbake the polymer clay, it breaks while making designs. In this situation, bake the clay stuff for 15 minutes at 275 degrees Fahrenheit and apply a new layer over it. After that, re-bake the clay compound at the same temperature and time.

3. How Do You Make A Polymer Clay Ring Stronger?

Answer: Polymer clay ring is quite thin than other ornaments. So, your clay ring can break even after one time using. Proper baking makes the polymer clay stronger. For this, you have to bake at the right temperature and time. Moreover, to make a polymer clay ring, you should use good-quality clays.

4. What Is The Strongest Polymer Clay?

Answer: There are so many brands that offer strong polymer clay. However, though super Sculpey clay is the most popular brand for polymer clay users, Cernit is the best for offering the strongest polymer clay to crafters.

5. Will Polymer Clay Break If Dropped?

Answer: Polymer clay is a fragile and sensitive compound. However, this compound becomes hard only after a proper baking procedure. It can break if the stuff falls apart or drops down from a higher area. Even clay can break in the cooling period after baking.

6. How Strong Is Polymer Clay?

Answer: Some polymer clay brands offer stronger compounds. Even some brands are so strong that you can’t break or harm the clay using only your hands. However, these brands bake the compound properly and make the clay thick up to 1.5 mm.

7. Can You Harden Polymer Clay With A Hair Dryer?

Answer: If you don’t have an oven or can’t bake the clay in the oven, you can use a heat gun like a hair dryer. These tools can give you perfect baking without using a particular temperature. Also, you can bake all over the compound according to your need.

Final Verdict:

Polymer clay is the best for craft lovers and dye projects. Clay ornaments have become more popular. However, to make any designs, you must first give the clay compound a perfect form. Otherwise, you can’t work through your project successfully.

That’s why as a crafter you should learn how to make polymer clay stronger correctly. By applying the proper method, you will be able to prevent burning and other severe issues quickly.

Meta:

How to make polymer clay stronger is a common issue for crafters. Proper baking with the right temperature and time makes the clay strong even after so long.


How To Paint Craft Foam?

How To Paint Craft Foam 1

Craft foam is a versatile crafting material that can be used to make a variety of different projects. If you’re not sure how to paint craft foam, this guide will show you the best way to do it. You’ll need some basic supplies and a few minutes of your time, and you’ll be ready to start painting!

How To Paint Craft Foam 1
Craft Foam Paint

Best way to paint craft foam

To paint your craft foam, you need to follow the steps below.

1. Collecting Basic Supplies for Painting Craft Foam

When it comes to painting craft foam, there are a few basic supplies that you will need.

First, you will need some foam sheets. These can be found at most craft stores.

Second, you will need paint. Acrylic paint works well on foam, and it is available in a variety of colors.

Third, you will need brushes. Foam brushes work well for this project, but you can also use regular paintbrushes.

Finally, you will need a sealer. This will help to protect your foam projects from damage. With these supplies in hand, you are ready to start painting craft foam!

2. Preparing The Craft Foam for Painting

If you’re planning on painting your craft foam, there are a few things you’ll need to do to prepare the surface first. Otherwise, your paint may not adhere properly or may not look as good as you’d like.

First, sand the surface of the foam with a fine-grit sandpaper. This will create a slightly rougher surface for the paint to adhere to. Next, wipe down the foam with a damp cloth to remove any dust or debris.

Once the foam is prepped, you’re ready to start painting! Be sure to use paint that’s specifically made for use on foam surfaces. These paints have a special formula that helps them bond well to the foam and prevent them from peeling or flaking off.

With a little preparation, you can easily paint your craft foam and create whatever masterpiece you have in mind!

3. Polish the Primer at The Surface Of Your Craft Foam And Allow It Adequate Time To Dry

Ensure you achieve an even paint application by using long strokes of up and down technique. Note that you may have to leave the paste to dry until it forms a transparent and clear layer on the surface of your craft foam.

Choose the right paintbrush for your project by taking into account the size of your craft foam. Do final touches on your foam to do away with unwanted bumps on the surface of your craft foam. It is recommended that you let the surface a maximum of 24 hours drying time before starting your painting process.

Which Paint Should You Apply to Your Craft Foam?

There are many types of colors you can use. However, you need to know the most appropriate color suitable for craft forms; Both metallic and golden paints are a good pick. Continue reading to discover the most appropriate paint to apply to your craft foam.

Acrylic Paint: Acrylic paint has many desirable properties, which makes it a good pick for many painting projects. If you want to paint the whole substance, then consider using acrylic paint. Acrylic polish is easy to apply to the surface because it has runny properties that allow it to spread much faster.

Mixing the Paint: To achieve a much denser color, you will need to leave the paint in its undiluted form. Ensure you mix your colors perry quickly to avoid losing your acrylic paint since it dries up much faster.

Patience: Acrylic paint is known for its ability to dry faster when applied on any surface. However, when acrylic paint is used on craft foam, you may have to wait much longer because it takes a little longer to dry. On that note, patience is key if you want to create a stunning finish.

You might be forced to wait for close to 4 hours before embarking on your painting exercise. Use an appropriate gloss finish to give your craft form a glossy finish; In this case, you might want to use acrylic gloss.

Make Your Writing Impressions Using Fabric Paint: You may decide to add more touches to your craft form, and this might be writing words of your choice or drawing specific patterns on the surface of your craft foam. In this case, consider using appropriate fabric paint since it dries out, leaving behind clearly marked impressions. Choose the right color that will be more visible after drying.

Making shapes: You might consider using a sketching tool to make patterns on your craft foam before painting it. Use a sponge to create the appearance much more appealing.

 Important Tips When Spraying Paint on your Craft Foam

  • Acquire the right spray paint from your nearest market. The nature of your project will determine the type of spray paint you will buy. Always go for a pocket-friendly can if you intend to apply a single color on your foam. Note that spray painting is harmless to your craft foam.

  • You will need to shake the spray can properly before embarking on your painting exercise. Shaking the can will allow the paint to mix properly for easy application.

  • You will need to be cautious with the nozzles to apply the paint evenly on your craft foam with much ease during the actual spraying. It would help if you considered holding the nozzle at a distance of about 3 feet from your craft foam. Having the nozzle close to the craft foam may create a lump of paint that is uneven. Spray your paint in long up-down sweeps to achieve a smooth and consistent layer of paint.

  • Doing this will also ensure minimal or no color running the surface of your craft foam.

  • When you are done with the first spray, allow for a maximum of 6 minutes, and then start applying another layer of paint. The time interval mentioned above ensures the paint dries properly before applying another coat. You should maintain the distance between your foam and the nozzle when using the second coat to minimize the chances of wrinkle-like formations on the surface.

  • As we mentioned earlier, allow your craft foam a maximum of 24 hours of drying time before you start doing any final touches on the surface. Ensure the space is a little drier to reduce your drying time.

Note that you can comfortably spray paint on your craft foam and make any color you desire for your project. You can improve the look of your craft foam by spreading it with spackling colors such as; silvery, metallic, and golden. Enjoy your painting!

How To Remove Dried Polyurethane From A Paintbrush?

How to remove dried Polyurethane from a paintbrush

It always feels satisfying to complete your DIY painting projects on time. But it feels disheartening after seeing the mess you have created while accomplishing your painting tasks. Now, you must have experienced the pain of cleaning or taking off the dried paint from your paintbrush. Getting off anything from a dried paintbrush sounds too complicated and tedious to you. Especially when you have to remove dried Polyurethane from a paintbrush.

I this guide, we’ll tell you about the easiest methods on “How to remove dried polyurethane from a paintbrush?”

How to remove dried Polyurethane from a paintbrush

Understanding the Basics of Polyurethane

Before we move further, it is important to understand the types of Polyurethane you are aiming to remove completely. Polyurethane is an organic polymer or layer that protects the surfaces from direct sunlight, heat, or other sources when applied. You can use Polyurethane on various surfaces such as sealants, varnishes, bookcases, bedding, and other protective coatings.

Due to the dynamic nature of Polyurethane, it dries faster once you apply it in liquid form. Also, it doesn’t go back to its original condition even when heated.

Generally, Polyurethane is categorized into two types:

  • Water-Based Polyurethane
  • Oil-Based Polyurethane

Let us explain the two types of Polyurethane in detail:

Water-Based Polyurethane

Water-based Polyurethane has gained momentum and massive popularity over the years. The qualities like low odor, no toxicity, environmental friendliness, and ease of use make it the desirable Polyurethane for many. Plus, you can take off the Polyurethane using tap water only.

Oil-Based Polyurethane

Unlike water-based Polyurethane, oil-based Polyurethane is slightly durable, cheaper, and usually complex in nature. You need to have a chemical in case you’re cleaning the oil-based Polyurethane smoothly. You must keep your windows and doors open for a few days after applying Oil-Based Polyurethane. Because it produces bothersome odors that might settle into your curtains, cover sheets, and clothing.

On the flip side, the Polyurethane still takes longer with some efforts to remove from the paintbrush. However, you can effortlessly remove Polyurethane from your paintbrush using the right methods and procedures.

Now, you must be curious to know about how to remove dried Polyurethane from a paintbrush?.

Well, the excellent news is there are still some practical ways that can help you clean off hard-to-remove Polyurethane from the paintbrush easily.

How to Remove Water-Based Polyurethane from Paint Brush?

Before beginning the process of cleaning the water-based Polyurethane from a paintbrush, you need essential tools. And these are:

  • A pair of gloves
  • Cups (Two or three)
  • Tap water
  • Dish soap

How to Start the Cleaning Process?

  • Simply submerge the paintbrush in the water
  • Rinse the paintbrush thoroughly
  • Take out the brush and soak again in freshwater
  • Repeat the process until the water-based Polyurethane loosens itself

How to Clean Oil-Based Polyurethane from Paint Brush?

Taking off oil-based Polyurethane is a bit complicated and needs more effort than water-based Polyurethane. But, you still remove the Polyurethane using good-quality paint thinner or white spirit. Here are the steps that you should follow to achieve the desired results:

  • Just our right quantity of mineral spirit or paint thinner in the cup
  • Dip the paintbrush directly in the solution and wait for a few minutes
  • Turn the sides of the brush to soften the dried part
  • Wait for only 15 minutes or even less
  • Massage gently if the Polyurethane is too dry or hard
  • Take out the brush and rinse the same using lukewarm water
  • Allow the paintbrush to dry using a towel or rag

It is recommended to wear protective gloves and a dust mask to protect yourself as well as the surroundings. The toxicity of the oil-based Polyurethane and the chemicals used might get you in trouble. So, use the necessary tools to remove the oil-based Polyurethane from the paintbrush.

How to Clean Polyurethane Like a Professional?

On average, a good-quality paintbrush can last up to 4 to 5 years and even more if maintained properly. To protect your investment, maximize the performance, and keep the paintbrush in shape, you must follow the proper cleaning methods before, during, or after every use. Having said that, let us take you through a comprehensive guide where you will learn about How to remove dried Polyurethane from a paintbrush?

Which is the Best Way to Use Comb for Cleaning Polyurethane?

Have you ever thought of using a comb to clean Polyurethane from a paintbrush like a pro? If not, then we would suggest you take advantage of the comb to take out varnish or paint from the bristles. Here is the cleaning thorough cleaning method:

  • Hold the paintbrush and insert comb gently into the bristles
  • Apply the right stoke motion and speed for the varnish, paint, and residue to come out effortlessly
  • Move the comb in different directions for speeding up the task

Does Using Turpentine Make the Polyurethane Go Away?

Turpentine is another effective method that can magically enhance the quality of your paintbrush. Using a turpentine solution not only cleans the bristles professionally but also makes your paintbrush look appealing.

  • Pour the right amount of turpentine into a plastic container
  • Immerse the brush into the solution
  • Put little pressure on both sides of the bristles and the brush alike
  • Keep doing that until the paint is completely removed
  • Take out the brush and wash the brush using soap water
  • Squeeze the excess water using a paper towel

You May also like: how to use paint thinner to clean brushes.

Is Mineral Spirits the Better Option?

Mineral spirits have potentially hazardous qualities and come with a strong odor that can make things worse. So, use protective masks, rubber-made hand gloves, and goggles before beginning the cleaning process.

  • Fill the plastic container halfway with mineral spirit
  • Soak the paintbrush into the solution
  • Swish the brush around for two to three minutes
  • Clean the brush using tap water and dish soap

How to Clean Polyurethane from the Paint Brush with Fabric Softener?

A fabric softener is an excellent way for cleaning water-based paints only and not oil-based paints. For cleaning dried Polyurethane brushed, you need to:

  • Take a bucket off gallon warm water
  • Add a cup of fabric softener into it
  • Mix the two solutions thoroughly
  • Drop your paintbrush into the liquid
  • Stir your paintbrush vigorously every minute until the color lift off naturally
  • Lift the paintbrush from the water and let it dry

Is Baby Oil Suitable for the Polyurethane Cleaning Process?

Who would have imagined that baby oil could help you clean the unattractive Polyurethane from the paintbrush? Thankfully, baby oil also acts as a cleaning agent that can positively remove dried paint from the brush.

  • Just like mineral spirits, you need to pour baby oil into the container
  • Drop the paintbrush in
  • Allow the baby oil to sit into the brush for a few minutes
  • After that, take out the brush and wash out the left oil using dish soap water
  • Dry the brush using a rag or paper towel

Can I Use Dish Soap Instead of Toxic Chemicals?

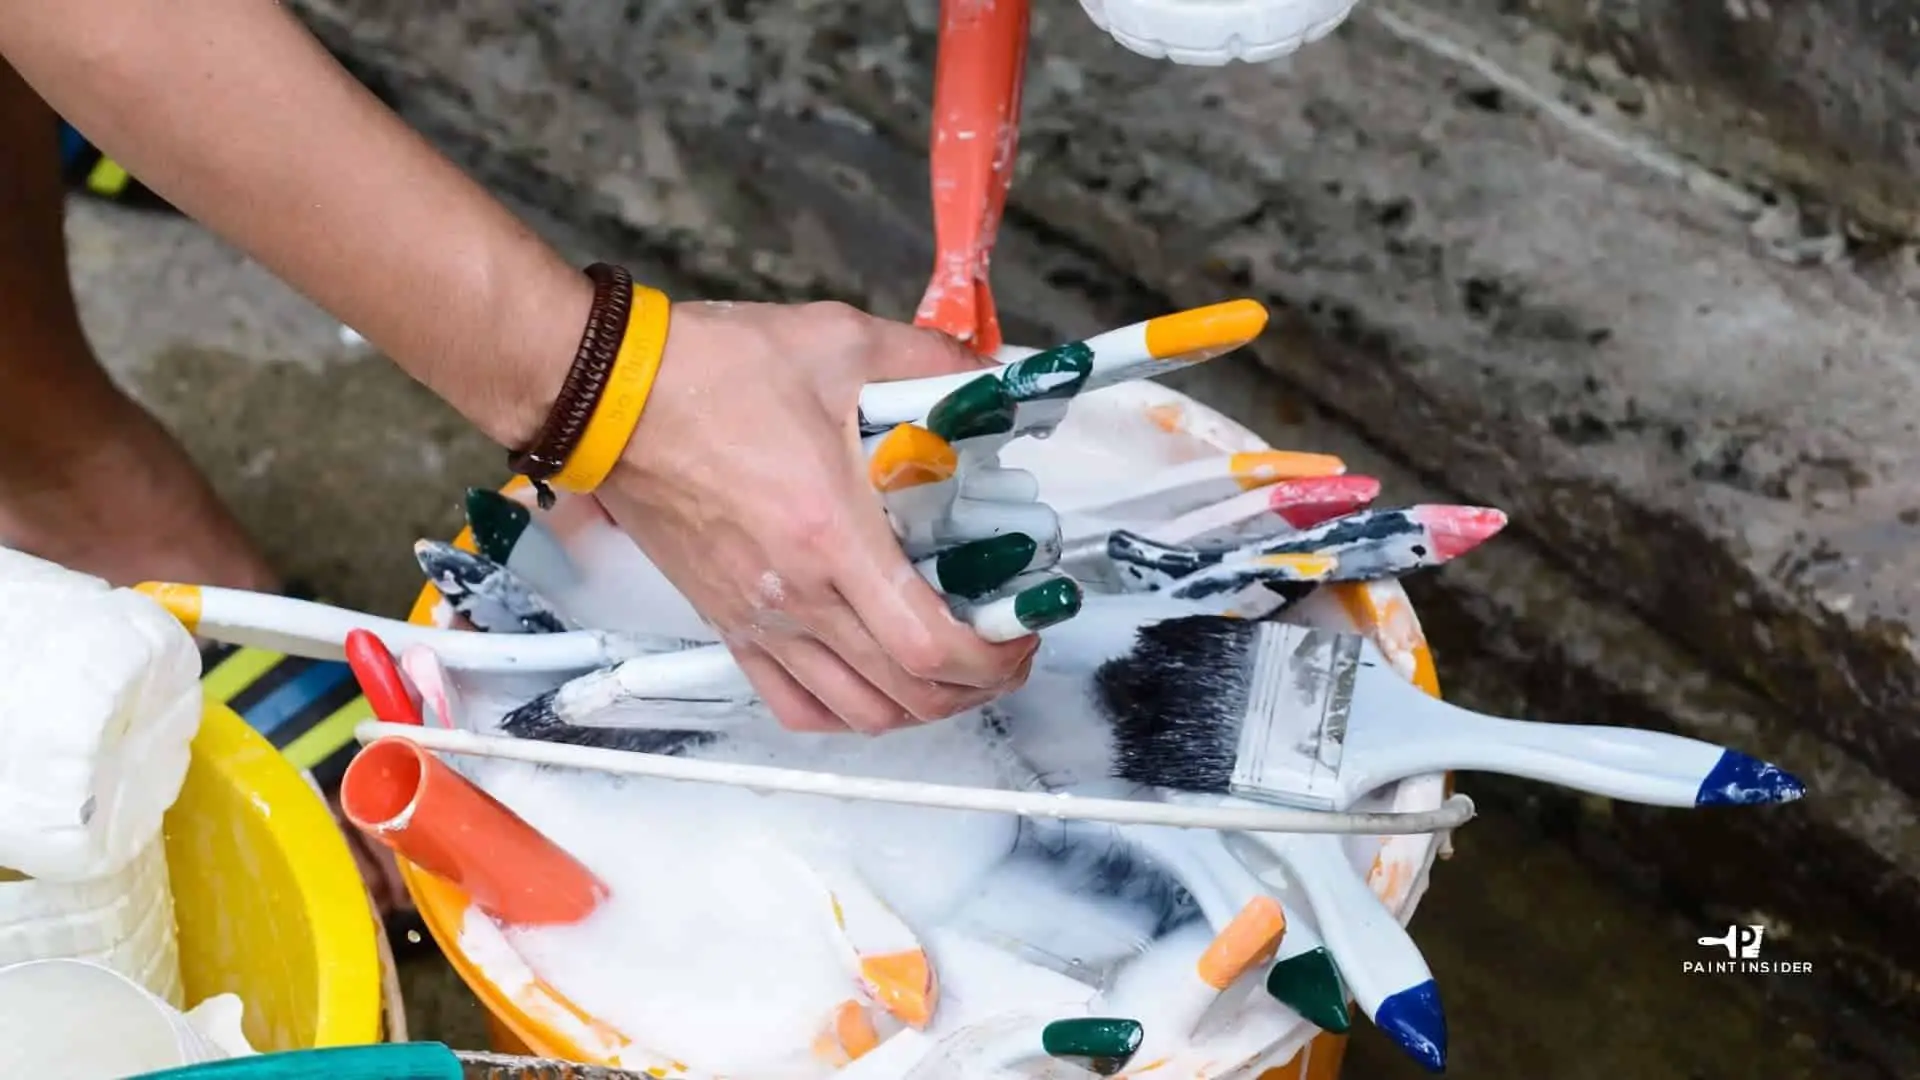
Dish soap is supposed to be one of the primary ingredients available in every household. For those who are worrying about the harmful effects of using chemicals and having sensitive skin, this is the safest solution you can opt for. To clean the delicate paintbrush bristles:

  • Take a small amount of dish soap in a container
  • Dip the paintbrush to remove the oil-based Polyurethane from the bush
  • Wait for a few minutes
  • Take the brush out and massage thoroughly
  • Now, raise the brush using lukewarm water
  • Keep outside to air dry

Can I Use White Vinegar for Taking Off Polyurethane from the Brush?

If you’re afraid of using harsh chemicals, then white vinegar might work in your favor. To restore the condition of your dried paintbrush, use the following methods:

  • Pour the right quantity of white vinegar in a wider pot or container
  • Please bring it to boil or a little simmer
  • After heating up, dip the paintbrush in the white vinegar
  • Let the brush soak for around 20 minutes or even more, depending on the hardness and severity of the Polyurethane
  • Next, take out the brush and wash it using warm and soapy water
  • Use the comb to remove the extra resize or particles from the paintbrush

Can I Use Acetone for Making the Bristles Look Polyurethane-free?

The acetone has the finest quality and comes with solvent strength that can clean off dried-up Polyurethane from the brush magically. Simply soak the paintbrush in the acetone-based solution. Please wait for the paint to come off and rinse it using soap water. Repeat the procedure until the bristles get soft.

In most cases, a professional painter uses a paint thinner before using acetone to clean out the thinner traces from the brush. After that, you can rise off the varnish using soap and water to remove the acetone. Why soap? Because the soap acts as a bristle softener to make the bristles look cleaner, softer, and ready to use again.

No matter whether you are a professional painter or a beginner, you aim to preserve the paintbrush quality for a longer duration. With these practical methods, you can quickly keep your paintbrush neat, clean, and away from Polyurethane.

How to Store Paint Brush for Future Use?

Cleaning unnecessary polyurethane is as important as storing them in the right safe place. After you have done applying the right techniques, it is time to use the proper storing techniques for your brush longevity. Here are the things you can do to maximize the efficiency and longevity of your brush with ease:

  • Always store your paintbrush carefully in a plastic bag or wrap after every use
  • Make sure to keep the neck of the brush airtight using masking tape in a cool area or refrigerator to avoid moisture
  • After completing your painting-related project, do a practice of using the comb to keep the shapeless bristles in shape
  • Hanging the brush vertically with the bristles facing downwards can make a great difference

There is no greater satisfaction than taking off the toughest as well as dried Polyurethane from brush professionally. This joy can reach its peak while giving you optimal results if you apply the right tips and techniques.

It is now crystal clear that cleaning a polyurethane brush isn’t all that difficult. All you need is to try these easy-to-follow methods to make your brush look in shape and order. The most common thing you can do is use water, dish soap or paint thinner, depending on the type of Polyurethane you used, and comfortably water to rinse it off.

The key is to keep your brush polyurethane-free and try any of the above steps. Trust me, your brush will last forever while giving you the performance that you have never imagined before.

Key Takeaways

It will be much safer to restore your brushes in the upcoming years. Now that you know the procedure for removing Polyurethane,

Hence, follow these painting tips on Removing dried Polyurethane from a paintbrush now. We hope that you can clean your brushes smartly after completing your every DIY project.

How To Remove Spray Paint From Wheels?

How To Remove Spray Paint From Wheels

It is enjoyable to move your car here and there. Unfortunately, when you’re moving here and there, your car wheels are getting in touch with various materials. You can even observe that, and even you can’t. You can try painting your wheels for cleaning and a better appearance. However, it’ll be so disappointing if you’ll find your wheels damaged with spray paint. Yes, they will look damaged entirely and wasted. 

Are you facing the same problem? Let’s move towards the solution. Do you wanna know how to remove spray paint from wheels without damaging the paint underneath? Then, don’t worry. The answer always stays very close to the problem. We just have to focus on it. You can also learn the procedure to remove spray paint from rims here

We’re here to completely guide you about how to remove spray paint from wheels. The considered process will be simple that even a fully inexperienced person will do within a short time. The material we will suggest will be easier to access, unlike those that professionals could only access. 

In this article, you’ll learn the method in the easiest way to remove paint from alloy wheels through basic steps. You’ll learn:

● How do wheels get undesirable spray paint?

● Important information regarding removing spray paint from the wheel.

● Materials you’ll need before starting the process.

● A 5-step simple guide in removing the spray paint.

● Final thoughts and ideas about the process.

You may also like: Best Spray Paint for Metal

How do wheels get undesirable spray paint?

Before we move towards the ways to remove spray paint, you must have a basic idea about how this happens. So, you cannot do it in the future. It happens when people try to paint their wheels or rims jet black. However, there are numerous times when they will have to regret their choice or mess up everything. First of all, try to avoid that kind of situation to have an easy life.

Have you already been stuck somewhere during the process? You can simply resolve the problem with a simple guide about how to remove spray paint from wheels. You must know every step clearly to avoid sticking again. The actual issue is that the spray paint bonds efficiently with plastic. The paint remover or stripper sometimes causes damage to the tires. So, these were the reasons why an ordinary paint thinner doesn’t always prove good. You have to be determined to preserve your tires and not damage your wheels. The process discussed is amazing for everyone. Actually, it’ll be an undoing job with minute elbow grease and a small number of tools. So, the next time you’ll return to the road with a set of refreshing, attractive wheels. 

What must you know about removing spray paint from the wheel?

Spray paint is considered a great product in the paint and designing industry. By using just a single can, anyone can change the color of his aluminum wheels. You can make original and unique paint designs to enhance the appearance and allow the old paint to appear brand new. However, some people face problems. They get spray paint perfectly on the tires and the points they didn’t want on the rims.  

If you type in the search bar, you’ll only learn repetitive things. They will show something like removing spray paint from wheels requires heavy elbow grease and effort more than anything else. However, advanced methods and tools have made it an easier and entertaining job. You’ll enjoy doing this and feel too expert after completing the task.

You may be interested in Best Spray Paint for Plastic

Materials you’ll need to remove the spray paint from wheels:

There are some essential tools to have on your hands when removing the stubborn spray paint from your wheels.

● Towel or Rag – It’s a basic thing accessible to everyone anytime at home. Just you’ll have to remember to keep this with you during the process. It’ll help clean the paint once you have freely applied it. You may desire to have much on hand, especially if a large project is going on. 

● Toothbrush-Have a toothbrush so close to your bedroom? Get it now and use it in the different activities. It’ll work similarly to a rag, but it’ll also help clean between the tiny spaces.

● Drill with brush attachment or sandpaper as alternative-Drill with a brush will help bluff the surface more rapidly. However, it’s more expensive than sandpaper. Sandpaper is also easy to use. So, if you’re doing it for the first time, we recommend you do this.

● Goof Off or related product -. This product works for paint thinner, or you may say as a remover. It’ll work effectively by efficiently cutting via the paint and making it clean away so easily.

Precaution: Be careful while using this. It can damage the tires if it gets in contact with tires for a long time.

● Water-Water will help clean the surface and make sure that it is thoroughly neat.

● Pressure washer (not necessary; it totally depends upon your choice)-It’s risky for this task. It can damage both tire and rim if improperly used or considered for a long time. However, if you face a hard time and want excellent results, using it can be helpful. Keep in mind that you must be experienced using it to avoid undesirable results.

A 5-step simple guide to know how to remove spray paint from wheels

1. Spray the considered area using Goof Off

2. Clean the paint with rags.

3. Use a toothbrush to access tiny spaces

4. Wash it with water

5. Use the buffer drill or sandpaper to clean up the alloy wheels

Step 1: Spray the considered area using Goof Off.

First of all, you’ll have to specify the area where you’ll work. In this way, you’ll be able to set boundaries and work with proper settings. After considering the specific area, use a rattle can of Goof Off and cover the place. It can efficiently deal with the chemicals and make the job easier for you. While dealing with the tire, be attentive and focused on using Goof Off.  

You can test this paint remover on a small unnecessary surface. It’ll ensure that it’ll not cause any problems while working. So, if the test proves it to be reliable, then apply it to the considered area of your tire. Remember that you must remove it so quickly. The long-term exposure will cause considerable damage to the plastic in the tire. 

Step 2: Clean the paint using rags.

The next step should be very simple and easy to perform. It’s simple to clean the paint with rags. The original finish will begin coming off quickly. The dried paint will begin chipping when you’ll apply the Goof Off because it’s an extremely powerful paint stripper. 

That’s why you’ll have to be efficient, well-focused, and fast while working. The Goof Off combo and the spray paint will be thick. So, you’ll require numerous rags in many cases to remove it efficiently. It’ll perform wiping off fairly easily. 

You need not be worried to think if your surfaces will get cleaned properly or not. Moreover, don’t feel any stress if it reaches crannies and nooks. Remove that first after applying Goof Off via rattle can to your tires. Remember doing it rapidly.

Step 3: Apply a toothbrush to access tiny spaces

Well, you may have realized that the process is going successful for various wheels categories. So, it’ll also resolve the problem of people asking how to remove spray paint from alloy wheels. 

Now, simply take the toothbrush and begin working on tiny compartments in alloy wheels. It’s the point at which you’ll have to make little effort through your elbow. It requires some hard work to ensure that all carnies and cracks will be properly clean.

The paint stripper effectively helps in loosening up the paint. You’ll have to work it out of all the interior places and make sure that they get their original finish back. Don’t forget that most places have disappeared. They are just required to be considered for screws and the planned purposes. 

You can also thread tools such as drills or thread cleaners and bolts to go through them and then pull off the paint.

Step 4: Wash it with water

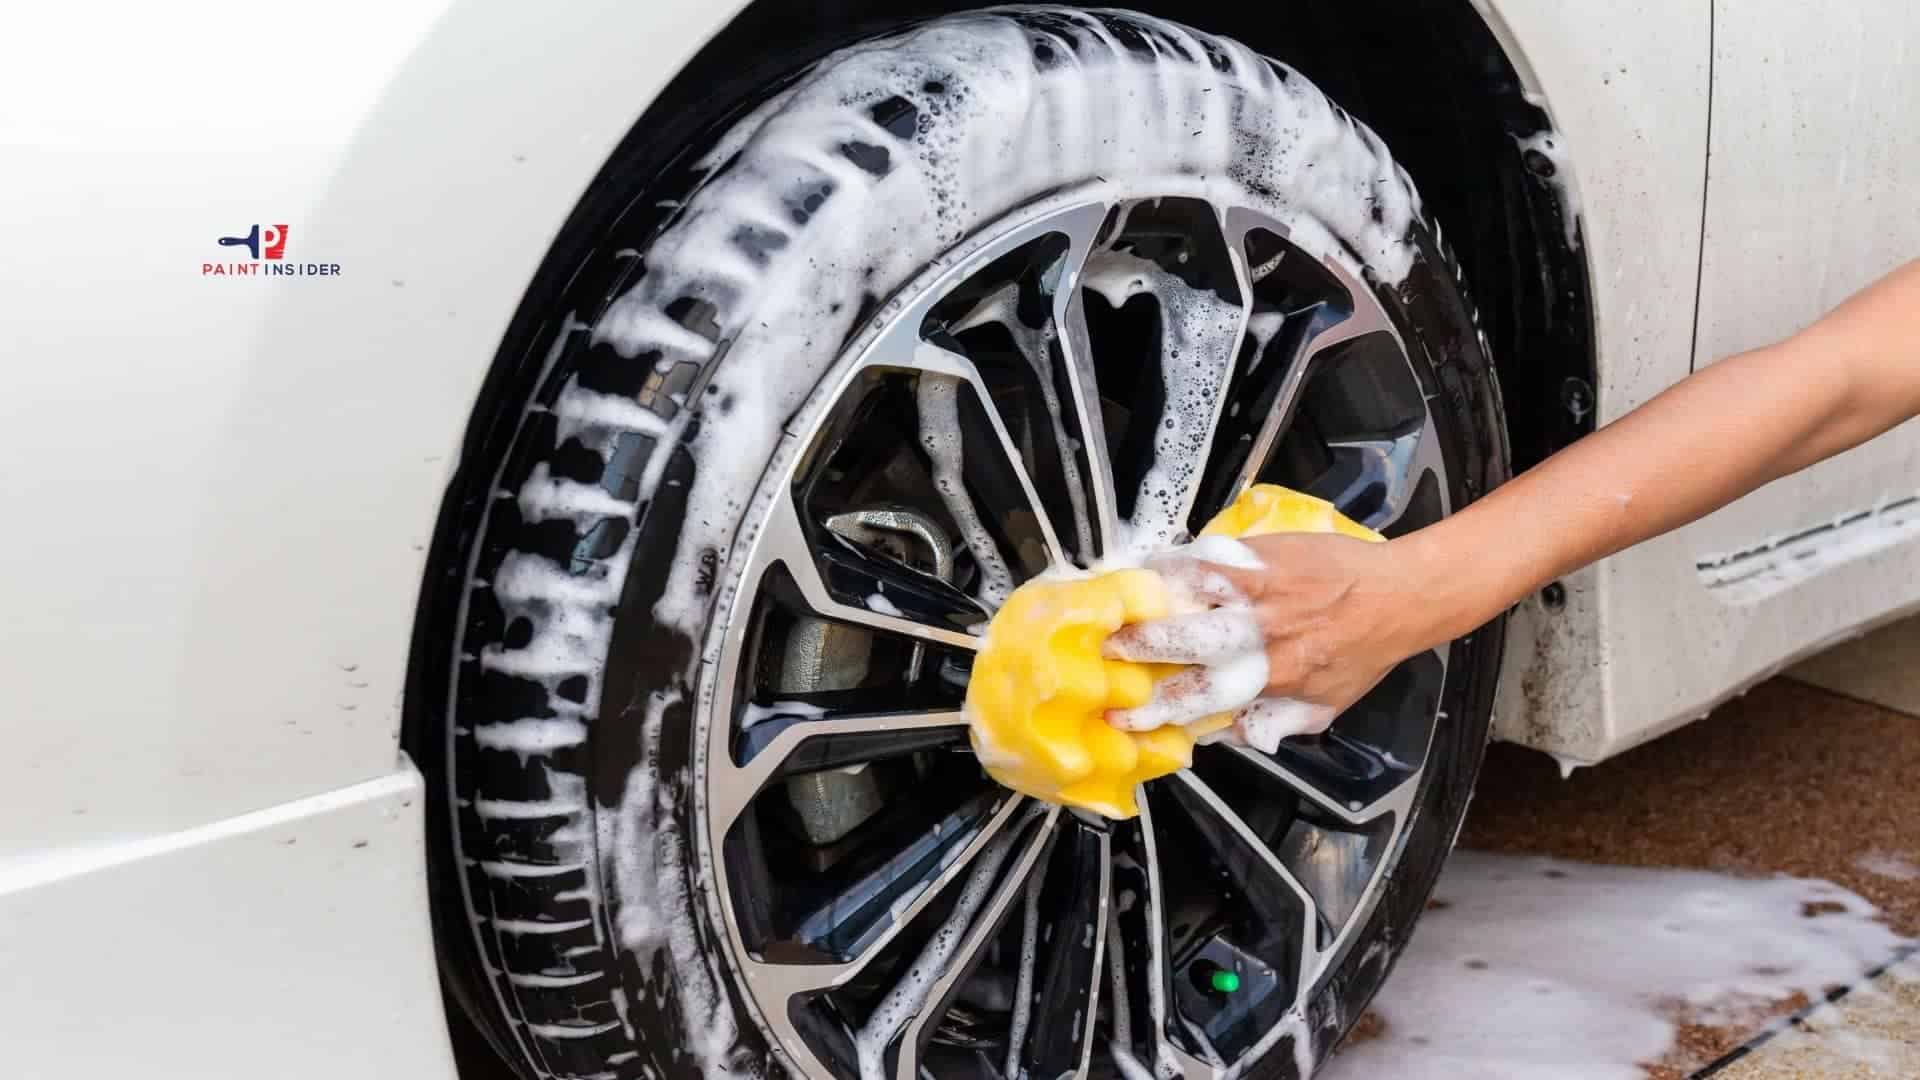
Now, it’s time to use the most powerful natural resource. Although we have advanced in introducing helpful chemicals, nothing can replace the water due to its amazing properties. Now, clear off the whole surface using it. The chemicals must have to be cleaned properly.

Ensure that all original paint and paint remover is completely gone. It must remove before using sandpaper or anything like that for bluffing the alloy wheels to finish it off, 

The paint stripper will probably get sanded and stick around. It’ll cause problems when you’ll do this again.

At this step, if you think there’s a need to consider a power washer, you can use it. However, as we advised you before, be careful that it’ll not damage the surface.

Step 5: Use the sandpaper or buffer drill for cleaning alloy wheels

All the lacquer, lacquer remover, and paint will be off the surface at this step. Imagine using a clear coat on your initial paint project top. Even now, your alloy wheel will look rough.

So, you use a drill with a buffing attachment or sandpaper to clean up the wheels. It’ll bring a finished, polished look to the surface. While using sandpaper, you’ll have to scrape every surface.

A buffer drill will probably make work done rapidly for you. You’ll work efficiently to return wheels to their actual finish and make them captivating.

Be focused on not damaging any internal couplings or the threads. You can consider thread starters to fix them up if you do so. You can also make completely new threads and ensure you still keep on drilling into them. However, it’ll require proper tools and bolts.

All these steps will help you to remove paint from wheels very efficiently.

Final thoughts and ideas about the process:

It doesn’t matter why you have decided to remove the spray paint from the wheels. This method will help you get a clean, clear, and shiny surface. Some people only want a fresh beginning, while others want to change as the original wheel’s owners did.

Regardless, paint is temporary, but you have to avoid any damage. 

Take an easy start, work calmly, and put in the required effort. This DIY project will fix your wheels up. So, you’ll return to the road with a new charm. Remember that you must judge your level and then begin working. It’ll help you carry material according to your effort and ability to use them.

Why wait? By this article, you can now get the idea of removing spray paints from wheels, so don’t waste your time. Start now. Something super exciting is waiting for you to make your life exciting and interesting.

How to Fix Uneven Spray Paints?

How to Fix Uneven Spray Paints

Wanna know how to fix uneven spray paints? Are you confused about why spray paint looks uneven? Don’t worry at all. Your every query will be resolved here. There can be many reasons behind the uneven surface. Most probably, it happens when you fail to apply the necessary coats. However, getting out of this problem is so easier if you work through a smart process. 

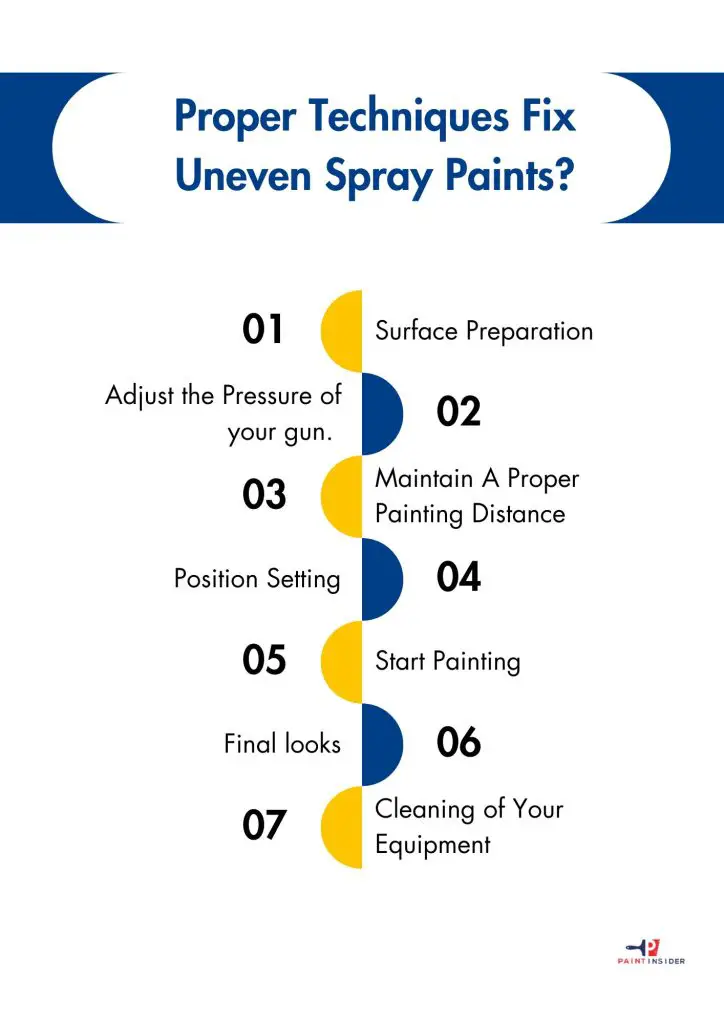
Proper Techniques Fix Uneven Spray Paints?

Supplies Needed:

● Spray gun or spray can 

● Respirator 

● Cardboard 

● Drop Cloth 

● Sandpaper

● Sanding block

● Wire brush

● Alcohol

● Trisodium phosphate (TSP)

A spray can is a metallic container, and it’s best to use for painting little parts. However, it becomes complicated to paint a large body with this can. A spray gun is in the form of a gun. It’s best for painting any area. It’ll give you more quality results than a spray can. 

How to Fix Uneven Spray Paints 1

Step 1 – Surface Preparation

The surface preparation becomes different with the different surfaces. Let’s discuss in detail which preparations we need for which surface. Here we’re sharing some points that help in properly preparing your required surface. 

Metal Surface

● The first step is picking a moist cloth for the metal surface, removing dust and pollutant particles. 

● If the surface has rust, then try to clear it. You can choose a wire brush for this purpose. 

● If you have any loose paint on your surface, make it clear with fine-grit sandpaper.

Plastic Surface

Now the case is different because we’re using the plastic surface.

● Pick up the soft cloth and start cleaning your surface. 

● For the removal of the base coat, wet sanding the surface lightly.

● To avoid the oil on the surface, remove it with alcohol. 

Wood Surface

Here the process also varies due to the unique composition of wood from other surfaces.

● As this is wood, we need trisodium phosphate (TSP) to remove any precious paint. 

● To remove the base coat, use sanding. To create a smooth surface, use fine-grit sandpaper.

Step 2 – Adjust the Pressure of your gun. 

For adjusting the pressure control knob of your spray gun, we need low pressure for perfect efficiency. That’s why we set low pressure on the gun. A perfect pressure setting helps you obtain fine and satisfactory results on your surface. But if you have any heavy edges or gaps, increase a little bit of pressure. To get a smooth pattern, don’t insert too much pressure.

Step 3 – Maintain A Proper Painting Distance

Distance varies with the gun you’re using. Different guns have their various settings. So it depends upon you which gun you’re using and how much distance you must keep. 

For an HVLP gun, there must be at least 6-8 inches from your painted surface, And if you have a conventional gun, try to keep it 8-10 inches from the surface. Finally, there are other air-assisted airless sprayers. For this, you must be at least 10-12 inches from your painted surface. And at last, you have airless sprayers. For this one, the distance must be 12-14 inches. 

Step 4 – Position Setting 

Keep your position well throughout to the height of your painted surface. It increases your process of painting. Also, you can do a much faster job in this position. Don’t move your wrist but try to move the whole arm to get the best results. Keep the position of the spray gun perpendicular to your painted surface.

Step 5 – Start Painting

Never directly start applying your spray on your painted surface when you’re recoating your surface. Instead, the strategy is first to paint the side areas and move your arm towards your main surface. So how to fix uneven spray paints?

To obtain even coverage on the surface, take your arm in a straight line. 

As compared to thick coats, thin coats are better. For better coverage, apply one coat and make it dry. When you realize it is fully dry, then move towards the next coat. Usually, your paint takes 30-40 minutes. It can vary according to your paint. 

Make sure to have the correct color of your paint. Start your first coat process by spray painting. After applying the first coat, move towards the second coat for smooth and even coverage. And at last, use a top and clear coat.

Step 6: Final looks 

Your first effort is useless if you don’t do the last check. When you’re checking, if you feel any spots pick up the fine-grit sandpaper. You can also choose a dry cloth and start rubbing the paint very gently. After doing this, repaint the final coating. 

Step 7: Cleaning of Your Equipment

Don’t leave your equipment dirty. Your final step is to clean it. Take your spray gun and start cleaning. Refer to the gun’s instructions for guidance. You will mainly need water or solvent, depending on whether you’re using water-based or oil-based paints.

After completing these steps, congratulations! You’ve successfully fixed uneven spray paints. Now you know how to do it. Gather your supplies and start fixing uneven spray paints at home, aiming for great results.

Fixing Common Spray Painting Issues

One common frustration when spray painting is uneven coverage. This usually happens because of being too far or too close to the surface or uneven spraying. To fix this, keep a consistent distance of about 6 to 12 inches and use smooth, sweeping motions. If you see lighter patches, apply a thin second coat after the first one dries; this can help blend the colors and remove streaks.

A common problem is paint drips or runs, which occur when too much paint is applied in one spot. To fix this during your project, let the area dry completely, then lightly sand the drips with a fine-grit sandpaper. After smoothing it out, touch it up with light coats of spray paint for better control. Patience is key; addressing these issues slowly will give you a smoother finish and improve your spray-painting skills for future projects!

Conclusion: Achieving a Flawless Finish

To get a perfect finish when spray painting, you need good technique, preparation, and the right mindset. First, remember that preparing the surface is crucial. Uneven surfaces or dirt can ruin your results, so spend time sanding, cleaning, and priming your workspace. It’s like building a strong foundation before creating a beautiful structure.

When you see uneven spray patterns, be patient. Changing the distance of your spray nozzle can greatly affect the quality. If it’s too close, you’ll get drips; if it’s too far, you’ll have overspray. Also, try different speeds and angles to gain better control over your strokes. Lastly, practice is important! Each project teaches you how to improve uneven sprays and achieve better consistency in the future.

How to Get Rid of Spray Paint Smell?

How to Get Rid of Spray Paint Smell

Painting your walls, fixtures, and furniture is one of the most soothing as well as refreshing tasks. This can make your surfaces look new and clean as you were hoping for. Unfortunately, those fresh coats of paint sometimes alter your home air quality and end up giving you headache-inducing ailments. Why? Because paint usually contains certain toxic chemicals which further release exasperating fumes. After applying, these chemicals mess up with your surroundings and start emitting displeasing comfort in or around you. Whether interior emulsions, exterior paints, or textured paints, almost every painting contains some amount of toxicity that can pose a great risk to your indoor air quality.

While you can still reduce the annoying odor using low-VOC and low-odor paint formulas, it is better to adopt natural methods to get rid of the spray paint smell. In this article, we will discuss some eco-friendly as well as easy solutions that can help you minimize the risk of fumes inside your home.

What Type of Chemical a Typical Paint Contains?

Spray paint is undeniably the easiest applied paint mechanism. It aims to give both professionals and homeowners the advantage of causing no or little mess. Also, it aims to offer you maximum productivity and optimal results. However, some ordinary paints loaded with harsh chemicals can put your life at risk if ignored.

If you think that paint is just a usual color that can be dissolved easily with water, then you might be wrong. Most traditional paints contain a slew of toxins that can cause harm to people, pets, and the whole environment.

To be honest, paints or even other paint-related products are loaded with VOCs (Volatile Organic Compounds). VOCs are the gases that release the fumes directly into the air once you open the can of paint.

The house paints boast of the enormous amount of toxic elements such as:

  • Xylene
  • Ethyl acetate
  • Methylene chloride
  • Glycol
  • Formaldehyde
  • Benzene
  • Phenol
  • Quaternary ammonium compounds
  • Carbamates

Depending on the quality, type, and brand, these are the chemicals responsible for making the air quality poor. It further potentially causes serious risks to your health. You either need to choose the branded spray paints or take the necessary precautions to tackle the spray paint fumes without a hitch.

The Ill-Effects of Spray Paints on Your Health

No matter whether your exposure to VOC fumes or smell is minimal or extended, it can still cause definite risks to your health. From short-term side effects to longer ones, here is what inhaling spray paint fumes can do to your health:

  • Headaches
  • Loss of coordination
  • Nausea
  • Damage to liver, kidneys, and central nervous system
  • Allergic skin reaction
  • Dyspnea
  • Fatigues
  • Dizziness
  • Trouble breathing

Having said that, let us now take you through some of the eco-friendliest methods of minimizing the effects of spray paint smell.

Here’s How You Can Avoid Spray Paint Smell in Less Than a Week

Now, you must be wondering how to eliminate spray paint smell from your home. For your convenience, we have mentioned a few simple tips and tricks that you can use to avoid harmful spray paint fumes and odors completely:

Using Low-VOC Spray Paint

While some paint smell goes away naturally with time, some stay longer for months. The best you can do is choose the low or zero VOC “Volatile Organic Compounds” spray paints to keep the paint smell away. It is one of the most effective, affordable, and eco-friendly ways that can keep your overall health and surroundings in check. These paints are generally made using organic materials such as plants, milk, clay, etc. You get the opportunity to save yourself and the environment alike from the troublesome toxicity.

Scented Candles

Scented candles are another mind-blowing solution to eliminate the paint odor. All you need to do is buy quality scented candles or incense, light them and you will get an odor-free home within hours. From mild to strong-smelling candles, you can pick from a variety of flavors to get the most.

Baking Soda

You must have used this magic powder before to give the perfect volume and texture of baked goods. Now, you can use this surprising pinch of potion to remove irritating smells from your home’s environment. Baking soda has the quality to absorb odors from your clothes, refrigerator, and spray paints. Just pour the right amount of baking soda into a container and place them around the room. It will act as an agent to suck in bothersome odors and fumes while minimizing the risk of breathing. If the odor persists, sprinkle some amount of baking soda on your carpets, leave overnight and vacuum the same next morning.

Onions

Sometimes, it is good to fight against one pesky smell with another smell. To make this thing happen, slice the medium or large-sized onion into half, place each half onion in the freshly painted room and leave for one or two days. The onion tends to eliminate even the harshest paint odor naturally. Make sure to throw away the onions after every use and do not be tempted to eat them or cook them again.

Bucket Full of Water

One bucket full of water can do wonders for you. Here’s how? Just fill one to the three-gallon bucket using tap water only, place the bucket in the center of the room, leave the bucket overnight or until the paint smell goes away completely. If the space is large or wide, use two or three buckets of water to get faster results.

Charcoal

If you’re struggling hard to make your room free from odor or fumes, then activating charcoal could be a good idea. For ages, charcoal is regarded as a household-friendly product that also acts as an odor-absorbing ingredient. To enhance the air quality- pick the activated charcoal in small tubes or aluminum baking pans, leave it in the room overnight to discard the smell of paints from your home.

Coffee Beans

A true coffee enthusiast knows how it feels to smell and take a sip of brewing coffee every morning. Now, the same coffee smell can help you remove those disturbing elements from your home. Just like charcoal, place the coffee grounds or beans in every corner of the room, leave it overnight and let the magic begin.

As a smart homeowner, you want your home to look, feel and smell perfectly. It is important for you to take the necessary precautions after and before applying the spray paint with no health hazards.

Spray Paints: Plan Ahead and Wisely to Mask “Those” Sensitive Smell & Odors

Choosing the right spray paints can enhance the look of your interior effortlessly. But it can also raise a lot of red flags which you are not prepared for. No one wants to deteriorate the air quality as well as affect their health negatively.

If you are opting for spray paint and looking for ways to mitigate spray paint fumes, here are a few additional things that you can do.

  • You must choose top-quality air purifiers or systems to normalize the air quality in your home
  • Selecting the low or zero VOC spray paints can make the painting process much easier while reducing the uncomfortable smell
  • Keep your home well-ventilated. It is important to keep the main gate, doors as well as windows open to get fresh air.
  • The more humid the weather, the more it will produce the strongest fumes. It is advisable to keep a tab on the weather from the beginning to the end of the painting process.
  • Damp walls and wet surfaces can trap fumes easily. It is recommended to fix the walls first with the help of professionals and then use the spray paints for better results.

It is always better to stay “SAFE” rather than “SORRY” by adopting the right methods that can work in your favor. You need to think thoughtfully and positively to keep your health in check. Also, to keep toxic spray paint fumes miles away from your home.

FINAL THOUGHTS

Spray painting is itself a fun, creative, and pleasant activity to make the surface look brand new again. It is worthwhile to not only change the color of your wall but also to keep your home environment smelling better. If getting rid of the spray paint smells seems daunting for you, then you must pick the above-mentioned tips and tricks that you think will significantly help you.

Be it charcoal, baking soda, or buying a low VOC spray paint, you can pick the right steps depending on your level of comfort, severity, and convenience. If you are experiencing spray paint fumes for more than a month, then seeking a professional would be a good option.

Therefore, untrap the trapped spray paint fumes, odors, or smell using the above easy methods to live comfortably inside your home.

How To Remove Spray Paint From Glass?

How To Remove Spray Paint From Glass

Removing spray paint from a glass surface can be a hectic process. Read through the article to learn how to remove spray paint from glass effortlessly.

7 Sure Methods To Get Spray Paint Off Glasses

If you have ever been involved in any painting activities, you probably know that getting rid of spray paint from a given surface is never an easy task. However, armed with the right information, you can remove spray paint from your glass surface with the least effort possible. Read on for more information on how to get spray paint off glasses quickly.

Supplies Needed

  • Suitable bucket
  • Scouring pad
  • Scraper
  • Cleaning rags
  • Paper towels
  • Gloves
  • Protective gear
  • Drop cloth

Method 1 : How To Remove Spray Paint From Glass Using  Acetone?

Removing spray paint from your glass has never been any easier, but thanks to Acetone, you can now get rid of paint stains effortlessly.

  • Cost is a big factor when deciding on the solvent to use. That said, Acetone is cheaper compared to other solvents. Since nail polish remover  is basically acetone, you can use it to get rid of spray.
  • Immerse a rag in a bucket containing your solvent nail polish remover and apply it to the paint spots. Allow your Acetone to sit on the paint stains briefly before rubbing it out.
  • Use a moist rag to wipe the residues left behind after the initial wiping. Use another rag with a warm solution of soapy water to wash dirt on the surface of your glass. At this point, take your paper towel and dry your glass surface.

Important tip: Using Acetone on your fiberglass may cause unprecedented damage.

Method 2 : Using Vinegar To Remove Spray Paint Off Glass

Supplies needed

  • About 1 cup of vinegar
  • Two tablespoons of dish soap
  • Warm water

Using readily accessible household products will help you do the job. Consider using white vinegar because it is as effective as other commercial products.

  • Note that vinegar is an acid. The acidic content in vinegar is enough to dissolve paint stains on your glass, thereby removing them. You can also use  vinegar to get rid of  paint from building glass without any worries.
  • Pour your vinegar into a suitable metal can and boil it. Dip a clean rag in the vinegar solution and rub it onto the paint overspray.
  • It would be helpful to let your vinegar sit on the paint stains for a few minutes before proceeding. At this point, you can use the rag dipped in vinegar to rub on the paint spots.
  • Use your dish soap to clean your glass surface thoroughly. Be sure to use warm water to enable you to remove stubborn and sticky stains. Take a dry cloth and wipe your glass surface dry.

Method 3 : Using Alcohol To Get Spray Paint Off Of The Glass

  • You can easily get rid of spray paint from the  glass using rubbing alcohol. The procedure is nearly the same when using other solvents.
  • Immerse a clean towel in Alcohol and apply it to the paint stains on your glass. Scrap the paint stains using your cloth until the stains begin to come off.
  • It would be helpful to let the alcohol react with the  paint overspray for a  while before moving to the subsequent step.You might want to use a little more of your Alcohol to remove stubborn stains on the surface of your glass.
  • Always perform a sample test on your glass before embarking on your project. Rub a small amount of Alcohol on your glass surface and examine if there is any effect on the glass.
  • Be sure to wash the surface of your glass with soap and warm, then rub the surface using a dry rag.

Method 4 : Removing Spray Paint Off Glass Using Mineral Spirits

  • Did you know that you can use petroleum products to remove paint stains from glass surfaces? Well, now you know. Mineral spirits are excellent cleaning agents, so you should consider using them to eliminate spray paint.
  • As always, wash the surface of your glass using a soapy solution. Be sure to wipe the glass surface after completing the exercise.

Method 5: Using Turpentine To Get Rid Of Spray Paint From Your Glass

  • Using turpentine to remove spray paint from your glass is no different from using Acetone. Immerse a clean rag into a bucket containing turpentine.
  • Rub the soaked rag onto the spray paint. Let the turpentine sit on the stains for a few minutes before you proceed to wipe it off the surface.
  • Scour your glass surface until the paint stains begin to come off. Ensure all the stains have come off the surface before washing the affected areas with soap and warm water. Dry your glass surface using a clean and dry towel.

Method 6 : Using A Water Jet  To Remove Spray Paint From Glass

  • Be sure to work in an open area if you decide to remove spray paint using this method. In this case, you might want to use a high-pressure water source to wash away large debris from your glass surface. However, adjust the nozzle of your horse to avoid damaging your glass.
  • Direct and maintain the jet of water onto the affected parts until the stains begin to come off.

Method 7 : Getting Rid Of Spray Paint Using A Scalpel

  • On the off chance that there are traces of paint remaining on your glass surface, it would be helpful to use a scalpel to chip off the stains.
  • Be sure to hold your scalpel at an appropriate angle to avoid damaging your glass with scratches.
  • It would be a good idea to use your scalpel on a dried glass surface to avoid damaging the glass surface.
  • Be sure to clean your glass surface using warm water and soap, then wipe it dry using a dry rag or piece of towel.
  • If possible, place disposable plastic containers filled with soapy water underneath the paint removal area to catch the paint chips.

Removing spray paint from your glass can be challenging if you’re a newbie on matters to do with paint. The tips highlighted in this article will come in handy whenever you want to get rid of overspray from any given surface. Always remember to clean your glass surface using warm water and soap.

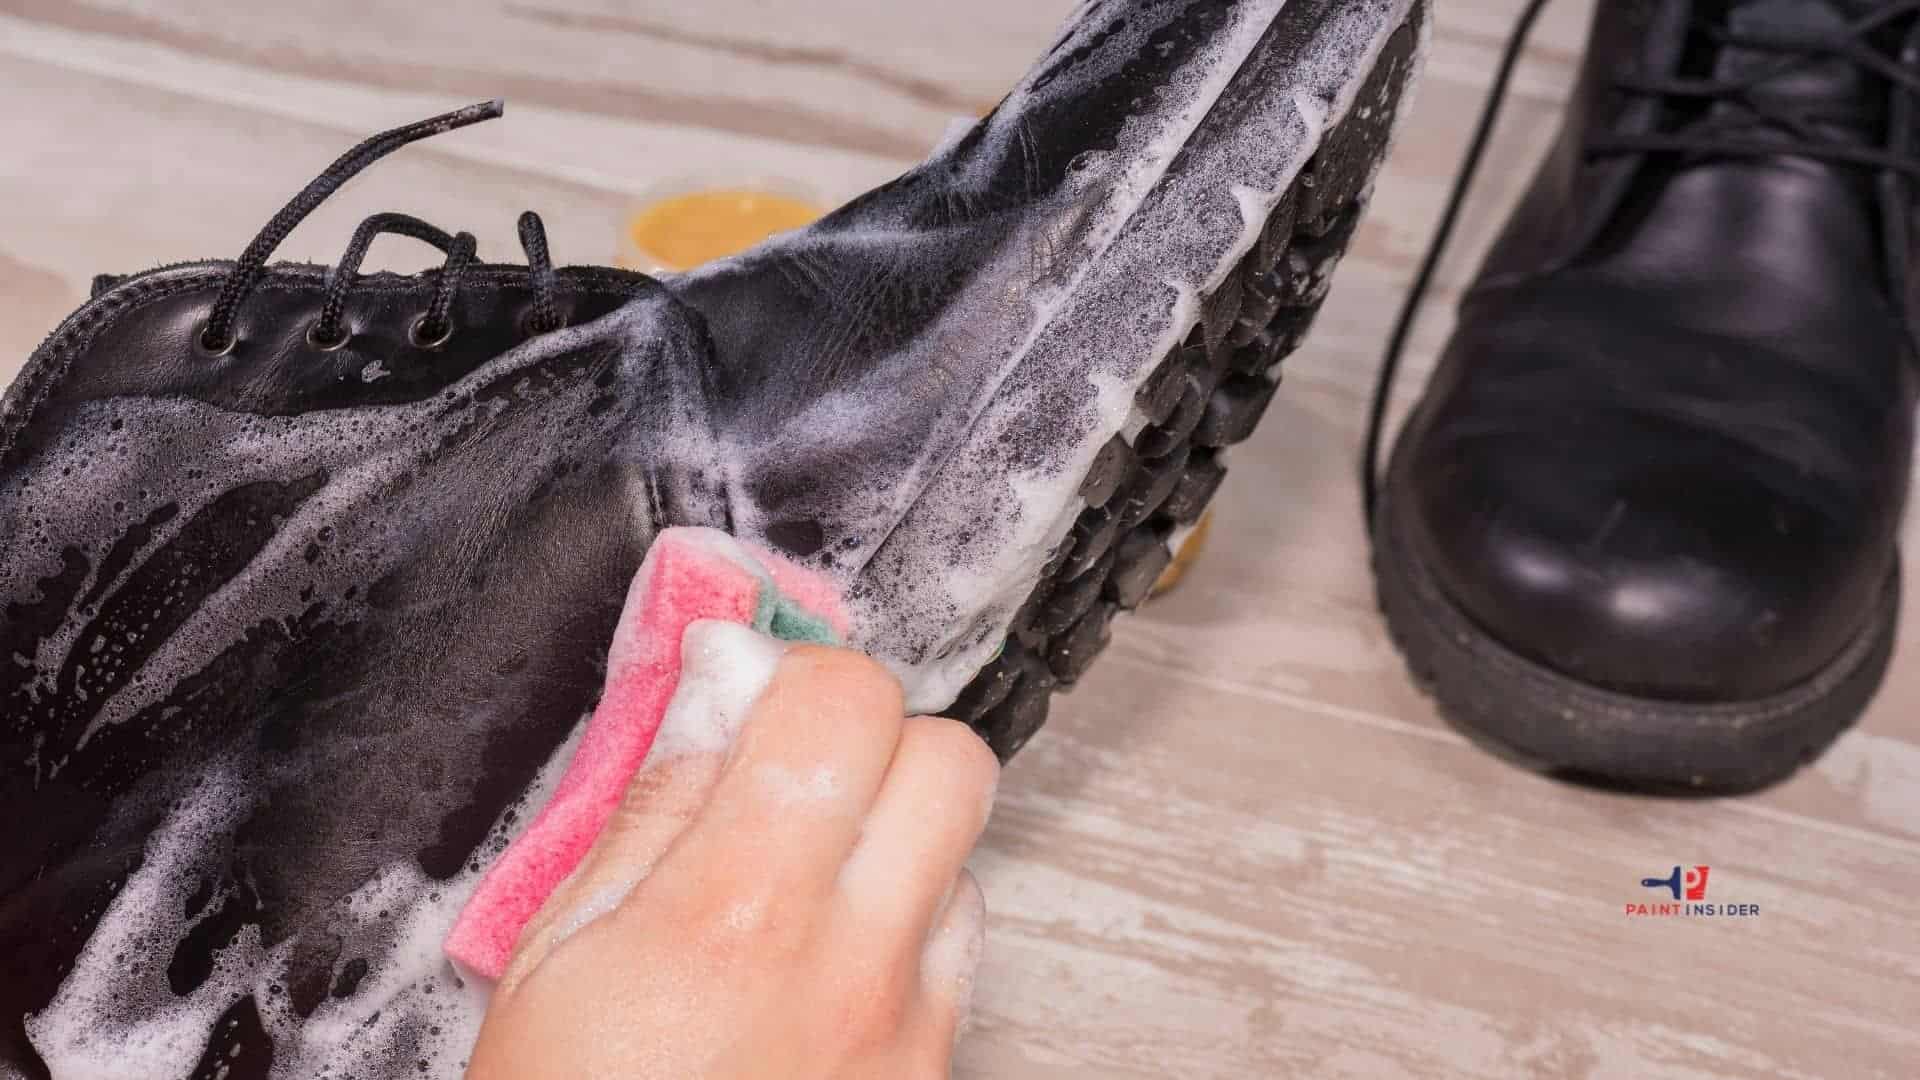
How To Remove Paint From Leather Shoes?

How To Remove Paint From Leather Shoes

The thought of spilled paint on your shoes is an unwelcome one. Regardless, learning how to remove paint from leather shoes is essential. Continue reading for more.

4 Different and Effective Ways to Get Spray Paint off Shoes

You can use many products to remove paint from your shoes; How easy you will to remove spray paint from your shoes depends on the duration the paint has stayed on your shoes. Read on to learn more on this subject.

Method 1 : Using Soap and Water

Before starting anything, note that this method is suitable for freshly spilled paint stains. Nevertheless, you may find it hard to apply this method to dry paint stains. Below is a  step-by-step guide for this method.

Supplies Needed

  • Towel
  • Water
  • Detergent
  • Toothbrush
  • Dry cloth

Step 1 – Wrapping Your Shoes In A Towel: Wrap your towel around your leather shoes so they can absorb the paint stains. The towel will help you to remove excess paint stains on your shoes. Before you apply a soapy solution, stains on stains, so are sure to remove excess paint as much as possible.

Take great care when using your towel on the paint stains because you don’t want to smear the stain all over your shoes. Apply the towel gently to avoid getting messy.

Step 2 – Preparing A Solution Of Soap And Water: Ensure you are using a neutral soap to avoid damaging your leather shoes. One way to ensure your leather shoes are protected is by using suitable detergents when you are cleaning them.

Ensure your soapy solution is made from warm water because you want a fast reaction between your detergent and the paint stains.

Step 3 – Wiping  The Paint Stains: Use a suitable scrubbing tool to get rid of dissolved paint stains from the surface of your leather shoes; It would be helpful for you to use a new toothbrush to work on your shoes. Note that you will be using gentle brushes on the surface of your shoes to get rid of the spray paint.

Step 4 – Use A Soft Towel To Dry Your Shoes: Now that you are removing paint stains from your shoe surface Consider using a soft towel to dry your leather shoes.

Method 2 : Using Organic Oil

In the first section of this article, we examined a method that is suitable only for water-based paints. Olive oil is an excellent detergent for oil-based stains. If you have sufficient quantities of olive oil(cooking oil) in your home, you can use it to get paint off your leather shoes.

One advantage of this method is that you will not do any scrubbing, and with that in mind, here are the supplies you need:

  • Olive oil/cooking oil
  • Clean towel
  • Nail polish remover
  • Cotton swab

Step 1 – Applying Olive Oil: Take a significant quantity of your olive oil and apply it to the paint-stained area of your shoe. Be sure the paint seats on the stains.

Step 2 – Rub The Olive Oil Onto The Paint Stains: Your fingers will be helpful at this point to rub the olive oil over the paint stains. Work thoroughly through the stains until the olive oil interacts fully with the paint stains.

Step 3 – Reaction Time: The Olive oil will react with the paint stains for easy removal, so be sure to allow the oil sufficient time to react with the stains. Note that olive oil can not react with your leather shoes.

Step 4 – Dry The Affected Parts On Your Shoes: Dry the affected area after removing the stains using a clean towel. If you notice traces of tough stains, go over the whole procedure to ensure no strain remains.

 Method 3 : Using Nail Polish Remover

Acetone is considered a cheaper alternative if you don’t have olive oil. Follow these tips to get spray paint off your shoes in no time.

  • Use a cotton swab or a suitable tool to apply the remover on the stains.
  • Blot the remover onto the stains on your boot.
  • Continue pressing the cotton swab on the stains a couple of times.
  • Consider changing your cotton swaps because you don’t want to do a messy job.
  • Gently clean the dissolved stains with a clean and dry cloth.
  • Be sure to apply your preferred leather polish after removing the paint stains to restore the lost dye.

Method 4 : Getting Rid Of Dry Spray Paint Off Leather Shoes

From the previous methods, we discussed how to remove spray paint off your shoes. How do you remove dry paint stains from your leather shoes? Keep reading to discover more.

Supplies  Needed

  • Plastic Material
  • Vinegar
  • Water
  • Stiff brush
  • Sponge

Step 1 – Scraping Off The Paint: Use your plastic material to get rid of excess paint stains from your boot. Avoid using sharp tools to remove the top layers of the paint stains because you don’t want to damage the fabric of your leather shoes.

Step 2 : Applying  Vinegar  To The Stains

You can use vinegar or lemon juice to do the work. Note that both of these solutions are neutral acids and, therefore, cannot damage your leather fabric. Vinegar will break down the paint stains on your leather shoes for easy removal. It would be helpful to consider using alcohol if you don’t have access to either lemon juice or vinegar.

Step 3 – Scrapping The Stained Parts: Use your stiff-bristled bush to scour the affected parts of your shoes. Consider repeating the whole step as described to be sure no paint stains are left behind.

Step 4 – Clean Your Leather Shoes: Use a spongy material to wipe out the paint residue from your shoes. Go over the procedure several times to be sure no stains are left behind.

Getting rid of spray paint from your shoes is not an easy task. Since leather shoes require great care, avoid paint spills on them. It would help to wear suitable shoes when painting to safeguard your leather shoes. Note that it would be best if you learned how to get spray paint off shoes effortlessly. If you apply the methods discussed above correctly, you will get spray paint off your leather shoes much faster.

<!– /wp:paragraph –Follow these tips to get spray paint off your shoes in no time.shoes is an unwelcome one. Regardless, learning how to remove paint from leather shoes is essential. Continue reading for more.

4 Different and Effective Ways to Get Spray Paint off Shoes

You can use many products to remove paint from your shoes; How easy you will to remove spray paint from your shoes depends on the duration the paint has stayed on your shoes. Read on to learn more on this subject.

Method 1 : Using Soap and Water

Before starting anything, note that this method is suitable for freshly spilled paint stains. Nevertheless, you may find it hard to apply this method to dry paint stains. Below is a  step-by-step guide for this method.

Supplies Needed

  • Towel
  • Water
  • Detergent
  • Toothbrush
  • Dry cloth

Step 1 – Wrapping Your Shoes In A Towel: Wrap your towel around your leather shoes so they can absorb the paint stains. The towel will help you to remove excess paint stains on your shoes. Before you apply a soapy solution, stains on stains, so are sure to remove excess paint as much as possible.

Take great care when using your towel on the paint stains because you don’t want to smear the stain all over your shoes. Apply the towel gently to avoid getting messy.

Step 2 – Preparing A Solution Of Soap And Water: Ensure you are using a neutral soap to avoid damaging your leather shoes. One way to ensure your leather shoes are protected is by using suitable detergents when you are cleaning them.

Ensure your soapy solution is made from warm water because you want a fast reaction between your detergent and the paint stains.

Step 3 – Wiping  The Paint Stains: Use a suitable scrubbing tool to get rid of dissolved paint stains from the surface of your leather shoes; It would be helpful for you to use a new toothbrush to work on your shoes. Note that you will be using gentle brushes on the surface of your shoes to get rid of the spray paint.

Step 4 – Use A Soft Towel To Dry Your Shoes: Now that you are removing paint stains from your shoe surface Consider using a soft towel to dry your leather shoes.

Method 2 : Using Organic Oil

In the first section of this article, we examined a method that is suitable only for water-based paints. Olive oil is an excellent detergent for oil-based stains. If you have sufficient quantities of olive oil(cooking oil) in your home, you can use it to get paint off your leather shoes.

One advantage of this method is that you will not do any scrubbing, and with that in mind, here are the supplies you need:

  • Olive oil/cooking oil
  • Clean towel
  • Nail polish remover
  • Cotton swab

Step 1 – Applying Olive Oil: Take a significant quantity of your olive oil and apply it to the paint-stained area of your shoe. Be sure the paint seats on the stains.

Step 2 – Rub The Olive Oil Onto The Paint Stains: Your fingers will be helpful at this point to rub the olive oil over the paint stains. Work thoroughly through the stains until the olive oil interacts fully with the paint stains.

Step 3 – Reaction Time: The Olive oil will react with the paint stains for easy removal, so be sure to allow the oil sufficient time to react with the stains. Note that olive oil can not react with your leather shoes.

Step 4 – Dry The Affected Parts On Your Shoes: Dry the affected area after removing the stains using a clean towel. If you notice traces of tough stains, go over the whole procedure to ensure no strain remains.

 Method 3 : Using Nail Polish Remover

Acetone is considered a cheaper alternative if you don’t have olive oil. Follow these tips to get spray paint off your shoes in no time.

  • Use a cotton swab or a suitable tool to apply the remover on the stains.
  • Blot the remover onto the stains on your boot.
  • Continue pressing the cotton swab on the stains a couple of times.
  • Consider changing your cotton swaps because you don’t want to do a messy job.
  • Gently clean the dissolved stains with a clean and dry cloth.
  • Be sure to apply your preferred leather polish after removing the paint stains to restore the lost dye.

Method 4 : Getting Rid Of Dry Spray Paint Off Leather Shoes

From the previous methods, we discussed how to remove spray paint off your shoes. How do you remove dry paint stains from your leather shoes? Keep reading to discover more.

Supplies  Needed

  • Plastic Material
  • Vinegar
  • Water
  • Stiff brush
  • Sponge

Step 1 – Scraping Off The Paint: Use your plastic material to get rid of excess paint stains from your boot. Avoid using sharp tools to remove the top layers of the paint stains because you don’t want to damage the fabric of your leather shoes.

Step 2 : Applying  Vinegar  To The Stains

You can use vinegar or lemon juice to do the work. Note that both of these solutions are neutral acids and, therefore, cannot damage your leather fabric. Vinegar will break down the paint stains on your leather shoes for easy removal. It would be helpful to consider using alcohol if you don’t have access to either lemon juice or vinegar.

Step 3 – Scrapping The Stained Parts: Use your stiff-bristled bush to scour the affected parts of your shoes. Consider repeating the whole step as described to be sure no paint stains are left behind.

Step 4 – Clean Your Leather Shoes: Use a spongy material to wipe out the paint residue from your shoes. Go over the procedure several times to be sure no stains are left behind.

Getting rid of spray paint from your shoes is not an easy task. Since leather shoes require great care, avoid paint spills on them. It would help to wear suitable shoes when painting to safeguard your leather shoes. Note that it would be best if you learned how to get spray paint off shoes effortlessly. If you apply the methods discussed above correctly, you will get spray paint off your leather shoes much faster.

How To Paint On Silk?

How To Paint On Silk

By now, you realize that you can apply paint on almost any surface provided you follow the proper procedure. With that in mind, let’s learn how to paint on silk.

Introduction: Why Paint on Silk?

Painting on silk is an exciting way to blend creativity with texture and light. Silk, a natural fiber known for its shiny surface, turns simple colors into bright artworks that seem to shine. Each brushstroke flows easily, allowing colors to mix in ways that traditional canvases can’t achieve. This special interaction between the dye and fabric creates a beautiful effect that catches the eye and invites thought.


Painting on silk can also be a calming experience, encouraging artists to take their time and fully engage with their materials. The delicate nature of silk requires patience and precision, helping artists connect more deeply with their work. As you start this artistic journey, you’ll learn new techniques and gain a greater appreciation for every detail in your piece. Whether you’re painting scarves or wall hangings, each silk creation tells a personal story woven into your art.

Tools and Materials Needed for Silk Painting

Painting on silk is a delicate art that requires specific tools and materials. Here’s a list of essentials:

Tools

  1. Silk Frame or Hoop: To stretch the silk and keep it taut for painting.
  2. Paintbrushes: Fine-tip brushes for details and wider brushes for larger areas.
  3. Dropper or Pipette: To transfer dyes accurately.
  4. Spray Bottle: To mist water to create gradients or keep the silk damp.
  5. Pins or Clips: To secure silk to the frame.
  6. Hair Dryer: To speed up drying between layers.
  7. Iron: For heat-setting the paint or dye.

Preparing the Silk Fabric Properly

To prepare silk fabric for painting, start by cleaning it. Wash the silk gently in cool water with a mild detergent made for delicate fabrics. This removes any factory coatings and tightens the fibers, creating a smooth surface for the paint. After rinsing, hang the fabric to dry away from direct sunlight to keep its shine.

Once the silk is dry, stretch it lightly onto a frame or hoop. This will keep it stable and prevent creases while you work. You can also use masking tape along the edges for extra security and to help you create clean lines while painting.

Preparation is not just about cleaning; think about how your colors will work together on the shiny silk. Plan their placement carefully to enhance your artwork.

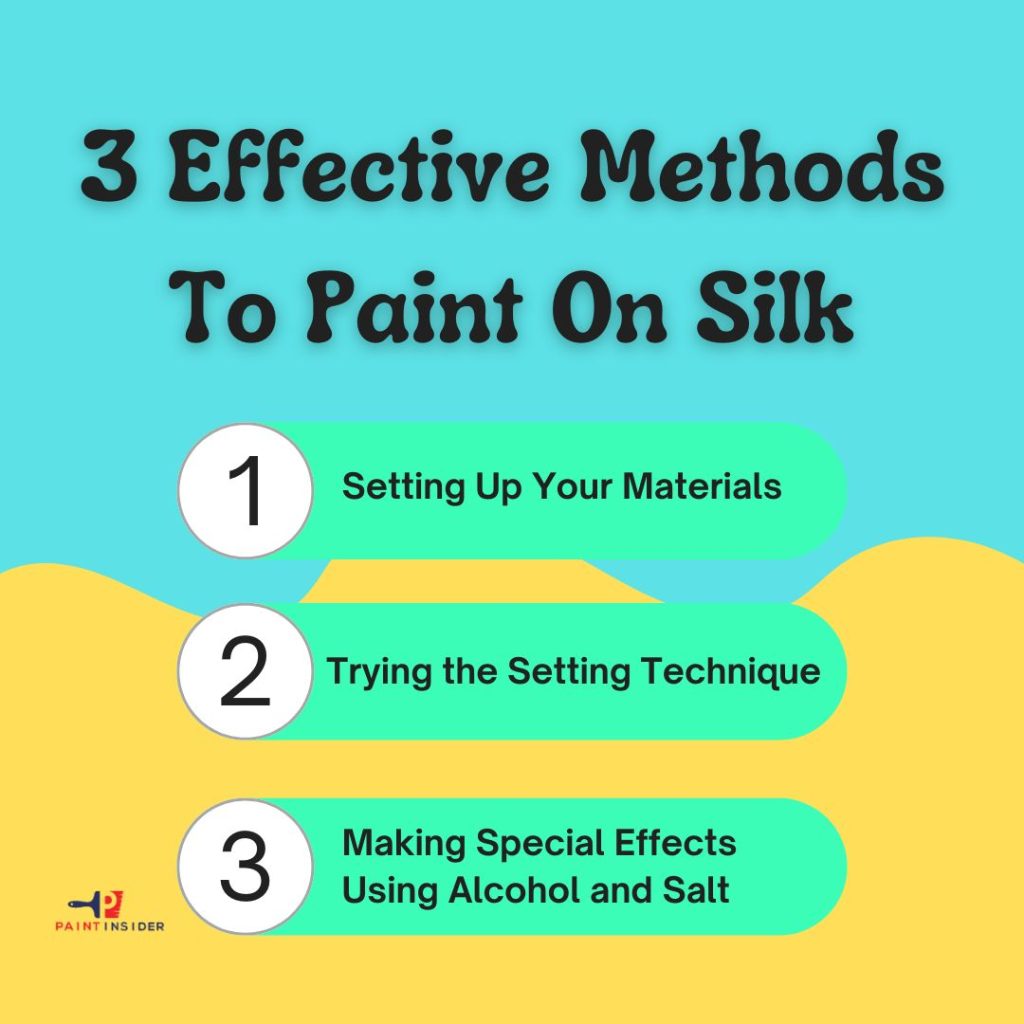
3 Effective Methods To Paint On Silk

Successful painting entails a lot of input from you as an artist. You can paint on any surface if you are armed with the correct information regarding your painting project.

Yellow and Pink Playful Vibes Stress Free in 3 Steps Instagram Post

Method 1: Setting Up Your Materials

Before you begin your project, ensure you have all the necessary supplies at your disposal. If you have the correct supplies at your disposal, you can easily apply paint to your silky fabric effortlessly. Below is a step-by-step guide on how to paint on silk easily.

Step1. Use paints meant for silky surfaces

It is common knowledge that any form of paintwork requires you to use the most suitable color for excellent results. In this case, consider using silk-based paints if you want flawless paintwork.

Step 2. Clean your silk thoroughly

As always, ensure your painting project is clean before applying any paint. This is to remove any dirt that may affect the bonding properties of the color to the surface. The most appropriate way to clean your silk material is to wash it with your bare hands directly.

Step 3. Straighten your silk using a suitable mounting

If you are creative enough, you can craft your prop to stretch out your silk fabric. Alternatively, you can buy ready-made support to carry out your exercise. Be sure your material is adequately stretched for proper painting.

Method 2: Trying the Setting Technique

Step 1. Create a sketch of the silk

At this stage, you need to employ your artistic skills properly. Create several drawings, first on a piece of paper using your pencil. Pick the most appealing graphic and recreate it on your silk fabric.

To recreate your sketches on the material, It would be helpful to trace them using a pencil and an appropriate marker. Note that you are not limited to the designs you can make; patterns such as flowers and wordings of your choice will do better.

 Step 2. Make a bold outline of your sketch

Use a suitable resist substance to outline your designs. You can shop online for the most suitable resist solvent to use for your project. Be sure to outline your sketch bold enough for desired results. While creating the outline, be sure to press gently for efficient products. Avoid breaks between your lines of the sketch.

 Step 3. Let the Tracing Chemical dry

Be sure to give the resist chemical used above maximum drying time before moving on to the next activity. It would be good to consider using a source of dry air to quicken the drying process.

Step 4. Use a suitable brush for paint application

When applying paint on fabric, the most critical consideration should be the paintbrush you are using. In our case, be sure to select a medium brush for use on your silk painting project. Work your way around the silk fabric until all the surface is covered in paint.

Step 5. Place the paint with iron material

Be sure to switch your mounting after every twenty-four hours. Place a suitable ironing material beneath your silk fabric. Set a standard temperature on your iron box and press on your fabric. Ensure you iron the entire surface of your fabric for even and consistent results.

Step 6. Washing /Dry cleaning your Silk fabric

After completing your paint application and ironing exercise, it is time to wash your artwork to remove any chemical substances used in the initial stages. Alternatively, you may consider dry cleaning your fabric depending on the type of Chemical used to create your outline.

Method 3: Making Special Effects  Using Alcohol and Salt

Step 1. Applying  A mixture of alcohol and salt

This method is a bit straightforward, and you are only required to use a combination of alcohol and salt on your silk fabric. A mixture of alcohol and salt will create a medium under which your paint can work efficiently on the silk fabric.

Step 2. Applying the initial coat of paint

After applying a mixture of rubbing alcohol and salt to your silk item, you can go ahead and apply your first coat of paint. Be sure to use a suitable paintbrush at this point because you want the lines and edges of your pattern to be as bold as possible.

Step 3. Adding a dark shade

Apply subsequent coats of paint but be sure to use a shade of paint that is a little darker than the initial one. Be sure of the colors to start with because once you are done applying one color, there is no room to redo it if you are mixed up.

Step 4. Let the shades applied dry correctly

Just as you would other layers of paint, be sure to let your painted layers a sufficient amount of time before jumping into the next step.

Step 5. Make your lines bolder using a darker shade

Since you want the lines on your fabric item to be more visible, it would be helpful to consider using a shade that is a little bit dark to make them bolder. You will notice the outlines once the paint dries out.

Step 6. Sing Alcohol

As mentioned in the preceding sections of this article, consider using a mixture of alcohol and salt to create a medium under which paint can work efficiently on the silk fabric. Note that alcohol is essential if you want to smooth out sharp outlines on your silk paintwork.

Step 7. Ironing Your Silk Paintwork

Prep your fabric for ironing. However, be sure to allow your material a standing time of up to twenty-four hours before you do the ironing. Press your iron over the fabric gently but in circular motions until all the paint sets in properly.

From the preceding information, you may have discovered that you can paint on any project provided you have the right supplies and the correct information. Although painting on silk surfaces is tricky, the tips highlighted above will come in handy whenever you decide to paint on a silky material. Enjoy your painting!

Troubleshooting Common Issues in Silk Painting

Silk painting can sometimes lead to problems. Here are some common issues and how to fix them.

1. Colors Bleeding:
If colors run into each other, it may be due to too much water or not enough resistance. To fix this, use less water when mixing paints and apply resist properly to keep colors separate.

2. Faded Colors:
If your colors look dull after drying, it might be because of low-quality dyes or not enough layers. Use high-quality dyes and apply multiple layers for brighter colors.

3. Streaks or Lines:
Streaks can happen if you don’t apply paint evenly. To avoid this, use a soft brush and work quickly to spread the paint smoothly.

4. Wrinkles in the Silk:
Wrinkles can form if the silk is not stretched properly. Make sure to stretch the silk tightly on your frame before painting.

5. Paint Not Setting:
If the paint washes out, it may not have been set correctly. Follow the setting instructions carefully, and consider using a fixative to help the paint stay in place.

By addressing these common issues, you can improve your silk painting experience and create beautiful artwork.

Conclusion: Embrace Your Creativity with Silk Painting

Silk painting lets you colorfully express your creativity. This art form lets you experiment with colors and textures that other mediums can’t offer. As you paint on silk, you’ll see how the dyes interact with the fabric, bringing your imagination to life. Whether you make a beautiful scarf or a wall hanging, silk painting creates a personal connection between you and your work, allowing for spontaneity in your art.

Silk painting is also a great way to relax and practice mindfulness as you focus on the details of your design. The way the dyes flow reflects our creative processes sometimes unpredictable but always beautiful. So, why not try this art form? Gather some silk, brushes, and gutta resist, and ask yourself how to paint on silk. You might discover hidden talents and passions that bring you joy in every piece you create.

How To Paint Latex Mask?

How To Paint Latex Mask

Having the correct information regarding any painting project is a critical step towards achieving desired results. This article will focus on how to paint a latex mask.

3 Sure Methods To Paint Latex Mask Effortlessly

There could be many methods you can use to apply paint on your latex mask. However, each technique has specific procedures and guidelines which you must follow adequately to produce a stunning piece of painting. Before you embark on your painting project, be sure to have all the necessary supplies as seen below:

Supplies Needed

  • Rubber cement
  • Turpentine
  • Latex-based paint
  • Oil-based paint
  • Compressor
  • Brushes
  • Dubbing substance
  • Water

 Method 1. Blending  your Paint

This method will entail the blending of your paint with other additives such as rubber cement which you will you on your latex mask. Below are the steps involved:

Step 1. Prepare your working area and put on protective gear

Because you will be working with paint-emitting fumes, you only prepare yourself adequately. Arrange your working space for ease of painting, and most importantly, put on suitable protective gear to shield yourself from the harmful paint fumes.

 Step 2. Use a paint specifically meant for latex

Although you can mix your paint to apply on your latex mask, it is advisable to purchase an already packaged paint meant for use on latex surfaces. You can make your order online and have it delivered to your place of work.

 Step 3. Using Rubber Cement

Measure a significant amount of rubber cement and put it in a suitable container. Note that this step is only necessary if you decide to prepare your latex paint; Rubber cement will improve the adhesive properties of your color for easy application on your latex mask.

 Step 4. Adding Turpentine to Rubber Cement

Add the correct proportion of turpentine to the rubber cement and stir until you get a consistent solution.

 Step 5. Mix the rubber cement solution with an Oil-based paint

Mix your contents in a ratio of 2:1. For every two spoonfuls of your oil-based paint, add one spoonful of the rubber cent solution and stir to achieve a uniform mixture. If you mix the contents in the right proportions, you should form a paint that will easily sit on your latex mask.

 Method 2. Paint Your Latex Mask With an Airbrush

Step 1. Use your airbrush and compressor

Because applying paint on a latex material requires high standards, It would be helpful to use a compressor and airbrush even to apply paint. If you are clueless about the working of the two components, consider seeking the service of a technician to help connect the airbrush and the compressor.

Step 2. Pouring your Paint into the spray can

Measure a significant amount of the paint you prepared above and pour it into your spraying can. Alternatively, you can use ready-made paint designed to be used on latex material. Ascertain that your tools are properly fixed to avoid any paint leakage.

 Step 3. Actual Application Of Paint

Now you are almost done with your painting project. Hold the nozzle of your spray gun at a suitable distance from the mask and start spraying. Ensure that your spray is even and consistent by adjusting the nozzle accordingly. One coat is enough if done correctly.

 Step 4. Let the Paint Dry

The recommended drying time, in this case, should be anywhere around one to two hours. Be sure to add one more coat of the pant before allowing it to dry because you want an even and smooth finish; the final coat should be relatively thin to enhance blending properties between the latex surface and the paint.

 Step 5. Cleaning your airbrush and changing colors to use

If you are painting a Halloween mask, you may have to apply various colors to your latex mask. Before switching to a different color, be sure to clean your airbrush properly to avoid messing with your paintwork. It would be helpful to rinse your airbrush tip with the color you’re switching to before filling your spray can with paint.

Step 6. Doing touches on your latex mask

Your airbrush will be very useful in adding final touches and decorations to your latex mask. Be sure to use suitable colors on specific parts of your show. The last look of your latex mask will depend on the type of shades and touches you make on your front.

 Method 3. Painting your Latex Mask Using Standard Paint Brushes

Step 1. Create a primer using a thin coat of paint

Use a suitable brush to apply a thin layer of color to your latex mask. Be sure to use a thick but flat bristle paintbrush for your exercise. Get rid of excess paint drops utilizing a piece of towel.

 Step 2. Allow the paint sufficient time to dry

As always, let your paint dry before continuing to the next step. Allowing your color enough time to dry will ensure that your stains stick correctly on your mask.

 Step 3. Detailing your latex Mask

In this case, it would be helpful to use a small brush to detail your latex mask. Be sure to use a small brush with relatively thick bristles for better application of paint. You want your mask to look natural, so you can be as creative as you want.

Apply gentle and calculated strokes to avoid distorting the intended look on your latex mask. As we mentioned earlier, be sure to wash your brushes thoroughly before alternating between colors.

 Step 4. Use a dubbing material (Sponge) to bring out the outer feel of your mask

Because you want your mask to have an authentic and consistent look, it would be helpful for you to use a sponge to dab on the surface of your latex mask. Immerse your sponge in the paintwork on your mask until you have the results you want.

From the preceding content, you may have realized that applying paint on a latex material is a bit challenging if you don’t have the foggiest idea about the whole process. The tips featured in this article will help you to understand how to paint your latex mask with much ease.