How To Make Flat Paint Semi-glossy?

How To Make Flat Paint Semi-glossy

You may find it easy to apply flat paint but it gives off a dull finish. So, you should know how to make flat paint semi-glossy to do away with dullness in your room

None of us would wish to stay in a dull-painted house, which is why, if you are a DIY person, you will try to make your room as shiny as possible. In trying to find a perfect fit for your house, you may end up applying dull paint, which in this context we are calling flat paint. So, how can you describe flat paint?

Flat paint contains a higher concentration of pigments as compared to other paint finishes. It is this attribute that makes it a good filler. Additionally, flat paint absorbs light (also described as non-reflective).

You may find it easy to apply flat paint on a given surface compared to other paints. It is cost-effective and effective in getting rid of small bumps on the surface. However, note that flat paint gives off a dull finish needed to make it gloss or semi-gloss (how to make flat paint semi-gloss) to do away with dullness in your room.

What is Flat Paint?

Flat paint, characterized by its non-reflective finish, possesses a unique charm that many homeowners appreciate. It offers a soft, velvety texture that not only masks wall imperfections but also creates an inviting ambiance in any room. Unlike glossy paints, which can sometimes feel sterile or overly shiny, flat paint absorbs light rather than reflecting it, giving spaces a warm and cozy feel. Its subdued nature lends itself beautifully to contemporary and rustic aesthetics alike.

However, if you’re looking for ways to elevate your design while keeping the soothing vibes of flat paint intact, consider blending it with semi-glossy elements. A popular method among creatives is mixing a small amount of semi-gloss or satin finish into the flat paint that can enhance durability while subtly increasing sheen without completely losing that classic matte appearance. Alternatively, strategic placement of semi-gloss accents through trim or furniture against flat-painted walls can create stunning visual contrasts that breathe new life into your existing decor. Understanding how these finishes interact invites limitless possibilities for transforming your space!


Steps To Make A Flat Semi-Paint Glossy

You can give your flat paint a glossy and bright look by using an appropriate glazing medium, and in this case, you can use a water-based poly-acrylic varnish. Like any other painting, you will need to prepare your walls adequately and then apply your thinner accordingly. So, how do you make flat paint semi-gloss? Read on to find out more.

Follow the following steps carefully to prepare a uniform gloss paint from flat paint.
How To Make Flat Paint Semi Glossy

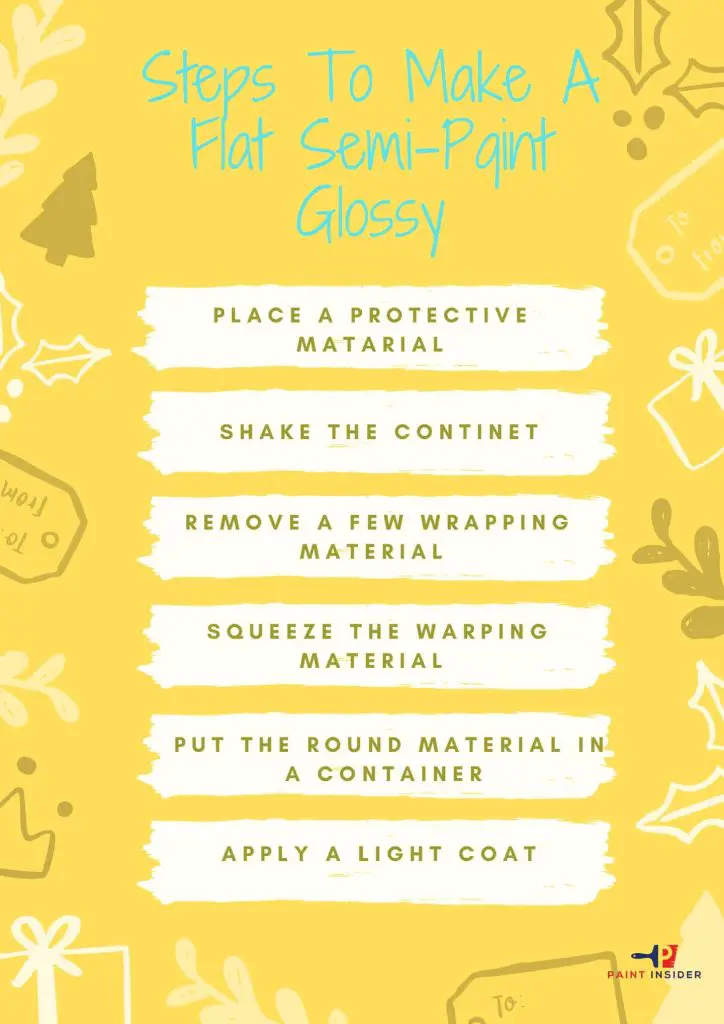
Step 1 – Place a protective material below your painting exercise. You can use an old piece of cloth for this step. The glazing content sips through the drop cloth quickly.

Step 2 – Shake the container holding your glazing medium thoroughly to blend the contents. Shake the can of glazing medium well to mix the ingredients.

Step 3 Remove a few inches of the wrapping material and use it to apply the glazing medium since it is non-absorbent. You should be able to see a glossy shine on the surface.

Step 4 – Squeeze the wrapping material into a round shape.

Step 5 – Put the round material in a container of glaze.

Step 6 – Apply a light coat of the glazing medium on the wall. Repeat this step a couple of times over a specific area.

Choosing the Right Additives for Gloss

When it comes to enhancing the sheen of flat paint, additives can be game-changers. Choosing the right additives isn’t just about achieving a semi-gloss finish; it’s about elevating your overall decor aesthetic and durability. A common choice is a gloss medium that can seamlessly blend with existing paints while offering UV protection. Additionally, consider experimenting with pearl or satin additives, as they add unique depth without overpowering the exquisite of flat finishes.

Don’t overlook compatibility between your existing paint and selected additives, this ensures proper adhesion and longevity of the final look. Testing small batches before committing is essential; it lets you preview your chosen combine’s appearance under different lighting conditions. While navigating these options might feel daunting, exploring innovative blends could transform not only how surfaces catch light but also how they fit into your design vision seamlessly. As you embark on this journey, remember: achieving that perfect semi-gloss isn’t merely a cosmetic choice, it’s an expression of personal style waiting to shine through!

Application Methods for Semi-Gloss Effect

Achieving a semi-gloss finish from flat paint can be an art in itself, and various application methods can enhance the sheen while maintaining a smooth appearance. One popular technique involves using a gloss medium mixed with your flat paint. By gradually blending in small amounts, you can control the level of gloss desired, allowing for personalized finishes that cater to specific lighting conditions or design aesthetics. This method not only prolongs durability but also ensures that the color remains vibrant without turning overly reflective.

Another effective approach is through layering. Start with a thin coat of semigloss or satin topcoat to stop your already painted flat surface. Applying multiple light coats instead of one heavy layer helps to avoid drips and creates an even texture that catches the light beautifully without overpowering the underlying matte look. If you’re feeling adventurous, consider incorporating sponging techniques with diluted gloss paints to create unique textures and subtle highlights that breathe life into your spaces.

Lastly, don’t overlook the power of sanding between coats for achieving that sought-after semi-gloss effect. A fine-grit sandpaper will help smooth imperfections while enhancing adhesion as you apply your final glossy finishes resulting in an effortlessly sophisticated aesthetic. With these tips in mind, transforming flat surfaces into stunning semi-gloss statements becomes not just possible but truly enjoyable!

Tips for Achieving Consistent Results

Achieving consistent results when transforming flat paint into a semi-gloss finish requires both technique and patience. One of the most effective methods is to mix a clear gloss medium with your flat paint; this not only enhances the sheen but also maintains the integrity of the original color. Be sure to start with small test batches, as even slight variations in mixing can significantly alter your final result. Distributing the gloss medium evenly ensures that every stroke replicates that desired semi-gloss look.

Another key aspect lies in your application technique. Using a high-quality synthetic brush or foam roller can help you achieve an even finish without streaks or blotches. Apply multiple thin coats instead of a single thick layer; this approach allows for better control over sheen while reducing drying time and potential imperfections. Finally, remember that drying conditions play an essential role for ideal temperature and humidity levels will enable each coat to cure perfectly, paving the way for that beautifully consistent semi-gloss effect you’re aiming for.

The Benefits of Glossy Paint

There are many reasons why you should opt for glossy paint over flat paint. Note that a higher concentration of ingredients in paint does not make the paint more durable. So what are the benefits of using gloss paint? Continue pursuing to discover more information.
How To Make Flat Paint Semi Glossy Copy

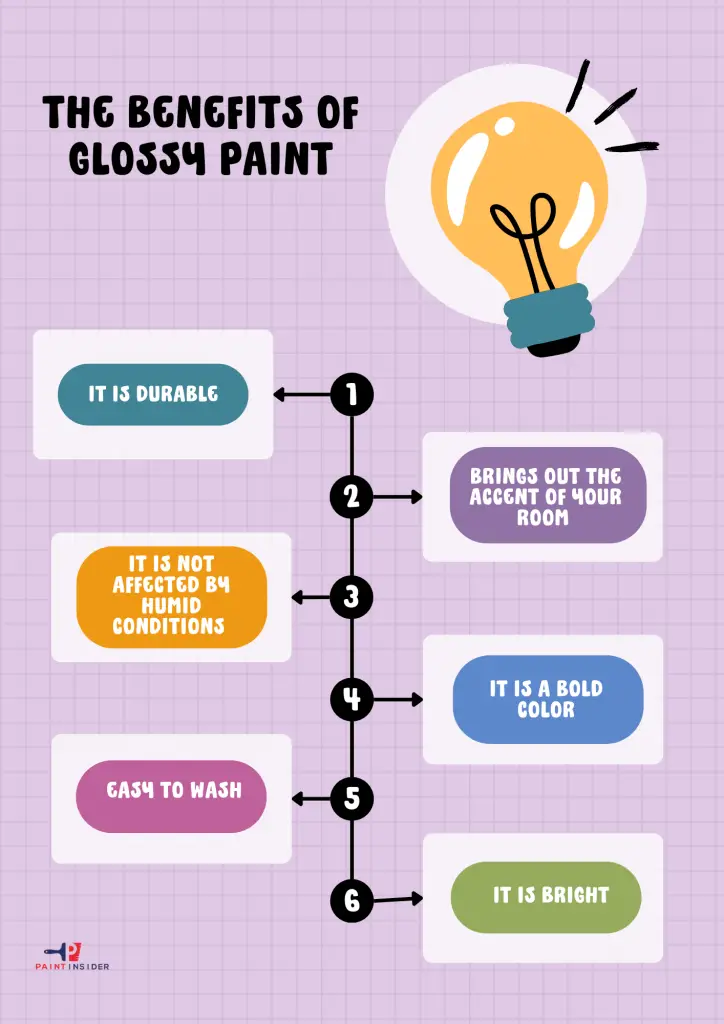
It Is Durable – A higher concentration of pigments in flat paint can make it peel and come off quickly, which is why you should consider using gloss paint because it has high bonding content; this will minimize peeling.

Brings Out The Accent Of Your Room – Gloss paint brings out the finer details of the room and makes them shine brightly.

It Is Not Affected By Humid Conditions – You have seen that gloss paint is more durable than other finishes; this makes it also a good pick if you stay in high humidity areas since it is not affected by moisture and water vapor.

It Is A Bold Color – Gloss paint brings out the boldness in any color and, since it is non-reflective, forms a uniform shiny surface. If you want to stress specific areas in your room, then gloss paint will do the magic for you.

 Easy To Wash – Gloss paint is to wash. The layer gloss paint lets you clean the surface quickly without any damage worries. Flat paint is prone to water damage, so you should give it a gloss finish to make it water-resistant.

 It Is Bright – Glossy paint is an ideal paint if you want to brighten your rooms. It has desirable reflective properties which you can use to illuminate your house instead of relying on natural light to lighten your room.

 Compatible With Other Finishes – You can mix gloss paint with other colors to give you the finish you want without much difficulty. Gloss paint allows you to create various finishes to apply to areas of your choice with much ease.

Disadvantages Of Gloss Finish

Every finish you choose to use has both advantages and disadvantages, and a gloss finish is no exception. Having looked at its benefits, let us now explore its disadvantages. Won’t we?

It Shows Imperfections – If you paint gloss paint on a surface, that is. Poorly painted initially, the result might not be so appealing; Since it unhide the hidden parts of the surface, applying it might bring out a clear finish and might show some imperfections on the surface of a material. For this reason, you might consider using flat paint only on walls with many imperfections.

Painting Over Gloss Finish Is Difficult – You have painted your dull walls with a gloss finish and polished them accordingly. But the finish won’t last forever, and you might want to repaint the surface in the future. Painting over a glossy finish poses a significant challenge to painters since it is not an easy task. The outcome of such an endeavor is mostly an ugly-looking surface.

With time, your gloss finish will lose its luster and change its appearance completely; Initial coats may begin to show up prominently, so are unwanted spots, and all this will add up to an ugly surface, making it almost impossible to repaint.

Nevertheless, you can maintain your gloss finish by ensuring it is clean all the time, and this will save you from stressing about how to do a touch-up of your walls in the future.

Common Mistakes to Avoid

One of the most common mistakes people make when trying to achieve a semi-glossy finish from flat paint is overlooking surface preparation. If the surface isn’t clean and well-prepped, even the best paint modifications will fail to yield the desired effect. Always ensure that you repair any imperfections, sand down rough areas, and apply a good primer where necessary; this can vastly improve adhesion and enhance the final appearance.

Another pitfall is underestimating the importance of mixing techniques. Simply adding a gloss medium or varnish on top of flat paint might seem like a quick fix, but if not mixed thoroughly or evenly applied, it can lead to uneven sheen and unsightly streaks. Instead, consider blending the flat paint with a suitable glossy additive before application for an even finish. Lastly, keep in mind that lighting plays a significant role in how finishes appear; test your newly created semi-gloss in different light conditions to ensure consistency and satisfaction before committing fully to your project.

Conclusion

Making a flat paint semi-glossy need not be a difficult task that experienced painters can only perform. Armed with the right tools and procedures, you can easily make flat paint look glossy and shiny to brighten your spaces.

Follow the steps outlined above to achieve a perfect blend of gloss finish for your project. It would be best to keep in mind that you must do patch tests on the wall to ensure you achieve the finish you want. Enjoy your painting!

The Top 7 Best Chalk Paint for Furniture

Best Chalk Paint for Furniture

When it comes to transforming tired furniture into stunning statement pieces, chalk paint is a revolutionary tool in the hands of DIY enthusiasts and professional painters alike. The quest for the perfect chalk paint can be daunting with so many brands flooding the market, each claiming to be the best. In this comprehensive guide, we have sifted through countless options to bring you an expertly curated list of the top 7 best chalk paints for furniture that promise to elevate your next project from mundane to magnificent.

From vintage shabby chic vibes to modern sleek finishes, these handpicked chalk paints offer a spectrum of colors and textures, ensuring there’s something for every style and taste. Whether you’re a seasoned pro looking for superior coverage and durability or a beginner seeking user-friendly formulations that guarantee exceptional results, our selection caters to all preferences. Get ready to dive into this detailed exploration of the finest chalk paints on the market, and discover which one will become your go-to companion in your furniture transformation journey.

Who Needs This Product?

Chalk paint is ideal for all kinds of painters, from more experienced ones to first-time painters. Considering how Chalk painting requires a minimum skill set, with a little bit of research, you can equip yourself to have a professional finish on any furniture you prefer.

What Readers Will Get Ahead

Finding the best one in the market can be the most intimate choice you’d ever make. So, here’s a complete guide that breaks down all the concepts, the best chalk paint for furniture, and buyer’s guide, and provides a solution to all paint-related problems. So, let’s dive right into it!

7 Best Chalk Paint for Furniture

  1. Retique It Chalk Furniture Paint by Renaissance DIY, 16 oz (Pint) – Best Overall
  2. KILZ 4804 Interior Chalk Style Ultra Flat Decorative Paint for Furniture – Best for Indoor Purposes
  3. Rust-Oleum 285140 Ultra Matte Interior Chalked Paint – Best for Coverage
  4. Retique It Chalk Furniture Paint by Renaissance Deluxe Starter Kit – Best for Art and Craft Projects
  5. FolkArt Home Decor Ultra Matte Chalk Finish Acrylic Craft Paint Set Formulated – Best for Beginners
  6. KILZ L540746 Chalk Spray Paint for Upcycling Furniture – Best for Thin Paints
  7. Rust-Oleum 302595 Chalked Paint Spray, 12 oz, Serenity Blue – Best in Effectiveness

1.   Renaissance DIY, 16 oz (Pint) – Best Overall

Retique It Chalk Furniture Paint by Renaissance DIY, 16 Fl Oz (Pack of 1)
Check Latest Price

Instead of doing a full house redo, you can count on this highly easy-to-use Retique It Chalk paint to freshen up your cabinets with a pop of color or even go for neutral tones for that ever-needed elegant look. The formula glides on the surface just fine and gives you the freedom to choose from over 4 colors ranging from neutrals to oh-so-bright ones.

Made in the USA, this paint allows you to prevent scuff and scratches regardless of how many kids you have at home. In addition, it offers superior coverage, which lets you get solid-looking paint in just 1-2 coats. With little prep work, this paint is specially formulated for furniture cabinets and home decor to help give a personal touch to everything you do.

It is an excellent choice for both exterior and interior furniture projects. However, it is recommended for outdoor projects to use a marine finish topcoat like Politique It right before applying the clear wax to help secure the color in place.

That’s not it; it dries within 30 minutes to get you the contemporary finish that you have been longing for. What makes it a great choice for creative DIYers is how the matte finish lets you distress the color (if desired) for that artsy look. As for practicality, it is hypoallergenic with no small, Ultra-low VOC (Volatile Organic Compounds) and is easy to clean up with just soap and water for added perks.

Features

  • You get to have a final look in just 1 to 2 coats.
  • It offers a silky, chalky, and smooth finish that feels gentle on the tips of your fingers
  • It contains no toxic materials to make it safe for indoor purposes
  • The thick and self-level coverage make it a convenient choice to have

Pros

One of the many reasons why this paint takes the lead is how much great durability it offers. Weekly parties can expose your furniture to scratches and damage by the guests. However, with this, I still haven’t found any scratches.

At first, it was easy to apply and gave a smooth look in just two coats without the need to smoothen the surface by sanding. The 100% recycling coating in a chalky smooth finish makes it a safe choice with zero emissions for your home.

Cons

The paint creates a mess while applying. Also, if you are a newbie, it can be hard to find the ratio of dark to chalk paint to let it spread evenly across the surface.

2.   KILZ 4804 Interior Chalk Style Ultra Flat – Best for Indoor Purposes

KILZ 4804 Interior Chalk Style Ultra Flat Decorative Paint for Furniture, 1 Quart, Authentic Navy, 32 Fl Oz
Check Latest Price

With 14 different shades, this water-based Chalk paint formula is everything you need to experiment with your furniture. Whether it is the dark tones you love or the bright, refreshing ones, it can add any ascent to your room. Thanks to its smooth application, it wouldn’t be a surprise if you ended up painting the entire house with this.

The paint can be used to cover up old or new wood, concrete, glass, wicker, and cast stone for added convenience. Unlike any other type of paint, you don’t have to worry about the surface before painting it. The ultra-matte paint formula can help give chic vibes and offers a durable overall finish. I love this specific chalk paint because it goes on thick and provides unmatched coverage to make this hectic task seamless for you.

However, it is best to make sure the paint goes on clean and dust-free furniture to have a smoother look at the end. You can easily touch the paint after 1 hour and recoat it after 2 hours for your desired finish. Another thing to bear in mind is that the paint is tinted with colorant, so it’s never a bad idea to stir it well before use.

Features

  • The ultra-matte texture is ideal for small interior furniture
  • Offers x100 coverage to improve convenience
  • It comes in 1 quart of paint
  • Should only be used for indoor purposes
  • Can add character to anything you apply this to

Pros

Using the wide array of color options, you can easily add a pop of color to any surface you may like without breaking a sweat. As it is chalk paint, you don’t have to prep the surface besides cleaning it to get the best results. However, what makes it stand above the rest is the overall professional finish that distinguishes this paint from most of the brands out there.

Cons

Compared to most other chalk paints, this one has slightly thinner formulas which means you may need to go overboard with the layers. In addition, although it offers a wide range of colors, it lacks some of the basic colors for people who are only looking to upcycle their furniture. 

3.   Rust-Oleum 285140 Ultra Matte – Best for Coverage

1 qt Rust-Oleum Brands 285140 Linen White Chalked Ultra Matte Paint
Check Latest Price

Regardless of whatever surface you may have, this Rust-Oleum Ultra Matte Interior Chalked Paint has got it all! You can use it on a wide variety of surfaces ranging from canvas, and ceramic to metal for that gorgeous vintage look. In addition, the low-odor latex formula is easy to clean and dries in just about 30 minutes for an easy application. This is, in fact, one of the best things about Rust-Oleum, as you can finish off the entire project in just a few hours.

It results in zero-emission and still a professional finish. It can cover about 150 feet easily, and the one-coat coverage means you can also go ahead with a distressed look to complement the rest of the furniture.

However, according to a few chalk paint experts, it’s best to sand or light scuff high gloss surfaces before application. You can also try 1-3 even coats with 30 minted gaps each. The eight classic colors are everything you need to color your favorite surfaces and make them a statement in the room. It can be used straight out of the paint can, which means no mixing or stirring is required. In addition to that, the ultra-matte, velvety finish, and excellent adhesion make this Rust-Oleum paint a must-have at home!

Features

  • Made for interior purposes only, which makes it a safe choice to have
  • The 30 oz can is big enough to cover 150 sq ft of surface area
  • It can be a great way to DIY projects and upcycle your furniture.
  • It is also available in Chalked Spray and Chalked Glaze to help you get your ideal finish.

Pros

If you are looking for ways to rejuvenate your house, nothing can beat this paint in a wide range of colors and textures, giving a Chippy look with slight traces of vintage. You can rest assured that it will stick to any surface like metal, glass, and ceramic.

You can count on trendy colors to paint your furniture paste and ensure to keep it clean using its easy-to-clean properties and wipe it off using soap and water. If you want a product available in a wide array of color options, this one is your best bet to go.

With this, it’s possible to get a unique look by simply building up the layers. For added protection, count on the Rust-Oleum Chalked Clear Protective Topcoat after the painting application.

Cons

The cans came dented for some customers, which led to a mess and overall poor experience. However, this can be prevented by making sure you got the right can and asking for a return/refund if you didn’t.

4.   Renaissance Deluxe Starter Kit – Best for Art and Craft Projects

Retique It Chalk Furniture Paint by Renaissance Deluxe Starter Kit, 8 Piece Set, 11 Alabaster, 32 Ounces
Check Latest Price

With just 1 to 2 coats of this amazing paint, you can rest assured to have an incredible finish that will last for years. Regardless of how many objects you may have, this Retique It Chalk Furniture can be your companion to make the process more enjoyable for you. Go for 1 to 2 coats depending on the coverage of your surface, and let it dry for up to 30 minutes for a contemporary look.

It can work perfectly well for outdoor and indoor purposes as well a few arts and crafts project spots make it your go-to paint for anything you need. It is easy to apply and features a chalky matte finish for the exact look that you are going for. The exceptionally well durability is eco-friendly and safe to do your part for the goodness of the world.

The low odor means it contains zero emissions and can be worked with kids around. Although it is recommended to apply 2 coats, using 1 is usually enough if you manage to get the right application on the first try. In addition, the paint suits people with allergies and VOCs as it’s hypoallergenic to nature, meaning you don’t have to worry about your allergies acting up due to the chemical compounds present in the paint.

The formula is built with a primer, so you don’t have to worry about prepping the layer before going on with the single stroke.

Features

  • The zero VOCs make it safe to use indoors as well as outdoors
  • Durable to water
  • The thick coat is everything a beginner could want to ace his first paint job
  • Virtually no odor

Pros

The paint is made up of the highest quality ingredients to make sure you never compromise with the final look of the paint. The quality is so good that you can easily distinguish Retique It from the rest of the paints out there. This is because they are 100% acrylic coating, it offer only premium quality ingredients.

Cons

Although many people enjoyed the entire kit, not many people were fans of the color selection. It can also be slightly more expensive for people who want to paint their furniture under budget.

5.   FolkArt Home Decor Ultra Matte Chalk Finish – Best for Beginners

FolkArt Home Decor Ultra Matte Chalk Finish Acrylic Craft Paint Set Formulated for No-Prep Application Designed for Beginners and Artists, 2 oz Bottles, Top Colors
Check Latest Price

The convenient size of the paint includes 9-2 oz bottles of chalk paint. With a wide array of color options, you can always mix and match to create a masterpiece of your own. The ultra-matte finish, once dry, offers versatile neutral colors with an easy-to-distress ability for added satisfaction.

Besides that, you can always feel free to use it on different surfaces to give a look you prefer and do an easy clean-up once you are done with the cleaning process. It eliminates one of the most concerning points about chalk paint which is a mess.

The water-based paint creates minimal mess during the application process, easily removed with soap and water. The trusted brand has been known for providing excellent quality paints to suit real experience and skill levels.

If you think that’s enough, wait till you find out how the nontoxic creamy consistency is exceptional for blending and shading for an overall professional and smooth look. 

Features

  • It can be used on any surface interior or exterior furniture
  • The 2 Fluid onus is enough to cover large objects
  • Known for offering exceptional durability that will last for some solid years
  • Easy to apply process is ideal for beginners

Pros

The paints dry to an ultra-matte finish in just 30 minutes so you can wrap up the task in no time. You don’t have to prime or sand the surface before the application process for your convenience. Thanks to the vivid colors, you can rest assured to get a refreshing look to your home to complement your house perfectly.

Cons

There have been a few complaints about receiving leaky paints which ruined the whole experience with the product. Therefore it is recommended to rigorously look for the right paint before you get it off the box and start painting.

6.   KILZ L540746 Chalk Spray Paint – Best for Thin Paints

KILZ L540046 Chalk Spray Paint for Upcycling Furniture, 12 oz. Aerosol, Clear, 12 Ounce
Check Latest Price

Need to upcycle your furniture? KILZ Chalk Spray Paint is packed with just the right features that can instantly elevate your house’s appearance. It helps add a personal touch to all the boring furniture and brings out the best of creativity in you.

The quick-drying matte formula can get into the intricate details and is ideal for tiny and valuable furniture. In addition, it can cover both indoor and outdoor projects made up of metal, cast stone, wicker, and metal without adding on extra prep for you.

The coverage rate of this paint spray is 12 sq ft, but this can differ depending on the surface texture, application method, and porosity. If you want to go the extra mile, nothing can be the finished look of paint once you apply the KILZ Clear or Dark Sealing Wax to lock everything in place and enhance appearance.

After the painting application, you can easily use water and soap to clean up the mess and enjoy the new masterpiece that you created in just a few hours. 

Features

  • The chalk paint dries in an hour, and the next layer can be done in 2 hours
  • It covers 100 sq feet per quart
  • 12 oz. Aerosol
  • It can be used for both interior and exterior purposes
  • Offer a matte/flat finish

Pros

The comfort tip of this excellent spray prevents finger fatigue. Depending on the surface texture, it can be an ideal application to cover a large surface area without breaking your sweat. Thanks to the spray application, you don’t have to worry about The comfort tip reducing finger fatigue. The coverage rate is 12 sq. ft. per can, depending on the surface texture, porosity, and the way you apply the paint.

Cons

This paint is a bit hard to mix when I first tried out the paint. Therefore, if you are DIYing it straight out of the bottle, expect to experience the same.

7.   Rust-Oleum 302595 Chalked Paint Spray – Best in Effectiveness

Rust-Oleum 302595 Series Chalked Ultra Matte Spray Paint, 12 Ounce (Pack of 1), Serenity Blue
Check Latest Price

If lightning-fast drying paint is your best bet, this Rust-Oleum Chalked spray is all you need. First, it creates a vintage look using a wide range of colors for that gorgeous timeless look. Then, using the thick consistency of the oil-based formula, it hides all the past flows of your furniture.

In 20 minutes, you can rest assured to get a complete look with excellent adhesion and ultra-matte beautiful finish to get your desired look. It covers 12 sq ft, and the outstanding adhesion goes on smoothly with minimal prep.

Features

  • The velvety smooth finish is easy to achieve with the spray paint
  • Better coverage than most of the paints out there
  • You can spray at any angle and still get the best results
  • It can be used for interior furniture purposes only

Pros

You can easily rejuvenate the look of your house using the refreshing, bold colors and get your room Instagram-ready in just a few hours. It can be used on any surface you have, from ceramic to metal, and still, the best results. In addition, the application is safe to use, so you don’t have to put your health at risk while spraying this on furniture.

Cons

Like most spray paints, this one does create more mess than usual, but with a little bit of practice, I think you can learn to paint it without creating a facade at home. Besides that, Some customers review sprays with a clogged tip that makes it difficult to get a smooth finish.

Best Chalk Paint For Furniture Buyers Guide And Things to Consider Before Buying

Now that you are aware of the best chalk paint for furniture available in the market, it’s time you cut through the surface-level information and find out what really works for you. Here are some of the things to consider before you dive in headfirst to buy the best chalk paint for furniture.

Furniture You’re Painting

The furniture or surface you’re painting plays a significant role in deciding which paint suits the best for your purpose. For example, chalk paints are mainly used for decorative purposes and are more quick and easy to apply when compared to other types of paints. However, they are prone to getting dirty and chip, especially when it’s furniture you use frequently.

Thus if you are on the market to look for chalk paint, it’s best you also look into some good wax or polyurethane finish to get a lasting matte finish that is likely to stay with you for as long as you want.

Method

This decides whether it is paintbrushes that are your best friends or spray cans. If you want it quickly to refresh your furniture or perhaps hide flaws in your current furniture, you can never go with spray paints as they are quick, easy, and dry in no time.

They don’t require any sanding and can be nooks and corners to cover everything Whereas, paint using brushes gives a more professional feel with maximum coverage to cut. They also give long-lasting results.

Color

As we all know chalk paints are known for their aesthetic benefits. So if you are on the hunt for them, chances are, you are finding ways to elevate the appearance of your house. If this is the case, make sure you are perfectly aware of the colors you want to complement the rest of the furniture, AND then decide which paint color would suit your requirements.

Finish

The finish isn’t just associated with the look of your paint. It also determines how long your paint is going to last. Gloss paints have a more contemporary feel, while matte ones give a more shabby-chic look to meet your taste. As far as practicality is concerned, glossy or semi-gloss paints are easier to wipe with a wet cloth than chalk finishes.

However, with the use of a topcoat, you can clean any paint without having to worry about smudging it off.

Preventive Measures That You Should Take Before Buying Or Applying Chalk Paint on Furniture

  • Before ordering pain, make sure to use a measuring tape to properly measure the surface area you will cover with the paint. For example, if it’s a table, how big is it and how many will you do? It’s best to order all the quality at once instead of waiting for the first bottle/tin to finish before ordering a new one.
  • Although prepping isn’t needed in chalk paint. However, the surface must be clean and there is no muss or dust to help get a smooth and durable finish.
  • To avoid creating a mess, you should lay a large disposable plastic underneath the furniture you are painting.
  • The mark of the brush plays a crucial role in covering the tiny corners of the furniture. Here remember the bristles of your paintbrush shoulder be flagged in multiple lengths to form a slim tip. The synthetic ones, which are a mix of nylon and polyester, do wonders in holding the paint well. However, if you are going for oil-based finishes, it’s best to go for natural bristles.
  • Apply masking tape on the areas where you don’t want the paint to be prone to accidents. This can make your process a lot better.
  • To properly clean the surfaces of your furniture before painting, try using special cleaning agents like bleaching, soda, and ammonia to do the trick for you.
  • A mistake that many beginners make is to only focus on coats, not the texture. This can lead to uneven thickness on larger furniture. Therefore, try to align your strokes with each other. You can also avoid making fat edges where the paint’s gloppy cornices form a thick layer on the edges. Finally, make sure your brush is not overloaded and properly cover the edges for an ideal finish.
  • The biggest challenge is to create long, straight strokes. To help you do that, breathe out and hold your breath while making a long stroke. Later, you can vibrate your hands a little to cover the uneven and tiny corners.

Frequently Asked Questions FAQ

Is it necessary to sand furniture before using chalk paint?

No, it is not necessary to sand the furniture before you use chalk paint. However, since it will give you a matte finish, you will get to see each of the flaws accentuating and peeking behind the paint. Therefore, it’s best to clean the surface with cleaning agents before you begin the painting process. Other than that, if you are going over a high-gloss surface, a little bit of sanding can help you get that matte finish.

Does chalk paint scratch easily?

If you haven’t sealed your chalk paint properly, you run the chances of scratching it easily. Therefore, the best way to protect your paint and increase its durability is to apply a liquid topcoat once your paint has been completely dried.

Are you supposed to seal chalk paint?

In a nutshell, no protection means your masterpiece is vulnerable to any wear and tear that it may face. If you don’t like the finish of gloss topcoats, go for matte ones to give the desired look to your chalk paint.

What are the benefits I can get by using chalk paint on furniture?

Chalk paint is mainly famous for its rust, vintage, and chic look to give a farmhouse effect to your furniture. However, many people use their artistic flair to give a distressed look and add character to any boring corner of a house. The best part, it takes only a few hours to get your furniture looking Instagram-ready!

What’s trending in painted furniture?

A trend taking over on all celebrity homes and Pinterest profiles uses the flawless matte finish in paint colors like gold, copper, black, or silver metallic paints. You can also add a splash of bold colors to your stressed furniture to get a vintage look.

What is known as the best topcoat for chalk paint?

A high-performance topcoat in a flat finish is ideal for preserving your paint’s look, feel, and color. There is no doubt that topcoats are the key to improving the longevity of your chalk paint. However, if you prefer a rather gloss finish, you can go for a thick glaze to create shine and give a contemporary look.

Conclusion

Coming to the end of the guide, as easy as it may look when applying chalk paint, there are many things that you need to try yourself to see the best results. It is always recommended to use a paint sprayer for thin paints and as for thicker ones, it is best to count on brush paints. It also helps to give a creative layered and rugged feel to help create the vintage look that you’ve been aiming for.

Apart from the tips, chalk paints inevitably breathe life into any worn-out piece of furniture. The visual effects of these chalks allow you to go all in and go the extra mile to bring the best of your imagination. With a glowing house in bold colors and creative designs, it will surely be the hot topic of every gathering!

The Top 10 Best Body Paint For Body Art You Need to Try in 2024

Best Body Paint

As the world of body art continues to evolve and captivate audiences with its mesmerizing creations, finding the perfect body paint has never been more critical. In 2024, artists and enthusiasts are constantly looking for innovative products that can elevate their designs to new heights. From vibrant hues to long-lasting formulas, choosing the best body paint is essential for creating stunning masterpieces that leave a lasting impression.

In this article, we have curated a list of the top 10 body paints you need to try in 2024. Whether you’re a seasoned professional or a budding artist looking to experiment with new techniques, these carefully selected products offer unparalleled quality and performance. Get ready to unleash your creativity and transform your canvas into a work of art with these exceptional body paints that are sure to inspire and delight.

Who Needs This Product?

If you’re in the market for high-quality body paint for your next artistic endeavor, look no further than these top 10 picks for 2024. With vibrant colors, long-lasting formulas, and easy application, these body paints are a must-have for any professional or aspiring body artist. Whether you’re creating intricate designs for a photo shoot or preparing for a festival performance, having the right body paint can make all the difference.

Artists who prioritize quality and creativity in their work will appreciate the versatility and pigmentation of these top-rated body paints. From water-based options that provide a smooth finish to alcohol-activated paints that offer durability and smudge-proof results, there’s something for every type of body art enthusiast. Say goodbye to dull colors and unreliable products – elevate your artistry with one of these standout body paints and watch your creations come to life like never before.

What Readers Will Learn

This guide is your one-stop solution for any doubts you may have regarding body paint. Starting with some of the best body paints for body art followed by a complete buyer’s guide to ensure you are equipped with the right knowledge before dinging headfirst into the shopping. Lastly, you will get the answers to all your swarming questions to make this journey a no-brainer for you.

1.   Midnight Glo Black Light Paint UV Neon Face & Body Paint Glow Kit – Best for Overall Aesthetics


Midnight Glo UV Face & Body Paint Set - Fluorescent Face Paints - Blacklight Reactive - Safe, Washable, Non-Toxic (6 Bottles 0.75 oz. Each)

Check Latest Price

These 6 bright Neon Dayglow Colors offer every color you may need to rock any party!

Whether you are going for a night out with your buddies, Halloween special day, or need to prepare for a costume, this set covers it all. Given that these body paints are neon, they give a cool effect in UV or backlights and vibrant, funny colors in the time. This is one of many reasons why this is non-toxic and easy to apply; it is the favorite of many artists out there.

Features

Reason To Buy

We all know that no product is perfect, but considering how body paint offers more good than bad compels many people to opt for it. It has a great base color that seamlessly blends into your skin and features a wide range of bright colors to suit your needs. Another thing that adds convenience to this body paint is that it can be applied to hair without damaging it in the long run. 

Mehron Makeup Paradise Makeup AQ Face & Body Paint (1.4 oz) (Dark Pink)
Check Latest Price

Here are some of the celebrity makeup artist’s favorite best body paint that you see in sci-fiction movies. They are world-renowned and are water-based adding another work to its long list of benefits that it provides to its users. The pain is formatted with semi-soft, water-activated, and moisture-bold colors that help you transform anyone into a piece of art.

Mehron helps you exceed expectations by using high-quality equally safe materials with their pigmented industry-leading colors. Nowadays, you can see Mehron fans in Hollywood fashion shoes, photoshoots, movies, and theater. Some of the movies that were possible with Mehron are

  • Phantom of the Opera
  • Black Swan
  • The Lion King
  • Shrek the Musical
  • Cirque du Soleil

Along with many more who trust Mehron to create a theatrical-like result skin.

Features

  • Includes healthy ingredients like cocoa butter, avocado oil, Vitamin E, lemongrass, aloe, chamomile, and glycerin to make sure you never compromise your skin’s health for the sake of wearing this pain for one night
  • A wide range of colors, including 8 metallic shades
  • Easy to apply as its texture can cover full coverage without making it too frustrating whatsoever.

Reasons To Buy

His body paint is available in kaleidoscope colors and finishes to help you make an aesthetically appealing design without much struggle. It also offers full coverage to save time, and the water-based face and body makeup are safe to use for babies and adults.

3.   Snazaroo Classic Face and Body Paint – Best for Safe Application

Snazaroo Classic Face and Body Paint, 18ml, Pale Pink
Check Latest Price

Snazaroo is the paint you use on special occasions like Christmas, Halloween, or parties to amp up your ordinary looks. It is made up of the finest ingredients specially formulated to be fragrance-free and quick to remove from the skin.

Just like most water-based body paints, this one is friendly to delicate skin, so you can be assured of a safe journey with this, even if your skin is prone to allergies.

Each of the paints has been tested and reviewed by professors or dermatologists and toxicologists and is fully compliant with EU and FDA toy and cosmetic regulations to be paraben-free and non-toxic.

To make the best use of the product, simply add a few drops of water to the color you want, and use a sponge or brush to apply it smoothly over your skin. Once dried, you can easily wipe it off using soap and water.

Features

  • The paint is known for maximizing hygiene and QC standards to make it your go-to option for the best safe body paint.
  • With 54 colors and three textures, this Snazaroo face paint is for all those cosplayers, performers, and professional face painters to get the ever-needed satisfaction.
  • Easy-to-remove features make it easier to apply it to your skin.

Reasons To Buy

Considering how this face paint is water-based, it is one toxic-free paint that artists vouch for. It is fragrance-free; this means neither do you have to risk your skin with harsh chemicals nor have to be embarrassed by the strong odor of body paints.

4.   Neon nights 8 x UV Body Paint Set | Black Light Glow Makeup Kit – Best for Families

neon nights 8 x UV Body Paint Set | Black Light Glow Makeup Kit | Fluorescent Face Paints for Music Festivals and Parties
Check Latest Price

This incredible body paint is a perfect accessory for parties and festivals where going bare skin is the most boring thing you could do. The 8 different bright glowing colors are suitable for teenagers, kids, and adults.

One of the things that make it stand above the rest is its revocable feature which makes sure to get it off your fabrics if you accidentally spill it on your precious party wear or furniture.

As this paint offers full coverage, it provides good value for money to last you for a long time. 

Features

  • The neon body paint even makes a mark during mornings for those afternoon bashes.
  • Make sure your skin is perfect right after you remove the paint
  • Only glows in true backlight or UV lighting

Reasons To Buy

Being a customer myself, I can certainly say that paint comes right off with no struggle whatsoever. The durable paints stay on your skin throughout the party regardless of how rough you are with your skin.

5.   UV Glow Blacklight Face and Body Paint – Best for Ease of Apply

UV Glow Blacklight Face and Body Paint 0.34oz - Set of 6 Tubes - Neon Fluorescent
Check Latest Price

UV Glow Face & Body Paint is one of the most well-known body paint brands that go the extra mile to ensure you never need fluorescent glow under UV lighting at parties. The paints are easy to apply and dry quickly so that you can focus on rather important things for the night.

It has managed to satisfy most outfit customers by helping you make a masterpiece using its wide range of colors and textures to suit your needs. It meets all your requirements under the EU Cosmetics Directive to cut as if this wasn’t already enough.

Features

  • The paint is made using premium quality material to help it last long without damaging your skin
  • Ideal for clubbing and festivals
  • 6 Bright Neon Dayglow colors to glow whenever, wherever

Reasons To Buy

The paint is bright on your skin and removes easily wherever you are done with the part. You can instantly wipe off the spilled paint on any fabric using a microfiber cloth for added convenience.

6.   CCBeauty Professional Face Body Paint Oil – Best for Versatility

CCbeauty Professional Face Body Paint Oil 12 Colors Halloween Art Party Fancy Makeup Palette Set with 10 Blue Brushes,Deep
Check Latest Price

The oil-based CCBeauty professional face paint is an oil-based paint that glides on your skin effortlessly and can be removed with a makeup remover or oil to break down the product. Considering how it is an oil-based paint, it may take time to dry, but you can rest assured to enjoy the endless awesome effects of your designs when it does.

This non-toxic application is a safe, superior cosmetic grade makeup that has undergone countless tests before offering it to you. However, if you work with clients daily, you should patch test before applying it to someone else’s skin.

One of the things that its customers love about CCBeauty is the large variety of colors that can perfectly blend to help you craft creative ideas in your mind. The fantastic pigmentation and coverage are ideal for crazy looks like themed parties, fancy dresses, and carnivals.

Many professional artists have been creating special effects using this thick and premium quality to create magic on screen for many years.

Features

  • Great for sensitive children’s skin on special occasions
  • You can easily mix and match colors to create your colors
  • The oil-based factor gives a nice texture to it

Reasons To Buy

If you are afraid to put artificial paint that has the potential to damage your skin, this is your knight in shining armor. This outstanding paint is highly safe to use and is cruelty-free, which means it has not been tested on animals. A little application of this paint goes a long way to make custom and blendable colors.

It also fits your pockets just right and is super easy to clean for added convenience.

7.   Zalan Zinc Stick – Colored Zinc Sticks for Face and Body Paint – Best for Color Variety

Zalan Zinc Stick - Colored Zinc Sticks for Face and Body Paint - Set of 8
Check Latest Price

The washable face paint is skin-friendly and made up of nontoxic water-activated face paint that will help you create gorgeous designs on human skin. The manufacturers made sure to use it not to itch or irritate the skin, which is a common problem with many other paints.

The crayon face and body paint are twistable and don’t break easily to help it last for as long as you want.

It is specifically designed to keep families in mind and further elevate the fun at gatherings and parties.

Features

  • 10% Zinc Oxide is great for keeping your skin smooth after the paint
  • Each of the sticks can twist up to 2.5 inches
  • The 12 colors are enough to paint 100 faces for all sorts of festivals, sporting events, and music festivals.
  • You can count on any gentle wipes or makeup remover to remove this water-resistant face and body paint.

Reasons To Buy

If you apply it with sunscreen or moisturizer before the paint, you can easily wipe off the paint and reveal beautiful skin underneath. It is mainly used for covering large surface areas for that crazy full-body art. This is one of the very few paints that artists never stop buying.

8.   TAG Face & Body Paint – Best for Wax Paint

TAG Face & Body Paint - Regular Palette 12 x 10g
Check Latest Price

The TAG Face and Body Paint comes with 12 regular colors to help you create remarkable designs using a size 2 flat brush and seized 3 round brushes that come with this body paint. According to countless satisfied TAG customers, the paint doesn’t crack or peel to help you have a seamless blend on your skin.

It is hypoallergenic and made with skin-safe ingredients for a lighter feel. The brand manages to bring all these benefits using its wax-based coverage, ensuring your design doesn’t flex as you move your body throughout the occasion or party.

As this comes with a slightly creamier texture, you will only need less water to activate it than regular paint. The outstanding final result with vivid colors speaks for itself and eliminates all the cracking, which gives an overall unprofessional feel to the artwork.

Features:

  • During the day, the neon colors are colorful, but as you get to UV lights or backlights, you get to see them glowing in the dark.
  • Offers 5 different platelets with multiple shades, including regular, neon, pastel, pearl, and skin tone.
  • These paints are great for detailed work as they stick on your face perfectly without dripping whatsoever.

Reasons To Buy

If you struggle with getting the right application on your face that uplifts your face rather than making it too awkward, this one is your best bet.

Unlike most parts with a pungent metallic smell, these paints have a subtle sweet scent to make them ideal for wearing in crowds. The affordable price is excellent for its vibrant colors as they have great aesthetic value but have a smooth application to fill in all the lines on the face.

9. Custom Body Art 1-oz 8 Color Primary AirbrushWater Base Face-Body Paint Set – Best for Beginners

Custom Body Art 1-oz 8 Color Primary AirbrushWater Base Face-Body Paint Set
Check Latest Price

The FDA-compliant and nontoxic application easily washes off your skin to leave it buttery soft at the end of the day. You can paint your whole body and not break a sweat while removing it. Yes, you read that right. This is possible with Custom Body Art 1-oz 8 Color Primary AirbrushWater Based Face-Body Paint Set.

The large selection of brilliant colors offers 8 primaries, 8 secondary, 8 pearlescent, and 4 neon colors to do the trick for you. This is a single purchase where you will enjoy all the benefits of high-end body paint to use on your body.

All in all, think about a common problem that body paints have and rest assured that this paint has the issue for them all!

Features

  • Excellent choice especially if you prefer to be in control of your artwork
  • Beginner-friendly as it is easy to use
  • It takes only a few minutes to dry

Reasons To Buy

This airbrush pant is an excellent chase if you are just starting with a body painting journey. It comes off right after you use an oil-based product or water to break down the product. Besides that, none of the products in this guide have a color variety as wide as this paint set.

Best Body Paint Buying Guide

Now that you are aware of the best body paints available in the market, it’s time you weigh all the best options before you spend your time and money on them. Remember, unlike tattoos, body paint is temporary. This means it requires constant retouching and a more creative design that can make or break your party looks.

Therefore, it is essential you know the factors that make a perfect body paint to suit your needs.

Water-Based Body Paint

When you go out there in search of body paint, you get exposed to countless textures and paint types that come with their own set of perks and cons. Due to the advancements in paint materials, water-based paints offer the most non-allergic and safe products.

They are beginner-friendly and are the easiest to wash off after a full-body artwork. You can easily apply them using synthetic sponges, neutral sea sponges, or airbrushes of your choice.

However, with these benefits, you may also experience a few drawbacks so it’s important to make an educated decision. Considering how these paints are easy to wash off, you may need constant touch-ups throughout the party if you need the same polished look during your parties or photoshoots.

Depending on the weather, water-based paints are also prone to cracking or melting if you sweat a lot in those areas.

For some brands, coverage is also an issue. It will not spread across your entire skin evenly unless you apply several coats. On the brighter side, as they dry out quickly, having multiple coats is not a problem.

In a nutshell, water paints should be a priority if you are just starting with body paints that are not only easy to apply but are also relatively cheaper to buy.

Container Size

Before you go headfirst to buy body paint, take a step back and think about all the work you need to do with your body art. If it is just faces painted for a few parties, container size shouldn’t be a big problem. However, if you are covering a large surface area, you may need to go for 20g or larger container sizes, making a bang for your buck.

Remember, an ideal body paint should go a long wait without charging you a lot for it since it can be used more frequently than normal. Would these paints cost more than normal?

Yes and no. Depending on which brand, paint type, and features it offers, you can expect the price to go up to $$, and it’s worth it.

Quality

When you get to avail countless brands on the web, you must learn to distinguish good brands from bad ones. Therefore, it is recommended to stay away from odd brands that follow the formulas from the past. You can also count on customers’ reviews to get honest insights into the paint.

Frequently Asked Questions (FAQ)

Do You Have To Prepare Your Skin For Body Paint?

Preparing your skin for body paint is key to not only having a comfortable experience during parties and festivals but also making it easier to remove it right off once you are done for the day too. To do this, start with well-exfoliated and moisturized skin with a thin coat of sunscreen for added protection. If you only focus on face paint, it is recommended to carry out a full skincare routine so you have an extra layer of barrier protecting your skin from paint.

What Is The Reason Behind Body Paint Cracking?

Body Paint cracks mainly because of faults in the application process. Some of them include excessive hardener use, thick coats, too long between undercoats, and poor paint textures.

Does Body Paint Wash Off?

This answer isn’t as easy as you may think. Whether the body paint washes off properly or not depends on which paint you use as mentioned earlier, water paints are the easiest to get rid of. Therefore, if paint removal is your concern, modern-day water-based ones are non-toxic and can easily break down with gentle soap and water.

However, it’s best to thoroughly cleanse your face with an oil-based product or any other makeup remover to prevent breakouts.

How Long Does Body Paint Last?

Oil-based paints are likely to last longer than any other type of paint. They can last for up to one whole day but can be a little difficult to remove. Other types of body paint like henna tattoos or “Mehndi” can last for around 2 weeks. When buying, try to refer to the product description for the best estimate for the paint.

Is It Harmful To Paint Your Entire Body?

Although these paints are typically safe and tested, you should avoid covering your whole body for long periods. This is because as body paints block your pores, it runs the risk of heatstroke by preventing you from sweating and or even breaking out. However, it is wonderful if it’s for a 2 to 3-hour body photoshoot.

Conclusion

To sum up, body painting isn’t an ordinary hobby that one could practice; it is a form of self-expression. You could be wearing a basic outfit and amp up the whole look using creative body art. However, one wrong paint and your hours of practice in maligning that masterpiece can go to waste.

Make sure you don’t make that mistake and be well informed of all the nitty-gritty of body paints to make the best decision.

What color paint goes with brown tiles? 11 Best ideas for you

what color paint goes with brown tile?

Most asked questions before selecting the color of wall paint with brown tiles floor, what color paint goes with brown tiles?

Our expert team found the best color combination for brown tiles. In our experts’ and other interior designer’s eye, the 11 best color combinations for brown tiles are:

  1. Slate Gray
  2. Cream
  3. Sage Green
  4. Navy Blue
  5. Terracotta
  6. White
  7. Red
  8. Blue
  9. Purple
  10. Brown
  11. Sandy Beige

When it comes to interior design, finding the perfect color combination can transform a space from ordinary to extraordinary. One common dilemma many homeowners face is deciding what color paint goes with their existing brown tiles. The rich and earthy tones of brown tiles offer a versatile canvas for creating various moods and styles within a room. Whether aiming for a cozy and inviting ambiance or a modern and sophisticated look, choosing the right paint color can make all the difference in seamlessly tying together your decor scheme. In this article, we will explore expert tips and creative ideas to help you discover the perfect hues that flawlessly complement your brown tiles.

what color paint goes with brown tile?

But before selecting the color of wall paint you need to consider the following points to make a perfect appalling look.

  • The size of the area you want to paint
  • The room purpose  (Is it a living room, a kitchen, or a bathroom)
  • The area covered by the tiles in the room
  • The overall color scheme of your house
  •  The effect you want to give to the aesthetics of your room, and so on.

Let’s have a look at different color combinations with brown tiles:

Different Wall Paint Color That Goes With Brown Tiles

Normally, brown is a neutral color that can be complemented with various other shades of warmer or coolest-toned colors. Each combo creates different results that give a range of different looks to your room. But, the most preferred is to use brown tiles color with different hues of neutral shades like grey and white to give a more intense look to your room.

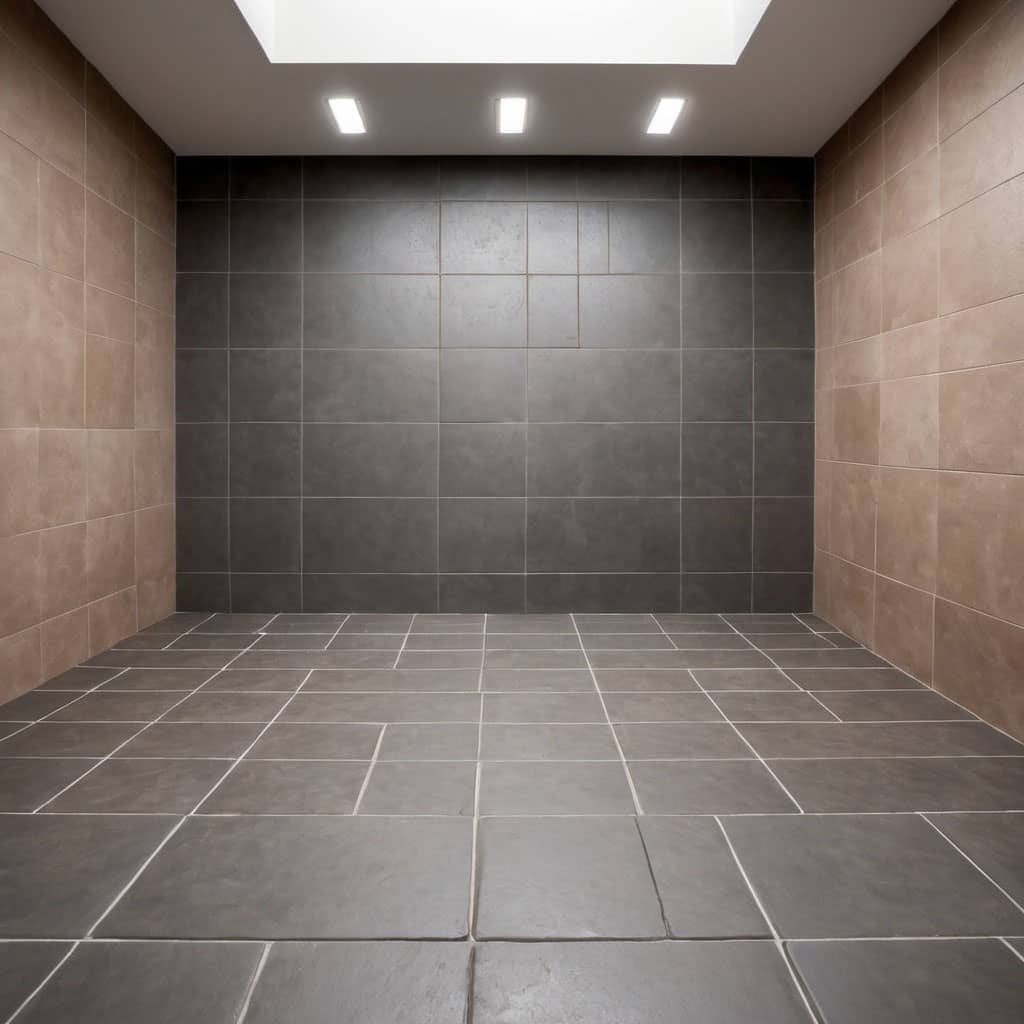
Brown Tiles With Slate Gray Wall Paint

In the realm of home decor, the combination of brown tiles with slate gray wall paint has emerged as a timeless and sophisticated pairing that exudes both warmth and modernity. This unexpected yet harmonious blend creates a rich tapestry of textures and tones that elevates any room from mundane to magnificent.

Brown Tiles With Cream Wall Paint

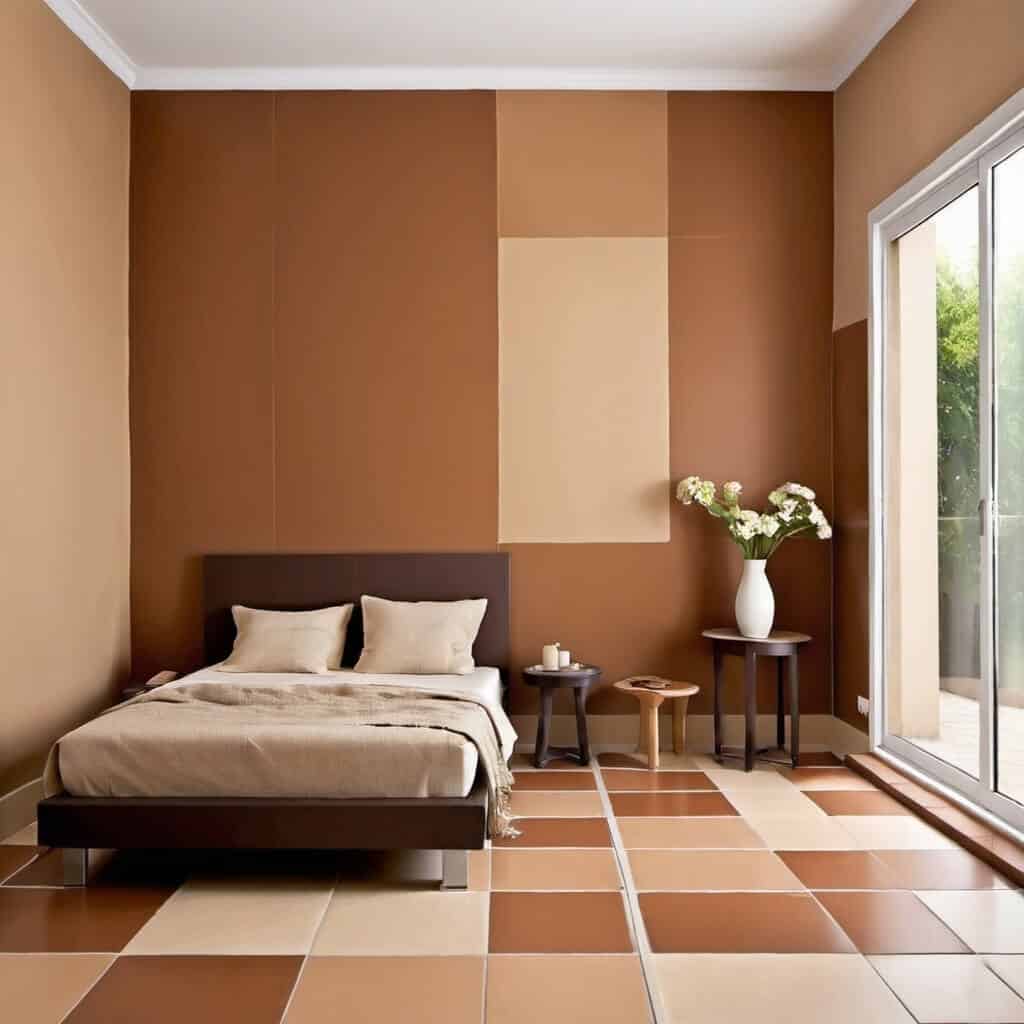
One classic yet often overlooked combination that exudes warmth and sophistication is the pairing of brown tiles with cream wall paint. This timeless duo brings together earthy richness and subtle elegance, transforming any room into a sanctuary of comfort and style. Imagine stepping into a bathroom adorned with lustrous brown tiles that evoke images of natural wood grains, complemented by walls painted in a creamy hue reminiscent of soft vanilla ice cream. The interplay between these warm tones creates a harmonious balance, infusing the space with a sense of serenity and refinement. Whether used in kitchens, bathrooms, or living areas, this color scheme offers versatility and charm that can suit various design styles

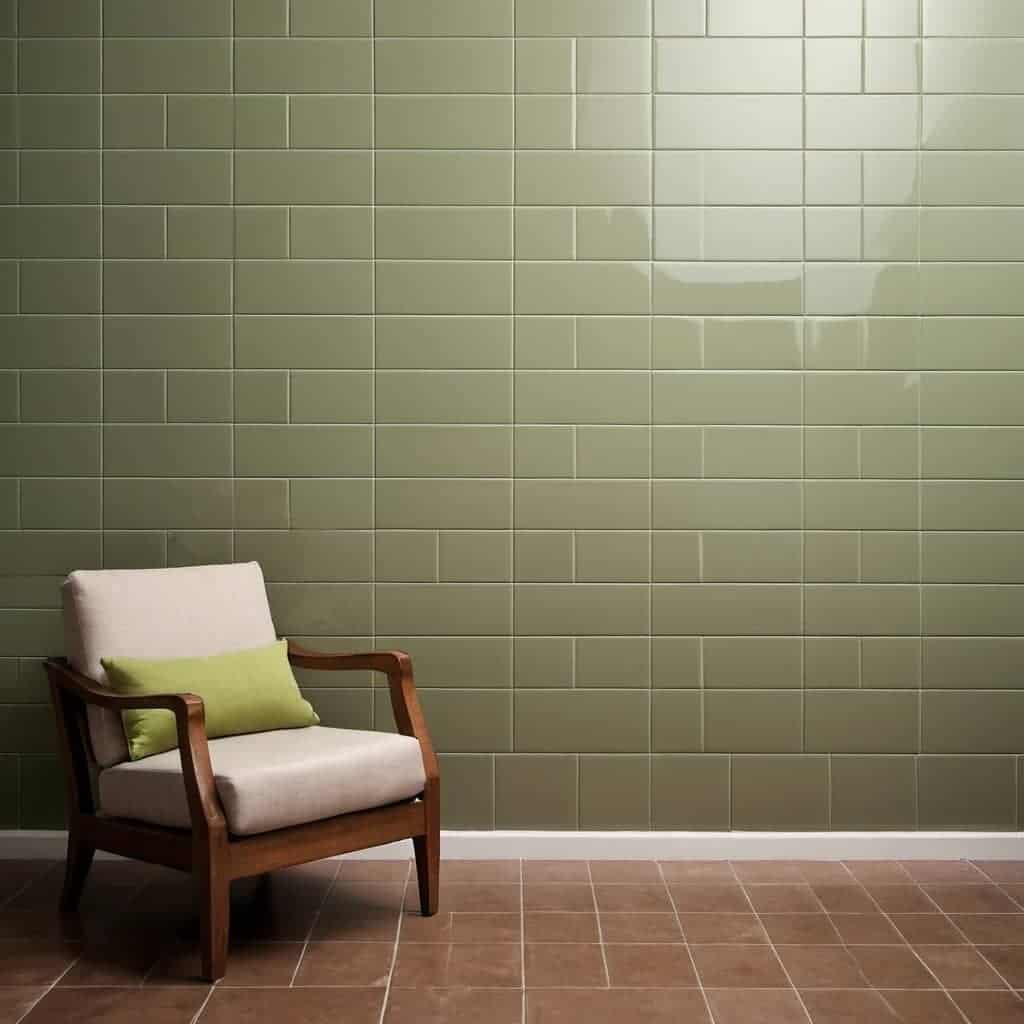
Brown Tiles With Sage Green Wall Paint

The combination of brown tiles with sage green wall paint creates a harmonious and sophisticated aesthetic. The earthy tones of the brown tiles add warmth and depth to the space, while the soft hue of sage green on the walls brings a sense of tranquility and freshness. This pairing exudes a natural and organic vibe that can make any room feel inviting and relaxing. Moreover, the contrast between the rich brown tiles and the muted sage-green walls adds visual interest and dimension to the space. This combination is versatile enough to complement various design styles, from modern to rustic. By incorporating elements of nature into your home decor with brown tiles and sage green paint, you can create a soothing environment that promotes feelings of peace and serenity.

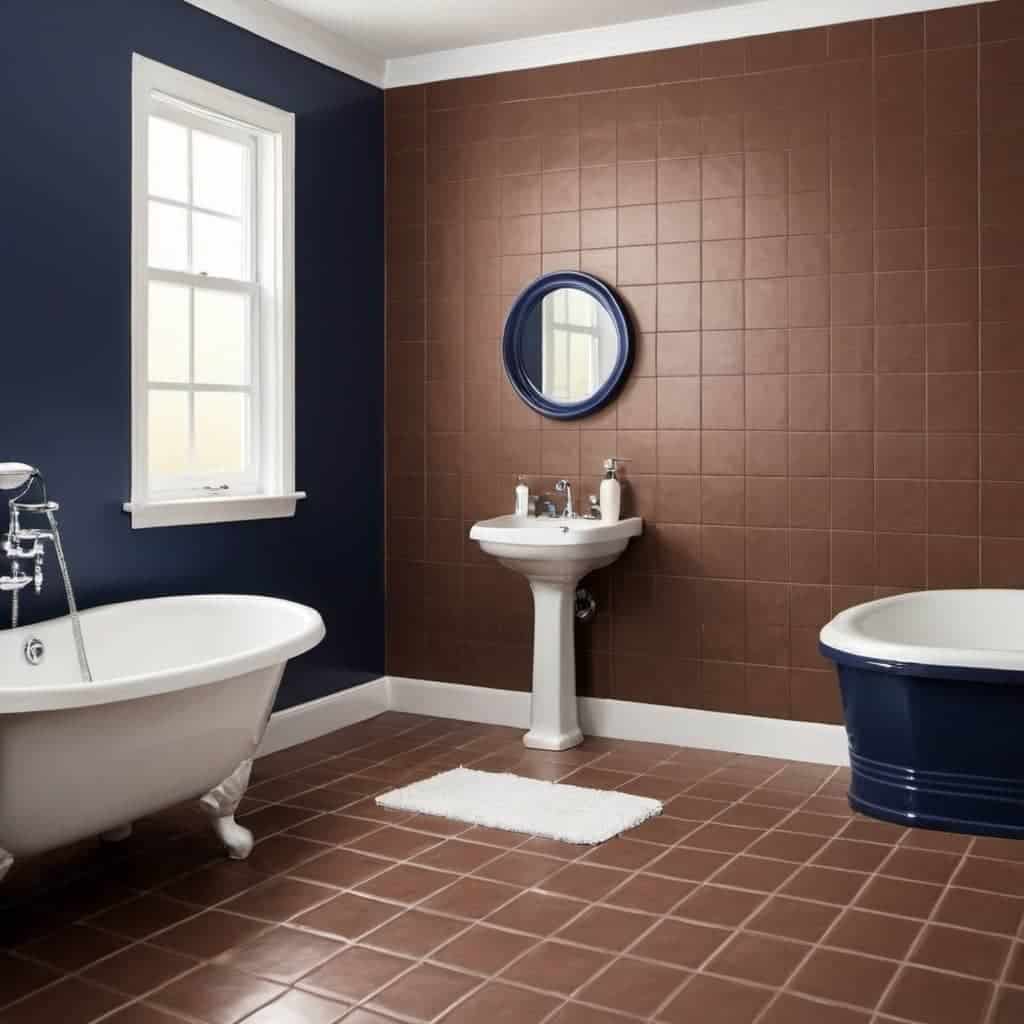
Brown Tiles With Navy Blue Wall Paint

One of the most sophisticated color combinations in interior design is the pairing of brown tiles with navy blue wall paint. The deep richness of navy blue adds a sense of calm and depth to any space, while the warm hues of brown tiles bring a subtle earthy charm that complements the overall aesthetic. This combination creates a harmonious balance between cool and warm tones, making it versatile for various design styles.

Brown tiles with navy blue wall paint can be used in both traditional and modern spaces, adding a touch of elegance and sophistication. The dark tones create a cozy atmosphere perfect for creating a relaxing retreat in bathrooms or bedrooms. To elevate this color duo further, consider incorporating metallic accents like gold or brass fixtures to add a touch of luxury and glamour. This classic yet contemporary combination is sure to stand the test of time, making it an excellent choice for those looking to create a stylish and inviting space.

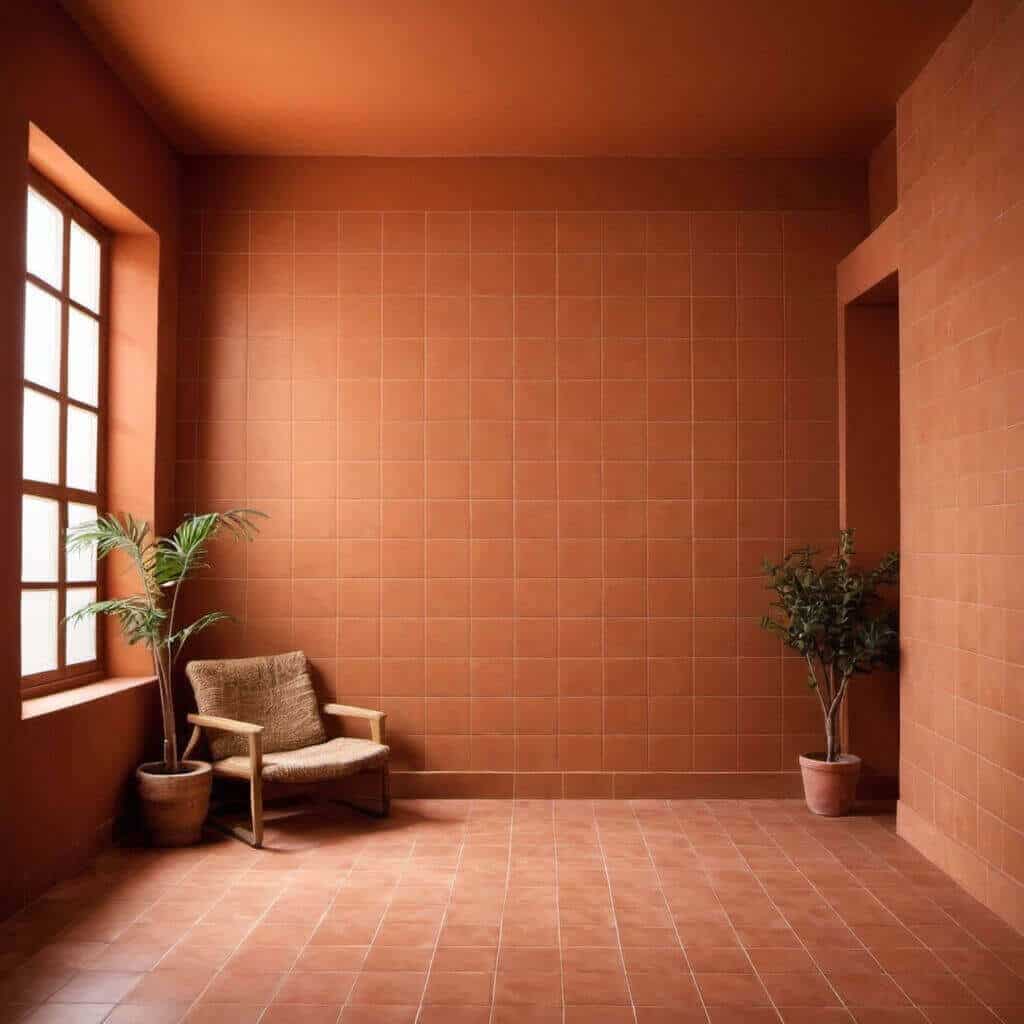
Brown Tiles With Terracotta Wall Paint

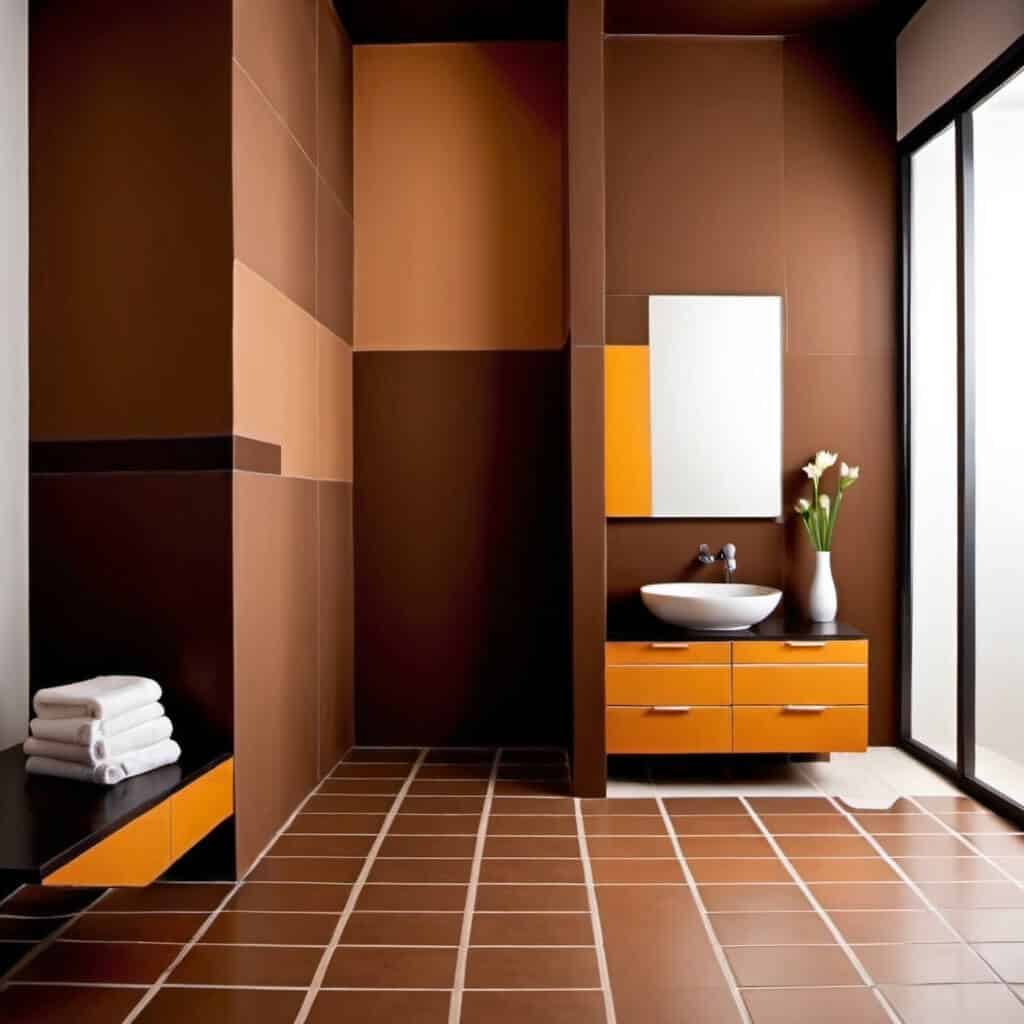
Combining brown tiles with terracotta wall paint can create a warm and inviting atmosphere in any space. The earthy tones of the terracotta complement the richness of the brown tiles, adding depth and character to the room. This color scheme works particularly well in bathrooms and kitchens, where a cozy and rustic feel is desired.

One key advantage of using brown tiles with terracotta wall paint is that it adds a touch of warmth without being overpowering. The combination evokes a sense of natural beauty and simplicity, creating a harmonious environment that is both stylish and timeless. By carefully selecting complementary accents such as wooden furniture or metallic fixtures, you can elevate the overall aesthetic appeal of the space while maintaining a cohesive look that exudes sophistication.

Brown Tiles With White Wall Paint

The juxtaposition of brown tiles with white wall paint creates a stunning contrast that exudes elegance and sophistication. The warm earthy tones of the brown tiles complement the crisp, clean look of the white walls, creating a harmonious balance in any space. This combination is a timeless choice that adds depth and dimension to the room while maintaining a sense of simplicity and serenity.

The brown tiles add a sense of warmth and richness to the overall aesthetic, while the white walls provide a bright, airy backdrop that helps to visually expand the room. This pairing is versatile and can be adapted to suit various design styles from modern to traditional, making it a popular choice for both residential and commercial spaces. Ultimately, the combination of brown tiles with white wall paint enhances the visual appeal of any room, creating an inviting atmosphere that is both sophisticated and welcoming.

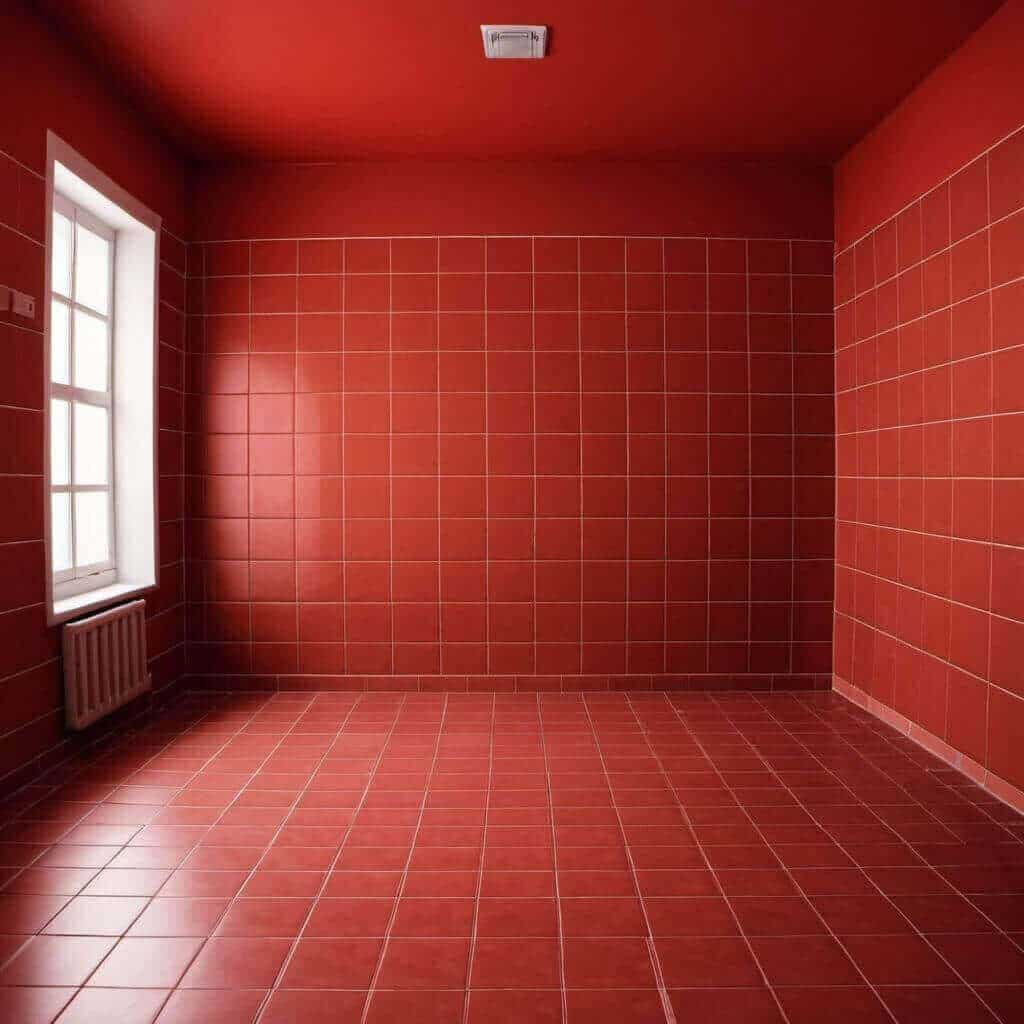
Brown Tiles with Red Wall Paint

The harmonious combination of brown tiles with red wall paint can create a stunning and sophisticated look. The rich earthy tones of the brown tiles complement the boldness of the red walls, adding warmth and depth to any space. This pairing works particularly well in areas like the kitchen or bathroom, where the contrast between the two colors can create a dramatic yet inviting ambiance.

The key to successfully incorporating brown tiles with red wall paint is to balance them properly. Opt for lighter shades of brown tiles to prevent overpowering the deep intensity of the red walls. Consider adding accents like metallic fixtures or light-colored furnishings to enhance the overall aesthetic appeal. By carefully selecting complementary elements, this combination can transform any room into a stylish and contemporary haven that exudes sophistication and charm.

You can also check: How to paint over red walls?

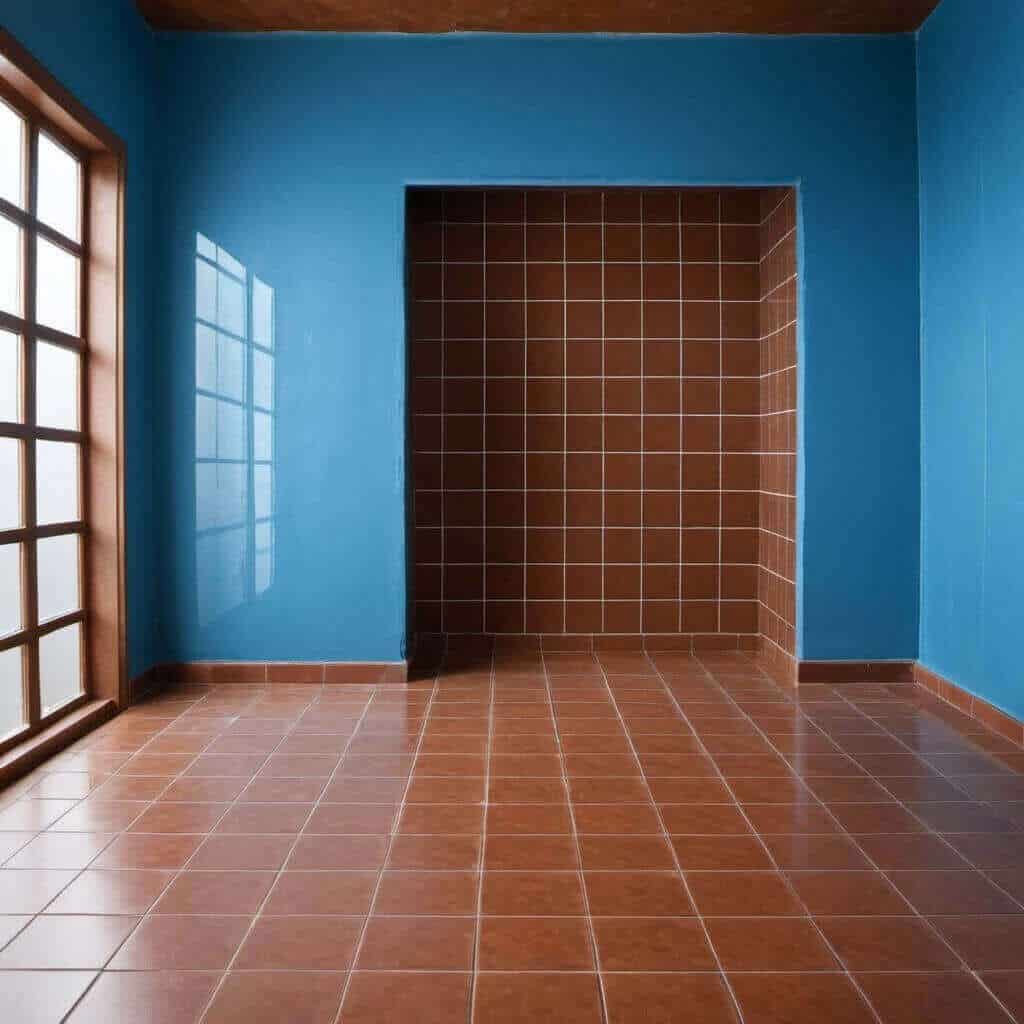
Brown Tiles with Blue Wall Paint

The pairing of brown tiles with blue wall paint creates a striking visual contrast that adds depth and sophistication to any room. This combination can evoke a sense of tranquility and relaxation, making it an ideal choice for bathrooms or bedrooms where creating a soothing atmosphere is key. The richness of the brown tiles enhances the depth of the blue wall paint, creating a dynamic interplay that draws the eye and lends a sense of luxury to the space.

Overall, combining brown tiles with blue wall paint allows for endless design possibilities, from achieving a rustic chic look to creating a contemporary style with an edge. Whether used in large or small spaces, this pairing is sure to elevate any room’s aesthetic appeal while offering a timeless and elegant ambiance.

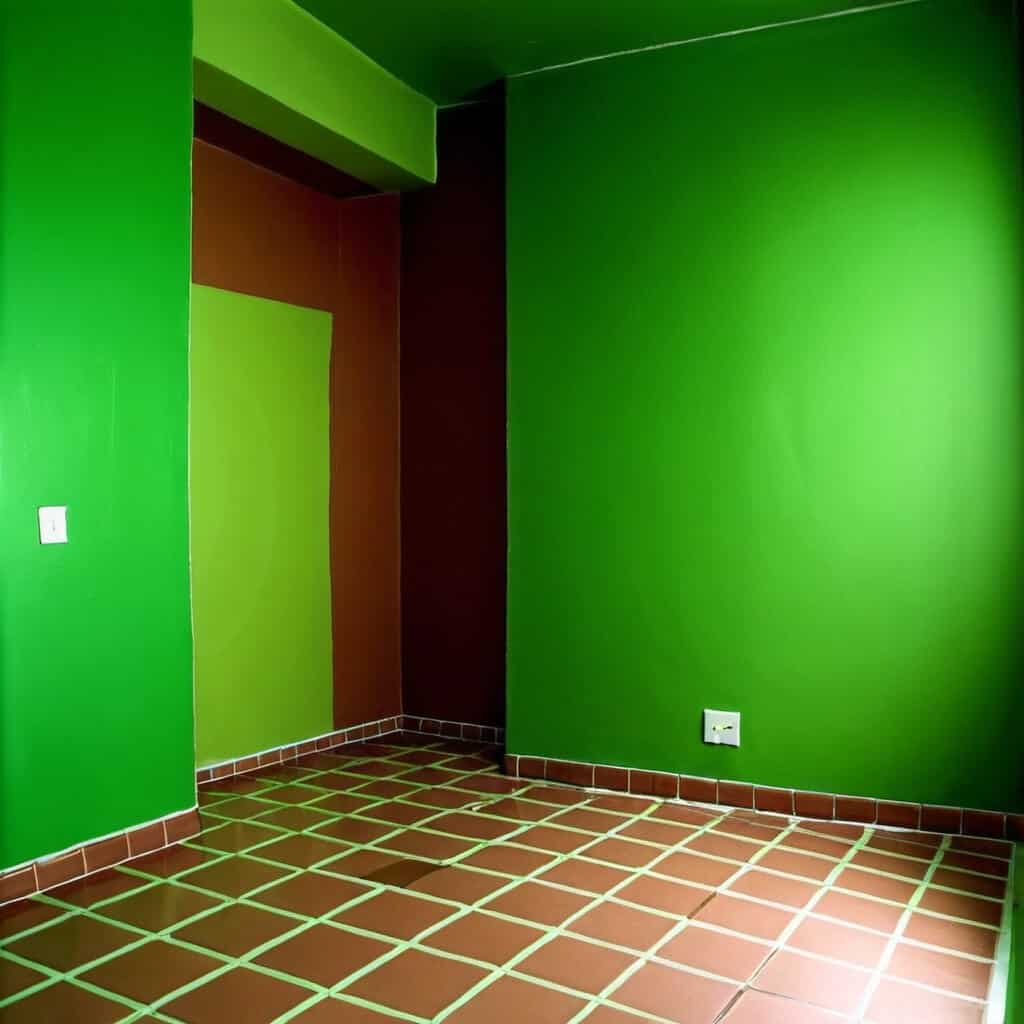
Brown tiles with Green Wall Paint

The combination of brown tiles with green wall paint creates a harmonious and welcoming ambiance in any space. The earthy tones of the brown tiles complement the freshness of the green wall paint, bringing a sense of balance and tranquility to the room. This combination is particularly effective in creating a natural and organic feel, making it ideal for spaces such as bathrooms or kitchens where a connection to nature is desired.

In addition to their aesthetic appeal, brown tiles paired with green wall paint can evoke a sense of sophistication and elegance. The richness of the brown tiles adds depth and warmth to the room, while the green walls provide a pop of color that enlivens the space. This pairing can also create a calming atmosphere, making it perfect for creating cozy and inviting living areas or bedrooms. Overall, combining brown tiles with green wall paint allows for endless possibilities in interior design, offering a unique and stylish look that is both timeless and versatile.

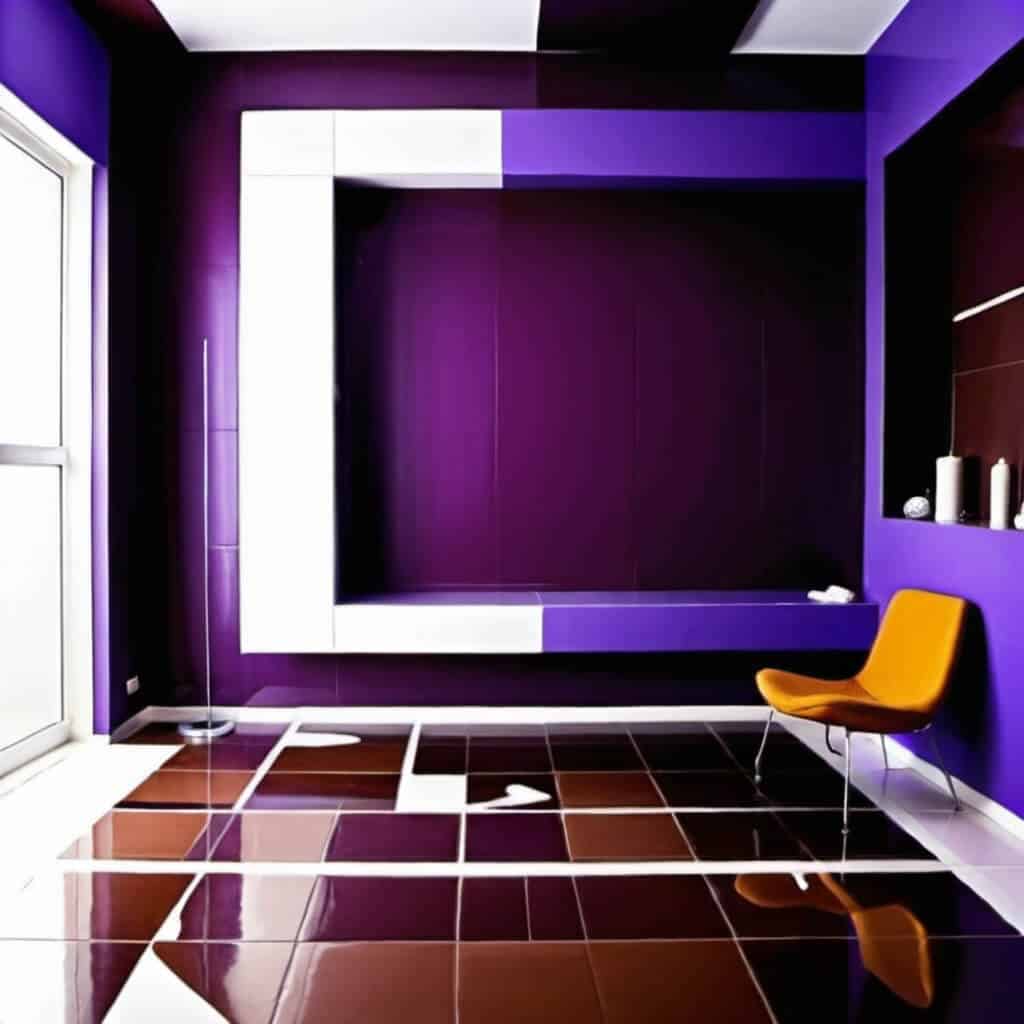
Brown Tiles with Purple Wall Paint

The combination of brown tiles flooring with purple wall paint creates a captivating visual contrast that exudes warmth and sophistication. The earthy tones of the brown tiles ground the space, offering a sense of stability and elegance, while the vibrant hues of purple on the walls add a touch of luxury and personality. The interplay between these colors brings depth and richness to the room, making it both inviting and stylish. Whether in a cozy living room or a chic bedroom, this pairing creates a striking ambiance that leaves a lasting impression.

Brown tiles with Brown Wall Paint

A matching look can never be out of trend in makeup dressing fashion or fashion interior design. The past year of 2020 was a year of monochromatic looks in the fashion industry, makeup industry, and interior designing industry. The brown wall paints like latte, mocha, and chocolate colors with brown tiles give a bright sophisticated look to the area. Add a variant to the brown matching wall by opting for the textured or glossy effect of the wall so that the wall can stand with brown tiles like glossy stripes or a sponging effect on the wall.

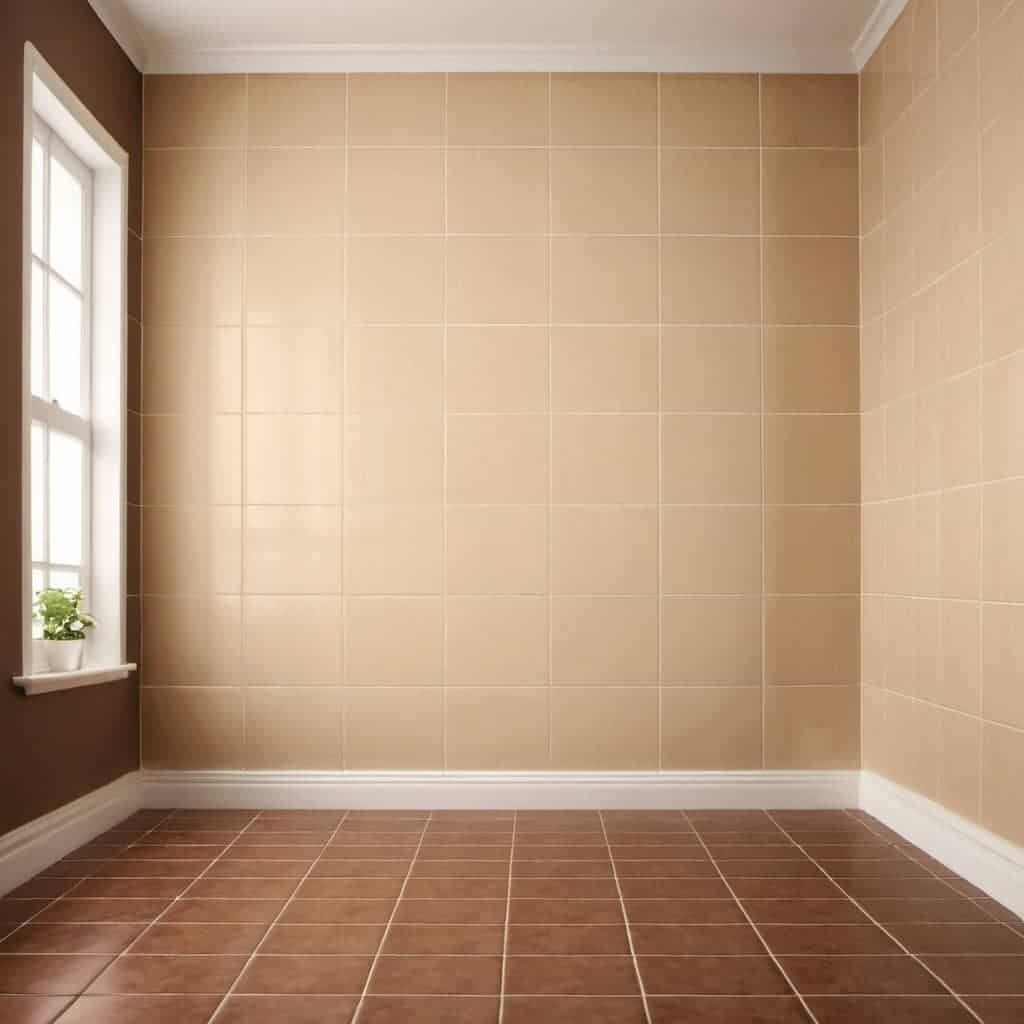
Brown tiles with a sandy beige wall

Brown tiles with a sandy beige wall are a great combination for creating a natural and earthy feel in your home. Brown tiles are perfect for floors and walls in any room where you want to create a warm and welcoming atmosphere. The sandy beige color of the walls helps to add a touch of elegance to the room, while still keeping it feeling grounded and natural. This is a great choice for those who want to create a space that feels both cozy and chic.

Final Words

In conclusion, choosing the right color paint to complement brown tiles can greatly enhance the overall aesthetic of a room. The 11 best ideas presented in this article offer a variety of options to suit different styles and preferences. Whether opting for a contrasting color scheme to make the tiles stand out or selecting a complementary shade to create a cohesive look, there are plenty of choices available. By considering factors such as lighting, furniture, and personal taste, homeowners can find the perfect paint color to harmonize with their brown tiles. Take inspiration from these ideas and experiment with different combinations to transform your space into a beautifully coordinated and inviting environment.

What Type Of Paint Is Best For A Bathroom: A Complete Guide

What Type Of Paint Is Best For A Bathroom

Do you know what type of paint is best for a bathroom? We are here to provide you with the best paints and related info if you don’t. Let’s dive into the deep.

Keeping a home sound and disturbance-free is a house owner’s top priority. When it is your bathroom, it demands the top-notch attention of a house owner. Indeed, the bathroom is a house’s most vulnerable part due to its watery environment. So, every house owner should know the proper management of the bathroom and painting as its significant part. 

What Type Of Paint Is Best For A Bathroom

Among the overcrowded market of paints, glossy and satin paints have the best usage for bathrooms. You can prioritize the higher glossy, glossy, semi-glossy, and satin paints according to their usability for bathroom walls.

Keep faith in us; we will show you the right path where to go. We will reveal all bathroom painting aspects from our real-life experience and more about what you need to paint your bathroom.

Important facts to know before choosing a paint

You will find a lot of paint in nearby shops. You can use them for almost any painting purpose. But when it comes to bathroom paint, you can’t use a randomly selected one. So, it’s important to know the paints as well as some relevant catalysts.

Before knowing about paints, if you don’t have some painting know-how, you won’t get the best paint and ultimately the best result. Let’s get you introduced to the basic principles of paints first.

Glaze and durability

The current paint market offers a lot of paints. The variation comes to fulfill various purposes. If you use them for the wrong purpose, this will lead to poor results. So, it’s far better to understand which paints will be durable for your bathroom.

There is a common theory of paint – the more glazing a paint, the more durable it is. When you want to choose durable paint, ensure that it is glossy.

Moisture and steam

The hot shower and other usages of hot water, cause serious effects on the bathroom wall. Hot water creates steam and increases moisture levels. Also, sometimes you might find some dirty texture, peeling, bubbles, etc., on the wall. These effects are because of the increased moisture level that happened by the emergence of steam.

Characteristics of water and oil-based paints

Water-based paints are suitable for the walls. You can easily use them for coloring your walls, ceiling,  or any interior parts of the house. You might find these paints by another name – latex paints. Besides the above-mentioned places, this paint will not bring a satisfactory result.

Oil-based paints are not suitable for wall painting. They are less durable and obstructive considering the wall-damaging aspects. They are highly suitable for door, metal, wood, and skirting boards.

Dampness

Compared to other places, the bathroom faces more water and remains damp almost always. If this dampness continues, your bathroom walls will get damaged promptly. So, they need to use paints that can resist dampness more than other paints. It means you need to use a particular paint that is particular for prevent dampness.

Manufacturing purposes of paints

Some manufacturers make some paints for special purposes. Suppose a paint is perfect for ceiling or outdoor walls, it will not be fruitful for other places due to its manufacturing particularity. So, you have to understand the specializations and their usage.

Easy cleaning

Bathroom walls tend to allow stains and mildew. You need to wipe them at regular intervals. If the paint is easy to clean and doesn’t get washed away during cleaning, it will ease your task. Because washable paints help to remove mold and mildew and remain undamaged after washing.

Waterproof

Bathroom problems start when water enters the walls and allows a reaction. If you apply waterproof paint on your wall, it will lead you to enjoy several years worry-free. Besides, it reduces your bathroom cleaning task.

Introduction to the paint types

Let’s get introduced to some paints and their usage nature. We have chosen the paints after a lot of experiments and from real-life users’ experiences.

Beyond the above paints, manufacturers produce some more paint depending on quality. They are retail paint and trade paint. While the retail paints represent a lower standard; the trade paint indicates superior paints.

Retail paint

Retail paints are lower grade than trade paints. You can use them for normal purposes and to save money. However, these types of paints fail to deal well with bathroom painting purposes. Also, when you have a low budget for painting, you can select this. It is easily affordable and you can use it for more than one coat of paint. 

Trade paint

Trade paints are more durable and effective for bathrooms indeed for other purposes too. They are more expensive than typical retail paint. You can use them for ceiling and narrow spaces. For special purposes, if you need to use trade paints more than twice, you have to pay notably a higher amount.

Besides these two superior categories, we have to know about some significant paints individually in detail. They are below with their highlighting characters.

Matt or flat finish paint

Flat finish paints provide lower durability when you use them in a congested area. It contains a higher amount of pigments and a lower amount of binders and resin. These elements lead the paints to result in better finishing, flourishing color, and low gloss. This paint is highly recommended when you need a superb finish.

All the elements of matt or flat are low water-resistive and allow moisture to come between the wall and the paint coat. Also, none of the matt or flat paints are mildew resistive or can serve the full needs of a bathroom.

Eggshell paint

A top class of paints with a lower level of sheen that reflects a low amount of light. Superior paints to the flat type. You can get the best result from the eggshell if you use it on walls of stairs and entrance paths. It will reflect low light and be less sensitive, which helps to hide finishing imperfections. One more benefit of eggshell paints is that you can get them dried more quickly.

Satin paint

Eggshell and satin paints are some of the notable paints. Considering usability, you can use it the same as eggshell paints. But it is a better choice than the eggshell Because this paint ensures more durability and prevention to bathroom walls than flat or eggshell. Since it is glossier than eggshell paints, it will show finishing imperfections easily.

Silk paint

You can bring out the best result from silk paint if you use it in a natural light-falling area. You can also use silk in narrow places like kitchens. Compared to matt paint, you can get a better result from it. 

Semi-gloss paints

Semi-gloss paint indicates the starting place of gloss paint. You can have higher efficiency from the paint, which is lower than its two other genres.

Gloss paints

A painting that starts with trustworthiness for the bathroom is gloss paint. The brighter the paint, the more superior to use for a bathroom. Using gloss paints, you can have more durability than all the above paints. This paint surpasses semi-gloss and stays under the high gloss paint.

High gloss paints

This type of paint is best suitable for a crowded and overused place. When you color in a bathroom, it must be highly preventive to mildew, water, moisture effects of a hot shower, etc. Low-quality paints can not prevent water from penetrating into bathroom walls.

High gloss paints are perfectly made for overcrowded and narrow spaces like bathrooms, kitchens, etc. They contain moisture-preventive elements. This is what you need precisely. All three paints of the gloss category have better usability than non-gloss paints.

What type of paint is best for a bathroom – finalization

From our experience and experiment, water-based gloss paints are our best choice. These washable paints are also known as latex paints. They contain mildew preventive elements and reflect more light as sheen or glossy paints.

Since sheen or glossy paints are basically three types, it is best to use the most glossy one among the three. Glossy and semi-glossy paints are better than others but inferior to high-gloss paints.

After all glossy paints, Satin paints are in the second category of paints for bathroom use. Since these paints can not produce the best result, we don’t recommend them highly. If you have a low budget and importance on the bathroom, you may consider these.

Oil-based paints allow water to come between the paint coat and the wall. This happening brings volatile organic compounds (VOC) out and creates barriers to breathing in bathrooms. So, we recommend you avoid these paints for bathrooms.

Frequently Asked Questions (FAQs)

1.    Do you have to use special paint for bathrooms?

Yes, a bathroom needs specialized paint to support its few adverse conditions. A bathroom is a place that becomes wet almost all day due to the touch of water. This water creates stains, bubbles, steam ( a result of hot water), mildew, etc. So, you need specialized paint that can prevent problems and is easy to wash.

2.    What paint to use in the bathroom to prevent mold?

A paint that contains antimicrobial additives can prevent bathroom mold. You will get plenty of options if you search for paints in nearby shops. But you need to choose a paint in which anti-microbial elements are present. These types of paints are sometimes called “mold-resistant paint.”

3.    What color should you not paint a bathroom?

Generally, painting experts suggest not using black, white, yellow, and red colors for a bathroom. Because white is more sensitive to stains and other unwanted objects. Black color absorbs light and causes a deficiency in brightness. This shortage of light will create a barrier to your makeup or grooming.

Red is also an unpopular color. Indeed, we discourage using red in all interior places. The red also creates a deficiency of luster. The matter of suitable and unsuitable paint for a bathroom is not totally fixed. Some experts discourage green, cringy, gray, etc., color usage in a bathroom.

4.    Can you just paint over mold in the bathroom?

To get the best from the paint, keep yourself from painting over the mold. In case you paint over mold, it will not be effective in stopping the mold from growing. What you need here is mold-resistant paint. Before that, clean the mold completely. Otherwise, your mold-resistant paint will not be effective.

Conclusion

We have described to you the most durable and effective paints. Understand our content thoroughly to choose a suitable paint for your bathroom and successfully apply it. Without understanding what type of paint is best for a bathroom, you might choose an imperfect paint. What will result in ultimate damage to your bathroom?

To understand more, please read our nice piece of presentation more times. For the new guys, we cordially suggest if you have enough time, patience, and money, you can have a try. If you are nervous or do not wish to complete the job in the DIY method, hire a professional.

Once you hire a professional, you will see the application of our guide.

How To Paint Over Venetian Plaster? A Step By Step Guideline

How To Paint Over Venetian Plaster

This content includes a complete guide on how to paint over Venetian plaster. Read out to learn more about the correct method of painting Venetian plaster.

Venetian plaster is considered a modern plastering method. With limestone and other ingredients, it decorates the surfaces nicely. Homeowners prefer this plaster most for its glossy marble look. However, most users want to paint over it and don’t know how to paint over Venetian plaster.

With a few special tools and the correct type of paint, anyone can paint Venetian plaster without professional help. Also, some special tricks and tips for painting the application can save time and energy.

How To Paint Over Venetian Plaster

In this context, I’ll share with you all the experiences I gathered when I painted my Venetian wall. Also, l has kept some techniques for making your task easy. So, let’s go to the step-by-step method to paint like a pro.

7 Easy Steps To Paint Over Venetian Plaster:

Limestone and marble dust are the main ingredients of Venetian plaster. This plaster looks like a polished marble surface after burnishing. That’s why Venetian plaster has become more popular with homeowners.

Venetian plaster will be the best option if you want a classy look on your interior surfaces. Besides, Venetian plaster is now shown on the ceiling surfaces in most houses.

Venetian plasters are eco-friendly and non-toxic. It is a long-lasting wall decorator product with safety. Also, Venetian plaster never becomes mold and damages any liquid.

You can use it on any wall, even in little places where it is hard to carry pure marble stones. The glossy and sophisticated look feels like the original marble surface. Now, let’s dive into the in-depth discussion about the painting method over the Venetian plaster.

Step-1: Collect Your Necessary Tools

To apply paint over the Venetian plaster, you must collect some necessary tools. As you have to cover the corners and narrow areas of your surface, don’t use the alternative options of these tools.

  • Sandpaper
  • Tape
  • Primer
  • Venetian plaster
  • Orbital sander
  • Drill machine and mixture
  • Paint
  • Paintbrush
  • Paint roller
  • Drop cloth
  • Plastering trowel
  • Stainless-steel spatula

Step-2: Repair The Wall

Sometimes, the old surface may have holes and cracks over it. Before applying the paint, you must repair these sections of the wall. Use some Venetian plaster to fill the gaps and cracks.

Firstly, take some Venetian plaster on the plastering trowel and apply it over the damaged sections. After that, fill the holes carefully with the application. Blend the Venetian plaster and set it with the surface perfectly.

Step-3: Burnish The Surface

Burnishing is an essential part of painting a Venetian surface. It removes the extra plaster from the wall and makes it smooth. For furnishing the surface, use mild sandpaper in an orbital sander and sand the surface gradually.

When the sander completely removes the extra plaster, stop the sander. Now, sand the wall with regular sander paper to clean the dust.

Step-4: Apply The Primer

You must choose the best primer for Venetian plaster. Remove all the water from the primer and mix it carefully to reduce velocity. For this task, use the mixture tool and shake the primer. Applying primer is the first coat over the plaster.

So, use a paint roller or brush to apply the primer and let it dry. Generally, it takes almost twelve hours to dry the primer completely.

Step-5: Paint Over The Surface

As Venetian plaster is a polished surface, it can’t carry the paints without adhesiveness. That’s why polymer or vinyl-based paints aren’t suitable for this type of plaster. So, it would be best if you used the latest colors over the Venetian plaster.

Take paints in a large bucket. Attach the mixture with the drill machine and blend well. Now, check the bottom colors through a plastic spatula to see if it mixes the full paints or not. Leave the wall for at least ten hours.

Take some paints in a stainless-steel spatula and apply them over the plaster as a second coat. You have to follow a 15 degrees slope to apply the paint. Repeat this process all over the surface. After that, use the third coat and blend it in the opposite direction.

After applying the second coat, you must leave the paint for ten hours to dry. Apply the third coat when the second coat dries up completely.

Step-6: Cover The Corners

Covering the corners is another essential part of painting over the plaster. Regular plastering trowels can’t blend the corner painting. You have to use a corner spatula to cover the corners.

Use a spatula to cover the corners. Blend the paint with the spatula and remove the excess portion from the surface.

Step-7: Give A High Polish

You have to polish your surface highly when all the coatings are done. You can use the sander and drop cloth to burnish the wall. However, a sander makes the task more manageable than the cloth. After giving it a fine polish, enjoy the new version of your old surface!

Difference Between Venetian Plaster And Traditional Plaster:

For decorating walls and ceilings, plaster is a must item to coat. Among other types of plasters, Venetian plaster and gypsum plaster is more prevalent in the modern world. However, there are some significant differences between these two plasters.

Generally, the main difference between Venetian and regular plaster is in raw materials and appearance. For this reason, Venetian plaster costs a little more than traditional plaster. The Venetian plaster ceiling is also available for users.

Besides, both plasters have different types of benefits and drawbacks. So, before choosing anyone, know the variations first. Now, glance at the table below to understand the actual differences.

Name Of ConceptTraditional PlasterVenetian Plaster
MaterialsGypsum, cement, and lime are the primary material.Fired limestone and marble dust.
CostingSo much cost-effective.Little more than a regular one though affordable.
AppearanceGood polished and finishing lines.Sophisticated marble stone gloss and excellent textured.
DurabilityDoesn’t last for a long time using.Long-lasting and durable features for years.
ToxicityContains toxicity for the human body and environment.Non-toxic and eco-friendly compounds.
Using areaCan be used for a few purposes.Versatile using opportunity over any surface.
MaintenanceQuite hard to do the maintenance.Easy maintenance and no need to work hard to clean it.
OdorSometimes, spread a lousy odor, especially in rainy or damp seasons.Never spread any odor. The compounds are odorless.
Damage and dampingBecomes damped and molds after using it for a long time.Do not create any mold and damping even after wetting with water.
Advanced featuresDoesn’t contain any advanced features.Customizable for any surface.
Difference Between Venetian Plaster And Traditional Plaster

4 Things You Should Avoid While Painting Over Venetian Plaster:

Painting over the Venetian plaster isn’t an easy task. Also, sometimes, it may become hazardous to paint if the painter won’t follow the rules and regulations properly. So, you must maintain the process and safety cautions to make the job successful. Now, I’ll discuss some factors you should avoid while painting over Venetian plaster.

1. Applying The Next Coat Over The Wet Surface:

After applying a coat, you must wait to dry the surface completely. The paint can’t stick with the wall if you use it over a wet surface. Also, it may spoil the previous coat because of the excess material. Wait at least ten hours for the next step after applying a coat.

2. Leaving The Corners:

Sometimes, painters leave the corners empty and don’t apply the proper paint. It may spoil the look and can’t give the finished look to the surface. So, never leave the corners and narrow sidebars. Apply paint with a corner spatula.

3. Leaving The Excess Material:

When you paint over the corners, sometimes, there remains some excess material. These leftover paints don’t allow the next coat to blend perfectly. So, remove the extra materials from the surface whenever you paint over the corners.

4. Blending In A Wrong Direction:

Generally, you must follow a 15-degree or 30 degrees direction while painting the surface. Also, blending the paint from the opposite direction for the last coat would be best. If you can’t manage the order, it can spoil the texture and appearance of your wall. So, always avoid applying several directions when painting over any Venetian plaster.

10 Tips To Paint Over Venetian Plaster Successfully:

Venetian plaster painting will be the most straightforward task if you follow some tips and tricks. Traditional painting methods may take time and need much toil to do the proper painting. However, some effortless ways still make the task easy for you. So, follow my pro tips to paint over the Venetian plaster quickly.

  • Do wax polishing before painting to make the surface more accessible.
  • Always use some spirit to clean the excess wax from the wall.
  • Use a drop cloth to clean the dust quickly before painting.
  • Apply more paint coat as possible you can over the plaster.
  • Make your first coat thin to set the paint perfectly.
  • Create different textures after completing the second coat.
  • Use painter’s tape to cover the places you don’t want to paint. Remove the tape sheets immediately after painting.
  • If you find any drips and lumps after painting, use an orbital sander to remove these.
  • Inspect to identify the missed areas and apply paint over them.
  • Always sand and clean the stainless-steel spatula before putting paint.

Frequently Asked Questions (FAQs):

What Happens If You Paint Over Venetian Plaster?

If you paint over Venetian plaster, it gives an impressive appearance with a sophisticated marble glossy surface. Generally, the application contains limestone, which helps the surface provide a classy look. After painting, the marble stone looked colored to bloom on the wall. You can paint your Venetian plaster to give a stunning look to your walls.

Can You Sand Venetian Plaster?

You can sand Venetian plaster. You can rub the application with an orbital sander or mild sandpaper to remove the excess material. Also, sanding makes the plastered surface smooth and drips-free. It helps the wall to blend the painting coats perfectly. So, sand Venetian plaster before painting it.

How Do You Make Venetian Plaster Look Like Marble?

You can make Venetian plaster look like marble by applying a suitable color over it. Generally, the appearance of Venetian plaster feels like marble stone because of its ingredients. Adding color gives an extra glossy and stunning look to it. You have to sand the surface properly to get the perfect furnishing.

Does Venetian Plaster Need To Be Sealed?

Venetian plaster needs to be sealed. As it shines like marble stone, you must close the application completely. Proper sealing gives the Venetian plaster a durable look. Also, the plaster material and paints can’t drip out from the surface after sealing the Venetian plaster. So, it is better to close the application properly.

How Long Does Venetian Plaster Last?

Venetian plaster can last more than 400 years! This plaster contains limestone and water. Also, it remains sealed from the outside to make it more durable and long-lasting. For this reason, Venetian plaster lasts for a long time, even from generation to generation. So, if you want stable walls and ceilings, use Venetian plaster unworriedly.

Final Verdict:

Painting over the Venetian plaster can be a challenging task for most homeowners. Though this plaster gives a stunning look to the surface, it takes more time and effort to apply over any wall. Also, there need some special tools to complete the job.

However, this task becomes accessible if you know how to paint over Venetian plaster. The proper method makes the task easy and saves much time for the painter. Even by applying the correct processes, you can do this job by your hand.

How To Paint Craft Foam?

How To Paint Craft Foam 1

Craft foam is a versatile crafting material that can be used to make a variety of different projects. If you’re not sure how to paint craft foam, this guide will show you the best way to do it. You’ll need some basic supplies and a few minutes of your time, and you’ll be ready to start painting!

How To Paint Craft Foam 1
Craft Foam Paint

Best way to paint craft foam

To paint your craft foam, you need to follow the steps below.

1. Collecting Basic Supplies for Painting Craft Foam

When it comes to painting craft foam, there are a few basic supplies that you will need.

First, you will need some foam sheets. These can be found at most craft stores.

Second, you will need paint. Acrylic paint works well on foam, and it is available in a variety of colors.

Third, you will need brushes. Foam brushes work well for this project, but you can also use regular paintbrushes.

Finally, you will need a sealer. This will help to protect your foam projects from damage. With these supplies in hand, you are ready to start painting craft foam!

2. Preparing The Craft Foam for Painting

If you’re planning on painting your craft foam, there are a few things you’ll need to do to prepare the surface first. Otherwise, your paint may not adhere properly or may not look as good as you’d like.

First, sand the surface of the foam with a fine-grit sandpaper. This will create a slightly rougher surface for the paint to adhere to. Next, wipe down the foam with a damp cloth to remove any dust or debris.

Once the foam is prepped, you’re ready to start painting! Be sure to use paint that’s specifically made for use on foam surfaces. These paints have a special formula that helps them bond well to the foam and prevent them from peeling or flaking off.

With a little preparation, you can easily paint your craft foam and create whatever masterpiece you have in mind!

3. Polish the Primer at The Surface Of Your Craft Foam And Allow It Adequate Time To Dry

Ensure you achieve an even paint application by using long strokes of up and down technique. Note that you may have to leave the paste to dry until it forms a transparent and clear layer on the surface of your craft foam.

Choose the right paintbrush for your project by taking into account the size of your craft foam. Do final touches on your foam to do away with unwanted bumps on the surface of your craft foam. It is recommended that you let the surface a maximum of 24 hours drying time before starting your painting process.

Which Paint Should You Apply to Your Craft Foam?

There are many types of colors you can use. However, you need to know the most appropriate color suitable for craft forms; Both metallic and golden paints are a good pick. Continue reading to discover the most appropriate paint to apply to your craft foam.

Acrylic Paint: Acrylic paint has many desirable properties, which makes it a good pick for many painting projects. If you want to paint the whole substance, then consider using acrylic paint. Acrylic polish is easy to apply to the surface because it has runny properties that allow it to spread much faster.

Mixing the Paint: To achieve a much denser color, you will need to leave the paint in its undiluted form. Ensure you mix your colors perry quickly to avoid losing your acrylic paint since it dries up much faster.

Patience: Acrylic paint is known for its ability to dry faster when applied on any surface. However, when acrylic paint is used on craft foam, you may have to wait much longer because it takes a little longer to dry. On that note, patience is key if you want to create a stunning finish.

You might be forced to wait for close to 4 hours before embarking on your painting exercise. Use an appropriate gloss finish to give your craft form a glossy finish; In this case, you might want to use acrylic gloss.

Make Your Writing Impressions Using Fabric Paint: You may decide to add more touches to your craft form, and this might be writing words of your choice or drawing specific patterns on the surface of your craft foam. In this case, consider using appropriate fabric paint since it dries out, leaving behind clearly marked impressions. Choose the right color that will be more visible after drying.

Making shapes: You might consider using a sketching tool to make patterns on your craft foam before painting it. Use a sponge to create the appearance much more appealing.

 Important Tips When Spraying Paint on your Craft Foam

  • Acquire the right spray paint from your nearest market. The nature of your project will determine the type of spray paint you will buy. Always go for a pocket-friendly can if you intend to apply a single color on your foam. Note that spray painting is harmless to your craft foam.

  • You will need to shake the spray can properly before embarking on your painting exercise. Shaking the can will allow the paint to mix properly for easy application.

  • You will need to be cautious with the nozzles to apply the paint evenly on your craft foam with much ease during the actual spraying. It would help if you considered holding the nozzle at a distance of about 3 feet from your craft foam. Having the nozzle close to the craft foam may create a lump of paint that is uneven. Spray your paint in long up-down sweeps to achieve a smooth and consistent layer of paint.

  • Doing this will also ensure minimal or no color running the surface of your craft foam.

  • When you are done with the first spray, allow for a maximum of 6 minutes, and then start applying another layer of paint. The time interval mentioned above ensures the paint dries properly before applying another coat. You should maintain the distance between your foam and the nozzle when using the second coat to minimize the chances of wrinkle-like formations on the surface.

  • As we mentioned earlier, allow your craft foam a maximum of 24 hours of drying time before you start doing any final touches on the surface. Ensure the space is a little drier to reduce your drying time.

Note that you can comfortably spray paint on your craft foam and make any color you desire for your project. You can improve the look of your craft foam by spreading it with spackling colors such as; silvery, metallic, and golden. Enjoy your painting!

How to Fix Uneven Spray Paints?

How to Fix Uneven Spray Paints

Wanna know how to fix uneven spray paints? Are you confused about why spray paint looks uneven? Don’t worry at all. Your every query will be resolved here. There can be many reasons behind the uneven surface. Most probably, it happens when you fail to apply the necessary coats. However, getting out of this problem is so easier if you work through a smart process. 

Proper Techniques Fix Uneven Spray Paints?

Supplies Needed:

● Spray gun or spray can 

● Respirator 

● Cardboard 

● Drop Cloth 

● Sandpaper

● Sanding block

● Wire brush

● Alcohol

● Trisodium phosphate (TSP)

A spray can is a metallic container, and it’s best to use for painting little parts. However, it becomes complicated to paint a large body with this can. A spray gun is in the form of a gun. It’s best for painting any area. It’ll give you more quality results than a spray can. 

How to Fix Uneven Spray Paints 1

Step 1 – Surface Preparation

The surface preparation becomes different with the different surfaces. Let’s discuss in detail which preparations we need for which surface. Here we’re sharing some points that help in properly preparing your required surface. 

Metal Surface

● The first step is picking a moist cloth for the metal surface, removing dust and pollutant particles. 

● If the surface has rust, then try to clear it. You can choose a wire brush for this purpose. 

● If you have any loose paint on your surface, make it clear with fine-grit sandpaper.

Plastic Surface

Now the case is different because we’re using the plastic surface.

● Pick up the soft cloth and start cleaning your surface. 

● For the removal of the base coat, wet sanding the surface lightly.

● To avoid the oil on the surface, remove it with alcohol. 

Wood Surface

Here the process also varies due to the unique composition of wood from other surfaces.

● As this is wood, we need trisodium phosphate (TSP) to remove any precious paint. 

● To remove the base coat, use sanding. To create a smooth surface, use fine-grit sandpaper.

Step 2 – Adjust the Pressure of your gun. 

For adjusting the pressure control knob of your spray gun, we need low pressure for perfect efficiency. That’s why we set low pressure on the gun. A perfect pressure setting helps you obtain fine and satisfactory results on your surface. But if you have any heavy edges or gaps, increase a little bit of pressure. To get a smooth pattern, don’t insert too much pressure.

Step 3 – Maintain A Proper Painting Distance

Distance varies with the gun you’re using. Different guns have their various settings. So it depends upon you which gun you’re using and how much distance you must keep. 

For an HVLP gun, there must be at least 6-8 inches from your painted surface, And if you have a conventional gun, try to keep it 8-10 inches from the surface. Finally, there are other air-assisted airless sprayers. For this, you must be at least 10-12 inches from your painted surface. And at last, you have airless sprayers. For this one, the distance must be 12-14 inches. 

Step 4 – Position Setting 

Keep your position well throughout to the height of your painted surface. It increases your process of painting. Also, you can do a much faster job in this position. Don’t move your wrist but try to move the whole arm to get the best results. Keep the position of the spray gun perpendicular to your painted surface.

Step 5 – Start Painting

Never directly start applying your spray on your painted surface when you’re recoating your surface. Instead, the strategy is first to paint the side areas and move your arm towards your main surface. So how to fix uneven spray paints?

To obtain even coverage on the surface, take your arm in a straight line. 

As compared to thick coats, thin coats are better. For better coverage, apply one coat and make it dry. When you realize it is fully dry, then move towards the next coat. Usually, your paint takes 30-40 minutes. It can vary according to your paint. 

Make sure to have the correct color of your paint. Start your first coat process by spray painting. After applying the first coat, move towards the second coat for smooth and even coverage. And at last, use a top and clear coat.

Step 6: Final looks 

Your first effort is useless if you don’t do the last check. When you’re checking, if you feel any spots pick up the fine-grit sandpaper. You can also choose a dry cloth and start rubbing the paint very gently. After doing this, repaint the final coating. 

Step 7: Cleaning of Your Equipment

Don’t leave your equipment dirty. Your final step is to clean it. Take your spray gun and start cleaning. Refer to the gun’s instructions for guidance. You will mainly need water or solvent, depending on whether you’re using water-based or oil-based paints.

After completing these steps, congratulations! You’ve successfully fixed uneven spray paints. Now you know how to do it. Gather your supplies and start fixing uneven spray paints at home, aiming for great results.

Fixing Common Spray Painting Issues

One common frustration when spray painting is uneven coverage. This usually happens because of being too far or too close to the surface or uneven spraying. To fix this, keep a consistent distance of about 6 to 12 inches and use smooth, sweeping motions. If you see lighter patches, apply a thin second coat after the first one dries; this can help blend the colors and remove streaks.

A common problem is paint drips or runs, which occur when too much paint is applied in one spot. To fix this during your project, let the area dry completely, then lightly sand the drips with a fine-grit sandpaper. After smoothing it out, touch it up with light coats of spray paint for better control. Patience is key; addressing these issues slowly will give you a smoother finish and improve your spray-painting skills for future projects!

Conclusion: Achieving a Flawless Finish

To get a perfect finish when spray painting, you need good technique, preparation, and the right mindset. First, remember that preparing the surface is crucial. Uneven surfaces or dirt can ruin your results, so spend time sanding, cleaning, and priming your workspace. It’s like building a strong foundation before creating a beautiful structure.

When you see uneven spray patterns, be patient. Changing the distance of your spray nozzle can greatly affect the quality. If it’s too close, you’ll get drips; if it’s too far, you’ll have overspray. Also, try different speeds and angles to gain better control over your strokes. Lastly, practice is important! Each project teaches you how to improve uneven sprays and achieve better consistency in the future.

How to Get Rid of Spray Paint Smell?

How to Get Rid of Spray Paint Smell

Painting your walls, fixtures, and furniture is one of the most soothing as well as refreshing tasks. This can make your surfaces look new and clean as you were hoping for. Unfortunately, those fresh coats of paint sometimes alter your home air quality and end up giving you headache-inducing ailments. Why? Because paint usually contains certain toxic chemicals which further release exasperating fumes. After applying, these chemicals mess up with your surroundings and start emitting displeasing comfort in or around you. Whether interior emulsions, exterior paints, or textured paints, almost every painting contains some amount of toxicity that can pose a great risk to your indoor air quality.

While you can still reduce the annoying odor using low-VOC and low-odor paint formulas, it is better to adopt natural methods to get rid of the spray paint smell. In this article, we will discuss some eco-friendly as well as easy solutions that can help you minimize the risk of fumes inside your home.

What Type of Chemical a Typical Paint Contains?

Spray paint is undeniably the easiest applied paint mechanism. It aims to give both professionals and homeowners the advantage of causing no or little mess. Also, it aims to offer you maximum productivity and optimal results. However, some ordinary paints loaded with harsh chemicals can put your life at risk if ignored.

If you think that paint is just a usual color that can be dissolved easily with water, then you might be wrong. Most traditional paints contain a slew of toxins that can cause harm to people, pets, and the whole environment.

To be honest, paints or even other paint-related products are loaded with VOCs (Volatile Organic Compounds). VOCs are the gases that release the fumes directly into the air once you open the can of paint.

The house paints boast of the enormous amount of toxic elements such as:

  • Xylene
  • Ethyl acetate
  • Methylene chloride
  • Glycol
  • Formaldehyde
  • Benzene
  • Phenol
  • Quaternary ammonium compounds
  • Carbamates

Depending on the quality, type, and brand, these are the chemicals responsible for making the air quality poor. It further potentially causes serious risks to your health. You either need to choose the branded spray paints or take the necessary precautions to tackle the spray paint fumes without a hitch.

The Ill-Effects of Spray Paints on Your Health

No matter whether your exposure to VOC fumes or smell is minimal or extended, it can still cause definite risks to your health. From short-term side effects to longer ones, here is what inhaling spray paint fumes can do to your health:

  • Headaches
  • Loss of coordination
  • Nausea
  • Damage to liver, kidneys, and central nervous system
  • Allergic skin reaction
  • Dyspnea
  • Fatigues
  • Dizziness
  • Trouble breathing

Having said that, let us now take you through some of the eco-friendliest methods of minimizing the effects of spray paint smell.

Here’s How You Can Avoid Spray Paint Smell in Less Than a Week

Now, you must be wondering how to eliminate spray paint smell from your home. For your convenience, we have mentioned a few simple tips and tricks that you can use to avoid harmful spray paint fumes and odors completely:

Using Low-VOC Spray Paint

While some paint smell goes away naturally with time, some stay longer for months. The best you can do is choose the low or zero VOC “Volatile Organic Compounds” spray paints to keep the paint smell away. It is one of the most effective, affordable, and eco-friendly ways that can keep your overall health and surroundings in check. These paints are generally made using organic materials such as plants, milk, clay, etc. You get the opportunity to save yourself and the environment alike from the troublesome toxicity.

Scented Candles

Scented candles are another mind-blowing solution to eliminate the paint odor. All you need to do is buy quality scented candles or incense, light them and you will get an odor-free home within hours. From mild to strong-smelling candles, you can pick from a variety of flavors to get the most.

Baking Soda

You must have used this magic powder before to give the perfect volume and texture of baked goods. Now, you can use this surprising pinch of potion to remove irritating smells from your home’s environment. Baking soda has the quality to absorb odors from your clothes, refrigerator, and spray paints. Just pour the right amount of baking soda into a container and place them around the room. It will act as an agent to suck in bothersome odors and fumes while minimizing the risk of breathing. If the odor persists, sprinkle some amount of baking soda on your carpets, leave overnight and vacuum the same next morning.

Onions

Sometimes, it is good to fight against one pesky smell with another smell. To make this thing happen, slice the medium or large-sized onion into half, place each half onion in the freshly painted room and leave for one or two days. The onion tends to eliminate even the harshest paint odor naturally. Make sure to throw away the onions after every use and do not be tempted to eat them or cook them again.

Bucket Full of Water

One bucket full of water can do wonders for you. Here’s how? Just fill one to the three-gallon bucket using tap water only, place the bucket in the center of the room, leave the bucket overnight or until the paint smell goes away completely. If the space is large or wide, use two or three buckets of water to get faster results.

Charcoal

If you’re struggling hard to make your room free from odor or fumes, then activating charcoal could be a good idea. For ages, charcoal is regarded as a household-friendly product that also acts as an odor-absorbing ingredient. To enhance the air quality- pick the activated charcoal in small tubes or aluminum baking pans, leave it in the room overnight to discard the smell of paints from your home.

Coffee Beans

A true coffee enthusiast knows how it feels to smell and take a sip of brewing coffee every morning. Now, the same coffee smell can help you remove those disturbing elements from your home. Just like charcoal, place the coffee grounds or beans in every corner of the room, leave it overnight and let the magic begin.

As a smart homeowner, you want your home to look, feel and smell perfectly. It is important for you to take the necessary precautions after and before applying the spray paint with no health hazards.

Spray Paints: Plan Ahead and Wisely to Mask “Those” Sensitive Smell & Odors

Choosing the right spray paints can enhance the look of your interior effortlessly. But it can also raise a lot of red flags which you are not prepared for. No one wants to deteriorate the air quality as well as affect their health negatively.

If you are opting for spray paint and looking for ways to mitigate spray paint fumes, here are a few additional things that you can do.

  • You must choose top-quality air purifiers or systems to normalize the air quality in your home
  • Selecting the low or zero VOC spray paints can make the painting process much easier while reducing the uncomfortable smell
  • Keep your home well-ventilated. It is important to keep the main gate, doors as well as windows open to get fresh air.
  • The more humid the weather, the more it will produce the strongest fumes. It is advisable to keep a tab on the weather from the beginning to the end of the painting process.
  • Damp walls and wet surfaces can trap fumes easily. It is recommended to fix the walls first with the help of professionals and then use the spray paints for better results.

It is always better to stay “SAFE” rather than “SORRY” by adopting the right methods that can work in your favor. You need to think thoughtfully and positively to keep your health in check. Also, to keep toxic spray paint fumes miles away from your home.

FINAL THOUGHTS

Spray painting is itself a fun, creative, and pleasant activity to make the surface look brand new again. It is worthwhile to not only change the color of your wall but also to keep your home environment smelling better. If getting rid of the spray paint smells seems daunting for you, then you must pick the above-mentioned tips and tricks that you think will significantly help you.

Be it charcoal, baking soda, or buying a low VOC spray paint, you can pick the right steps depending on your level of comfort, severity, and convenience. If you are experiencing spray paint fumes for more than a month, then seeking a professional would be a good option.

Therefore, untrap the trapped spray paint fumes, odors, or smell using the above easy methods to live comfortably inside your home.

How To Paint On Silk?

How To Paint On Silk

By now, you realize that you can apply paint on almost any surface provided you follow the proper procedure. With that in mind, let’s learn how to paint on silk.

Introduction: Why Paint on Silk?

Painting on silk is an exciting way to blend creativity with texture and light. Silk, a natural fiber known for its shiny surface, turns simple colors into bright artworks that seem to shine. Each brushstroke flows easily, allowing colors to mix in ways that traditional canvases can’t achieve. This special interaction between the dye and fabric creates a beautiful effect that catches the eye and invites thought.


Painting on silk can also be a calming experience, encouraging artists to take their time and fully engage with their materials. The delicate nature of silk requires patience and precision, helping artists connect more deeply with their work. As you start this artistic journey, you’ll learn new techniques and gain a greater appreciation for every detail in your piece. Whether you’re painting scarves or wall hangings, each silk creation tells a personal story woven into your art.

Tools and Materials Needed for Silk Painting

Painting on silk is a delicate art that requires specific tools and materials. Here’s a list of essentials:

Tools

  1. Silk Frame or Hoop: To stretch the silk and keep it taut for painting.
  2. Paintbrushes: Fine-tip brushes for details and wider brushes for larger areas.
  3. Dropper or Pipette: To transfer dyes accurately.
  4. Spray Bottle: To mist water to create gradients or keep the silk damp.
  5. Pins or Clips: To secure silk to the frame.
  6. Hair Dryer: To speed up drying between layers.
  7. Iron: For heat-setting the paint or dye.

Preparing the Silk Fabric Properly

To prepare silk fabric for painting, start by cleaning it. Wash the silk gently in cool water with a mild detergent made for delicate fabrics. This removes any factory coatings and tightens the fibers, creating a smooth surface for the paint. After rinsing, hang the fabric to dry away from direct sunlight to keep its shine.

Once the silk is dry, stretch it lightly onto a frame or hoop. This will keep it stable and prevent creases while you work. You can also use masking tape along the edges for extra security and to help you create clean lines while painting.

Preparation is not just about cleaning; think about how your colors will work together on the shiny silk. Plan their placement carefully to enhance your artwork.

3 Effective Methods To Paint On Silk

Successful painting entails a lot of input from you as an artist. You can paint on any surface if you are armed with the correct information regarding your painting project.

Yellow and Pink Playful Vibes Stress Free in 3 Steps Instagram Post

Method 1: Setting Up Your Materials

Before you begin your project, ensure you have all the necessary supplies at your disposal. If you have the correct supplies at your disposal, you can easily apply paint to your silky fabric effortlessly. Below is a step-by-step guide on how to paint on silk easily.

Step1. Use paints meant for silky surfaces

It is common knowledge that any form of paintwork requires you to use the most suitable color for excellent results. In this case, consider using silk-based paints if you want flawless paintwork.

Step 2. Clean your silk thoroughly

As always, ensure your painting project is clean before applying any paint. This is to remove any dirt that may affect the bonding properties of the color to the surface. The most appropriate way to clean your silk material is to wash it with your bare hands directly.

Step 3. Straighten your silk using a suitable mounting

If you are creative enough, you can craft your prop to stretch out your silk fabric. Alternatively, you can buy ready-made support to carry out your exercise. Be sure your material is adequately stretched for proper painting.

Method 2: Trying the Setting Technique

Step 1. Create a sketch of the silk

At this stage, you need to employ your artistic skills properly. Create several drawings, first on a piece of paper using your pencil. Pick the most appealing graphic and recreate it on your silk fabric.

To recreate your sketches on the material, It would be helpful to trace them using a pencil and an appropriate marker. Note that you are not limited to the designs you can make; patterns such as flowers and wordings of your choice will do better.

 Step 2. Make a bold outline of your sketch

Use a suitable resist substance to outline your designs. You can shop online for the most suitable resist solvent to use for your project. Be sure to outline your sketch bold enough for desired results. While creating the outline, be sure to press gently for efficient products. Avoid breaks between your lines of the sketch.

 Step 3. Let the Tracing Chemical dry

Be sure to give the resist chemical used above maximum drying time before moving on to the next activity. It would be good to consider using a source of dry air to quicken the drying process.

Step 4. Use a suitable brush for paint application

When applying paint on fabric, the most critical consideration should be the paintbrush you are using. In our case, be sure to select a medium brush for use on your silk painting project. Work your way around the silk fabric until all the surface is covered in paint.

Step 5. Place the paint with iron material

Be sure to switch your mounting after every twenty-four hours. Place a suitable ironing material beneath your silk fabric. Set a standard temperature on your iron box and press on your fabric. Ensure you iron the entire surface of your fabric for even and consistent results.

Step 6. Washing /Dry cleaning your Silk fabric

After completing your paint application and ironing exercise, it is time to wash your artwork to remove any chemical substances used in the initial stages. Alternatively, you may consider dry cleaning your fabric depending on the type of Chemical used to create your outline.

Method 3: Making Special Effects  Using Alcohol and Salt

Step 1. Applying  A mixture of alcohol and salt

This method is a bit straightforward, and you are only required to use a combination of alcohol and salt on your silk fabric. A mixture of alcohol and salt will create a medium under which your paint can work efficiently on the silk fabric.

Step 2. Applying the initial coat of paint

After applying a mixture of rubbing alcohol and salt to your silk item, you can go ahead and apply your first coat of paint. Be sure to use a suitable paintbrush at this point because you want the lines and edges of your pattern to be as bold as possible.

Step 3. Adding a dark shade

Apply subsequent coats of paint but be sure to use a shade of paint that is a little darker than the initial one. Be sure of the colors to start with because once you are done applying one color, there is no room to redo it if you are mixed up.

Step 4. Let the shades applied dry correctly

Just as you would other layers of paint, be sure to let your painted layers a sufficient amount of time before jumping into the next step.

Step 5. Make your lines bolder using a darker shade

Since you want the lines on your fabric item to be more visible, it would be helpful to consider using a shade that is a little bit dark to make them bolder. You will notice the outlines once the paint dries out.

Step 6. Sing Alcohol

As mentioned in the preceding sections of this article, consider using a mixture of alcohol and salt to create a medium under which paint can work efficiently on the silk fabric. Note that alcohol is essential if you want to smooth out sharp outlines on your silk paintwork.

Step 7. Ironing Your Silk Paintwork

Prep your fabric for ironing. However, be sure to allow your material a standing time of up to twenty-four hours before you do the ironing. Press your iron over the fabric gently but in circular motions until all the paint sets in properly.

From the preceding information, you may have discovered that you can paint on any project provided you have the right supplies and the correct information. Although painting on silk surfaces is tricky, the tips highlighted above will come in handy whenever you decide to paint on a silky material. Enjoy your painting!

Troubleshooting Common Issues in Silk Painting

Silk painting can sometimes lead to problems. Here are some common issues and how to fix them.

1. Colors Bleeding:
If colors run into each other, it may be due to too much water or not enough resistance. To fix this, use less water when mixing paints and apply resist properly to keep colors separate.

2. Faded Colors:
If your colors look dull after drying, it might be because of low-quality dyes or not enough layers. Use high-quality dyes and apply multiple layers for brighter colors.

3. Streaks or Lines:
Streaks can happen if you don’t apply paint evenly. To avoid this, use a soft brush and work quickly to spread the paint smoothly.

4. Wrinkles in the Silk:
Wrinkles can form if the silk is not stretched properly. Make sure to stretch the silk tightly on your frame before painting.

5. Paint Not Setting:
If the paint washes out, it may not have been set correctly. Follow the setting instructions carefully, and consider using a fixative to help the paint stay in place.

By addressing these common issues, you can improve your silk painting experience and create beautiful artwork.

Conclusion: Embrace Your Creativity with Silk Painting

Silk painting lets you colorfully express your creativity. This art form lets you experiment with colors and textures that other mediums can’t offer. As you paint on silk, you’ll see how the dyes interact with the fabric, bringing your imagination to life. Whether you make a beautiful scarf or a wall hanging, silk painting creates a personal connection between you and your work, allowing for spontaneity in your art.

Silk painting is also a great way to relax and practice mindfulness as you focus on the details of your design. The way the dyes flow reflects our creative processes sometimes unpredictable but always beautiful. So, why not try this art form? Gather some silk, brushes, and gutta resist, and ask yourself how to paint on silk. You might discover hidden talents and passions that bring you joy in every piece you create.