How To Wash Walls With Flat Paint?

How To Wash Walls With Flat Paint

Flat paints tend to have a matte finish and they are most popular for their non-reflective properties, they are also easier to apply and it’s the least expensive choice you can choose from when it comes to painting. Flat paints provide great pastry-looking finishes and are famous for their aesthetic appeal and practical application. Flat paints are also great for bringing out beautiful designs or details and can be used to light up certain dark areas or spaces. Many people prefer flat paints because of their translucent and opaque finish which diminishes glares on surfaces they are used on.

To some, cleaning off a flat painted wall from stubborn dirt can be tricky. Cleaning a flat paint from dirt, stains or fingerprints can be challenging especially when the paint starts to come off with the tool you’re using, a rag, for example, to remove the dirt leaving the wall with a botched look. In this case, the wall may need to be repainted to cover imperfections which is not good if you’re on a budget.

However, some techniques can be used to prevent the botched look and unnecessary spending, and below we list a few:

What you’ll need:

  • Dish or laundry soap
  • Cloth or rags
  • 1 bucket
  • White vinegar
  • Eraser
  • Gloves
  • Water

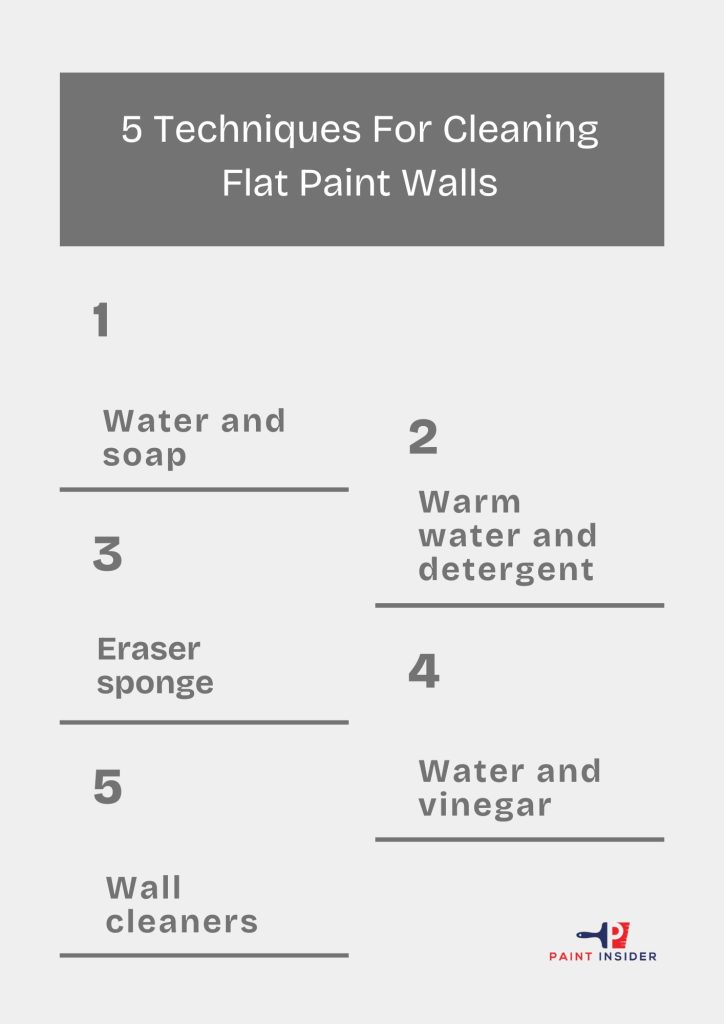
5 Techniques For Cleaning Flat Paint Walls
How To Wash Walls With Flat Paint

1. Water and soap:

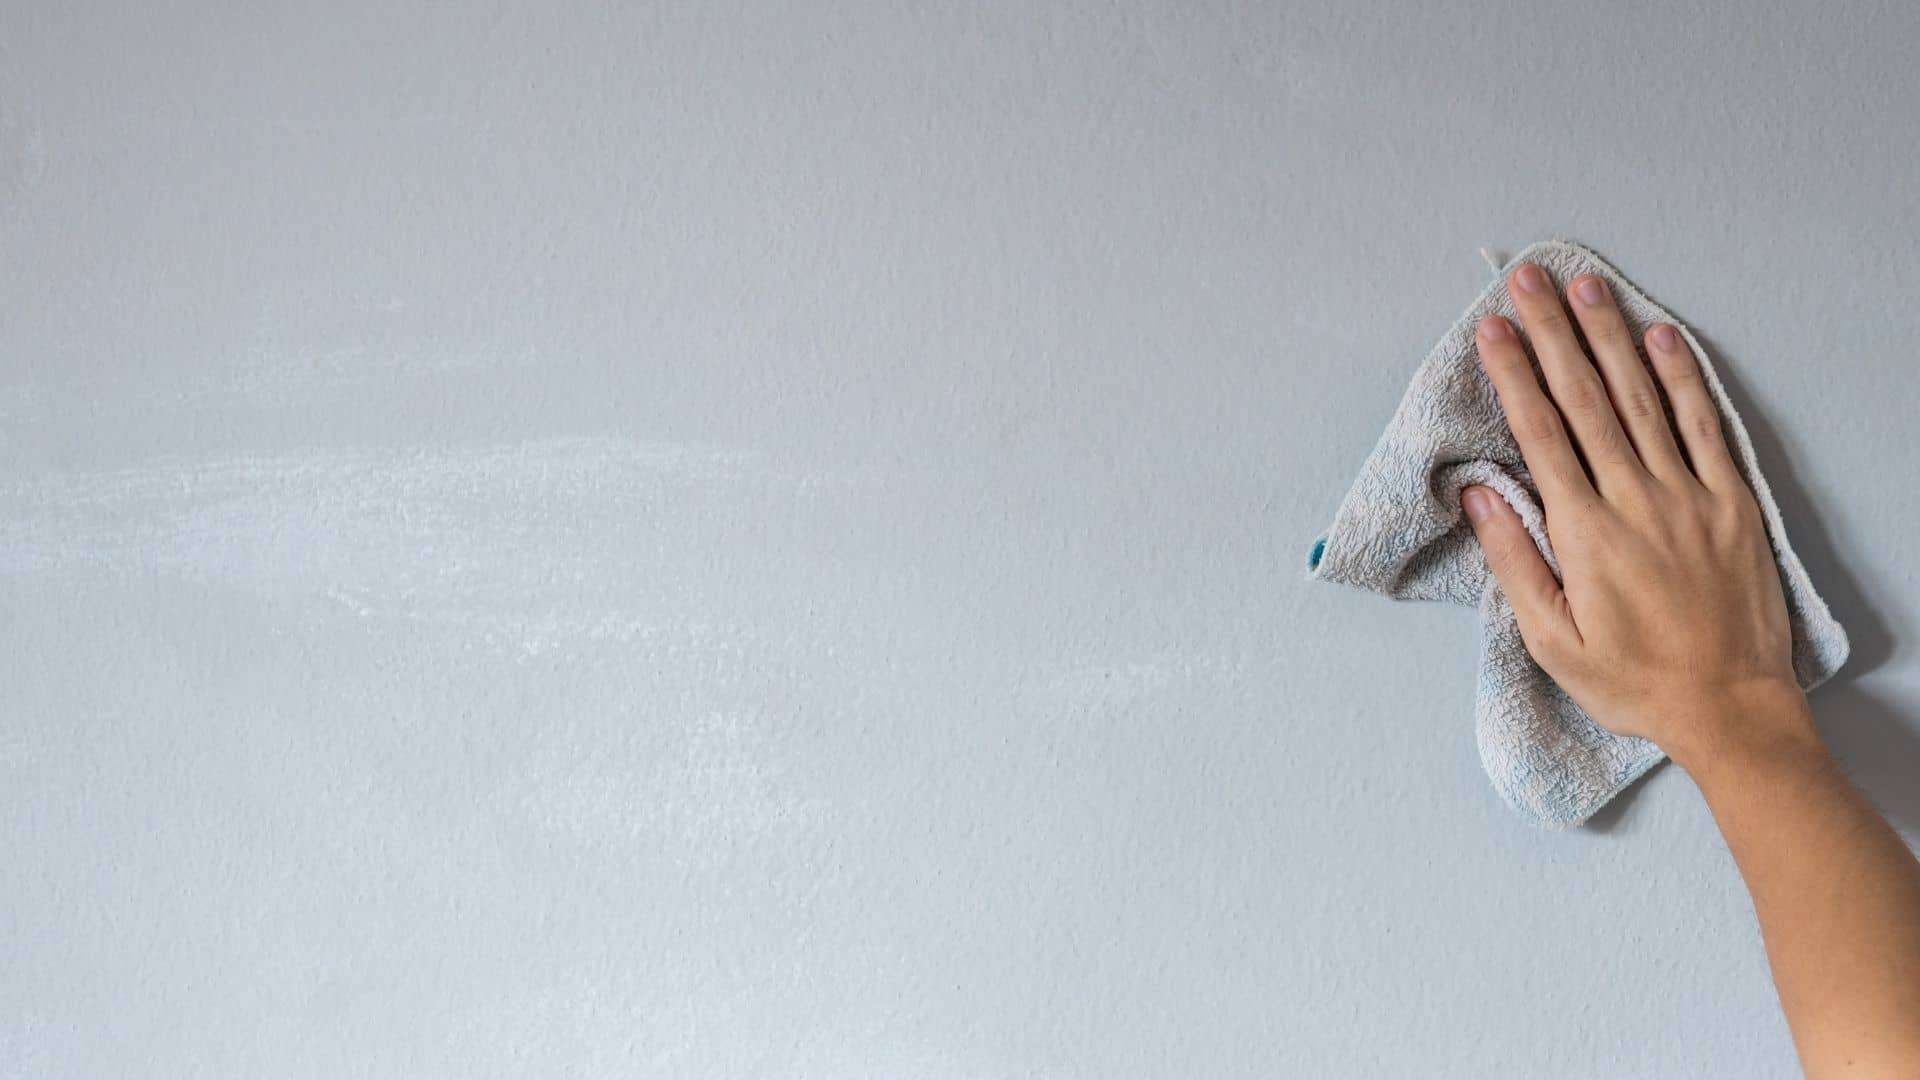
Water and soap are great methods to clean dirty spots off your wall without damaging the flat paint on your wall. It is also recommended to clean the wall immediately after any spill is made. To clean flat paint walls from dirt, pour some water into a bucket then add a few drops of liquid soap and stir to make a cleaning solution. Soak a sponge into the solution, and once soaked, squeeze out the excess water and rub the area with the dirt without adding pressure, until the dirt is no longer visible. Rinse the spot with clean water then pat with a towel to dry it, allow about 15 minutes or more for the area to completely dry. Use a fan if needed. Once dry, check the area once again to make sure all dirt was removed and if still notice any additional dirt in the area, repeat the same process once again.

2. Warm water and detergent:

Sometimes all you need is water to remove stains but if it doesn’t work, warm water and detergent should help. To begin, add some water into a bucket then add a few drops of dishwasher detergent to create a gentle solution. Note that you can also use laundry detergent to make a solution, use one spoon of detergent to a gallon of warm water and mix well. Soak a sponge or a cloth into the warm solution and squeeze out excess water, then start by gently rubbing the dirty area with the damp sponge or cloth without adding much pressure until the dirt is no longer visible, then allow it to dry. Once dry, check to make sure the area is clean from the dirt and repeat the process if the area still has some dirt left. It is also recommended to pat the wet area with a towel so that it may dry faster but make sure not to rub the area to not rub off the paint.

3. Eraser sponge:

Another recommended method is the eraser sponge. Soak the eraser in water and then squeeze out excess water. Start by cleaning the area with the dirt with a downstroke motion and sometimes with an up-and-down motion while adding a bit of pressure. Whilst cleaning, notice if any paint is being removed from the area you’re cleaning, if so, you may be doing it too hard. With this technique, the paint should remain intact. Clean until the dirt is no longer visible and allow up to 15 minutes for the area to dry. It may take longer depending on the environmental conditions. After theropod check the area to make sure all stains are removed. If still notice any dirt, follow the same method to remove it. This technique is great for cleaning walls and doors.

4. Water and vinegar:

For a more substantial cleaning, vinegar is a great recommendation, it is considered a natural eco-friendly cleaner that will not damage the walls and you may have some handy. Take one cup of vinegar, usually white vinegar, and mix it into half a bucket of warm water. Soak a clean cloth or a sponge into the solution and gently wipe off the dirt on the wall with an up-and-down stroke motion. Allow to dry for about 15 minutes or more, then double-check to see if all dirt was removed, if not, repeat the same process a second time or until the dirt is completely removed.

5. Wall cleaners:

Foam wall cleaners are another way to clean flat paint walls if you prefer a more industrial approach to cleaning the dirt off your flat paint walls. They are somewhat inexpensive and can be used instead of the household items you may have available like dish soap and rags, although many people would rather choose household items if they are on a budget. They come in spray bottles or wipes. They offer easy-to-spray and wipe-off methods and save you some time. It is recommended to follow the safety instructions available on the product when using chemical products.

Although flat paints are considered to be a bit difficult to clean, they can be accomplished with a gentle cleaning approach. It is recommended to clean flat-painted walls regularly. Cleaning flat-painted walls routinely will keep it looking fresh and bright and it’s a great way to protect the paint too. Use products that are mild enough to use on the walls and won’t damage the paint. As a safety tip, make sure electrical outlets are covered for safety reasons. Do not use anything abrasive or harsh chemicals as this may damage the wall by rubbing off the paint. We hope you find these tips helpful.

Drying the Walls Properly

When tackling the question of how to wash walls with flat paint, understanding the drying process is crucial for achieving optimal results. Flat finishes are notorious for their susceptibility to moisture, which can leave unsightly streaks when not dried properly. To facilitate a cleaner finish, consider using a damp microfiber cloth instead of soaking your walls with water. This method minimizes excess moisture while effectively removing dust and smudges.

After washing, allow your freshly cleaned walls ample time to dry ideally 24 hours if possible. Ensure the room is well-ventilated by opening windows or utilizing fans; this not only expedites drying but helps prevent mold growth that can easily thrive in damp environments. Remember to check humidity levels; higher humidity might require additional drying time or dehumidifiers for optimal conditions. By adopting these careful practices in wall maintenance, you’ll elevate the beauty of your space while ensuring long-lasting results without compromise.

Common Mistakes to Avoid When Washing

One of the most common mistakes when washing walls with flat paint is using too much water. Flat finishes are particularly absorbent, and excessive moisture can lead to streaks or even damage to the paint. Instead, opt for a damp cloth and a gentle cleaning solution suitable for your wall’s finish. This will ensure you’re effectively removing dirt without compromising the integrity of the paint.

Another frequent pitfall lies in neglecting to spot-test before diving into a full wash. Different areas in your home may react differently depending on lighting and wear; what works in one section might not translate well elsewhere. Take a few minutes to test your chosen cleaner on an inconspicuous spot first it could save you from costly touch-ups later. Lastly, don’t overlook drying techniques; using dry microfiber cloths aids in swift absorption, preventing unsightly marks while preserving the appearance of your flat-painted surfaces.

Conclusion: Maintaining Your Flat Painted Walls

Maintaining flat-painted walls requires a gentle touch and a mindful approach to cleaning. To wash walls with flat paint effectively, start by dusting surfaces with a microfiber cloth to remove any loose debris, which is crucial in preventing scratches during the washing process. When it comes time for deeper cleaning, opt for a solution of warm water mixed with a mild detergent; this combination effectively lifts stains without compromising the finish. Use a soft sponge or cloth and work in circular motions of this method reduces streaks and allows you to target specific areas without soaking the paint.

It’s also wise to conduct regular spot checks for scuffs and fingerprints before they set into the paint, early intervention can keep your walls looking fresh and vibrant longer. Keep your tools on hand; using an extendable duster or even a soft-bristle broom can easily reach higher spots while avoiding unnecessary pressure that could mar your flat finish. Lastly, remember that preventive measures like being mindful of touches near door frames or furniture can significantly enhance durability, it’s all about embracing those small habits that make your living space shine effortlessly!

Best Spray Paint For Spray Paint Art

Best Spray Paint For Spray Paint Art

If you happen to visit major streets, you will be greeted with a ton of street art. Join us as we discuss details about the best spray paint for spray paint art.

Spray paint is used to create many arts. One notable art is street painting commonly known as graffiti painting. These activities are commonly done by do-it-yourself artists. We gathered crucial information regarding this topic to help you understand it better.

With the advancement in technology, most artists are tuning to spray paints as a mode of creating graffiti art. Street painting involves a lot of processes that must be followed to the letter if you want to get the best results. In this article, we will examine the two best spray paints for spray paint art in the market. 

Who Needs This Product? 

If you have been trying to find the best spray paint for your street art, this article is for you. Whether you are starting as a beginner or an established painter, it would be best to learn a few tips about the products we will discuss in the subsequent sections.

“Readers may be interested in Best Spray Paint for wood.”

What Do Readers Will Learn?

Are you the kind of person who prefers to buy quality products? If that sounds like you, then you are in the right place; In this article, you will learn all there is to know about the best spray paint for spray paint art and a detailed guide to help you in your next painting project. 

Top 2 Best Spray Paint for Spray Paint Art

The problem of inadequate information among painters seems to be on the rise; this affects the quality of paintwork that is produced by both professional and amateur painters. With that in mind, you must understand what to look for in your preferred spray paint if you want to do quality work. Here is a list of the two best spray paints for spray paint art:

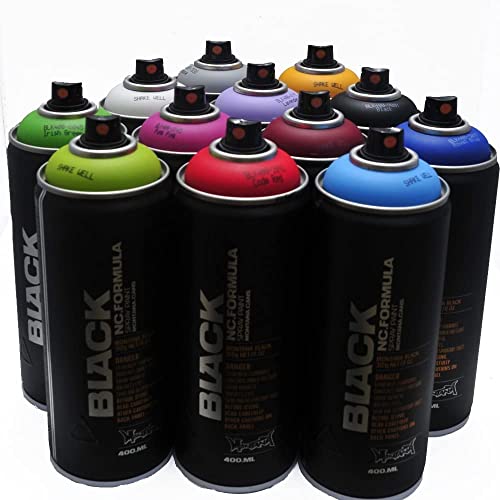
1. Montana BLACK 400ml Popular Colors Set of 12 Graffiti Street Art Mural Spray Paint: spray best for street art


Montana Black 400ml Popular Colors Set of 12 Graffiti Street Art Mural Spray Paint

Check Latest Price

Finding the best spray paint for spray paint art is not a walk in the park if you don’t have reliable information about the various brands in the market. That shouldn’t worry you because we were able to pick Montana BLACK 400ml Popular Colors Set of 12 Graffiti Street Art Mural Spray Paint just for you. This paint is UV resistant which allows you extra safety for your project. It is best for graffiti street art and mural works. This paint has excellent features to give you the kind of finish you desire. Here are its features:

Features

  • Montana BLACK 400ml spray Paint has excellent adhesive properties which enhance its sticking abilities.
  • It is multicolored paint.
  • It is balanced for easy shade and lighting effects.
  • It is a fast-drying paint.
  • It gives your paintwork a durable effect.
  • It has a variety of color choices for your project.

Pros

  • Montana BLACK 400ml spray Paint has a thick consistency for easy application.
  • It is easy to use.
  • It is pocket-friendly.
  • It is highly effective during winter.
  • This paint is perfect for multiple surfaces.

Cons

  • It is expensive.
  • It can be affected by clogging.

Reason to Buy

Finding the best spray paint for spray paint art is not a walk in the park if you don’t have reliable information about the various brands in the market. That shouldn’t worry you because we were able to pick Montana BLACK 400ml Popular Colors Set of 12 Graffiti Street Art Mural Spray Paint just for you. This paint has excellent features to give you the kind of finish you desire.

2. MTN Spray Paint Packs – Water-Based 100 Workshop 16 Pack


MTN Spray Paint Packs - Water Based 100 Workshop 16 Pack

Check Latest Price

Second, on our list is MTN Spray Paint Packs – Water Based 100 Workshop 16 Pack. This is one of the best-rated paints in the market because of its sought-after properties. This water-based workshop comes with 16 16-pack full-color sets, ready to use! It is excellent for use in any skill level or shape. The small can allow complete control, perfect for the small user. Let us examine its features and advantages.

Features

  • MTN Spray Paint Packs come with excellent chemical formulae to enhance their sticking features.
  • It contains the highest-intensity colors made with high-quality pigments.
  • Its usability is pretty straightforward.
  • It offers excellent durability once applied to the surface.
  • It has a low odor.

Pros

  • MTN Spray Paint Packsis non-toxic paint.
  • It is easy to use.
  • It is fairly priced to cater to your pocket needs.
  • It is not messy(can be cleaned with much ease).
  • This paint is suitable for use during the winter season.

Cons

  • It is affected by clogging.
  • It is expensive.

Reason to buy

The second on our list is MTN Spray Paint Packs – Water Based 100 Workshop 16 Pack. This is one of the best rates paints in the market due to its excellent properties, so you should consider buying it for your next painting project. When shopping for spray paint for your project, be sure to take into consideration the type of finish you are likely to get with your preferred paint. Again, depending on your preferences, you may want to check out the label of the can to know the kind of finish your paint will produce.

Top 2 Best Spray Paint for Spray Paint Art: Buying Guide & Factors to Consider when Buying Your Preferred Paint

Whenever you want to buy paint for your painting project, it is always a good idea to have a list of features you will be considering to make your purchase. However, this is not an easy task if you are green on matters to do with painting and this is where we come from. We have compiled a detailed guide to help you to make an informed buying decision. Check it out!

Factors to consider in your preferred spray paint

1) The surface to be painted

The nature of your surface will, to a larger extent, determine the type of paint you will choose for your project. It might help if you decide to go for spray paint that is meant for a specific surface. You might consider reading the usage directions to get more insight into the applicability of your paint.

2) The finish you want

When shopping for spray paint for your project, be sure to take into consideration the type of finish you are likely to get with your preferred paint. Again, depending on your preferences, you may want to check out the label of the can to know the kind of finish your paint will produce.

3) The paint should be durable

Your primary focus, whenever you decide to paint a given art, is to use a pretty long-lasting paint. You don’t want to apply spray paint that will last a couple of days and then start coming off the surface. Most paints have different techniques of application. The method you choose to apply to your preferred paint will depend on many factors such as the thickness of your paint. Below, highlight crucial tips you should know regarding spray paint art.

4) Amount of drying time

Working with spray paint is a bit tricky; Since you want your piece of art to dry faster, it would be best to use a versatile paint for better results.

5) Consumer reviews

Before you make any purchase, it would be better to consider doing a little research to find out what previous users think about the product. Consumer ratings of a product will help you to decide appropriately.

6)  Ability to stand the heat

The best spray paint should be able to withstand high-temperature conditions. So when buying your preferred paint, be sure to go for a product that has excellent resistance to the effects of heat if you intend to attain the desired levels of quality. You can enhance the heat resistance properties of your paint by applying suitable coating on your painted surfaces.

Spray Paint Art tips you should know.

Most paints have different techniques of application. The method you choose to apply to your preferred paint will depend on many factors such as the thickness of your paint. Below, highlight crucial tips you should know regarding spray paint art.

.

  • Be sure to mix your paint properly before you start your painting to get the best results.
  • Spray paint is pretty versatile, so it would be better if you consider working on your art quickly to get consistent results.
  • Ensure you have all the required supplies as they may come in handy during the painting exercise. It would be helpful to keep old rags and magazines close to help in wiping any overspray.
  • Always remember to carry out a patch test to determine the number of sprays you will apply to get the desired shade on your project. Begin with a light coat of paint before adding subsequent coats.
  • Note that street painting is an art and you should learn all the necessary information to understand it better.
  • Be sure to read all the usage instructions if there are any before applying your first coat. Be sure to have all the pigment colors you need to use because spray paint dries quickly.
  • Always remember to carry out a patch test to determine the number of sprays you will apply to get the desired shade on your project. Start by applying a thin layer of your paint before adding subsequent coats.
  • Note that street painting is an art and you should learn all the necessary information to understand it better.
  • Be sure to read all the usage instructions if there are any before applying your first coat. Make sure you have all the colors you need to use because spray paint dries quickly.
  • Always remember to carry out a patch test to determine the number of sprays you will apply to get the desired shade on your project. Start by applying a thin layer of your paint before adding subsequent coats.
  • Note that street painting is an art and you should learn all the necessary information to understand it better. Be sure to read all the usage instructions if there are any before applying your first coat. Make sure you have all the colors you need to use because spray paint dries quickly.

Frequently Asked Questions

Every form of painting has its challenges and spray paint is no exception. Below, we will discuss a well-analyzed list of the most frequently asked questions in this niche of painting so that you can get more insight into the topic. We capitalized on expert views and recommendations to drive the answers we have provided. Please read through the questions carefully to understand our discussion.

Question: What is the possibility of spray paint sticking on a metal surface?

Answer: Spray paint has excellent bonding properties when applied on a metal surface. However, you need to prepare your metal surface properly if you intend to get the desired results. Prepare your metal surface by sanding it to achieve a smooth surface to enhance the adhesive properties of your paint.

Question: Why do street painters prefer spray paint to other paints?

Answer: Spray paint is pretty versatile, which makes it a good choice for use in graffiti painting. Additionally, with spray paint, you can unleash your painting abilities with much ease.

Question: Which method can you use to do spray painting on art?

Answer: All paint types use pretty much the same method of application. However, spray paint requires you to have a proper mastery of the necessary skills to help you achieve a good finish.

Conclusion

From our discussion, we were able to note that spray painting can be a bit challenging if you are not well-versed in the intricacies involved. It is, therefore, a good idea to consider learning a few tips and tricks to be able to understand how to go about it. If you apply the information we shared in this article, you will master the art of street painting and be able to choose the best spray paint for spray paint art.

Note that street painting is an art and you should learn all the necessary information to understand it better. Be sure to read all the usage instructions if there are any before applying your first coat. Make sure you have all the colors you need to use because spray paint dries quickly.

How To Paint a Skateboard?

How To Paint a Skateboard

You would want to paint your skateboard; learning how to paint a skateboard is pretty crucial. Keep reading for more content.

Introduction: Why Paint Your Skateboard?

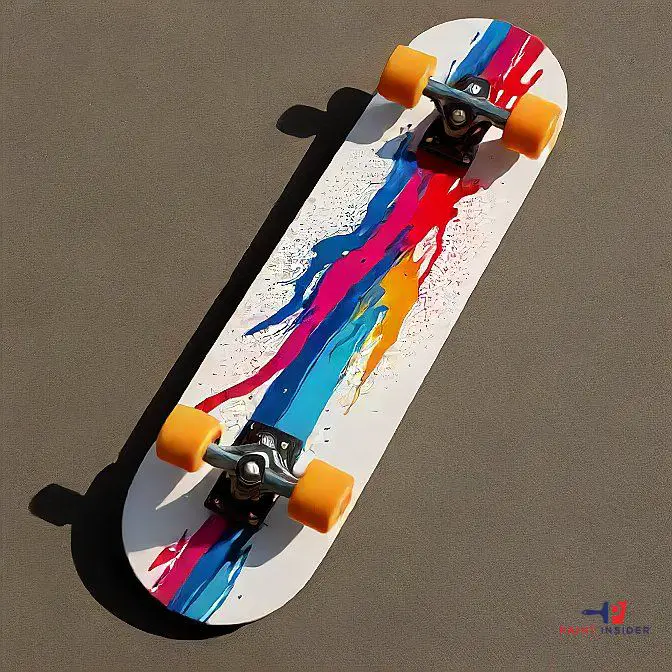
Painting your skateboard is more than just an artistic endeavor; it’s a personal statement that reflects your individuality and style. Every brush stroke and color choice gives life to what is essentially a canvas on wheels, allowing you to transform your ride into a unique piece of self-expression. Whether you’re seeking to revitalize an old board or simply want to start fresh with something that embodies who you are today, the act of painting ignites creativity and brings a sense of ownership.

Choose a Design or Theme

Choosing a design or theme for your skateboard is an exciting part of painting it. It’s not just about looks; it’s a chance to show your personality and interests. Think beyond classic designs and explore themes that connect with you, like your favorite band, a beloved movie, or personal experiences that shaped you. Working with friends or getting inspired by art styles like street art or abstract art can spark creativity and offer new ideas.

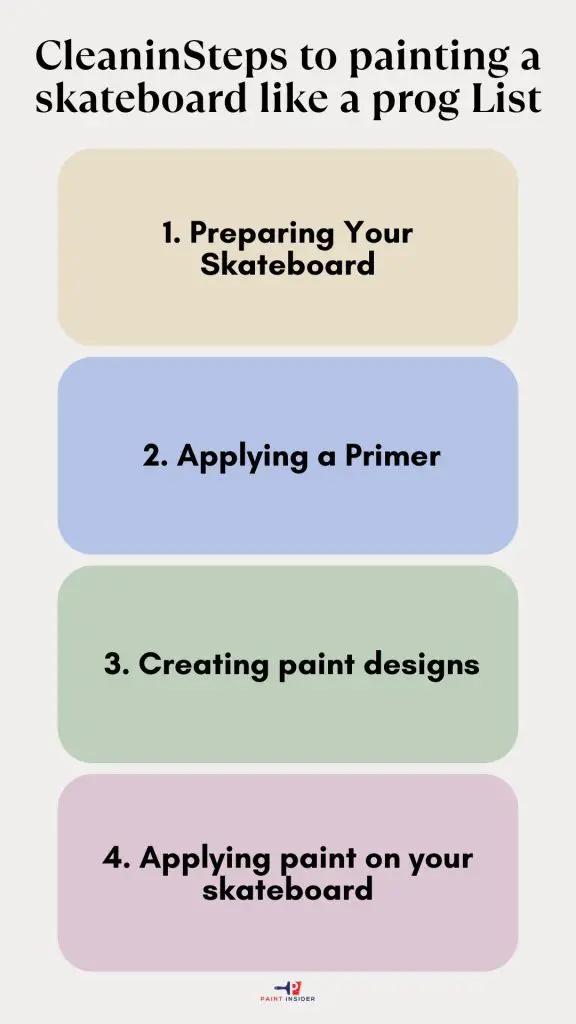
Steps to painting a skateboard like a pro

Regardless of your painting the skateboard, it is always essential to learn all there is to know regarding skateboard painting. Customized Skateboard painting can be reasonably costly, which is why you should learn how to be a do-it-yourself person for painting projects like this. In the subsequent sections, you will learn four different methods to paint a skateboard with acrylic.

How To Paint a Skateboard

Step 1. Preparing Your Skateboard

Put on your protective gear: It is common knowledge that preparing yourself is the first thing to do whenever you embark on your painting project. In this case, it would be best to adorn yourself in protective attire to shield your body from harmful paint fumes. Additionally, consider preparing your workspace to avoid doing a messy job.

Do a thorough sanding on the original painting: One of the initial preparations will incorporate sanding the original paint on your surface, as this will allow you to apply a new paint with much ease. An electric sanding machine will do the job satisfactorily.

To remove original designs from the surface of your skateboard, it would be best to press your hand firmly on the designs for better results. Then, finish off by using fine-grained sandpaper to achieve a smooth and even surface.

Scrub away any dust residue: When preparing your skateboard for painting, your primary concern is to achieve a smooth and even finish. With that in mind, use a stiff-bristled brush to scrub off all dust residue from the surface of your skateboard.

 Do repairs on your skateboard if necessary: In the course of your preparatory activities, you may notice that the surface of your skateboard has a few blemishes that might affect your painting. Be sure to do light repairs on your skateboard by using suitable sealants to cover scratches and cracks.

Mask the screw holes: Certain parts of your skateboard might not require to be painted after all, so it would be best to conceal them with painter’s tape. Areas like screw holes should not be painted.

Step 2. Applying a Primer

Painting your primer: Having prepared your skateboard for painting, you can now go ahead and apply your primer. You can either spray or use paintbrushes to apply your prime on the skateboard. Whatever method you choose, be sure to go through application instructions to ensure how effectively you apply your primer for the best outcome.

Do light sanding for a smoother surface: Let your primer dry properly, and then do a light sanding to achieve an even smooth surface. Be sure to use fine-grained sandpaper at this point. Note that sanding is meant to minimize the bumps on your skateboard after you are done with your painting.

 Apply a thinner on your skateboard: Painting a skateboard will require you to follow all steps to the letter; one such crucial step is applying a suitable thinner immediately after doing your light sanding on the primer. Be sure to use an acrylic-based primer for best results preferably, lacquer thinner.

 Step 3. Creating paint designs

Master the process: Because there is no room for mistakes and guesswork when painting your skateboard, be sure, you fully master the basics as regards design creation on your skateboard. An excellent way to go about design creation is by using stencils or impressions using masking tape. Then, use your tape to create designs and patterns of your choice.

 Create design sketches in advance: We mentioned earlier the need to prepare for your painting project properly. With that in mind, it would be helpful to create sketches of your preferred designs on the skateboard in advance. Then, use your craft skills and suitable tools to create your designs.

Proper choice of colors: Creating designs on your skateboard might involve more than one color; in that case, be sure to choose your colors correctly to create stunning designs. For instance, if you intend to use three colors in your design, ensure you have three different colors for your design project.

 Step 4. Applying paint on your skateboard

Start with the undercoat: Now, here comes the most critical stage of your painting project(painting). Because the surface of your skateboard is ready to be painted, it would be best to start with an appropriate undercoat. The undercoat will also act as a guide to making your impressions bolder.

Be sure to choose the right color to use as your primer. A denser color will give you the best results. Note that it would be best to spray your undercoat for better bonding.

 Attach your impressions by using painter’s tape: Use your masking tape to attach your impressions to the surface of your skateboard. Keep in mind that the areas concealed by your impressions will eventually remain unpainted with another color. Spray your skateboard with another layer while aiming for a consistent and even coat.

Take out the impressions attached earlier: It is time to take out the impressions you attached in the preceding step. Be sure to do it gently to avoid damaging your paintwork.

Do a final sanding for an even and smooth surface: Let your paintwork dry properly, and then do a final sanding on your paintwork for an even and smoother surface. Be sure not to overspend your paintwork because you don’t want to start over the whole project. Use a damp towel to wipe the sanded dust particles and let your skateboard dry before you can start your skating activities.

For obvious reasons, you may decide to paint your skateboard to give it a brand-new look. However, you may find it challenging to achieve this feat if you don’t have the foggiest idea of how to go about it. With that in mind, we hope that you will put the tips discussed in this article whenever you decide to paint your skateboard. Hopefully, this will help.

Conclusion: Enjoy Your Custom Skateboard!

How To Paint a Skateboard 2

As you roll away on your newly designed custom skateboard, you’ll not only appreciate its unique aesthetic but also the journey it took to bring it to life. Painting a skateboard is more than just adding color; it’s an expression of identity and creativity that can resonate with every rider. Your carefully selected design transforms the board into a personal canvas, reflecting your interests, values, and style a remarkable reminder of who you are as you navigate through life’s adventures.

Embracing the art of customizing your skateboard creates a deeper connection between you and your ride. Each brushstroke tells a story, whether it’s inspired by nature, urban settings, or even abstract concepts. Plus, maintaining that fresh look not only enhances performance but also sparks conversations with fellow skaters who recognize the passion behind your work. So grab those paints and embrace this opportunity; every time you step on that board, you’re showcasing not just a mode of transport but a piece of yourself ready to take on new horizons!

Best Paint To Use On Rubber

Best Paint To Use On Rubber

If you don’t want to have a bad day with your painting project, it would be better to read this article to learn crucial tips about the best paint to use on rubber.

By now you know, it is pretty clear that there are two main reasons to paint on whatever material you choose; firstly, you would want to paint to give your piece of art a more refined finish, and secondly, you paint your material to make it more durable. Regardless, it is proper that you know what you are doing to achieve the desired results.

In this article, we are going to furnish you with all there is to know about painting rubber and the best paint to use on rubber. Keep reading!

Who Needs This Product? 

Most of the equipment and machines we use in our homes and workplaces are essentially made of rubber; And because rubber is such an essential thing in our lives, we must take care of it by painting. However, if you are wondering how to apply paint on rubber and the best paint to use for your project, this article is for you.

We have capitalized on our many years of trying some of these products to give you up-to-date and credible information. Additionally, we have borrowed heavily from expert views on this topic coupled with intensive research to help you make a proper buying decision.

“You may be interested in Best Paint to Use on Rubber Tires.”

What Do Readers Will Learn?

We all know how it sucks if you can’t get it right with your painting project. As a result, we have compiled a list of the two best paints to use on rubber to make it easier for you to shop for your favorite paint effortlessly. Besides, in this article, you will learn helpful tips on how to paint your rubber material.

Having said this, you should now ask yourself how to buy the best paint to use on your rubber surface. Read on to find out.

Top 4 Best Paint To Use On Rubber in 2021

If you are starting as a beginner, or you have scant knowledge on the subject of paints and painting, getting to buy quality paint for your project is not a walk in the park.

The market is somewhat flooded with many paint brands, and this is where we come in. Check out the two best paints to use on rubber.

1. Flex Seal Spray Rubber Sealant Coating, 14-oz, Black: Best for  Cracks and holes


Flex Seal, 14 oz, Black, Stop Leaks Instantly, Waterproof Rubber Spray On Sealant Coating, Perfect for Gutters, Wood, RV, Campers, Roof Repair, Skylights, Windows, and More

Check Latest Price

This paint prides itself on a ton of excellent properties to give you the results you want. If you are looking to do a few repairs on your equipment, this should be your number one paint to consider. Flex seal works by sealing cracks and holes. It is sprayed out as a thick liquid that seeps into cracks and holes and dries to a watertight, flexible, rubberized coating that will Stop Leaks. It will give you very good results, it is proven. It is ideal for arts & crafts, projects & hobbies. Let’s know more about it.

Features

  • Flex Seal Spray Rubber Sealant Coating is effective on surface cracks and holes.
  • It has no complicated usage procedures.
  • It creates a protective layer on most surfaces.
  • It protects surfaces from corrosion.
  • It acts as waterproof.
  • The paint is pretty durable and Lasts for years.

Advantages

  • Effective in fighting against surface abrasion.
  • Flex seal has excellent sealing properties.

Pros

  • Flex Seal Spray Rubber Sealant Coating does not require any complicated preparation processes.
  • It is easy to use, portable, aerosol spray.
  • Once it dries, can be painted any color.
  • It is resistant to chipping and cracking during extreme climatic conditions.
  • The paint is pretty straightforward in terms of usage.
  • It is suitable for use on most surfaces.

Cons

  • It takes a long time to dry.

Reason to Buy

If you have been looking for paint that is effective on cracks and holes on your rubber surface, Flex Seal is the big deal; the paint has excellent bonding properties that make it suitable for use in sealing cracks.

2. 3M 03584: Best for vehicle undersides


3M Professional Grade Rubberized Undercoating, Corrosion, Water and Salt Spray Resistant, 03584, 16 oz. Aerosol

Check Latest Price

3M paint happens to be one of the top-rated rubber paints in the market; it has many desirable features that make it suitable to use on most surfaces where rubber is the main material. The paint has been treated to pretty high standards to fight any form of rust on whatever surface you apply it on. This multi-purpose undercoating may be applied to cars, trucks, and recreational vehicles. Let us examine some of its features.

Features

  • 3M 03584Paint has excellent long-lasting effects on rubber surfaces.
  • It can be used by both professional and professional amateur painters.
  • It is suitable for use on most rubber-based surfaces.
  • You can lessen the effect of sound while on the road.
  • This paint contains additives that are matched to give your car wheel the required maintenance.
  • It shields the underside of your car from the effects of rust and corrosion.

Pros

  • 3M 03584 Paint is pretty durable.
  • It has excellent adhesive properties.
  • The paint is quite easy to use.
  • This spray gives you extra protection at a lower cost.
  • This spray paint allows for easy spray-on application.
  • The paint is strongly scented.

Cons

  • It takes a while for the smell to go away.

Reason to buy

If you are looking to buy a paint that will give the underside of yours a more refined and durable finish, consider using 3M. What is more, the paint is cost-effective.

3. Dupli-Color Tire Paint Black


Dupli-Color Tire Paint Black, 10 Ounce (TP101)

Check Latest Price

Dupli-Color Tire Paint Black is revolutionizing how car enthusiasts approach tire maintenance. This isn’t just another paint; it’s a specialized formula designed to adhere seamlessly to rubber surfaces, offering a long-lasting, vibrant finish that transforms worn-out tires into the eye-catching features of any vehicle.

Features

  • Vibrant, Long-Lasting Color
  • Easy Application for Everyone
  • Durable Protection Against Wear
  • Weather-Resistant Formula
  • Eco-Friendly Choice

Pros

  • Durability
  • Easy Application
  • Improves Appearance
  • Quick Drying
  • Non-Toxic Formula

Cons

  • Limited color option
  • Requires Surface Preparation

Reason to buy

When it comes to giving your tires a fresh, polished look, Dupli-Color Tire Paint in black is your go-to solution. Unlike traditional tire dressings that can wear off with the first rain or drive, this durable paint offers a long-lasting finish that maintains its vibrant appearance for weeks.

4. Rust-Oleum 248657 Rubberized Undercoating Spray


Rust-Oleum 248657 Rubberized Undercoating Spray, 15 oz, Black

Check Latest Price

When considering the best paint to use on rubber surfaces, Rust-Oleum 248657 Rubberized Undercoating Spray stands out for its exceptional durability and versatility. This spray provides a protective barrier that not only guards against moisture but also combats rust and corrosion, making it perfect for vehicles and other outdoor applications.

Features

  • Superior Protection Against Rust and Corrosion
  • Sound Dampening Quality
  • Easy Application for DIY Enthusiasts
  • Flexible Finish for Long-Lasting Performance
  • Versatile Use for All Types of Vehicles

Pros

  • protective barrier against moisture
  • Sound Dampening
  • Easy Application
  • Versatile Use
  • Flexible Finish

Cons

  • Drying Time
  • Odor

Reason to buy

When it comes to protecting your vehicle from the harsh elements, Rust-Oleum 248657 Rubberized Undercoating Spray stands out as a top choice for both ease of use and robust performance. This versatile spray not only protects against rust and moisture but also dampens sound, enhancing your driving experience.

Top 4 Best Paint to Use on Rubber: Buying Guide

If you thought that painting rubber is easy, you are wrong. There is more to just applying paint. Many factors come into play. You will need to know the type of paint to use, the method of applying paint on your rubber, and a suitable technique to get the results you want.

Poorly done paintwork on rubber will not give you the desired results. You don’t want your paint to come off after a short while. We will show you the crucial steps to follow to achieve an excellent finish on your rubber material.

10 steps to Spray Paint On Rubber Like a Pro

Below, we have highlighted the essential steps involved in painting rubber. Please go through them to have a gist of the whole idea of painting on rubber.

  1. Prepare adequately for your painting. Gather all the supplies you require such as towels, drop cloths, and most importantly, your preferred paint. The type of supplies you will need for your project will be determined by how big your project is. Be more creative because your main focus here is to achieve clean professionally painted artwork.
  2. As always, start your project by cleaning your rubber surface with suitable detergents to remove unwanted dirt. Use a mixture of soap and water to remove greasy substances from your rubber surface. It would be better to use clean water to clear all particles.
  3. Do light sanding on your rubber then wipe the surface clean using a clean towel. At this point, it would be helpful to use an alcohol-based detergent to wipe your rubber surface. Note that alcohol will break down any greasy substances on your rubber surface to enhance bonding.
  4. The most suitable method to apply paint on your rubber is by using a sprayer; Before you start spraying, ensure you are well protected against the paint fumes. Alternatively, you can do your project in an area with a free flow of air.
  5. Applying a primer. Depending on the spray paint you choose to use, you may need to start with a primer. But if your paint has a primer additive you can spray directly on your rubber without bothering to apply a primer. When shopping for a primer to use, be sure to read the labels to determine whether it is compatible with rubber surfaces
  6. Position the nozzle of your spray gun at a suitable distance to achieve consistent results. The recommended distance from the rubber surface should be anywhere between thirty and 40 centimeters. Hold your spray gun steadily as you do vertical and horizontal sprays.
  7. With each coat of paint, you spray, allow a significant amount of drying time before adding a subsequent layer. Experts recommend a maximum of 10 to 15 minutes and up to one day after you are done with your project. Make sure you understand how to do the sprays to achieve the results you want.
  8. Remove your masking tape if you used it in the preceding steps. Do it cautiously to avoid damaging your paintwork. Note that you can use paintbrushes if your preferred paint is acrylic-based. After removing the painter’s tape, be sure to do a few touches to correct the mistakes you may have made.
  9. This step will require you to add a protective layer of a suitable finish (preferably polyurethane). It is also at this point that you may consider being creative with your project and creating a few patterns and designs on your rubber. Several coats will be required, so be sure to let each coat dry before adding a subsequent layer.
  10. Allow your final spray to dry before doing the final touches on your rubber surface. Be sure to let the final paint dry adequately before carrying out any form of finishing. To be sure, it would be better to read usage directions to let your paint dry properly.

Tips to note to get a perfect rubber spray paint

  • The paints we highlighted above are suitable for making your rubber surface durable. An excellent way to seal cracks is by mixing your spray paint with fine particles of rubber. Spray your mixture directly into the cracks and holes and allow the paint to dry.
  • Before you start using your preferred paint, it would be better to shake it thoroughly to ensure all additives are properly mixed. It is always a good idea to consider going through usage instructions as labeled on the can before you begin your project.
  • Depending on the type of paint you decide to use on your rubber, ensure you don’t skip any step; Most paint products come with comprehensive usage instructions, be sure to read them for better results.
  • Some of your projects will require specialized painting procedures; Ensure that you have read all the requirements for such products to avoid messing up your paintwork.
  • When spraying your paint, you aim to achieve an even and consistent coat on your rubber surface. Keep adjusting the nozzle of the spray gun to give you a uniform and even spray.
  • As a rule of thumb, always put on protective gear when dealing with aerosol paints. You don’t want to be affected by the harmful fumes of your spray paint. Alternatively, it would be better to do your paintwork in the open where there is a free flow of air.

Frequently Asked Questions

Because there are many unanswered questions on this topic, we took it upon ourselves to craft a list of the commonly asked questions and possible answers. Our responses to these questions consist of expert views and thorough research. Check them out!

Question: Which Paint sticks properly to rubber?

Answer: If you are an avid reader of paint brogs, you can attest to the fact that spray paint is suitable for use on most surfaces, rubber inclusive.

Question: Is there a way to cover acrylic paint on rubber?

Answer: This is not an easy task; however, you can seal acrylic over rubber by creating a mixture of acrylic paint and cement. Note that this kind of feat is possible if you are using the original rubber.

Question: Is it possible to apply paint over flexible rubber?

Answer: Yes, but ensure you use suitable paint depending on whether your paintwork will be done in the open or an enclosed space. Be sure to follow through all the stages involved such as priming to get better results.

Question: Is it possible to use fabric paint on rubber?

Answer: Yes. However, be sure to have the necessary supplies to enable you to get accurate results.    

Conclusion

Our discussion focused on the best paint to use on rubber materials. Painting on rubber substances is pretty challenging, but if you are armed with the correct information, you will master this art effortlessly.

In our view, the top four paints we discussed in this article give pretty much the same results, however, we are inclined to recommend Flex Seal paint because it is compatible with most surfaces. It is our hope that this post will help you to achieve the results you want. Enjoy your painting!

Is Watercolor Paint Toxic?

Is Watercolor Paint Toxic

Watercolors are the most exciting and exciting activity for artists. Water paint is considered the most environment-friendly and nontoxic color among all colors. It comprises pigments and blinders. But here’s the question that comes to our mind: Is watercolor paint toxic? Many people are in the habit of tasting watercolor to check its taste. What are the side effects of this? Artists must be aware of their proper paints, which are healthy and which are not. What precautions do they have to keep in their mind while using watercolors? Here we’ll discuss in detail what is the toxicity of the paint. How much is it present in watercolors?

First, the answer comes to mind after questioning watercolor toxicity. No, it’s not toxic. Most substances present in the watercolors are nontoxic and are good to use for humans. Most watercolors contain a low unhealthy index, but it depends upon the pigment used. When you purchase the watercolors, they are mostly labeled as Approved Product. It means it contains no harmful material that possesses less toxic material that is not dangerous for humans. Other paints have a “Cautionary Labeling” seal which means they need proper usage. If you use them according to cautions, it will not provide any hazard to you.

Watercolors may contain hazardous compounds, but it doesn’t mean that you stop using them if it has some toxic combination. We face many pollutants and poisonous compounds; it doesn’t mean you skip all of them. We need to meet these pollutants. Just like watercolor contains some contaminants, you need to paint appropriately with proper instructions to paint without any hazard. If you’re using your water paints daily, keep the instructions in front.

Here I’m sharing the general and common-sense rules that you must keep. Let’s proceed.

  • Try not to eat or drink when you’re using your colors.
  • Mix your colors in the dedicated plates. Never use your eatable containers for painting.
  • Only rinse the brush in the dedicated jar that is used only for painting. Some people are in the habit of using their coffee mugs or water glasses. Don’t do this.
  • Once you’ve brought the colors, read the cautions carefully. And use according to them.
  • If you’re messy, It’s better to wear gloves, a mask, and protective clothes during the painting.
  • Never lick your brushes.
  • Always wash your hands after finishing the painting.

 Is water paint toxic for cats or dogs? Many people love to paint with their pets. If you ‘have a pet, don’t’ keep your paint plate and jar open in front of them. Like humans, they’re not also suitable for dogs and animals. Try that your pet will not lick the paint.

What happens if you drink paint-colored water? The watercolors contain nontoxic materials. If you drink the paint color water, then you might face mild irritation to your skin or maybe in your stomach. Sometimes you’ll also have a chance of vomit. If it “goes into your eyes, then it’ll cause blurred images and irritation. But it is necessary to face these symptoms every time. What happens if your kid eats watercolor paint? First, Don’t panic and have sudden reactions. Just wash your hands with the ordinary soap and water where you see the paint. Don’t try to use any harsh chemicals to remove the paint from the skin. Then give it some water. It’ll help you wash your stomach and eat a snack. And in the case of eyes, wash your hands and then wash your face gently. Only these methods help you to remove the effect of paint water.

Is water paint toxic to the skin? Yeah! It’s an accurate prediction that watercolors are safe for our bodies due to their toxic composition. But always remember that the concept of the safety of watercolors works for every category or condition. Unfortunately, some watercolors are composed of dangerous materials that compel them to be toxic to the skin.

Watercolor brands can often cause unusual irritations in the skin. Moreover, they don’t take off skin instantly after reacting. As we discussed above, the category of watercolor and condition matters; we can say that different bodies respond uniquely to watercolor paint. Let’s discuss in detail how to brand and the color matter. Researchers and workers have classified the level of the most watercolor paint toxicity so that any substance present in sufficient quantities is not toxic to humans. If you use watercolors as intended, then they will be nontoxic to your body.

Remember that here we’re not considering the acceptance of watercolor paint usage in the process of face painting. You shouldn’t use the pigments if you own sensitive skin. It will be best if you don’t use them even after having normal skin because pigments may be absorbed in the skin and cause irritation and many others (depending upon your skin type).

If I classify based on pigment type, then I will say that pigments based on Cadmium proofs are more toxic than any other pigments. So, it’s crucial to protect your skin by remaining at a distance from oranges, red, and yellow because usually they are composed of cadmium.

Let’s have a look at the effect that occurs due to the toxicity of the watercolor paint. It can happen incidentally or consciously.

Toxic Ingredient

Watercolor paints, usually available to buy for daily use at home, are generally included in the nontoxic classification. Following are some of the substances that make watercolor paint toxic:

  • Cobalt
  • Cadmium
  • Gum arabic

Home Care

The rules I’ll tell you are just for personal information. Don’t use them for the treatment in the case of actual poison exposure. Contacting a consultant or doctor, in that case, should be your preferred choice.

Here are some healthcare tips that may be useful in the case of an emergency:

  • Drink milk or water instantly if you have consciously or unconsciously swallowed the paint.
  • Don’t throw up any poison until the professional consultant or doctor asks you to do so.
  • Don’t drink anything hard to swallow for you.

What Is A Paint Leveler?

What Is A Paint Leveler

We all want to produce a piece of art that is free of errors. As a DIY person, you aim to create a smooth and clear painting. With that in mind, note that the art of painting requires all of your input to realize desired results, so you should pay attention to the finer details of the whole painting process. This calls for total commitment which may include daily painting practices to master the skills. In addition to that, it is important to mention that to produce the desired piece of painting, you have to prepare adequately.

Any paint you come across is made of a ton of additives that make it suitable for use on a given surface. Floetrol is a good example of an additive in paint that enhances the properties of a particular paint. With that said, what is a paint leveler? Read on to find out more.

Definition Of A Paint Leveler

Paint levelers are also known as paint extenders. They are powdered particles that are majorly earthy which are added to paints to enhance their properties. They allow the application of paint on a given substance to become much easier. Additionally, paint levelers cause the paint to dry out much faster. The paint levelers do not change the basic characteristics of paint.

Composition of paint levelers

Paint levelers(extenders) are mostly solid with varying particles but they are mostly in powder form which enables them to properly blend with paint to increase its(paint) quantity and improve its filler properties. Additionally, they enhance your paint’s applicability properties by causing it to withstand the natural processes of wear and tear.

Importance of paint levelers

Just like other substances, paint contains important additives that contribute to its application properties. So, how important is a paint leveler? Let us take a look at some uses of paint leveler.

Leveler additives have other important chemical characteristics when they react with a given paint. They include:

  • Improved application of paint
  • Enhanced sticking abilities
  • Increased film ruggedness
  • It adds to the bulk of the paint

Choosing your leveling additive

The most common leveling agent is the improved polydimethylsiloxane which is a long-chain polymer. You can not use this additive in its pure state because they are incompatible with other additives found in paint. You Should consider choosing modified additives to improve the leveling abilities of paint. Modified grounding agents can improve the adhesive properties of your paint by stabilizing its form and surface tension.

Problems encountered during paint application

You want to create a near-perfect piece of painting without any unwanted blemishes and if you are a professional painter, your customers expect you to produce “pure gold”. Such results are achievable if you will select the best grounding agent and proper surface preparation before you start painting and this is where paint levelers come in.

That notwithstanding, a lot of times you will encounter a myriad of problems during painting, and this does not mean you know anything as pertains to painting. These are common problems to expect but with adequate preparation, the chances of encountering such problems can be greatly reduced to achieve the desired finish.

The final look of your painting is determined by the nature of the painting you will apply whether you will spray it or use a roller when applying the paint. Additionally, the mode of drying will contribute to the quality of the final piece of your painting. So what problems are you likely to experience during your painting? Read on to discover more.

A characteristic Orange peel appearance

This is most common when doing spray painting and it is influenced by the following factors:

  • The viscosity of the substance used as a paint leveler.
  • Spraying  parameters such as air and liquid  ratio
  • The surface tension of the solution and the leveling agents used.

Craig-like formations

This is caused by contaminants in the solution that manifest during the drying process. The difference between the surface tension of the paint and impurities can also bring about this formation. Such impurities will affect the surface tension of paint and consequently lower its application properties.

Swellings on the surface

The swelling results due to the trapped air spaces in paints. They may also occur due to the availability of volatile agents in paint resulting in volcano-like formations on the painted surface. Adding paint levelers reduces this effect by acting as a filler to enhance the application properties of your paint.

Slinking

Spraying paint on a surface is the most effective method when applying your undercoat. However, it may cause film retraction on the surface immediately after application in what is referred to as dewetting. The coloring agent supposedly wets the surface temporarily but after a short while, it retracts leaving behind an ugly appearance. This scenario is possible due to a difference between the surface tension of the paint used and the additive.

Any paint you come across is made of a ton of additives that make it suitable for use on a given Floetrol is a good example of an additive in paint that enhances the properties of a particular paint. You will encounter a lot of challenges during the painting process which is why you should take precautions to avoid them.

Paint levelers are also known as paint extenders. They are soluble additives that improve the application properties of your paint. Ensure you choose the right extender for your paint to enable you to achieve your ultimate goal of a clear and smooth piece of painting. The type of leveling agent you choose will affect the time it takes for your paint to dry and this should be taken into consideration. Hope this helps, enjoy your painting!

Frequently Asked Questions (FAQ) About Paint Levelers

What Is A Paint Leveler

1. What is a paint leveler?  
A paint leveler is a specialized additive that helps to smooth out the finish of your paint, minimizing imperfections and improving surface quality for a more professional look.

2. When should I use a paint leveler?  
Use a paint leveler when you’re working with surfaces that tend to show brush marks or texture, or when painting over existing finishes that may be uneven.

3. How do I mix the paint leveler with my paint?  
Typically, you’ll add the recommended amount of leveler directly into your paint can and stir thoroughly. Always refer to the product instructions for specific mixing ratios!

4. Can I use paint levelers with any type of paint?  
Most paint levelers are compatible with water-based and oil-based paints, but it’s always best to check the product label for compatibility with your specific type of paint.

5. Will using a leveler change the color of my paint?  
No, adding a paint leveler should not alter the color; it simply enhances application and finish quality without impacting the hue.

6. Are there any special tools required when using a paint leveler?  
You don’t need special tools; just standard painting supplies like brushes or rollers will work! Just make sure you’re applying evenly for the best results.

7. How long does it take for the leveled surface to dry?  
Drying time can vary depending on environmental conditions and the type of paint used but generally expect it to take about 1-4 hours before recoating.

8. Can I use too much paint leveler? What happens if I do?  
Using too much can lead to an overly slick surface that may not adhere well during future coats. Stick to the manufacturer’s recommended ratio for optimal results!

Conclusion

In conclusion, understanding what a paint leveler is can improve your painting projects. You won’t have to deal with the unpredictable results of traditional methods; a paint leveler lets you control texture and finish more effectively. This helpful additive helps you get a smooth, shiny surface, turning an average job into something special and enabling professional-quality results at home.

Moreover, incorporating a paint leveler not only elevates aesthetics but also enhances the durability and longevity of your finishes. By investing time in mastering its application techniques whether you’re tackling furniture restoration or wall remodeling you’ll be empowered to create surfaces that not only look polished but also stand up to everyday wear and tear. So next time you’re preparing for a painting endeavor, remember: embracing tools like paint levelers isn’t just about the product itself; it’s about unlocking your creative potential and redefining what’s possible with every brushstroke.

How To Paint A Boat Hull?

How To Paint A Boat Hull

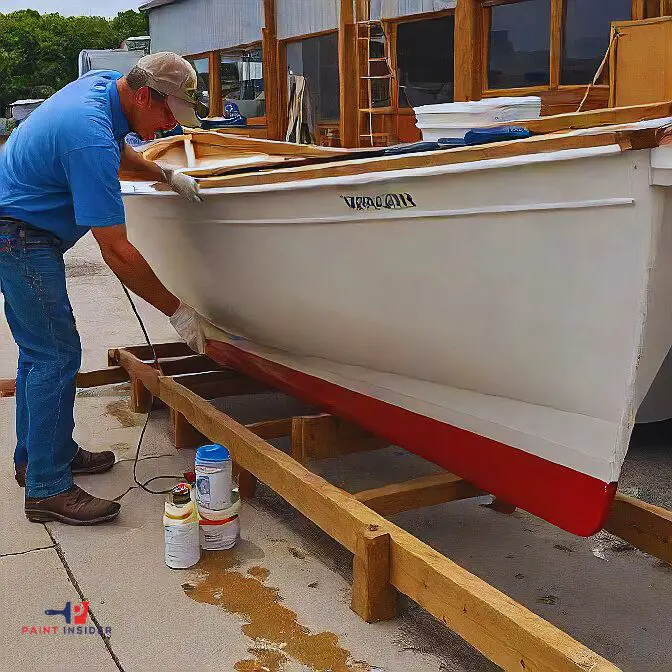
Doing paintwork on a vessel is not a walk in the park, and it is crucial to learn all that is there to learn about how to paint a boat hull, and more specifically, how to paint a fiberglass boat hull. The information we have shared in this article, coupled with expert knowledge, will go a long way in learning how to paint a boat hull in simple steps.

Introduction:

Painting a boat hull may seem challenging, but it can be a rewarding project that enhances your vessel and protects it from the weather. By learning about preparation, paint choice, and application techniques, even beginners can get great results. Start by checking the current paint; if it’s flaking or peeling, you need to prepare the surface properly. This involves removing old layers and smoothing any flaws to help the new paint stick well.

Method To Paint A Boat Hull

Before we go into the specific section of our discussion, we must understand the concept of painting a boast. Having the specifics of painting your boat does not only help you to restore the look of your boat, but it is also on the way to ensure your boat lasts much longer.

None of us will entertain the idea of having an old-looking boat. Additionally, it would be best if you remembered that the longer you leave your boat in an unpainted condition, the more you risk your life using the same boat over and over. Here is a step-by-step explanation of how to paint a boat:

  • Separate your boat from all detachable that you don’t intend to paint. For example, such detachable might include rails, cleats, and vents.
  • Examine your boat for any wear and tear marks and try to repair them accordingly.
  • Wash the boat surface as part of your initial preparation activities. Other preparatory activities to carry out include sanding and dewaxing if necessary.
  • After you are done with the preparatory activities, you can now apply the first layer of a suitable primer.
  • It would be helpful for you to wax the painted surface for durability purposes.
  • As a rule, always keep your boat clean, and remember to wash your boat using salty water. Also, ensure you go through warning instructions to understand the best practices regarding your boat.
  • it would be best if you remembered that the longer you leave your boat in an unpainted condition, the more you risk your life using the same boat over and over.
How To Paint A Boat Hull 1

 Tips for Painting a Boat Hull

  • The hull of a boat happens to be on the underside part of your boat, and it is, most of the time, in close with water. With that in mind, you will discover that applying paint on this part of the boat is a lot more direct compared to the upper parts of your boat.
  • You will easily apply paint on the hillside because there are no obstacles to slow your painting.
  • The surface on the hull of your boat is pretty vast so you can apply paint easily and quickly.

Method Paint the Bottom of Your Boat

The bottom of a boat is the most crucial part of your boat for the simple reason that it is always in contact with water. The environment surrounding the boat’s bottom is not so friendly because as the boat’s surface interacts with the water, corrosion will set in over time, so learning to paint the bottom of your boat is critical.

Tips for Painting the Bottom of Your Boat

  • The routine here is much similar to painting other surfaces of your boat; sanding. And all sorts of preparatory activities must be done here.
  • Note that in a case where you are applying a subsequent coat, activities like dewaxing might not be necessary. However, always be sure to do a proper amount of sanding before you use your paint.
  • You may decide to apply paint on the tip of your boat or ignore it altogether, depending on your needs. However, it is essential not to leave any part unpainted for whatever reasons.
  • It is noteworthy that the amount of time taken for the paint to dry varies greatly, so timing your boat lounge properly may help decide on the ideal time to apply paint on the bottom side of your boat.

Method to Paint a Fiberglass Boat

The process of painting fiberglass boats is closely related to painting. The only point of departure is the supplies you will use and the method of paint application to ensure the surface has been adequately prepared and taken care of during the application. We should note

Fiberglass boats are made from polyester resin (also referred to as boat resin) because they are the cheap raw material in boat building. The process of painting a fiberglass boat is not different from the one used in painting standard wood boats. However, the preparation activities tend to be a little different, so be sure to have the correct information.

Paints to Use on Fiberglass Boats

  • Single-Part Enamel Paints
  • Single-Part Polyurethane Paints 
  • Two-Part Polyurethane Paints

Any of the above points will give you the results you want; be sure to follow the necessary steps for better results. Note that every type of paint has its direction of Use to help you in your painting projects.

Preparation of your boat is essential before you can think of doing any form of painting. Be sure the surface is thoroughly cleaned because you don’t want your paint to come off within a short while after applying color.

“You may be interested in Best Paint for Fiberglass Canoe.”

Essential Tips For Efficient Painting Fiberglass Boat

  • Because a boat contains such an enormous surface to be painted, it would be helpful for you to consider looking for a coworker to help you with the painting exercise.
  • It is always good to consider painting your boat using many coats but light ones for best results. Be sure to achieve an even and consistent coat of paint. You might be required to paint up to three layers for better results.
  • Let each coat sit on the surface for a while before adding on subsequent results to enhance bonding to the surface of your boat.
  • It is always good to consider painting your boat using many coats but light ones for best results. Be sure to achieve an even and consistent coat of paint. You might be required to paint up to three layers for better results.

Safety Precautions While Painting

When painting a boat hull, safety should be at the forefront of your mind. The chemicals in paint can release harmful fumes, so ensure you’re working in a well-ventilated area, ideally outdoors or in a spacious garage with open doors and windows. Wearing a proper mask designed for paint fumes will protect your lungs from volatile organic compounds (VOCs). In addition to respiratory protection, donning goggles is crucial; they safeguard your eyes from splashes and harmful solvents while you work.

Don’t forget about your skin! Many paints and solvents contain toxins that can cause irritation or allergic reactions upon contact. Long-sleeved shirts and gloves are not just fashion statements but essential barriers between you and those potentially hazardous substances. Finally, it’s wise to keep fire extinguishers handy many boat paints are flammable and always store materials according to their safety data sheets. By prioritizing these safety precautions, you’ll create an enjoyable environment for transforming your vessel while minimizing risks associated with painting.

Conclusion:

Painting a boat hull is important for keeping your vessel in good shape and improving its performance. Taking the time to do this not only makes it look better but also protects it from damage that could lead to expensive repairs later. A well-painted hull can increase fuel efficiency and improve the handling of the water, which is something every boater values.

Also, don’t underestimate the joy of doing this DIY project. The satisfaction of admiring your hard work after the final coat is unmatched. It helps you connect with your boat, turning it into more than just a way to get around, but a valued companion for your adventures. So gather your supplies, get to work, and let each stroke show your commitment to the adventure your boat deserves!

Will Acetone Damage Car Paint?

Will Acetone Damage Car Paint

You may not find a car according to your choice of color. Now, you can easily paint your vehicle. But before start painting, you should think about some harmful things. The common problem faced by most car owners while painting their cars is the damage from acetone.

From my writing, you will be able to know about how acetone can damage car paint. So that, whenever you go for a car painting, have an eye on the process. You cannot let the acetone damage your newly painted car. The writing will help you make knowable about the damage and its consequences.

Liquids That Damage Car Paint

Many liquids are harmful to car paint. They may lead to color decay and ruin the outer surface of the car. Let’s check the liquids

Vehicle Fluid

Vehicle fluids may melt and damage the color of the surface of a car. They contain coolant and brake fluid. These fluids act as paint thinner and cause peeling.

Wipe the area with a soft cloth to remove fluids. Then, wash the spot with soap and a sponge.

Egg

If you do not remove eggs, they make a layer on the car paint. When exposed to paint, the yolk and whites of eggs become toxic.

  • Eggshell is responsible for destroying the paint. So, clean the area as soon as possible.
  • The egg white may stick to the surface of the car paint. Remove it by using wet sanding on the area.
  • The yolk contains fat, fatty acids, and cholesterol. It eliminates the coating of the car surface and creates a spot.

Hence, when you get any spot of the egg, rinse it with mild soap and water. You can also rub it with shampoo, and the spot will be gone.

Bird Droppings

Bird droppings are common situations for every car owner. It may permanently ruin the car’s paint. If you notice bird droppings on your vehicle, wash them before drying them. Take a wet towel and detergent. Scrubbing may cause peeling. So, softly wipe the area.

Shaving Cream

Shaving cream on a car’s surface can trigger the paint to peel. It may not be harmful in a foam state, but if you find shaving cream in dry form, damage happens. In this case, you have to damp the area and clean it thoroughly.

Acid Rain

Will Acetone Damage Car Paint

Acid rain destroys the surface of your car. The damage of the acid rain is to be repaired.

You can remove the spot by using clay bars. Gently moisten the surface and rub the clay on it. Using a microfiber cloth, clean the damaged area.

You can also remove acid rain with a watermark remover.

You can advice from a professional.

Shoe Polish

Shoe polish is responsible for leaving a spot on your car. It is tough, but not impossible, to remove on your own. To clean the polish all of it, follow the tips mentioned below.

You can use a specialized cleaner to eliminate the stain. How easy it is, right? If you still feel confused about doing so, consult with a professional anytime. But the method is mentioned to be followed by the beginners to expert level.

Coffee & Soda

Due to acidic components, coffee, and soda can eat away the coating of your car’s paint. Be careful whenever you have one. They can fall into the car at any time accidentally.

If they fall on your car, wash them instantly. Your car is completely clean now!

Will acetone damage car paint?

Now we’ll explain what acetone does to paint. If acetone pours into the car, it will tend to peel the car paint. This solvent will disintegrate the paint in a few hours.  You can remove the acetone immediately with soap and water.

If soap and water don’t work, try a non-acetone nail color remover. It can make your work easier.

Can Acetone remove car wax?

Acetone can remove car wax. Before starting the process, open the windows of your garage. It will help to remove strong odors. Now, soak a soft cloth in the acetone and pour it on the wax spot. Then, rub with a scraper or scrub brush. You can also do this rubbing process with fine-grit sandpaper.

Continuously pour acetone. To eliminate the acetone residue, swab the surface with fresh water.

Will acetone hurt your car paint?

Acetone can hurt the coating of the car. You cannot reverse the damage of acetone. But, if you find it earlier, can prevent the amount of damage. Remove the area and then polish the coating to shine.

It is difficult to undo the damage of acetone on plastic surfaces and other interior pieces. As plastic trim has an unusual shape, you will notice a difference.

However, to get rid of the problem, buy some 1600-grit sandpaper. Wet sand will help you to dissolve the spot into the paint. Minerals also can be used to remove spots.

Tips for maintaining the quality of car paint:

You can maintain the condition of the surface by following some steps. Read on-

  1. Wax offers an extra coating that helps protect your paint from minor scratches, keeps it from fading, and holds its beauty. So, wax your car every 3 to 6 months.
  2. Cover your car when not in use.
  3. WD40 is safe for cleaning tricky substances.
  4. Use a microfiber towel to wipe your car.

Conclusion:

Painting the car with your favorite color can bring peace to your mind. And if the color got damaged by a simple mistake, you cannot forgive yourself. So, to keep you notified about the damage from acetone on the car paint, the article is worth reading.

Never let the acetone create any damage to your newly painted car. Be careful when the painting is going on. Also, follow my writing to know more about the issue. Let us know how you find the problem and solve it.

How To Get Paint Off Boots?

How To Get Paint Off Boots

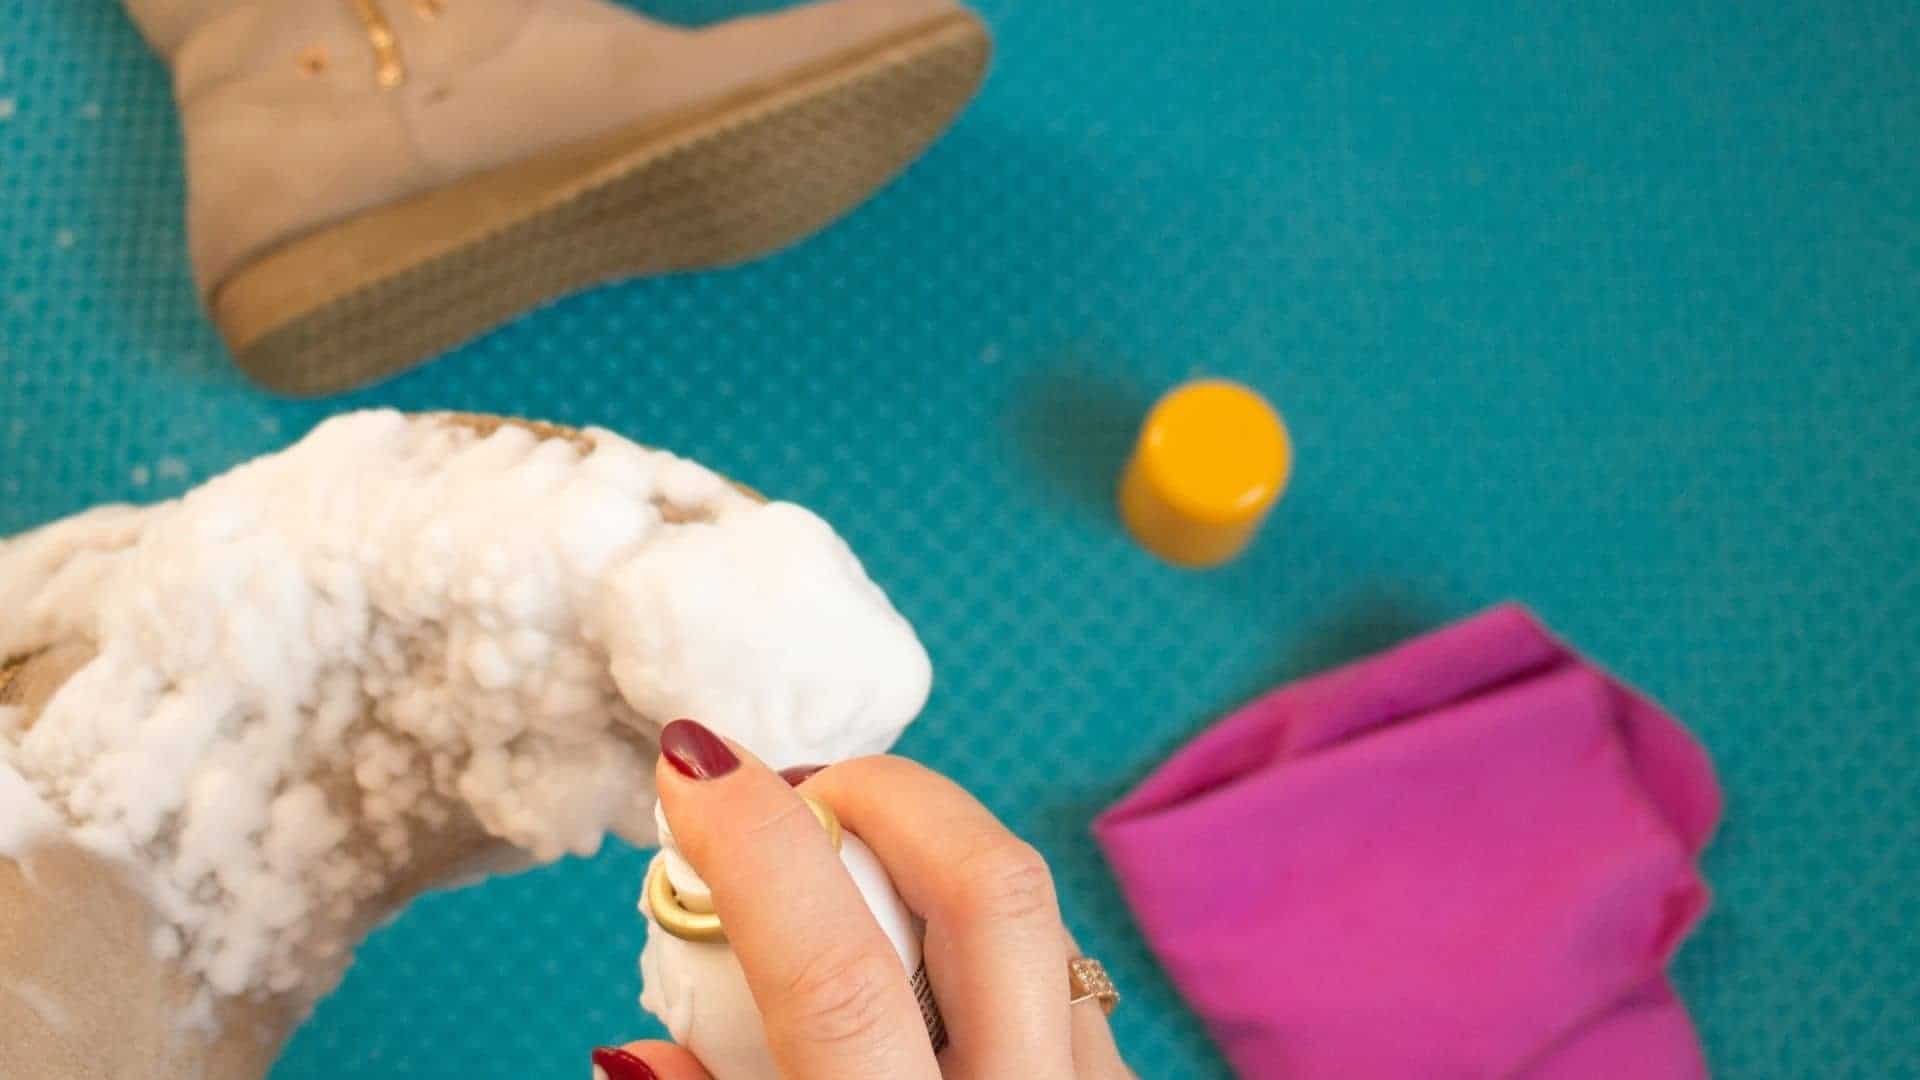
You may accidentally spill paint on your boots in the course painting, so learning how to get paint off leather boots is essential. Keep reading for more.

Introduction: Removing Paint from Boots Made Easy

Spilling paint on your favorite boots can feel like a disaster, but don’t worry! Restoring them is easier than you think with the right techniques and materials. First, identify the type of paint: is it water-based or oil-based? This will guide your cleaning method and help you choose the best cleaner without harming your boots.

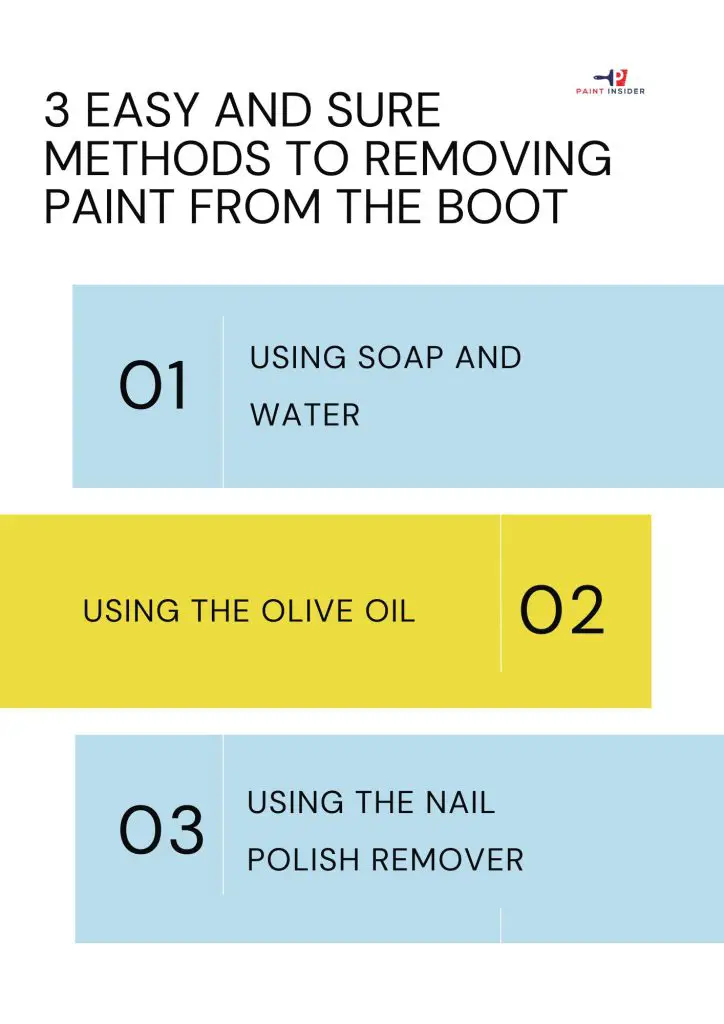
3 easy and Sure Methods to Removing Paint from the Boot

How To Get Paint Off Boots 1

Method 1: Using Soap And Water

This approach is suitable for fresh paint stains on your boots but it may be hard to apply this method on dry paint stains. Read on for a step-by-step guide on how to apply this approach.

Supplies Needed

  • Disposable towel
  • Water
  • Detergent/soap
  • Scrubbing tool/toothbrush
  • Drying cloth

Step 1: Using A Disposable Towel

Wrap the disposable towel around your boots so they can absorb the paint stains. The towel will help you to remove excess paint spills on your boots. Note that you want to apply your soapy water on stains, so be sure to remove excess paint as much as possible.

Take great care when using your towel on the paint stains because you don’t want to smear the stain all over your boot. Apply the towel gently to avoid being messy.

Step 2: Creating A Soapy Solution

Be sure to use neutral soap to avoid damaging your leather boots. One way to ensure your leather boots are protected is by using suitable detergents whenever you are washing them.

Ensure your soapy solution is made from warm water because you want a fast reaction between your detergent and the paint stains.

Step 3: Wipe Out The Paint Stain

Use a suitable scrubber to remove the dissolved paint stains from your boots; A new toothbrush will do the job perfectly. Note that you will be using gentle strokes on your boots to get rid of the stains.

Step 4: Use A Patted Towel To Dry Your Boots

Now that you are done wiping off the paint stains, it would be helpful to use a patted towel to dry your boots.

Method 2: using The Olive Oil

The first approach works best when you want to get rid of water-based paints from your leather boots. Olive oil is an excellent detergent for oil-based stains. If you have sufficient quantities of olive oil(cooking oil) in your home, you can use it to get paint off your leather boots.

Supplies Needed

One advantage of this approach is that you will not do any scrubbing, and with that in mind, here are the supplies you need:

  • Olive oil/cooking oil
  • Clean towel
  • Nail polish remover
  • Cotton swab

Step 1: Apply Olive Oil On The Paint Stains

Take a significant quantity of your olive oil and apply it to the paint-stained area of your boot. Be sure the paint seats are on the stains.

Step 2: Use Your Fingers To Rub The Olive

Your fingers will be helpful at this point to rub the olive oil over the paint stains. Work thoroughly through the stains until the olive oil reacts fully with the paint stains.

Step 3: Allow The Olive Oil To Sit In The Stains For A Few Minutes

The Olive oil will react with the paint stains for easy removal, so be sure to allow the oil sufficient time to react with the stains. Note that olive oil can not react with your leather boots.

Step 4: Dry The Affected Area On Your Boots

Dry the affected area after removing the stains using a clean towel. If you notice traces of stubborn stains, go over the whole procedure to ensure all stains have gone away.

Method 3: Using the Nail Polish Remover

Acetone, which makes part of the nail polish remover, is considered a cheaper alternative if you don’t have olive oil. Follow these tips to remove paint off your boots using nail polish remover:

  • Use a cotton swab or a suitable tool to apply the remover on the paint stains.
  • Blot the remover onto the paint stains on your boot.
  • Continue pressing the cotton swab on the paint stains a couple of times.
  • Consider changing your cotton swaps because you don’t want to do a messy job.
  • Gently clean the dissolved stains with a clean and dry cloth.
  • Be sure to apply your preferred leather polish after removing the paint stains to restore the lost dye.

How To Get Dry Paint Off Your Leather Boots

From the foregoing steps, we examined how to get paint off boots. However, we only discussed removal methods involving wet paint. So how do you remove dry paint from your leather boots? Continue reading to discover more.

Supplies  Needed

  • Plastic card
  • Lemon solution/ vinegar
  • Warm water
  • Stiff brush
  • Sponge
  • Sprayer

Step 1: Use Your Plastic Card To Scrape Off Paint

Use your plastic card to get rid of excess paint stains from your boot. Avoid using sharp tools to remove the top layers of the paint stains to help you protect your leather boots.

Step 2: Apply The Lemon Solution To The Paint Stains

You can use lemon juice or go for a vinegar solution. Note that both of these solutions are neutral acids and therefore cannot damage the fabric of your leather. Lemon juice will break down the paint stains on your leather shoes for easy removal. It would be helpful to consider using alcohol if you don’t have access to lemon juice and vinegar.

Step 3: Brush The Affected Area With A Toothbrush

Use your stiff-bristled bush to scour the affected parts of your boot. Consider repeating the whole step as described to be sure no paint stains are left behind.

Step 4: Clean The Affected Areas Of Your Boot

Use your sponge material to wipe out the paint residue from your boots. Go over the procedure several times to be sure no stains are left behind.

Getting paint off your leather boots is not an easy task. Since leather boots require great care, try to avoid any paint spills on them. It would help to wear suitable shoes when painting to safeguard your leather boots. Nevertheless, it would be best if you had essential tips on how to get paint off leather boots in case paint spills on your boots.

common mistakes to avoid

  • Using Harsh Chemicals: It’s tempting to reach for powerful solvents when trying to remove paint from boots, but these can damage the material. Instead, consider gentle alternatives like rubbing alcohol or vinegar, which are effective yet less abrasive.
  • Ignoring Material Type: One common mistake is not considering the boot’s material. Leather, canvas, and rubber each require different cleaning approaches. Researching the best method for your specific boot type ensures effective and safe cleanup without compromising quality.
  • Scrubbing Too Hard: When faced with stubborn paint spots, many might feel inclined to scrub vigorously. However, this can lead to further damage or discoloration of the surface. A gentle blotting technique often yields better results without harming your beloved footwear.
  • Not Testing First: Failure to test a small area before the full application of your chosen cleaning method can lead to unexpected results. Always patch-test any solution on an inconspicuous area first; it saves you from irreversible mistakes down the line while giving you peace of mind as you clean effectively.

Frequently Asked Questions (FAQs)

1. What is the best method to remove paint from leather boots?
Using a mixture of warm soapy water and a soft cloth usually works best for leather. Gently rub the area until the paint loosens.

2. Can I use nail polish remover on my boots?
Yes, acetone-based nail polish remover can help with paint removal, but test it on a small, hidden area first to ensure it doesn’t damage the material.

3. Is there a way to get paint off rubber boots?
For rubber boots, try using a plastic scraper or an old credit card to gently lift off the paint, followed by wiping with mineral spirits.

4. Should I use heat to remove paint from my boots?
Heat can be effective; a hairdryer set on low can soften the paint, making it easier to scrape off. Be careful not to damage the boot material.

5. Will vinegar help in removing paint?
Yes! Vinegar can help dissolve certain types of water-based paints. Soak a cloth in vinegar and apply it directly to the painted area.

6. Are there any commercial products for removing paint from footwear?
Definitely! Look for specialized paint removers or citrus-based cleaners that are safe for your boot’s material type.

7. How do I prevent damage while removing paint?
Always test any cleaning method or product on a small area first and use gentle techniques like rubbing or scraping carefully.

8. What if the paint has dried completely on my boots?
If dried, soak the affected area with warm soapy water or vinegar overnight before attempting to scrub it off gently with a soft brush.

Conclusion: Restore Your Boots to Original Condition

Restoring your boots is not just about cleaning, it’s about bringing back the stories they carry. Each scuff and splash has a story, but when they’re dirty or painted, those stories are hidden. Instead of seeing restoration as a chore, view it as a chance to refresh your favorite shoes. A little time with the right tools can enhance both your boots and the memories linked to them.

How To Thin Oil Paint Without Turpentine?

How To Thin Oil Paint Without Turpentine

You can use oil-based paints to enhance the beauty of your home or to make new art. Applying oil paint may not look good, but when the work is done, the finished product will look very good.

Introduction:

You can use some turpentine or mineral spirits with your paint for your residential or commercial projects. Professional painters use a mixture of linseed oil and mineral spirits to paint on canvas. The right proportion of paint and a thinning agent will give you the gift of a lively final product. Oil paints differ from other mediums as they are not water solvents. Painters need to apply a solvent to thin the color.

This is probably the most common way to use solvents to make your oil paints but there are some defects. Fortunately, you can make your oil paints thin without using solvents. I am outlining some available options for artists who want to thin the paint without using turpentine.

Why Avoid Turpentine for Thinning

Many artists often use turpentine to thin oil paint because it works quickly and effectively. However, it’s essential to consider the drawbacks: the harsh fumes and potential health risks associated with prolonged exposure can detract from your creative process. Artists may overlook safer alternatives that not only maintain the integrity of their work but also promote a healthier studio environment.

Which solvent should be used to thin the oil paint?

You will find 4 types of solvents suitable for use with oil-based paints. Among all of them, some solvents are more suitable than all other solvents. Although you will find different types of solvents, most of the solvents have the same working properties. These may quicken drying time and reduce density.

If you use excessive solvent in your paint, your paint may look chalky. When we use solvent in the paint, it reduces the oil content and may weaken the paint formation. Hence, you should not use too much solvent.

  • Turpentine
  • Odorless Mineral Spirits
  • Oil of Spike Lavender
  • Natural Citrus Solvent

Odorless Mineral Spirits

Odorless mineral spirit is a highly pure and premium solvent that can thin and blend oil paint. This solvent is odor-free. It is an effective cleaner for both brushes and other tools. This solvent is safe for your studio. You can get them cheaply. It dries very fast. You can easily clean them also. However, these mineral spirits may not be as effective for thinning paint as other solvents.

Odorless mineral spirits are also called white spirits by some people.

Since it is less toxic than turpentine, it is said to be more studio-safe. You need to ensure the ventilation of your studio while working as it can contain small amounts of chemical toxins.

Although odorless mineral spirits are not coherent with paints like turpentine, they still work successfully. This is the best possible alternative for cleaning the brush. You can make odorless mineral spirits by yourself easily. Use any type of drying oil like linseed for making odorless mineral spirits yourself. It will make the paint film powerful and flexible.

 Oil of Spike Lavender: Pleasant scent medium solvent

Lavender spike oil is the most effective and active paint thinner that has a sweet scent. It is not much safer than turpentine as a natural one. But this one is safe for the user. Artists use it as an oil painting medium.

Lavender spike oil is toxic-free and coherent with paint. But this will be costly for your project. The use of spike lavender oil is very convenient for you. It is extracted from the oil plant of Spike Lavender.

Lavender spike oil dries more slowly than other solvents. Since it is expensive, I would suggest you apply a small amount of it to your paint mix. You can also use it to make thin resin.

I like to use lavender spike oil as my solvent. You can also mix lavender spike oil into the first layer of your paint to dry fast. You should not use lavender spike oil for cleaning brush as it is expensive.

Natural Citrus Solvent

We get Citrus Solvent from citrus peels. It has a vegetable essence. Citrus Solvent does not contain petroleum products. Citrus Solvent replaces the extract of most mineral spirits. You can also clean the greasy surfaces with Citrus Solvent. As Citrus Solvent is derived from plants, this solvent is comparatively less toxic and eco-friendly. But the problem is we have only a little info about its reactions and characteristics.

This is a new solvent formulation for most artists. Very few solvents are as safe as Citrus solvents. The main ingredients of this solvent are citrus oil and hydrocarbons. Although citrus solvents are environmentally friendly, they can irritate your skin. Therefore, you are advised to wear gloves when using these solvents.

How To Thin Oil Paint Without Turpentine

How safe is solvent use?

Solvents are harmful to your health when you breathe. So, if you want to use solvents, you need to use a studio that is safe and well-ventilated.

You should not use turpentine if the studio is not actually well-ventilated. Without sufficient ventilation, Odorless Mineral Spirit, Oil of spike lavender, and Citrus solvent will not be safe to apply.

Things you should do to keep your studio safe:

  • When solvent is not used, keep it in a closed jar
  • Adequate ventilation in the studio room
  • Wear gloves during washing brush with solvents
  • Proper management of solvent and paint waste

Do not discard the solvent. You can refine and use it again. You can also keep the solvents in a container for future use.

You can use a brush washer or glass jar to leave the used solvents for some days to settle at the bottom. You can also use a paper coffee filter and filter out the dirty solvent.

Now, dump your dirty solvents on local hazardous waste facilities.

Conclusion:

To make painting more enjoyable and eco-friendly, thinning oil paint without turpentine offers new options for artists. Many choose alternatives like odorless mineral spirits, vegetable oils such as safflower or linseed, or natural additives like vinegar. These options reduce the strong chemical smell of traditional solvents and create a healthier workspace. By using these alternatives, artists can keep their creativity flowing while lessening their impact on the environment.

Additionally, trying different thinners can create exciting new textures and finishes in the artwork. For example, adding stand oil can give a smoother consistency that improves glazing techniques. Using essential oils can dilute paint and fill the studio with pleasant scents that boost creativity. Overall, finding ways to thin oil paint without turpentine encourages innovation and personal expression in art, as it should always involve pushing boundaries and exploring new ideas.