Who Invented the Paint Roller and When? The history of Paint Roller

Who Invented the Paint Roller and When Was It Invented

The paint roller was invented in 1940 by Richard Croxton Adams and Norman Breakey. They came up with the idea to create a tool that would make painting more efficient and less time-consuming than traditional brushes. Norman’s design featured a cylindrical roller covered in fabric, which allowed painters to cover larger areas quickly with a smooth, even coat of paint. The invention of the paint roller revolutionized painting, making it more accessible and practical for both professionals and DIY enthusiasts.

Introduction: The Evolution of Painting Tools

The history of painting tools is a fascinating journey that mirrors the evolution of artistic expression itself. From the simple ochre pigments smeared on cave walls to today’s sophisticated synthetic brushes and rollers, each innovation has transformed how we bring color into our lives. Among these tools, the paint roller stands out as a game-changer for both professional and amateur painters alike.

But who invented the paint roller and when was it invented? The modern paint roller is credited to Richard Croxton Adams and Norman Breakey in 1940, sparking a revolution in efficiency that allowed artists and homeowners to cover large surfaces quickly with an even layer. This invention dramatically shifted the landscape of painting, making it accessible for those who may have once felt intimidated by traditional brushes. Today, creativity flourishes as people experiment with texture and technique using these once-simple tools showcasing how innovation can breathe new life into age-old crafts.

The Birth History of the Paint Roller

The paint roller, a staple in modern painting, owes its invention to a creative spark in the mid-20th century. While many struggle with the cumbersome task of laboriously applying paint with brushes, it was in 1940 when Norman Breakey, a Canadian inventor, sought to revolutionize this process. He conceptualized a cylindrical design that allowed for faster and more even application of paint onto surfaces. His invention came about during World War II when personal time for home improvement projects was scarce; Breakey’s innovation catered perfectly to those eager to refresh their homes quickly.

However, despite his ingenious design, Breakey struggled to commercialize the paint roller effectively. It wasn’t until the late 1950s that an American company recognized its potential and began mass production. This pivotal moment not only transformed DIY home renovations but also redefined how professional painters approached their craft. The simple yet effective solution drastically reduced both time and effort while increasing productivity setting new standards in the painting industry as we know it today.

Key Inventor Behind the Paint Roller

The paint roller, a staple in the world of home improvement, traces its origins to 1940 when Norman Breakey, a Canadian painter, first conceived this ingenious tool. Frustrated by the inefficiencies of traditional brushes and labor-intensive methods, he sought a quicker way to apply paint to surfaces. Breakey’s innovative design incorporated a cylindrical fabric cover that allowed for seamless application over large areas a game-changer for both professional painters and DIY enthusiasts alike.

Interestingly, while Breakey is often credited with the invention of the modern paint roller, his idea underwent various adaptations before it became mainstream. Initially faced with skepticism from suppliers who doubted its practicality, the concept didn’t immediately take off. It wasn’t until after World War II that manufacturers began recognizing its potential and mass-producing it. This shift not only revolutionized painting techniques but also sparked interest in home renovations across North America and beyond transforming how people approached their living spaces and ultimately weaving itself into the fabric of modern culture.

The Origins of Painting Techniques

The evolution of painting techniques reflects humanity’s quest for expression, with origins tracing back to prehistoric times. Early artists used natural pigments obtained from minerals and plants to create vivid murals on cave walls. These primitive methods laid the foundation for more sophisticated approaches, culminating in innovations like oil paints during the Renaissance, which allowed for greater detail and depth.

Fast forward to the 20th century, a pivotal moment arrived with the invention of the paint roller. It was introduced by an innovative American painter named Richard Drew in 1940. This simple yet revolutionary tool transformed how we approach painting making it quicker and more efficient while ensuring even coats across surfaces. The paint roller not only democratized home improvement but also changed professional practices, allowing artists and homeowners alike to unleash their creativity without the laborious task of using brushes alone.

Early Innovations in Paint Application

The landscape of painting experienced a significant transformation with the invention of the paint roller in the mid-20th century. While brushes and traditional methods were long considered standard, it was Joseph McGuffey in 1940 who patented this ingenious tool, revolutionizing how we apply color to surfaces. The paint roller’s design featuring a cylindrical core covered with absorbent material allowed for even distribution and efficiency that brushes could scarcely match. This simple yet transformative innovation enabled amateur painters to achieve professional results, democratizing access to home improvement projects.

Beyond just convenience, the paint roller paved the way for a surge in creativity among homeowners and artists alike. It encouraged experimentation with textures and techniques that had previously been challenging or time-consuming to accomplish. The ability to cover large areas quickly not only made painting more accessible but also ignited an explosion of color choices in interior decor during the post-war years a period marked by optimism and bold design choices. Thus, while its origins may seem humble, the impact of McGuffey’s creation extends far beyond mere functionality; it became a symbol of self-expression that inspired generations to embrace art right within their living spaces.

Patent History and Development Timeline

The paint roller, a seemingly simple tool that revolutionized the painting industry, can be traced back to the early 20th century. Invented in 1940 by an innovative entrepreneur named Richard S. Smith, this device forever altered the way we approach home and commercial painting. Before its introduction, brush application was the norm an arduous task that required time and skill. Smith’s design featured a cylindrical roller covered with fabric, allowing for speedier application and a smoother finish. 

This invention not only made painting more accessible but also marked a significant shift in DIY culture; it empowered everyday people to take on home improvement projects with newfound ease. The evolution of the paint roller didn’t just end there; variations including extension handles and sponge rollers emerged, catering to diverse needs over time. Observing how such a simple item has influenced trends in art, design, and even color usage offers deep insights into our cultural relationship with aesthetics each roll of paint telling its own story through homes across generations.

Impact on DIY and Professional Painting

The invention of the paint roller in 1940 by Norman Brabant revolutionized both DIY and professional painting, making it more accessible and efficient. This ingenious tool allowed homeowners to transform their spaces with ease, erasing the labor-intensive brush-and-tray method from everyday life. As a result, DIY enthusiasts discovered a newfound confidence, empowered to tackle home improvement projects that once seemed daunting. The sleek design paired with ergonomic handles brought speed to painting tasks, encouraging even novice decorators to explore their creativity.

For professionals, the paint roller not only improves productivity but also enhances finish quality. With the ability to cover large areas quickly while maintaining a smooth surface, painters could take on bigger projects without compromising craftsmanship. Moreover, the evolution of rollers has led to an array of specialized options designed for various textures and finishes. This advancement means contractors can now tailor their choice of tools specifically for each job leading to better results and more satisfied clients. In this way, the legacy of the paint roller continues to shape how we envision our living spaces and enhances our relationship with color in interior design.

Modern Variations of the Paint Roller

Who Invented the Paint Roller and When Was It Invented

The evolution of the paint roller has sparked a wave of modern variations that cater to both DIY enthusiasts and professional painters alike. Initially invented in 1940 by Milton Birnbaum, the paint roller revolutionized the way we apply color to our walls, making it quicker and more efficient than traditional brushes. Today’s innovations give rise to mini rollers for tight spaces, foam rollers for achieving smooth finishes, and even programmable rollers designed to automate painting tasks and each variation is tailored to specific needs.

What truly stands out is how modern technology intersects with this classic tool. Some contemporary paint rollers now come equipped with built-in paint reservoirs that dispense liquid as you roll eliminating frequent dips into trays and reducing mess dramatically. Additionally, smart paint rollers equipped with sensors can gauge wall texture and adjust pressure accordingly, ensuring an even coat without any guesswork. These advancements not only save time but also enhance precision, allowing everyone from novices to professionals to achieve stunning results with ease.

Tips for Using a Paint Roller Effectively

  1. Choose the Right Nap: The nap of your roller cover affects the finish of your paint job. A thicker nap works best for textured surfaces, while a shorter nap is ideal for smooth walls. By selecting the appropriate nap, you ensure even coverage and reduce the need for multiple coats.
  2. Load Your Roller Properly: To minimize drips and achieve smooth application, dip your roller only halfway into the paint tray. Roll it along the ribbed edge to remove excess paint before applying it to your wall. This technique promotes an efficient painting process and helps maintain control.
  3. Employ a “W” Technique: Instead of rolling straight up and down, use a W motion when applying paint to walls. Start at one corner and create a W shape without lifting the roller; this distributes paint evenly over large areas. Not only does this method enhance coverage, but it also prevents streaks that often occur with traditional rolling techniques.
  4. Prioritize Edges First: Before tackling broader sections with your roller, address corners and edges with a brush or trim tool first. This approach ensures that those tighter spots are neatly painted and allows for smoother transitions when you transition to using larger tools.

Using these tips enhances not just the quality of your project but also gives you insights into optimizing efficiency making each stroke count! Interestingly enough, while you’re enhancing your painting skills today, it’s worth noting that the modern paint roller was invented by Richard Adams in 1940, revolutionizing how we approach projects like these!

Conclusion: The Legacy of the Paint Roller

The legacy of the paint roller is far more than just a tale of an efficient painting tool; it embodies the spirit of innovation that transforms creativity into practicality. Invented by Norman Breakey in 1940, the paint roller revolutionized how we approach surface finishing and home decor, allowing amateur DIYers and professional painters alike to achieve smooth, even coats with remarkable ease. This simple yet transformative invention helped democratize art, enabling countless individuals to express their style without necessitating elaborate skill or time investment.

As we look back on its impact, we recognize that the paint roller symbolizes a shift toward accessibility in craftsmanship. Its introduction sparked not just efficiency but also inspired a myriad of color choices and techniques that have shaped contemporary design trends. Today, as we select bold hues or intricate patterns for our walls, it’s crucial to acknowledge how Breakey’s invention laid the groundwork for this vibrant exploration of personal expression. The paint roller stands as a testament to human ingenuity turning mundane tasks into opportunities for creativity while leaving an indelible mark on homes worldwide.

Is acrylic paint good for outdoors? The Ultimate Guide

Is acrylic paint good for outdoors?

Learn if acrylic paint is good for outdoor use in this ultimate guide. Learn about its durability, weather resistance, and tips for long-lasting outdoor applications.

Understanding What  Is Acrylic Paint? 

Acrylic paint is a versatile medium loved by artists for its quick-drying properties and vibrant colors. Made from pigment suspended in a polymer emulsion, it can be used on various surfaces, including canvas, wood, and even concrete. One of the fascinating aspects of acrylics is that they can mimic both watercolors and oils depending on how much water or medium you use. This flexibility allows artists to explore different techniques without needing multiple supplies.

Now, when considering outdoor projects, you might wonder: Is acrylic paint good for outdoors? The answer is yes! While standard acrylics may fade over time with prolonged exposure to sunlight and moisture, many brands offer specially formulated outdoor acrylic paints designed to withstand the elements. These outdoor-friendly versions are more resistant to fading and weather damage, making them ideal for murals or decorative items like garden sculptures. So if you’re inspired to create art that lasts beyond four walls, acrylics could be your go-to choice!

Is it Suitable for Outdoors?

When considering whether acrylic paint is suitable for outdoor use, it’s vital to understand its unique properties. Acrylic paint is water-based, which means it dries quickly and can create vibrant colors that stand out in nature. However, exposure to the elements can take a toll on your artwork over time. While acrylics are moderately resistant to fading from sunlight, they need some extra protection to withstand rain and humidity.

To enhance the longevity of your outdoor projects, applying a UV-protective varnish after painting is a smart move. This can help shield your art from harmful rays and moisture damage. Additionally, choosing high-quality acrylic paints specifically formulated for outdoor use will make a significant difference. With the right preparation and care, such as selecting durable surfaces and using proper sealing techniques, you can create stunning outdoor pieces that feel fresh every season. So yes, with thoughtful choices and protective measures, acrylic paint can indeed shine brightly outdoors!

Benefits of Using Acrylic Paint Outdoors

  • Durability Against Weather Elements: One of the standout features of acrylic paint is its superior durability. Unlike other types of paint, acrylic is water-resistant once dry, making it a great choice for outdoor projects subject to rain or humidity.
  • Vibrant Colors and Quick Drying Time: Acrylic paints offer vivid colors that remain vibrant over time, ideal for brightening outdoor spaces. Plus, their quick drying properties mean you can complete large projects faster than traditional oil-based paints.
  • Flexibility and Adherence: This medium possesses excellent adhesion qualities on various surfaces like wood, metal, and masonry. Such versatility allows artists to explore different materials without worrying about paint flaking or cracking.
  • Non-toxic Options Available: For those concerned about environmental impact, there are non-toxic acrylic paints available that minimize harmful emissions. This makes them safer for use in gardens or areas frequented by children and pets.

By utilizing acrylic paints outdoors, creators can enjoy these benefits while transforming any environment into an engaging masterpiece that’s not only beautiful but also enduring through the seasons.

Types of Acrylic Paint for Outdoor Use

AD 4nXcQeDPWWyhAIKOrBbRAXDblJnQ6YZf ts9RPFm6SgrZuDhsFzCo8LYuqOfcYEVwhh8XRiAteT1ij5S49dFe7iUi5lXK7Nq6skSjbyVrybSG5DdPBgzbvCO8oZ5lca9st7POGF
  • Water-Based Acrylic Paint: Ideal for outdoor projects, water-based acrylics are easy to clean and maintain. They have good color retention and flexibility, allowing them to withstand changes in temperature without cracking.
  • Acrylic Latex Paint: This type combines the durability of latex with the vibrant colors of acrylics. It’s perfect for wooden surfaces like fences and decks, as it offers excellent adhesion and resistance to moisture critical factors when exposed to the elements.
  • Acrylic Enamel Paint: For those seeking a glossy finish on outdoor metal objects or furniture, acrylic enamel is your go-to choice. It’s incredibly durable and resistant to fading from UV rays, making it suitable for long-lasting outdoor art.
  • Exterior Acrylic Primers: Don’t underestimate their importance! A good primer ensures that your topcoat adheres properly while also enhancing its longevity. Using an exterior-grade primer can significantly boost the performance of any subsequent paint layer.

Exploring these options allows artists and DIY enthusiasts alike to choose paints tailored to specific environmental conditions. When asked if acrylic paint is good for the outdoors, consider not just aesthetics but also functionality; each type serves distinct purposes that elevate your projects’ success in facing nature’s challenges.

Surface Preparation for Outdoor Projects

AD 4nXdvScGHAYJQOZ0f4aFz3xJQ7gc347gFKo0anP IwLqozzLfSHSJbXyP7wO2RRHado3DAM2Zr3KT
  • Choose the Right Time: Consider the weather conditions before starting your outdoor project. Rain or high humidity can compromise paint adhesion, so aim for a dry day with moderate temperatures. This will ensure optimal conditions for your surface preparation and enhance the longevity of the finish.
  • Clean the Surface Thoroughly: Before applying any paint, cleaning is crucial. Remove dirt, grime, and biological growth like mold or mildew with a power washer or scrubbing brush. A clean surface not only improves adhesion but also helps prevent future peeling or chipping, making your project last longer.
  • Sand and Smooth: If you’re working on wood or metal surfaces, don’t underestimate the power of sanding! Use sandpaper to create a smooth base that eliminates rough spots and splinters. This step is particularly important if you’re considering using acrylic paint outdoors; achieving a flawless finish ensures that colors will pop vividly while preventing wear due to environmental exposure.

By keeping these steps in mind during surface preparation, you’ll set yourself up for success when painting outdoors ultimately leading to results you’ll be proud of as you enjoy your new space.

Weather Conditions Affecting Acrylic Paint Longevity

  1. Temperature Fluctuations: Extreme temperature swings can severely impact the longevity of acrylic paint. When temperatures drop at night and rise during the day, it can cause the paint to expand and contract, leading to cracks over time. Therefore, understanding regional climate patterns is crucial for outdoor projects.
  2. Humidity Levels: High humidity can hinder the drying process of acrylic paint, making it susceptible to mold and degradation. Conversely, very dry conditions may lead to rapid evaporation of water content, resulting in a compromised finish. Optimal humidity levels typically range between 40-60%, so consider local weather when planning your painting.
  3. UV Exposure: Prolonged exposure to sunlight accelerates the fading and deterioration of acrylic pigments. While some acrylic paints come with UV protection additives, their effectiveness diminishes over time. Utilizing a clear UV protective coat after application can significantly enhance both vibrance and lifespan.

In summary, if you’re contemplating whether Is acrylic paint good for outdoors? it’s critical to take these weather elements into account before diving into your project. Understanding how external conditions influence your artwork will help you make informed choices that maximize durability while keeping that vibrant aesthetic intact!

Tips for Applying Acrylic Paint Externally

  • Choose High-Quality Acrylic Paint: Investing in premium-grade acrylic paint specifically formulated for outdoor use ensures durability against the elements. Look for brands that highlight weather resistance and UV protection, which can prevent fading and peeling over time.
  • Prep Your Surface Thoroughly: Proper surface preparation cannot be overstated. Clean the surface of dirt, grime, or loose paint to create a solid foundation. Using a primer suited for outdoor applications boosts adhesion and extends the life of your paint job.
  • Consider Weather Conditions: Timing your painting project with favorable weather is crucial. Aim for mild temperatures without extreme humidity; this allows the paint to dry evenly and adhere properly, reducing the likelihood of bubbling or cracking later on.
  • Seal It Right: Once your masterpiece is complete, seal it with a clear acrylic varnish designed for outdoor use. This layer adds extra protection from moisture and enhances color vibrancy while providing an easy-to-clean surface.

By adopting these strategies, you’ll not only boost the longevity of your artwork but also transform external spaces into beautiful reflections of personal style and creativity!

Sealing and Protecting Your Artwork

  1. Choose the Right Sealant: Not all sealants are created equal, especially when it comes to outdoor artwork. Look for products specifically designed for exterior use that offer UV protection. This will help shield your vibrant colors from fading in harsh sunlight.
  2. Test Before Applying: Before you commit to sealing an entire piece, conduct a patch test on a small section of your artwork. This will not only reveal how the sealant interacts with your acrylic paint but also allow you to see any potential changes in texture or finish, ensuring you maintain the integrity of your work.
  3. Consider the Environment: If you’re positioning your art outdoors, think about its exposure to elements like rain and humidity. A waterproof clear coat can protect against moisture damage while adding extra durability.
  4. Regular Maintenance Matters: Even sealed artwork requires some level of upkeep. Every few months, inspect your pieces for wear and tear. Resealing may be necessary after severe weather conditions or if you notice any signs of deterioration.

By following these guidelines, you’ll enhance the longevity of your outdoor acrylic paintings and ensure they remain a striking focal point for years to come!

Common Mistakes to Avoid When Painting

  1. Skipping Surface Preparation: One of the most common mistakes is neglecting to properly prepare the surface before painting. Whether you’re using acrylic paint outdoors or indoors, clean and smooth surfaces ensure better adhesion and a longer-lasting finish.
  2. Ignoring Weather Conditions: When planning an outdoor project, it’s crucial to consider the weather. Painting on a hot day can cause quick drying, leading to cracks or uneven texture. Conversely, painting in high humidity can impede proper drying and cure time.
  3. Overloading the Brush or Roller: Beginners often dip their brushes too deeply into the paint, leading to drips and uneven coverage. Instead, opt for a light load; this encourages more control and precision in your strokes.
  4. Forgetting About Primer: Many DIYers skip primer thinking it’s unnecessary; however, it plays a vital role in sealing porous surfaces and enhancing color vibrancy especially when working with outdoor materials exposed to varying elements.

By avoiding these pitfalls, you’ll not only improve your technique but also ensure that your artistic endeavors withstand the test of time whether they’re gracing interior walls or brightening up an exterior façade.

Maintenance and Touch-Ups for Outdoor Art

  1. Regular Inspections: Check your outdoor art pieces every few months for signs of wear, fading, or damage. Look out for any discoloration or peeling, especially if you’ve used acrylic paint. While acrylics are durable and water-resistant, they can fade due to prolonged sun exposure.
  2. Proper Cleaning Techniques: Dust and dirt can accumulate over time, dulling the vibrancy of your artwork. Use mild soap and water on a soft cloth to gently clean surfaces without scratching them. Avoid harsh chemicals that could accelerate the degradation of the materials.
  3. Sealing Enhancements: Applying a UV-resistant clear sealant can extend the life of your outdoor pieces significantly. This additional layer not only protects against moisture and debris but also helps maintain color saturation. Choose a sealant specifically designed for use with acrylic paint to ensure compatibility.
  4. Timely Touch-Ups: Don’t wait until your artwork looks worn down before making repairs! Small touch-ups using compatible acrylic paints can reinvigorate faded areas and restore the original beauty without needing full repaint. Keeping some leftover paint handy will facilitate this process.

By integrating these maintenance practices into your routine, you can keep your outdoor art looking vibrant year after year while enjoying its aesthetic contribution to your space fully!

FAQs about Using Acrylic Paint Outdoors

1. Can I use acrylic paint on outdoor surfaces?

Yes, acrylic paint can be used on outdoor surfaces, but it’s important to choose a type specifically labeled for exterior use.

2. How does acrylic paint hold up against weather conditions?

Acrylic paint is water-resistant once dry but may not withstand extreme weather without proper sealing or a topcoat.

3. Do I need a primer before using acrylic paint outdoors?

Using a primer is recommended for better adhesion and durability, especially on porous or uneven surfaces.

4. Is there a specific type of acrylic paint for outdoor projects?

Yes, look for exterior or outdoor acrylic paints that are specially formulated to resist fading and moisture.

5. Will sunlight affect the color of my acrylic paint over time?

Yes, prolonged exposure to direct sunlight can fade colors; using UV-resistant acrylics can help minimize this effect.

6. Can I mix different brands of acrylic paint for outdoor use?

Mixing brands is generally fine as long as they are both water-based or solvent-based; just test a small area first.

7. How long does it take for outdoor acrylic paint to dry?

Drying times can vary, but most outdoor acrylic paints will be touch-dry in 1-2 hours; full curing may take longer.

8. Is it safe to use acrylic paint around plants outdoors?

While many acrylic paints are non-toxic when wet, it’s best to avoid overspray and clean up spills promptly to protect your plants.

Conclusion: Making the Right Choice

When deciding if acrylic paint is good for outdoors, it’s essential to weigh your options carefully. While acrylics are versatile and easy to use, outdoor conditions can be tough on any paint. If you choose acrylic, go for a high-quality exterior variety that offers better durability against sun and rain. Remember, investing in the right materials can lead to a longer-lasting finish.

Consider your project’s location and purpose as well. For items exposed to heavy weather or UV rays, look into specialized outdoor paints designed for those challenges. Also, think about how much time you’re willing to spend on maintenance; some finishes require touch-ups more frequently than others. By making informed choices based on your specific needs, you can ensure that your artwork remains vibrant and beautiful for years to come.

Is acrylic paint water based?

is acrylic paint water based

Yes, acrylic paint is water-based. It’s made of pigment suspended in an acrylic polymer emulsion, which is water-soluble when wet. This water-based formulation makes it easy to dilute, apply, and clean up with just water. Once it dries, however, acrylic paint becomes water-resistant and forms a durable, flexible surface that adheres well to a variety of materials. This combination of ease of use and durability is why acrylic paint is popular with both beginners and professional artists.

Understanding Acrylic Paint Basics

Acrylic paint is popular for artists because of its bright colors and flexibility. It’s water-based, so it can be easily thinned with water or mixed with different mediums to create various textures and effects. This makes it great for both beginners and pros, without needing strong solvents like oil paints do.

  • Composition and Properties: Acrylic paint is a water-based medium, meaning it uses water as its primary solvent. This makes it versatile and easy to clean up, unlike oil paints which require solvents. The quick-drying nature of acrylics allows artists to layer their work efficiently, enabling them to create textures and effects without lengthy waiting periods.
  • Types of Acrylic Paint: There are various types of acrylic paints, ranging from heavy body for thick applications to fluid acrylics for finer details. Each type offers unique features heavy body paints maintain brush strokes well, while fluid paints flow smoothly when applied. This diversity provides endless possibilities for creativity.
  • Mixing and Color Properties: Experimenting with mixable mediums is part of the fun! You can combine pigments with gels or pastes to change texture or achieve different finishes such as matte or glossy. Additionally, remember that colors often dry darker than they appear when wet; this can be both a challenge and an exciting opportunity for discovery in color mixing.

Unlock the potential that comes with understanding acrylic paint basics. Whether you’re painting on canvas or trying crafts at home, knowing how these pigments behave will take your artistry to new heights!

Water Solubility Explained

Water solubility is the ability of a substance to dissolve in water, and it’s a fascinating interplay of chemistry and nature that impacts everything from environmental processes to everyday products. When we think about acrylic paint, many wonder: is acrylic paint water-based? The answer lies in its composition. Acrylics consist of pigment suspended in a polymer emulsion that primarily uses water as its solvent. This characteristic not only allows for easy cleanup with soap and water but also means that the paint retains flexibility once dry, creating vibrant artwork with enduring appeal.

Acrylic paint is water-based, which makes it better for the environment than oil paints. Oil paints need strong chemicals like turpentine to clean up, which can be harmful, but acrylics don’t. They also dry quickly, so artists can add layers faster without losing color quality. For artists who care about the planet, acrylic paint is a great choice, it’s safe, easy to use, and still allows lots of creative possibilities. So next time you use acrylics, remember that they’re not only great for your art but also kinder to the environment!

Common Uses of Acrylic Paint

  • Canvas Art: One of the most popular uses of acrylic paint is creating stunning canvas artworks. Its vibrant colors and quick-drying properties make it a favorite among artists, allowing for layering and texture without lengthy wait times. The versatility means that both fine details and bold strokes can coexist beautifully on a single canvas.
  • DIY Home Decor Projects: Acrylic paint is not just for professional artists; it’s also a fantastic medium for DIY enthusiasts looking to breathe new life into their home decor. Think about personalizing furniture, like upcycling an old chair with bright hues or painting intricate designs on wooden frames. Its water-based nature makes cleanup easy, encouraging creative experimentation without the mess.
  • Mixed Media Creations: For those who love to combine different artistic styles, acrylic paint shines in mixed media projects. It adheres well to various surfaces from paper to fabric, making it perfect for collages or textile art pieces. This flexibility opens up endless possibilities for creativity, allowing artists to add depth and dimension by incorporating other materials alongside their painted components.
  • For Beginners: Acrylics are often recommended for beginners due to their forgiving nature; they can be easily diluted with water or layered without fear of damaging previous work or having a lengthy drying time as seen with oil paints! This accessibility encourages more people to dive into painting as an enjoyable hobby rather than an intimidating pursuit.

While pondering is acrylic paint water-based?, remember this key feature plays a significant role in its broad array of applications from traditional techniques to innovative crafting opportunities, opening doors for all levels of creativity.

Differences Between Acrylic and Oil Paint

When learning to paint, knowing the main differences between acrylic and oil paint can really help you decide which to use. Acrylic paint is water-based, so it dries fast and cleans up easily. This lets artists add layers quickly without mixing up colors. Acrylics are also very flexible and can look like different types of paint, from watercolor to oil, which is great for beginners and experienced artists.

is acrylic paint water based 2

However, Oil paint is known for its long history and special qualities. It dries slowly, giving artists more time to blend colors and add details. Oil paints are also famous for their rich colors and bright look, which have helped create beautiful art that has lasted for centuries. Both types of paint have their own strengths, so choosing between them depends on whether you prefer fast, easy painting or a slower, more detailed style.

Tips for Working with Acrylics

  • Embrace the Versatility: Acrylic paint is water-based, making it incredibly versatile. You can use it straight from the tube for vibrant color or dilute it with water to create a watercolor-like effect. Experimenting with different consistencies opens up a world of textures and finishes.
  • Layering Techniques: One of the unique qualities of acrylics is their quick drying time. This allows you to layer colors without waiting long periods between applications. Try glazing by applying thin, transparent layers over dried paint; this adds depth and complexity to your artwork while keeping your palette fresh.
  • Use Unique Tools: Step outside conventional brushes consider using sponges, palette knives, or even fingers! Each tool creates distinct effects, allowing you to push your creativity further and explore new styles that make your work stand out.
  • Stay Organized: Since acrylics dry quickly on palettes, keep a spray bottle filled with water nearby to mist your paints regularly. This simple practice not only keeps them workable longer but also encourages spontaneous experimentation as you blend colors directly on the palette.

FAQs about Acrylic Paint

How long does it take for acrylic paint to dry?
Acrylic paint typically dries within 15 to 30 minutes depending on thickness and environmental conditions.

Is acrylic paint water-based?
Yes, acrylic paint is water-based, which means it can be easily thinned and cleaned up with water.

What are the benefits of using water-based acrylic paint?
Water-based acrylic paint dries quickly, has low odor, and is non-toxic, making it safe for both indoor and outdoor use.

Can I mix acrylic paint with water?
Yes, you can mix acrylic paint with water to achieve a thinner consistency or to create washes.

How do I clean my brushes after using acrylic paint?
You can clean your brushes with soap and warm water before the paint dries.

Does acrylic paint require any special medium?
While not necessary, using a medium can enhance certain properties of the paint, such as texture or drying time.

Can I use acrylic paint on the fabric?
Yes, but make sure to use a fabric medium for better adhesion and flexibility.

Is acrylic paint waterproof when dry?
Once dry, most acrylic paints become water-resistant but may not be completely waterproof without a sealant.

Conclusion

In wrapping up our exploration of acrylic paint, it’s important to recognize the unique characteristics that make it a favorite among artists and DIY enthusiasts alike. The fact that acrylic paint is water-based not only simplifies the cleanup process but also opens up a world of blending possibilities. This quality allows for easy manipulation with water, enabling users to achieve various textures and effects, making each artistic endeavor distinctly personal.

Moreover, the versatility of acrylics extends beyond just easy usage; they dry quickly and can be layered ideal for building depth in your artwork. This fast-drying nature means that artists can confidently experiment without lengthy waiting periods, fostering creativity on a whole new level. Embracing these attributes empowers both seasoned creators and novices to express their visions boldly while enjoying the seamless journey from concept to creation. So whether you’re painting on canvas or experimenting with crafts at home, acrylic paints offer an inviting gateway into the vibrant world of art.

How To Paint Glass Windows? A Complete Guide

How to paint glass windows

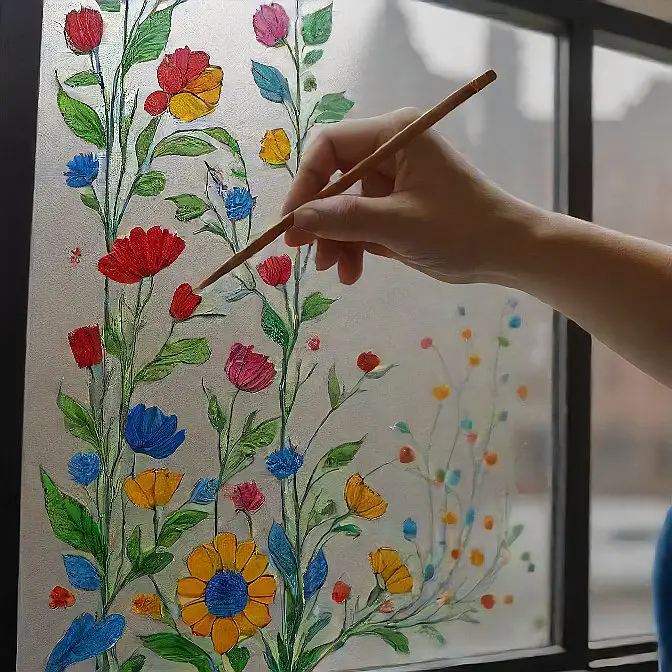
Bare glass windows may look dull and empty. However, in that case, a painted glass window can remove the dullness and fill the room with lots of joy. Painting a glass window can be hard if you don’t know how to paint glass windows.

You can easily paint the glass window with some easy tools and effective processes. Besides, the proper color and equipment make the task more effortless. Proper design planning and color application give the dull windows an elegant look.

In this context, I’ll describe the easiest steps to paint glass windows without facing any issues. Furthermore, here you will get some beginner-level pro tips to paint the window that will help you greatly. Therefore, let’s not waste time and dive into the in-depth discussion!

5 Easy Steps To Paint Glass Windows Effectively:

Painting a glass window may become fun for you. However, following the wrong process can make your job more challenging rather than amusing. For this reason, it is quite essential to follow the proper steps. Here I’ll describe the 5 easiest steps to paint a glass window effectively.

Step 1: Collect The Necessary Tools

To get the perfect painting, you have to choose your equipment carefully. Paint, brush, rag, pots, and other tools should be near the work site. Also, as it is a glass surface, you must maintain more caution while working over the window. Gather all the necessary tools according to the window size and glass material.

Besides, keep a ladder to reach the upper section if the window height is quite long. You may also need some glass cleaning agents to clean the surface properly. Furthermore, arrange several brushes for painting. Using different brushes will make your painting process easier.

Step 2: Select The Design And The Color

If you draw a scenario or any painting, plan your picture as a draft over the paper before starting. It will help you a lot while doing the actual job. Besides, you can manage the color combination perfectly through this draft painting. So, make a draft with the window over a paper piece.

Now, you have to pick the most important thing- the color. Generally, acrylic and enamel colors are the best option for painting glass windows. The enamel color is quite thick and needs more time to dry. However, this color can last longer over the glass surface. Acrylic color also provides a good result on the glass windows. Besides, you can use some varnish to increase the gloss level of the color.

Step 3: Prepare The Surface

Your glass surface must need to be clean. Heavy grease, rust, and other dirt can spoil your painting and color. Besides, dirty surfaces can’t hold the colors for a long time. For this reason, you must inspect the surface and clean it properly before painting.

To clean the glass window, use warm and soapy water to remove various spots and other stubborn filths. Soak a clean cloth in the liquid and rub the window gently. However, you can also use glass cleaner, rubbing alcohol, and mineral spirit to clean the heavy dirt, rust, and other corrosives. After cleaning the window, wipe it with a dry cloth and leave the window for a while.

Step 4: Apply The Paint

Now, mix your selected paint with a good adhesive and start painting. Paint the surface from the left side if you’re a righty, and paint from the right side if you’re a lefty. This technique will reduce the paint spreading more. Besides, you can cover the sidebars with tape to prevent paint in these spaces.

How To Paint Glass Windows

If you want to use different colors, try to paint with several brushes. Using other brushes will save you time and a lot of money. However, to use different colors through a single applier, finish the painting of that color before using another color. Draw your desirable artwork over the surface and complete the process.

Step-5: Cure And Seal The Paint

The curing time depends on the type and quality of the color. Generally, acrylic paint dries more quickly than any other glass painting option. It takes 2-12 hours to cure acrylic. On the other hand, enamel colors are quite thick and solid. For this reason, the enamel color needs 4-24 hours to dry up properly.

Moreover, the curing time can sometimes be different because of applying too many coats. Leave the window under the sun’s rays to dry up completely. Besides, the manual dryer needs an accurate curing time. If you have to use a manual dryer, keep a timer option. It will save the paint from cracking.

Benefits Of Painting The Glass Windows

There are a lot of benefits to painting glass windows. Privacy management is the most powerful advantage of painting your bare glass windows. Besides, other advantages also make window painting worth it. Now, let’s learn why you should paint your glass windows to get some amazing benefits.

Eye-Catching Appearance: Painted or stained glass windows provide an elegant appearance to the window and the room. It offers a unique style and designs to the glass. For this reason, even your simple, transparent glass windows become too beautiful and amazing. Besides, as you can draw over the window according to your design, you can leave a self-touch to the glass.

Secure The Home Privacy: Glass windows are generally transparent. For this reason, you must use curtains on the window to secure home privacy. However, a painted window can offer you the best solution in this case. Painting can reduce the transparency of the glass window and make it safe without using curtains or other ways.

Affordable Cost: Painting a glass window doesn’t cost too much. However, it depends on the window size and the color you’re using to paint. Most glass windows take only a few materials to cover the painting. That’s why you can paint your glass window at an affordable cost.

Customizable: You can customize the painting according to your choice. Even glass painting allows you to choose color, design, style, and pattern. Besides, you can add your creations over a readymade glass window piece. Therefore, painting is the only option if you want to give the windows your desirable design.

Using Versatility: With glass painting, you can paint anywhere over the glass surface. Besides windows, you can paint your mirrors, ceilings, and other glass surfaces without any hassle. That’s why you can use your glass painting ideas versatilely. To get a different environment, try glass painting on the windows.

Reusable: Glass windows with painting can be reused even after breaking. Through these window pieces, anyone can make dye projects easily. Even you can use the parts on a new window by attaching the old glasses. Hence, glass window painting will save the environment a lot by recycling.

Manage Daylight Frequently: Curtains are essential things for glass windows. You may face daylight issues without curtains on your glass-based windows. However, painting can prevent the daylight from reflecting the windows. Besides, the paint color can reduce the UV rays perfectly. That’s why with painted glass windows, you can manage sunlight frequently.

Long-Time Protection: Generally, acrylic and enamel colors are the best for glass windows. These colors can stay longer over the glass surface. For this reason, you don’t need to paint the glasses regularly. The paint can stick to the surface for a long time. Besides, more coats can give more protection to the painting.

Easy Installation: You don’t need to face any additional hassles using painted glass windows. Even you can install the glasses easily. The managing and installing process is quite effortless. Also, it would be best if you only had some simple tools to paint your desired painting.

Changeable Style: The painting over the glass window is quite changeable. You can change the picture anytime by removing the old colors. Besides you can also change the patterns by painting over the colors. Hence, with this feature, you can change the window look anytime.

6 Additional Pro Tips To Paint Glass Windows:

Glass window painting can be easy with some practical tips and tricks. Many people, especially beginners, can’t manage the whole process without proper instructions. For this reason, here I’ll give you some additional pro tips to manage the entire painting process easily. Hence, let’s go to learn more painting tricks.

Tip-1: Apply Several Color Coats

Apply several color coats over the glass surface to get a long-lasting painting. A single coat can make the picture transparent and light. On the other hand, several color coats can make the surface more smooth and dark. A heavy color layer prevents more light from coming inside.

Tip-2: Use Timer For Manual UV Dryer

Never leave the manual UV dryer without setting a timer option. In the drying process, you must set the timer or maintain the dry period for the manual dryer machine. However, for the natural sun ray option, you don’t need to follow the rule.

Tip 3: Try To Choose Oil-Based Paints

Try to choose oil-based paints for your painting projects. For long-lasting service, sticky paints are ideal to use. Oil-based paints are the best option in this case. Therefore, apply the oil-based ones to draw the scenarios over the glass windows.

Tip-4: Apply Vinegar To Remove Unsatisfied Painting

If you did anything wrong in your painting, use vinegar to the place for removing the paint. Vinegar will remove the color smoothly without any hassle. For this reason, keep the vinegar solution near your workstation.

Tip-5: Choose High Resistant Color

Choose the high resistant color for glass windows. High-resistant color can stay firmly even in heavy rainfall. Besides, these colors can prevent water and other liquid dirt quickly. You don’t need to scrub the surface to clean the window.

Tip-6: Use “Tempera” For Long Lasting Use

Tempera color is a high-quality and long-lasting glass color. It can prevent any dirt and damage. Also, this color can easily stay on the surface for a long time. Therefore, apply Tempera to get the best result on the glass windows.

Frequently Asked Questions (FAQs):

What Kind Of Paint Do You Use On Glass Windows?

It would be best if you used oil-based paint on glass windows. Oil-based paint can stay over the surface for a long time. Also, this paint is durable and also water resistant. For this reason, oil-based colors can remain fresh for a long time, even in the rainy season.

Can You Paint Directly On Glass?

You can paint directly on glass. However, use a primer before painting on the mirror for long-lasting service. Primer will make the paint durable and sticky to stay over the surface. Apply primer all over the bare glass surface at first.

How Do You Permanently Paint On Glass?

By using permanent paints, you can paint permanently on glass. Tempera is a paint that can last over the glass surface for a long time, even for years. Besides, if you use this paint with primer, it can stay permanently sometimes. Hence, try this option for permanent service.

Do I Need To Prime the Glass Before Painting?

It would help if you primed the glass before painting. Primer can make the paint durable and sticky. Furthermore, primer works like an adhesive that can stick to the paint and prevent water from damaging the color. Don’t forget to apply primer before painting.

Final Thoughts

Painting a glass window is fun and time-worthy. It gives a unique hand touch to the house perfectly. Besides, a painted or stained glass window can protect your home’s privacy.

However, painting the window may become challenging sometimes, especially if you’re a beginner in glass painting. For this reason, before starting, you must learn how to paint glass windows. I hope my content will help you complete the project easily.

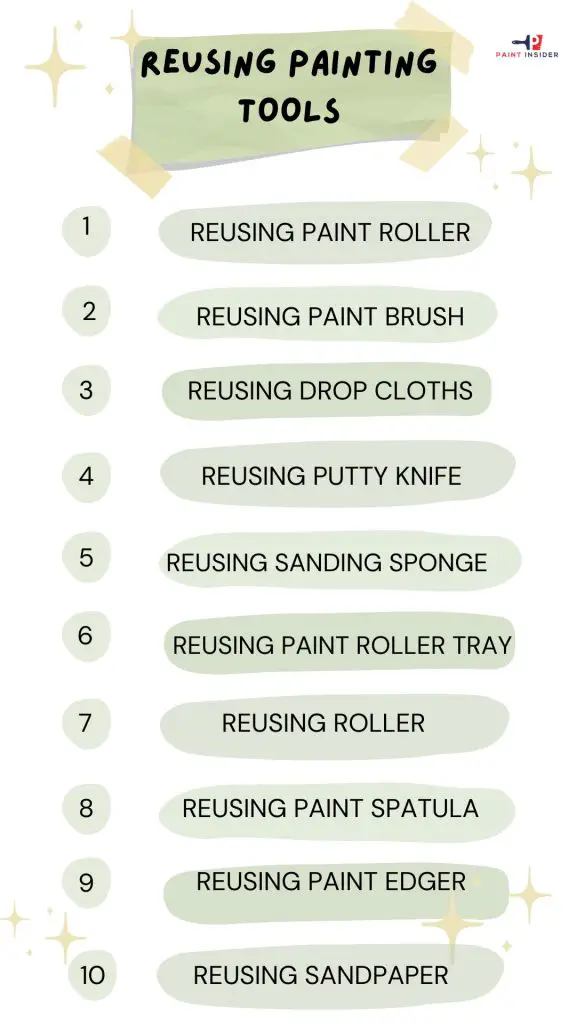
Tips For Reusing Your Painting Tools Effectively

Tips For Reusing Your Painting Tools

Reusing your painting tools can be a money and time-saving idea. Old tools can help you in your projects like the new ones. Besides, it is also an eco-friendly way to paint your walls. It may have seemed hard for you to clean the old tools. However, the best tips for reusing your painting tools effectively will save you a lot.

This entire content will provide you with the best tips for reusing your painting tools effectively. Continue reading the content to get more ideas for reusing your tools.

By cleaning your old and messy painting tools, you can use them several times in future projects. Old tools work great after recycling. Furthermore, recycling the old ones will reduce the amount of trash. Hence, reusing old tools is an effective step with fun.

In this context, I’ll describe some easiest ways to reuse essential painting tools like a paint roller, paintbrush, etc. Besides, you will get a complete idea of storing your tools properly. Let’s get and explore the detailed discussion!

Detailed discussion on reusing painting tools

Reusing Paint Roller:

Paint rollers are essential equipment for decorating walls. For a perfect finishing touch, you have to use paint rollers. Generally, paint rollers contain two parts in the whole structure. One is the roller frame, and the other is the roller cover. Roller nap is the most considerable thing for paint rollers.

If you’re carrying a low budget for your painting project, reusing paint rollers can save the money a lot. Besides, by reusing your paint rollers, you can also save the environment. Paint roller frames are easy to reuse for any project. However, roller covers are quite hard to clean and make suitable for painting again. Now, let’s learn the easiest steps to reusing your paint rollers.

Step-1: Understand The Roller Nap

Roller nap means the thickness of the roller cover. To make the paint roller capable of reusing, you must first understand the roller nap. Besides, if the roller cover is thick, it needs a corrosive cleaning agent. On the other hand, for thin covers, light detergent is enough for cleaning.

Step 2: Detach The Roller Parts

Detach the roller frame and the cover from each other. It makes cleaning much easier. Furthermore, the detached roller cover is quite effortless to soak in the cleaning agent. You can store the roller frames for reusing them in your next painting projects. Roller frames last longer than roller covers.

Step 3: Remove The Leftover Paints

Before cleaning the roller, remove the leftover paint from the roller cover. The leftover paint becomes dry most of the time and complicates the cleaning process. For this reason, use a putty knife to remove the excess paint immediately after painting. Besides, you can keep the roller inside the fridge to prevent dryness.

Step 4: Make A Perfect Cleaning Solution

A perfect cleaning solution is essential to clean and reuse the old paint roller. Warm water and a soapy solution are the main ingredients for cleaning paints. However, you can use mild detergents or liquids to clean the roller cover. Adjust the balance of the water and cleaning agent perfectly.

Step 5: Soak And Clean The Roller

Now, leave the roller cover inside the washing agent. Let the paints leave the cover surface. Generally, it takes only a few minutes to remove the paint. Spin the cover inside the bucket. You can use steel wool to clean the fibrils completely. Again, use clean and fresh water to rinse the roller properly. Always use hand gloves to wash this part.

Step-6: Prepare The Roller For Reusing

After washing the roller cover, ensure you make it dry completely. Wet covers can become damp and contain mold. For this reason, keep the roller part in the sun’s rays to dry up. Besides, a wet roller cover makes the application light. When the roller is completely dry, it will be prepared for reuse.

Reusing Paint Brush:

Paint brushes are the other vital equipment for painting walls and various surfaces. These tools contain bristles and handles. Besides, synthetic and natural compounds are the main ingredients of these bristles. Some brushes include polyester compounds in the bristles. You must choose suitable bushes for the project to get the best result in painting.

The thick paintbrush is perfect for applying color on large surfaces. On the other hand, thin ones can do the details jobs in painting perfectly. To complete the project, you must use both of these brushes sincerely. Furthermore, always try to choose high-quality brushes that contain effective bristles for painting surfaces. Now, let’s read about recycling paintbrushes for reuse.

Step-1: Use Warm Water For Oil-Based Paint

Oil-based paints are hard to clean with regular water and cleaning agents. For this reason, warm water and a soapy solution can wash out the fat of the paint. Besides, warm water can help the bristles to remove the paint.

It prevents the stickiness of the paint quickly and doesn’t take too much time to clean the paint from the bristle surface. If your paint is oil-based, remove the extra paint and soak the brush inside the cleaning solution for a while.

Step 2: Use Vinegar Solution For Latex Paint

Spirit and vinegar solution is the best way to clean the bushes with latex paint. Generally, the mineral spirit has more potential to remove latex paint than vinegar. However, vinegar contains natural compounds and naturally washes the bristles. I prefer vinegar to clean the latex paint brushes.

Step 3: Manage The Bristles

Bristles are the most important part of paintbrushes. After cleaning the brush, spread the bristles to clean up every corner. Besides, through this method, the bristle detaches the extra water from the brush. To dry the brush quickly, remember to manage the bristles properly.

Step-4: Dry Up And Reuse The Brush

To paint with an old brush, it needs to be dry perfectly. Otherwise, you need to paint the walls correctly. Wetness can make the paint non-sticky. For this reason, it is essential to dry the wet paintbrush after cleaning it with water. You can use hot driers to absorb the whole moisture quickly.

Reusing Canvas Drop Cloths:

Canvas drop cloths are highly effective for painting large walls or hall rooms. To paint a room, you must cover the furniture and other things to protect them from paint. Therefore, canvas drop cloth can perfectly cover all areas and make your painting easy.

Generally, canvas drop clothes are two types. You can choose plastic and fabric clothes to cover the protected parts while painting. Fabric drop clothes are biodegradable and environment-friendly, whereas plastics are not. However, it is quite a money and environment saver to reuse the old canvas drop cloth in a new painting project. Let’s learn about some effective ways to reuse canvas drop clothes.

Way 1: Buy Reusable And Washable Clothes

There are many reusable and washable canvas drop clothes available in the market. I prefer choosing washable drop clothes to recycle the piece without any hassle. Besides, these clothes are machine-friendly and reduce much toil to clean the cloth properly. For this reason, washable canvas clothes are highly recommended while purchasing.

Way 2: Clean The Canvas Drop Cloth

You can wash your canvas drop cloth in two ways. One is by hand, and the other is in the washing machine. Furthermore, you must use a liquid solution to soak the cloth for hand cleaning. Remember to remove excess paint over the cloth. Now, soak the cloth and rub it softly. A brush will be more effective in cleaning the dry paints.

Moreover, choose an effective cleaning agent if you want to clean the cloth in a washing machine. Remove leftover paints and put the cloth inside the machine with a handful of washing powder. In a nutshell, run the machine and wait to clean the cloth perfectly. Don’t put other clothes with it.

Way 3: Choose a Plastic Drop Cloth

Plastic drop clothes are more effective than canvas drop clothes. These drop clothes can prevent the paint perfectly to reaching unwanted surfaces. Besides, you can seal the paint to come out through this drop cloth. Plastic drop clothes are quite easy to clean and reuse.

Furthermore, canvas drop cloths can leak paint sometimes. But plastic ones never let the paint reach the surface. Again, these clothes are inexpensive and also effective for small projects. Large-size clothes are suitable for hallroom projects. Hence, choose plastic drop clothes instead of canvas drop clothes.

Way-4: Turn Into Decorative Piece

If you have used your drop cloth several times, it is time to replace it with a new one. However, you can still use this old one for another purpose. The oldest drop clothes can be a perfect decorative piece for your unpainted walls and hall rooms. Even you can decorate your stages for various functions. Furthermore, clean and cloth and decorate the cloth with new paints. Dry up, and it will be ready.

Reusing Putty Knife:

Putty knife scrapes or applies the paints effectively. Besides, this tool is useful for mixing up different paints and making textures over the wall. A Putty knife is made from metal and plastic wood. It contains a sharp blade that helps the tool remove paint or dirt from the surface without any hassle.

Furthermore, as these knives are metallic, releasing them into the environment is unsafe. These putty knives are quite costly sometimes. For these reasons, you should recycle the old putty knives and apply them to your new projects. Proper maintenance can make the oldest tool perfect. Let’s see the steps of recycling a putty knife.

Step-1: Soak In Water

If the putty knife becomes dry, the paints get hard to remove quickly. For this reason, making the paint soften will be the only way. Warm water makes the hard paint removal process much easier. For this reason, take some warm water in a bowl. Soak the tool inside the bowl and leave it overnight. Finally, the paint will leave the surface.

Step 2: Remove Excess Paint

Excess paint can become dry and hard to remove while cleaning. In this situation, you just need to clean the excess paint first. After soaking in warm water, the paint becomes soft and wet. Now, you have to remove the paint from all over the surface. Always use hand gloves before coming in contact with wall paints.

Step 3: Soak In A Cleaning Solution

Make an acidic and corrosive cleaning solution to clean the putty knife completely. You can use lemon juice and vinegar solution to clean your tool with natural ingredients. Furthermore, soak the tool inside the solution for a few hours. It leaves all the paint and dirt on the surface quickly.

Step 4: Wash With Clean Water

Rub the knife and clean it with warm water. A cleaning agent dilutes the paints and helps the surface to cut out the stickiness. Besides, it also makes the surface smooth and clear. You should clean the paint by using mild scrubbers. Finally, wash all the paints with fresh water.

Step 5: Sharpen The Blade

Old putty knives lose their shine and sharpness quickly. However, you can’t get the best result in the painting project in this situation. For this reason, you must sharpen the top of the knife carefully. You can use different corrosive surfaces or sharpener machines to remove the rust. It turns the old knife into a new one.

Step-6: Use It For The Project

When all the following steps are done, your knife will be ready to use in the project. Reusing an old putty knife will greatly save you time and money. However, you can reuse a putty knife only several times. It needs to provide better service after breaking the blades.

Tips For Reusing Your Painting Tools Effectively

Reusing Sanding Sponge:

A sanding sponge is a mandatory painting item to sand various things like drywall, painted walls, plastic, etc. This tool makes removing tasks easy and quick. Besides, the sponge contains an abrasive surface. For this reason, paints and other unfurnished surfaces can become smooth without any hassle.

However, sanding sponges can create a lot of dust while rubbing over the surface. In this case, a wet sanding sponge can handle the situation in the best way. Sanding sponges are quite expensive and hard to manage. That’s why you can make the best use of old ones by recycling them properly. Here, I’ll describe the three best ways to recycle your old sanding sponge.

Way-1: Clean The Sanding Sponge:

Cleaning the sanding sponge is one of the best ways to use your old and used tool effectively. If you want to clean the sponge, prepare a potential cleaning solution. Furthermore, it needs to be if the sanding sponge is too old and dirty. You can use warm water with soap powder or washing powder.

Besides, liquid agents are also effective for cleaning sanding sponges. I suggest using corrosive agents to remove paint and dust completely. Now, soak the sponge inside the solution and leave it overnight. It leaves all the paint and dust quickly. Soon it will become a new sponge for your next project.

Way 2: Cover With A New Sand Paper:

This technique can save both your time and money. By covering it with new sandpaper, you can clean the surfaces without any cleaning. Besides, through this new sandpaper, you will get the same service as the new one. New sandpaper can cover and prevent dust a lot while rubbing the surface.

However, always wear gloves if you want to rub the surface roughly. Most sandpaper needs to cover the sand sponge completely. In this situation, it becomes rough to hold the sponge. You can wet the sandpaper to avoid this type of irritation.

Way 3: Use the Shoe Sole To Sand The Sponge:

If you want to clean your sand sponge using the easiest trick, your old shoe sole may help you a lot. The shoe sole contains a curved surface that can make the sponge surface sharp and tough. For rotating the sponge surface you must need a grinding machine.

After that, it is the time to handle the major challenge. Hold the shoe sole with the sponge surface and rotate the machine. Furthermore, change the only part and direction after rotating for a few minutes. It will make the sponge sharper and more corrosive. When the entire surface is complete, put off the sponge from the sponge, and your tool will be ready.

Reusing Paint Roller Tray:

A paint roller tray helps to carry and apply paint over the roller. For using a paint roller, a paint roller tray will be the must-have item to complete the project. Furthermore, the paint roller tray is a plastic tray with a large space. It contains a deep slope to mix the paint with the paint roller.

This handy tool can become dry and dirty quickly. That’s why users are interested in something other than recycling paint roller trays. For this reason, the cleaning process is quite lengthy. However, applying some effective ways can make this process easy. Now, let’s check the best ways to recycle the tray easily.

  • Liner:

Generally, paint liners are suitable for covering the furniture during the painting period. However, you can also use these tape liners for various purposes. Covering the paint tray with liner tape can save the surface from unwanted paint. Besides, this method reduces the cleaning hassle a lot.

The paint tray must be dry and moisture-safe for using liner tapes. It is because the wet surface can’t stick with the plastic properly. After applying the tape, you must provide enough pressure to adjust the tape and plastic. Lastly, you can use heat for seating the liner for a long time.

  • Paint Thinner:

A paint thinner can remove any paint without any hassle. It contains some acidic and chemical formulas to remove the paint quickly. Furthermore, paint thinner can lose the paint quickly rather than any other option. If you have a time shortage, you can use this element to remove paint from the tray.

Firstly, remove the excess paint through a paint scraper. If the paint becomes dry, use some warm water and lemon juice. After that, pour the paint thinner over the surface and paint the affected areas. Wait for a few minutes, and your paint tray will finally be as new as before.

  • Power Washing Tool:

A tool can remove the paint from the tray without any manual touch. The power washing tool is perfect for washing your paint tray without hassle. Furthermore, this gadget can help the user to reduce time and money consumption for the project.

  • Cleaning Agents:

Regular cleaning agents can be ideal for washing your plastic paint roller tray. Washing powder and liquid cleaning agents are considered reliable ways to remove the color. However, the paint tray needs more time to wash properly through these elements.

Reusing Roller Extension Pole:

A roller extension pole is a multi-purpose tool for every homeowner. Through this tool, you can clean your whole house without any hassle. Besides, this roller extension pole can also do decorative tasks as it contains a good length. You can paint your ceiling easily by using an extension roller pole in the paint roller.

Extension rollers are metal-based tools to serve in various household works. That’s why this pole is almost an essential tool for every homeowner. However, to reduce your cost, truly take care of your extension pole! Let’s know the methods carefully!

Detach And Store All The Parts:

Generally, extension poles are medium size detachable poles. These tools are made from steel or other metallic ingredients. And that’s the reason you must keep the detached parts safe. You have to keep the separate parts in an airtight area to prevent various damages. Large-size poly bags can be a good option to store your extension poles.

Firstly, detach all the parts carefully. A lengthy extension pole is hard to store in any place. Hence, detach the medium size parts one by one. Never store a part that contains any moisture inside or outside. Besides, it would be best if you cleaned all the paints on both sides of the poles before storing them.

Protect From Rusting:

Rusting is the main danger in extension poles, as these tools are made from metallic elements. Yet by implementing the most potential methods, you can save your extension poles from rusting. Proper cleaning and drying is the leading solution for preventing rust. Dry paints can damage the metallic surface a lot.

Furthermore, moisture creates harmful elements that can damage the pole inside and outside. For this reason, clean all the paints with thinner or washing agents. Remember to dry your extension pole. Sun rays are the best way to dry up the poles perfectly. Dry the tools and store them inside the wooden drawers for a better result.

Use Oil To Clean Rust:

Oil can be another best option to clean rust. If your extension pole is unfortunately affected by rust, use oil over the surface as a solution. Furthermore, oil can smooth the tool and give it a new, shiny look. By using turpentine oil, you can finish this task easily.

However, keep your extension poles in contact with moisture. It makes the rust more stubborn and hard to clean. Now, rub the surface swiftly and clean it with fresh water. Besides, you can use any acidic cleaning agents in this case. Your old extension will be ready to support you in the project.

Reusing Paint Spatula:

A paint spatula helps to apply paints and make different textures over the walls. Stainless steel, metal, and wood are the main elements of these tools. The spatula contains steel, and the handle includes hardwood. To complete any painting project, you have to keep a paint spatula. Old spatulas can also be more effective for your job.

However, old spatulas contain rust and other dirt that damage the surface deeply. Through some secret tricks, you can recycle and fix these issues without hassle. Now, I’ll tell you some ways to recycle and properly use your old paint spatula.

Lock In An Air Tight Area:

Paint spatula can become damaged through so much rust. Besides, old spatulas lose their shine and gloss. These tools can ruin the paint while applied over the wall surface. For this reason, if you want to reuse your spatula, clean the entire paint immediately after using it and dry it up properly. Use poly bags or airtight areas to lock your spatula from rusting.

Cover With Oil:

You can apply oils while storing the metal spatula to prevent various damages. You can find out various metal storing oils for preventing rust in the market. Furthermore, soak the spatula in the oil and keep it overnight. It sucks the necessary amount and will be ready to store. You can store the spatula inside a poly bag or airtight box.

Replace The Spatula Handle:

The spatula handle is made from hard or soft wood. For this reason, the wood sucks moisture from the environment a lot. This moisture later creates rust over the metallic spatula. If you find the spatula old and wet, change it immediately to protect your paint spatula from rusting and other damage.

Reusing Paint Edger:

The paint edger completes the project by finishing the edge lines and corners of the rooms and walls. Besides, this tool can fill any holes and scratches quickly. For this reason, a paint edger is considered the finishing tool for any painting project. However, an old paint edger can save your investment a lot. Check out the steps below to recycle your old paint edger perfectly.

Step 1: Wipe The Paints

The paint edger contains a lot of extra paint over the roller. These paints should be removed quickly after painting. Otherwise, it can become dry and hard. You must use a heavy towel or steel wool to remove the paint from the roller surface. Furthermore, warm water and a soapy solution can make this task easier for you.

Step 2: Prepare Cleaning Agent

Now, prepare a suitable cleaning agent for your paint edger. An acidic cleaning agent or regular corrosive liquid can clean the paint perfectly. Furthermore, always use mild warm water to make any cleaning solution to remove paint. Lemon juice and vinegar solution can be another good option to remove paint.

Step 3: Soak And Rub The Tool

Soak the edger roller in the cleaning agent completely and keep soaking about one hour at least. When the roller starts to leave the paints, rub it with steel wool or brush to clean the edger. I prefer a brush as the bristle can reach the paints more than steel wool. Remember to detach the roller cover.

Step 4: Clean The Cover     

You have to clean the cover separately after cleaning the other parts of the edger. The roller cover is quite sensitive and soft. Furthermore, you must use mild detergent or cleaning products to clean the cover properly. Soak and let the paint leave the cover. Now, wash it by using your hands gently.

Step-5: Wash With Warm Water

You must clean the paint edger with warm water as the last washing step. Warm water can dilute the paint quickly. Besides, it makes the tool shiny and smooth after cleaning. Pour warm water over the painted surfaces and rub with a soft sponge or scrubber. It removes all the leftover paint spots and provides a complete cleaning touch.

Reusing Sandpaper:

For furnishing any surface, sandpaper is an essential tool. Sandpaper can sand and burnish any wood, plastic, drywall, and painted wall perfectly. However, these sandpapers are expensive and hard to get according to the grit number and corrosiveness. You can clean and reuse your old sandpaper by following the below.

Soak It Overnight:

It would be best if you made a suitable cleaning agent to clean your dusted sandpaper properly. The liquid solution is highly suggested. Furthermore, warm water and a cleaning solution will quickly remove dust or paint. Soak the entire sandpaper in the agent and leave it overnight.

Rub With Steel Brush:

A steel brush is the best way to remove hard particles from the sandpaper. Hard particles are quite difficult to remove over a corrosive surface. Besides, the corrosive surface holds these particles tightly. However, using a steel brush removes and cleans the wood or paint particles deeply. Rub the corrosive portion and clean it properly.

Clean With Water And Dry:

After rubbing with a steel brush, your sandpaper will almost be ready. You have to clean the paper with warm water as the last cleaning step. Soak the sandpaper and rinse it thoroughly. Furthermore, leave the sandpaper under the sun’s rays and make it dry completely. Your sandpaper will become a new one for your next project.

How To Store The Painting Tools?

Painting tools are expensive but reusable. If you want to reuse your painting tools in future projects, you must learn the correct ways to store the painting tools for a long time. A proper storage system can prevent any damage. Besides, it saves a lot of time on a new project. Now, let’s know the correct ways to store painting tools effectively.

  • Store By Preventing Air:

Air is the main culprit of rust over metallic painting tools. Iron rust is quite hard to clean. On the other hand, this rust can destroy the metal surface completely. It would be best to store your small to medium size painting tools in a poly bag. However, use a large poly bag or plastic container to seal the tool for a long time for larger tools.

  • Clean Quickly:

Never leave the painting tool for a long time after painting. It makes the paint dry and hard to remove. Besides, dry paint stuck over the surface tightly and faded the smooth tools. For this reason, you have to clean the tools immediately after painting any wall or room.

  • Scrap The Excess Paint:

Scrap the excess paint before storing the painting tool. Extra paint makes the cleaning process lengthy and hard. Furthermore, these paints create a heavy layer over the surface quickly. In this case, use a paint scrapper to scrap the excess paint properly and clean the tool perfectly.

  • Make The Tool Fully Dry:

Moisture can damage the metallic surface easily. Besides, after rinsing with water, the water drops make spots over the tools that reduce their shine. For this reason, you must make the tool fully dry before storing it for a long time. Keep the tool under the sun’s rays and let it dry.

  • Avoid Rusting:

Air and water are the main ingredients that create rust over the painting equipment. If you want to avoid rust, you have to avoid these elements perfectly. For this reason, never store a wet metallic tool inside a common storage room. Make the tool dry first and store it inside air-free storage at the proper temperature.

  • Keep The Tools Separately:

Always store the tools separately if you have a lot of painting tools together. Otherwise, it can exchange colors and stick with the surfaces. Besides, if the tool comes in contact with a rusted tool, it also becomes affected. Use different poly bags to store the different painting tools.

  • Detach The Roller Covers:

Before storing the paint rollers, detach the roller covers from the frame. Sometimes, the frame creates rust and spreads inside the cover if you don’t detach the roller cover. Store the cover inside another poly bag without the frame. Be sure the bag is airtight and clean to store the roller cover perfectly.

  • Cover With Foil Paper:

The extra lengthy tool can’t fit inside a poly bag or container. The extension pole, paint roller frame, and paint edger frame contain a high length. For this reason, you must use foil paper to cover these tools perfectly. A foil paper can prevent air and other moisture from protecting the metallic surfaces.

  • Keep Inside The Wood Drawers:

Wood drawers can be another best option to store your painting tools. These wood drawers can prevent moisture from keeping the tools reusable. Besides, wood drawers last long and defend against various bacteria and insects. Keep all your large to medium-sized tools inside the wood drawer.

  • Provide Heat To Suck The Moisture:

Provide enough heat to your stored tools often. Proper heat helps the tools suck the moisture completely. By following this process, it will become possible for you to keep the tool anywhere long. Besides, enough heat can help the environment to manage the temperature perfectly.

Frequently Asked Questions (FAQs):

How Do You Clean Tools After Painting?

Prepare a soapy cleaning solution with soap and mildly warm water. Afterward, take this solution inside a bucket and place a heavy bristle brush in the middle. Now, put your dirty tools in and rotate the bucket to clean them perfectly. Repeat the process until the tools remove all the paint. Finally, rinse them with fresh water and make them dry.

Is It OK to Reuse Paint Rollers?

It is completely okay to reuse your paint rollers in your next project. Proper storing and caring make the paint rollers long-lasting and durable. Besides, cleaning the roller cover allows you to use the paint roller several times. You have to store the roller frame and the cover accurately. Store both of them separately to get the best result.

What Do You Do With Paint Tools Between Coats?

Wrap your paint tools with an airtight wrapper between other coats while painting. It keeps the paint tool fresh and moist. Besides, washing your paint tools between coats can’t handle the paint in the next coat. For this reason, try to hold the moisture in this period. If you need a break between coats, you can coat another wall or room.

Do Professional Painters Reuse Brushes?

Many professional painters reuse their paintbrushes during new projects. If the paint brush contains high-quality and manageable bristles, it can be used many times. Furthermore, even some high-quality paintbrushes can last for years. Hence, reusing a paintbrush completely upsets the quality of the tool.

Should You Wet A Paint Roller Before Using It?

It would be best if you didn’t wet a paint roller before using it on the wall. When a paint roller becomes wet, it holds so much moisture. For this reason, it can’t stick with the paint and suck the liquid properly. Besides, applying paint on the wall with a damp paint roller becomes quite hard. Therefore, only wet a paint roller after using it.

How Long Can A Paint Roller Sit Between Coats?

Between coats, you can sit on a paint roller for at least two hours. After two hours, it starts to lose moisture and soon becomes dry. However, you can use airtight poly bags to prevent your paint rollers from coming into contact with air. Apply this method to finish your project quickly.

The Bottom Lines:

Nowadays, painting tools are expensive and hard to get the actual quality. For this reason, reusing your old painting tools can be the best choice to save you time and money. Old painting tools also work great in new projects.

However, cleaning and reusing your old painting tools is quite challenging. All my tips for reusing your painting tools effectively will help you a lot in your next painting plans. Remember to share your painting experiences using old tools with me via the comment section!

conclusion:

In conclusion, reusing your painting tools effectively not only makes financial sense but also contributes to sustainable practices in art and home improvement. By taking the time to clean and store brushes, rollers, and trays properly, you can ensure that they remain in good condition for future projects. A little effort goes a long way investing in a few quality cleaning supplies can extend the life of your tools significantly.

Moreover, consider repurposing old brushes or rollers for different styles and techniques in your next masterpiece, they can create unique textures that fresh tools may not achieve. Ultimately, being mindful about how we treat our painting materials enriches our craft while fostering a greener approach to our hobbies.

How To Paint Craft Foam?

How To Paint Craft Foam 1

Craft foam is a versatile crafting material that can be used to make a variety of different projects. If you’re not sure how to paint craft foam, this guide will show you the best way to do it. You’ll need some basic supplies and a few minutes of your time, and you’ll be ready to start painting!

How To Paint Craft Foam 1
Craft Foam Paint

Best way to paint craft foam

To paint your craft foam, you need to follow the steps below.

1. Collecting Basic Supplies for Painting Craft Foam

When it comes to painting craft foam, there are a few basic supplies that you will need.

First, you will need some foam sheets. These can be found at most craft stores.

Second, you will need paint. Acrylic paint works well on foam, and it is available in a variety of colors.

Third, you will need brushes. Foam brushes work well for this project, but you can also use regular paintbrushes.

Finally, you will need a sealer. This will help to protect your foam projects from damage. With these supplies in hand, you are ready to start painting craft foam!

2. Preparing The Craft Foam for Painting

If you’re planning on painting your craft foam, there are a few things you’ll need to do to prepare the surface first. Otherwise, your paint may not adhere properly or may not look as good as you’d like.

First, sand the surface of the foam with a fine-grit sandpaper. This will create a slightly rougher surface for the paint to adhere to. Next, wipe down the foam with a damp cloth to remove any dust or debris.

Once the foam is prepped, you’re ready to start painting! Be sure to use paint that’s specifically made for use on foam surfaces. These paints have a special formula that helps them bond well to the foam and prevent them from peeling or flaking off.

With a little preparation, you can easily paint your craft foam and create whatever masterpiece you have in mind!

3. Polish the Primer at The Surface Of Your Craft Foam And Allow It Adequate Time To Dry

Ensure you achieve an even paint application by using long strokes of up and down technique. Note that you may have to leave the paste to dry until it forms a transparent and clear layer on the surface of your craft foam.

Choose the right paintbrush for your project by taking into account the size of your craft foam. Do final touches on your foam to do away with unwanted bumps on the surface of your craft foam. It is recommended that you let the surface a maximum of 24 hours drying time before starting your painting process.

Which Paint Should You Apply to Your Craft Foam?

There are many types of colors you can use. However, you need to know the most appropriate color suitable for craft forms; Both metallic and golden paints are a good pick. Continue reading to discover the most appropriate paint to apply to your craft foam.

Acrylic Paint: Acrylic paint has many desirable properties, which makes it a good pick for many painting projects. If you want to paint the whole substance, then consider using acrylic paint. Acrylic polish is easy to apply to the surface because it has runny properties that allow it to spread much faster.

Mixing the Paint: To achieve a much denser color, you will need to leave the paint in its undiluted form. Ensure you mix your colors perry quickly to avoid losing your acrylic paint since it dries up much faster.

Patience: Acrylic paint is known for its ability to dry faster when applied on any surface. However, when acrylic paint is used on craft foam, you may have to wait much longer because it takes a little longer to dry. On that note, patience is key if you want to create a stunning finish.

You might be forced to wait for close to 4 hours before embarking on your painting exercise. Use an appropriate gloss finish to give your craft form a glossy finish; In this case, you might want to use acrylic gloss.

Make Your Writing Impressions Using Fabric Paint: You may decide to add more touches to your craft form, and this might be writing words of your choice or drawing specific patterns on the surface of your craft foam. In this case, consider using appropriate fabric paint since it dries out, leaving behind clearly marked impressions. Choose the right color that will be more visible after drying.

Making shapes: You might consider using a sketching tool to make patterns on your craft foam before painting it. Use a sponge to create the appearance much more appealing.

 Important Tips When Spraying Paint on your Craft Foam

  • Acquire the right spray paint from your nearest market. The nature of your project will determine the type of spray paint you will buy. Always go for a pocket-friendly can if you intend to apply a single color on your foam. Note that spray painting is harmless to your craft foam.

  • You will need to shake the spray can properly before embarking on your painting exercise. Shaking the can will allow the paint to mix properly for easy application.

  • You will need to be cautious with the nozzles to apply the paint evenly on your craft foam with much ease during the actual spraying. It would help if you considered holding the nozzle at a distance of about 3 feet from your craft foam. Having the nozzle close to the craft foam may create a lump of paint that is uneven. Spray your paint in long up-down sweeps to achieve a smooth and consistent layer of paint.

  • Doing this will also ensure minimal or no color running the surface of your craft foam.

  • When you are done with the first spray, allow for a maximum of 6 minutes, and then start applying another layer of paint. The time interval mentioned above ensures the paint dries properly before applying another coat. You should maintain the distance between your foam and the nozzle when using the second coat to minimize the chances of wrinkle-like formations on the surface.

  • As we mentioned earlier, allow your craft foam a maximum of 24 hours of drying time before you start doing any final touches on the surface. Ensure the space is a little drier to reduce your drying time.

Note that you can comfortably spray paint on your craft foam and make any color you desire for your project. You can improve the look of your craft foam by spreading it with spackling colors such as; silvery, metallic, and golden. Enjoy your painting!