There are many reasons why you would want to give your new or old pieces of furniture a new look and learning a few tips on how to paint your baby’s crib is one of them. This article will discuss the basic tips on how to paint a crib in simple steps. Continue reading to get more insight.
Let us say soon or later, you expect to welcome a new human being in your family. Among the preparations on your list will be to ensure that the newborn will have a safe and secure place to sleep. Since a baby’s bed is a must-have, you should prepare in advance and be sure that your child will sleep in a safe crib.
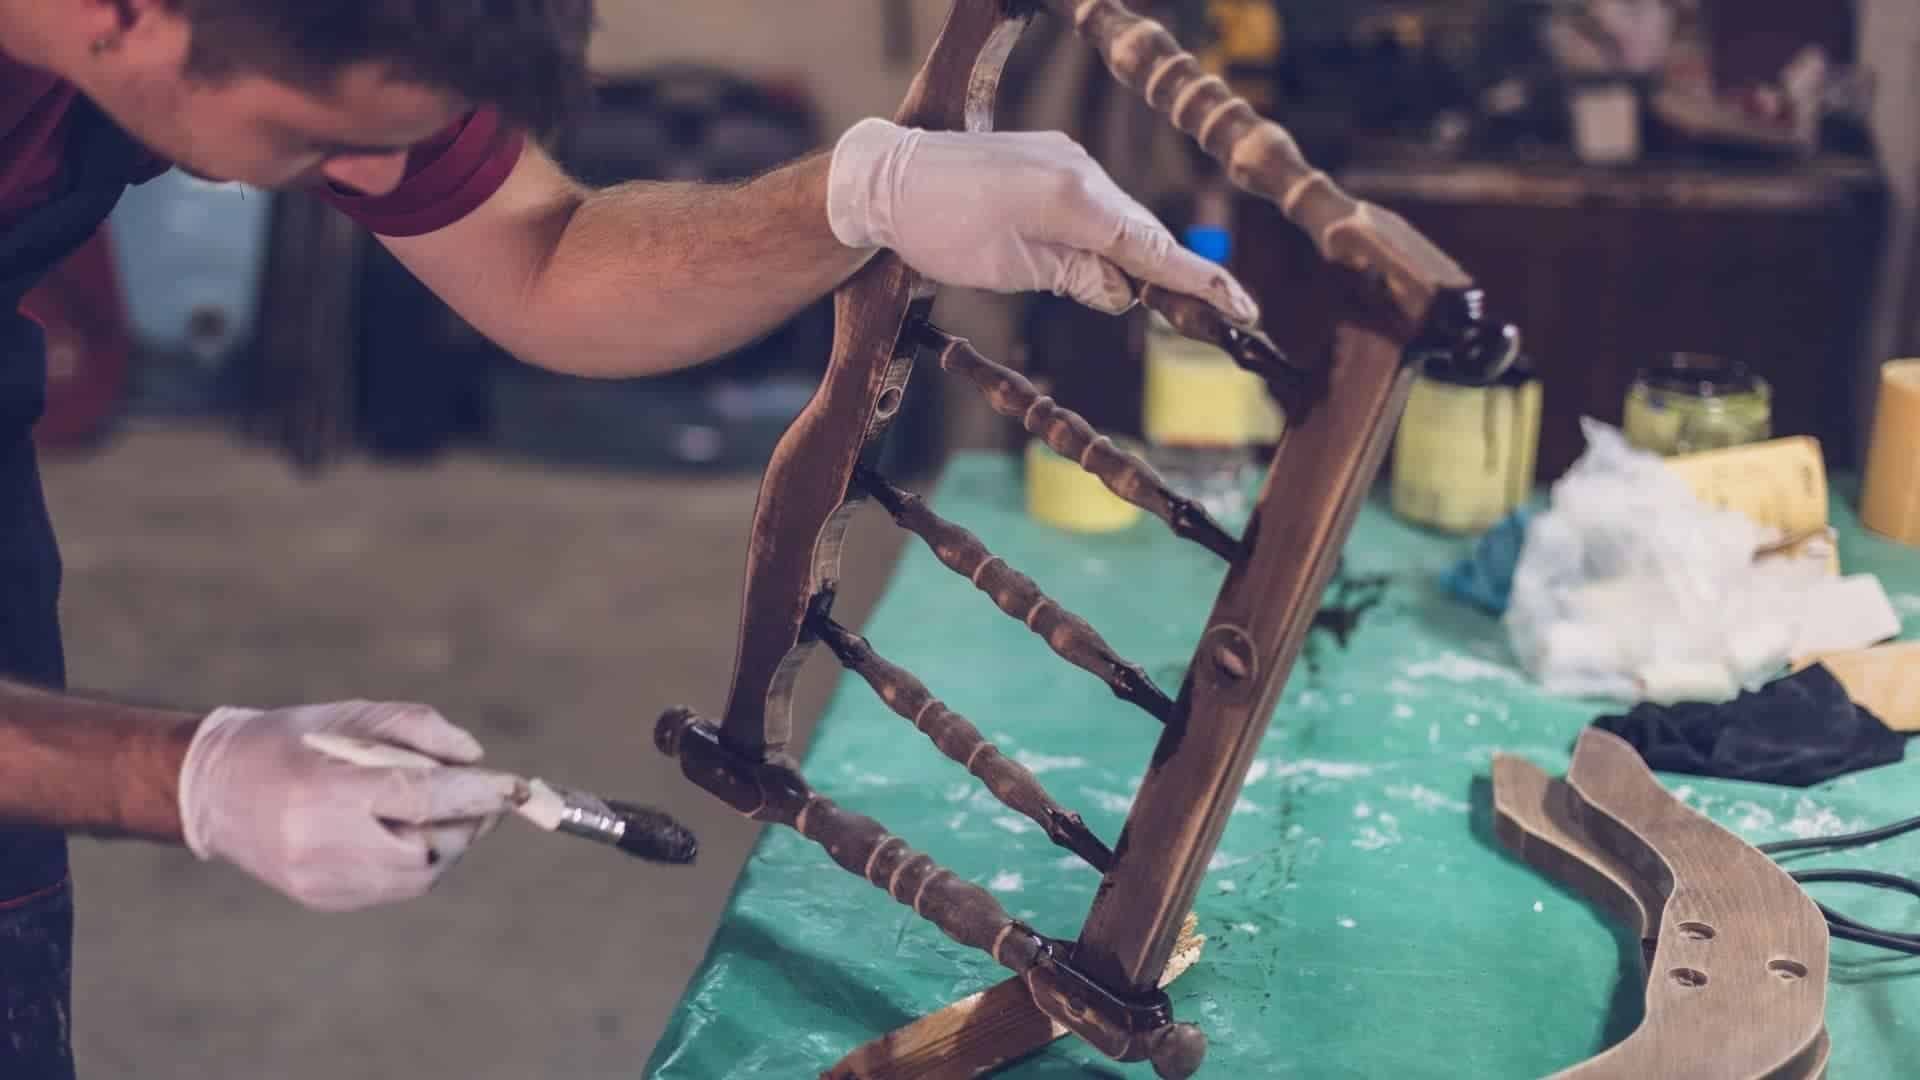
You don’t have to be a professional painter to carry out this exercise; if you are a DIY guy, you can paint your crib in no time. This article will highlight steps to follow when painting your baby’s crib(How to paint a crib).
None of us likes to keep items that are dull and old, especially furniture. You want to maintain their appearance, and one way you can achieve that is by painting them.
The most important thing is to make sure the crib is clean and fit for use. Before painting the crib, ensure you choose a suitable paint that is safe and odorless, with that in mind, you can choose to use either a new or old crib. Nevertheless, be sure to fix it properly and the best way to do that is by painting it. So, how do you paint a crib? Read on to find out.
Is it possible to paint cribs?
You may decide to buy a new crib or opt for an old baby’s crib, and your problem is sorted. However, for obvious reasons, you may not like the color painted on the crib(of course, your newborn won’t protest the color of the crib). You want to repaint the crib to the color of your liking.
You are free to repaint by hiring a professional to do the painting, or you can comfortably paint it yourself if you are a do-it-yourself kind of person by carefully following a set of steps discussed below.
Choosing the Right Paint for the Crib
Having decided to do the painting on your own, you need to decide on the most suitable paint to use on the crib. Note that the paint you choose should be safe, odorless, and non-toxic so that your baby sleeps comfortably. The following points will help you to decide on the most suitable paint:
- It should be lead-free. Peruse through the list of contents to be sure it does not have any trace of lead.
- The paint should be harmless
- Be sure to purchase a water-soluble paint
- Opt for paint with its low organic compound concentration.
- The paint should be completely odorless
- Opt for a paint that does not need a primer
- A suitable paint must be able to suppress the growth of mold or mildew.
What You Need to Paint the Crib?
You need to have the right materials for your project. However, you don’t need to acquire complex tools. You will need basic tools and follow the right steps to make your painting successful. So, what do you need? Continue reading to find out.
- A mixture of vinegar and water
- Abrasive pads
- Fine sandpaper
- Piece of cloth
- Mask
- Tack cloth
- Spray container
- A safe and suitable paint
- Painting sponge
- High-quality paintbrush
- Topcoat with no smell
Steps To Paint Your Crib
Now you have everything you need to start your project. You will need to follow the steps below to paint your crib carefully. These are the steps:
Step 1 : Place the crib on an old piece of cloth or used newspapers in an open area away from any activities. Ascertain that the crib is clean and free of dust and unwanted particles. Use the mixture of vinegar and water to clean the crib adequately before you start painting.
Step 2 : You can separate the crib into parts if it’s necessary to be able to paint adequately. Put on a face covering to avoid inhaling dust. Scrub the surface of the crib to give it a smooth finish. If you are dealing with an old crib, ensure you remove the old paint completely. Doing this will allow your new paint to bond with the surface with much ease.
Step 3 : Use a tack cloth to remove dust particles from the surface of the crib. Emphasize the joints and bumps and remove any dust particles. Use a damp piece of cloth to clean and wipe any stubborn particles on the surface of the crib. Note that you must let the crib dry out properly after using a damp cloth before applying any paint.
Step 4 : This step will involve the actual painting of the crib. Use suitable paint; as discussed above, you should use safe, non-toxic, and odorless paint. Allow up to a maximum of six hours, then apply another coat of paint.
Step 5 : Check for unpainted spots on the surface and sand them accordingly before repainting the crib with a second coat. You should use a suitable brush for the exercise; most parts of the crib are made of smaller surfaces, so you should select a brush that will paint the surface properly without wasting any paint.
Step 6 : At this point, apply a coat of finish polish to the crib to give the desired look and make it a little more durable. However, this might not be necessary if you use high-quality paint on your crib.
Polishing your baby’s bed is one of the surest ways to show them your love. You can choose to purchase a readymade crib or get it customized to your needs. Alternatively, you may opt for an old crib in your home and make it useful for the baby.
Applying paint on the crib is the easiest project you can undertake to save you time and money; what is more, you can use an old crib and repaint it.
The crib is your baby’s bed, and as such, you should ensure you paint it yourself to make it safe for you. You need to have the right materials for your project. However, you don’t need to acquire complex tools. You will need basic tools and follow the right steps to make your painting successful.