How to Build a Professional Paint Booth?

How to Build a Professional Paint Booth

This article is a guideline for people who want to install a paint booth by themselves. So, no one hesitates about how to build a professional paint booth. I have tried to keep the information convenient for people of all ages. I believe you can structure the booth professionally. Making a paint booth is not a big deal for you.

A paint booth is a crying need if you are thinking of doing a car business. By seeing its necessity, you can think of building one, but how? If I tell you, the desired paint booth can be possible by yourself! Do not be surprised. I am here to assist you in building the most efficient paint booth.

“Related Article: How to Build a Paint Booth Exhaust.”

Sizes of Paint Booths:

Sizing of Paint Booths for Vehicles: Paint booths have many configurations to fit various vehicle types and workshop productivity levels. Depending on your shop’s demands, you can build paint booths for painting motorcycles or bigger projects. A motorcycle requires 8′ x 10’x 12’8″ paint booths.

Size of a Standard Auto Shop Paint Booth: A paint booth 14′ by 24′ and 10′ tall works well for most vehicles. This size is ideal for most typical crash service centers.

Size of the Best Home Technicians Paint Booth: Home technicians will most certainly prefer anything simpler, but this will depend on your labor productivity. A 15′ by 8′ space is an excellent place for a home technician. Like always, ensure your paint booth has sufficient airflow.

AIR MAKE-UP UNIT

You should refill the exhausted air. If replacement air cannot be drawn directly from a structure, it can be collected from outside and purified by an air make-up device.

Air circulation in a paint booth is possible with an air make-up system during coating application. Despite the external air temperature, AMU keeps a constant moisture content. They restore the same amount of fresh air per cubic foot of air consumed.

The paint booth is furnished with purified airflow by this system. It is no longer necessary to pull air from the plant. Thus, AMU improves working conditions and lowers operating expenses.

Steps of Installing a Professional Paint Booth

Step 1:

  • Calculate the size of your paint booth. An 8-foot-wide paint booth is suitable for a large patio, and it can often fit a whole car within. However, an eight by 4 foot will be sufficient for most other works.
  • Make a frame to figure out how much pipe you’ll want. A vertical pipe will be required in each corner. It will also require horizontal panels all over the top, middle, rear, and sides.
  • Estimate the lengths of pipe for your booth. For increased durability, split the sides into two parts at the top. Additionally, for more vertical support, divide the middle pol into two sections. Please remember that the height poles will be separated into two sections as well.
  • Place the pipe in a small table with two planks on each edge functioning as a table-mounted vise. Saw through the PVC pipe with a PVC saw. To cut through it, rotate the saw backward and forth while adding light downward pressure.
  • Assemble the pipes so that they will match properly.
  • Inspect the 3-foot pipes. These four posts can reach the floor at the sides. To create the top of these poles, add two more in the front, one on each side.

Step 2: Installing a Booth Cover

  • A 10 × 25 ft piece of plastic sheeting should be used to cover the entire booth.
  • Cut and attach the back of the plastic. Fasteners can be used to hold the plastic in place. Now, slice the plastic straight up the corner pole from the base to the upper edge.
  • Next, drill a hole through the plastic and tape. Insert a zip tie through the gap and wrap it around the plastic.
  • Trim and peel off the plastic on the backsides. Stretch the piece of plastic on one side, then slice it up in a straight line from the bottom to the top corner.
  • Keep the gap between the two sheets in the front. Install a four-by-15-foot drop cloth within the booth. Press out any seams or bubbles to check their smoothness. Then, raise each of the paint booth’s legs to push the drop cloth corners under each leg.
  • Inside, fix the plastic covering. Tie it to the inner corners of the booth as well as the drop cloth.

Step 3: Fitting the Pipes Together

  • To the top of each corner pole, screw a T connector and an elbow connector.
  • Attach the top to the 3-foot bottom with one T connector on the front. In the backside, connect two T connectors in the middle of the post with a small pipe.
  • Mount the front corner pole to the 1 26 3/8-inch portion at the top. Insert a T connector. Insert the opposite end of this segment into the back corner pole.
  • Make a post for the booth’s center by inserting a 5-foot-11-34-inch length into the bottom of a T connector. To either side of the connector, put a 3-foot-11 7/8-inch segment.

Step 4: Building Ventilation System

  • Make a box fan layout. Install a box fan high enough to clear the middle PVC pipe of your paint booth by using a stepladder. Build the structure on one corner of the booth.
  • Stretch the plastic to the fan’s edge and tape it closed. If required, add extra plastic to ensure a tight seal.
  • Set the fan towards the angle of the booth. Air force blasts air from one filter to another. Rather than blowing air from the paint booth through the fan, you could end up pulling toxic pollutants into the fan’s engine.
  • Using duct tape, fasten a furnace filter to the plastic. On the other side of the fan, make a hole deep enough for a filter. Attach the filter to the plastic, ensuring sure to protect all of the corners with tape.
  • Always keep the fan on when operating the paint booth. Change your filters frequently. Overspray and paint dust will gradually jam the furnace filters.

Bottom Line

Whenever you become confused, you always look for an easy solution. And this is what I am doing in this article for you. You can easily build a paint booth once you read my article.

I hope, from now you will be more confident by doing anything besides building the paint booth. You can reach us at any time by leaving a message here or contacting us via email. Nothing is impossible and, best of luck!

How To Clean Miniature Paint Brushes?

How To Clean Miniature Paint Brushes

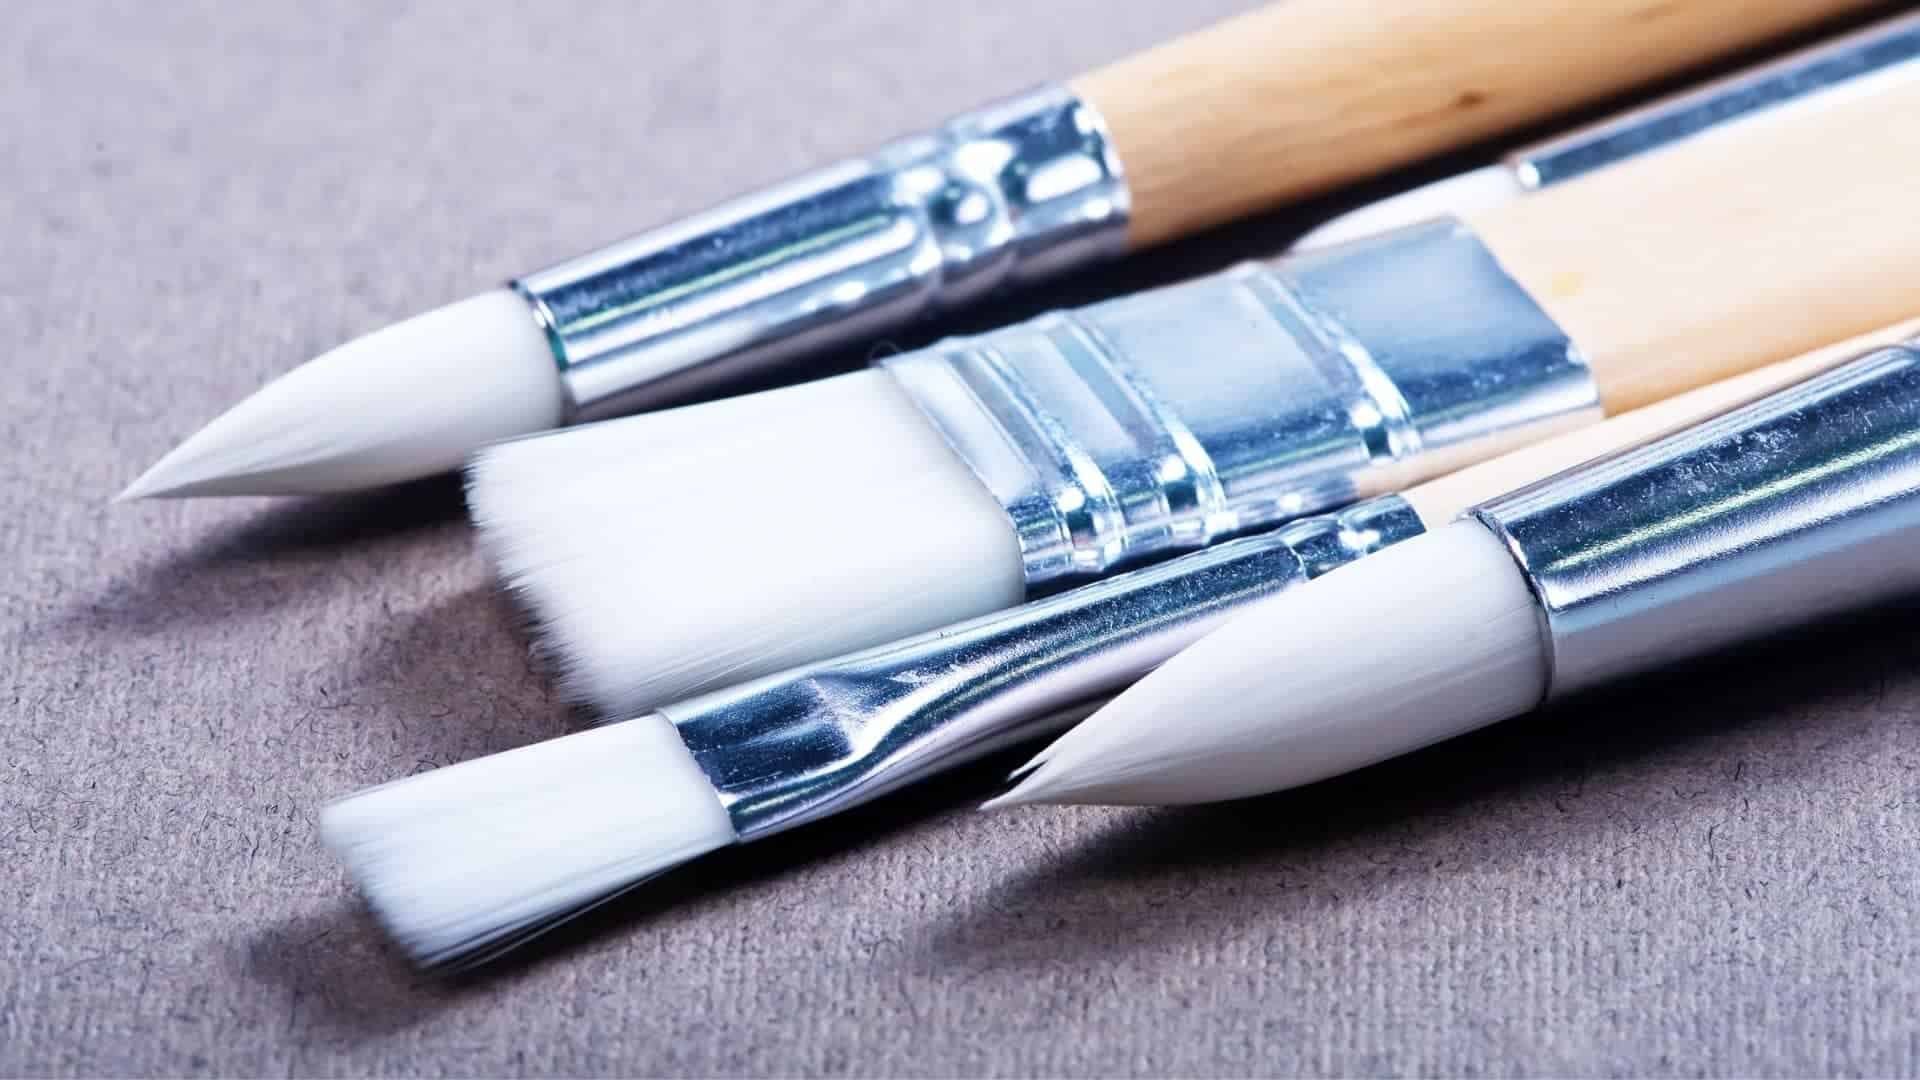
Learning a few tricks on how to clean miniature paintbrushes will relieve you of the idea of regularly buying new brushes. Continue reading for more insight.

9 Sure Steps To Clean And Protect Your Miniature Brushes

It is always a good habit to clean up your miniature paint as soon as you are done with your painting exercise. In this article, you will learn step-by-step instructions on how to clean your miniature brushes and store them safely for your future projects. Check out the steps below:

Step 1 – Do Not Paint The Metal Band Of Your Brush

When you are painting, be sure that there is no contact between the ferrule of your brush and the paint. Note that the metal band holds the bristle in one place, so if any color gets inside the metal band, you might find it hard to get rid of it. The most common resultant effect is splitting and breaking of the brush bristles.

Step 2 – Be Sure To Use Separate Brushes When Preparing Your Paint

Avoid the habit of using one miniature brush for the whole exercise of miniature painting. Ensure you have at least two miniature brushes; Use one of the brushes to prepare your paint and apply your paint to the miniatures.

Note that the chances of damaging the metal band of your brush will be high if you consistently use one miniature brush for your painting project.

Consider using a stirrer or old brushes to prepare your paint instead of using a single brush for the entire project. If you do this effectively, then cleaning your miniature brush will be effortless.

Step 3 – Choosing A Suitable Brush When Finishing Your Model

You want your model to look stunning, so consider using an appropriate miniature brush to do the final finish on your model.

Note that this is a great way to save on the costs of buying new paintbrushes. Additionally, an old paintbrush will help you achieve a fine and even look on your miniature model.

Step 4 – Do Not Allow The Paint To Dry On Your Miniature Brushes

As was mentioned earlier, the result of leaving paint on the bristles is not very appealing.  You may find it hard to clean the hairs of your miniature brushes because they will be stuck together.

With that in mind, consider rinsing your miniature brushes in water as soon as you are through with your painting project.

It might help you use your brush to stir the water in a container, which will help you get rid of paint from the bristles.

Be sure to clean your brushes thoroughly to prevent any paint from drying in your miniature brushes. You don’t want to have a hard time using stiff bristles to paint your miniature models in the future.

Step 5 – Use Clean Water  When Painting Your Miniature Models

It would be helpful to keep changing water when painting to maintain the clean condition of your brushes. Ensure you do not reuse water while rinsing your brushes.

The importance of changing the water at given intervals is to ensure there is minimal dirt and unwanted particles in your brush. Note that dirt and particles in water may eventually damage the bristles of your brush.

Be sure to rinse your miniature brushes at specific intervals when using metallic-based paints to avoid any corrosion problems.

Step 6 – Always Protect The Tip Of Your Miniature Brushes

How do you usually store your miniature brushes? The position you adopt to keep your brushes will impact the durability of your meetings to a greater extent. Avoid storing them in water due to the resultant effects of rust.

An excellent way to store your miniature brushes is by laying them in a flat position or any other suitable method that will ensure the tip of your brush is protected.

Step 7 – Wash Your Brushes With Warm Water

To ensure your miniature brushes are in good condition, be sure to wash them with lukewarm water to remove any unwanted and harmful chemicals from the bristles.

Using warm water is also essential because it loosens the bristles of your brush. It would be helpful to remove any traces of paint from the hair using your hand. However, be sure to wear protective gloves to avoid injuries associated with paint chemicals.

Take caution when cleaning your miniature brushes to avoid distorting the bristles. Remove Paint stains from the bristles to avoid breaking them.

Step 8 – Use A Suitable Brush Cleaner

If you have a few bucks to spend, consider shopping online for a suitable brush cleaner to help out. A good thing with a brush cleaner is its ability to protect the bristles and maintain their shape for a long time. However, using water is always a good option because it is readily available and cheaper.

Ensure to store your miniature brushes while dry to avoid any damage. Note that any water traces on the metal band will facilitate rusting and eventually eat away your entire brush.

Step 9 – Proper Storage Of Your Miniature Brushes

If you want your miniature brushes to last for some time, it would be helpful to mind how you store your miniature brushes. Protect the tip of your miniature brushes adequately if you want to use your brush soon. Be sure to lay your miniature brush in a horizontal position to help protect the tip and the bristles.

Ensure you have the protective cap that is meant to protect the tip of your miniature brush, and use it when you are not using your brushes. That notwithstanding, if you don’t position your tiny brushes properly, the bristles may still get damaged, so be sure to store your brushes in the most suitable position. It is advisable to suspend your paintbrushes using a string so that water may drip down from the bristles.

Be sure to store your miniature brushes while dry to avoid any damage. Note that any water traces on the metal band will facilitate rusting and eventually eat away your entire brush. Take caution when cleaning your miniature brushes to avoid distorting the bristles.

It is essential to clean your miniature brushes in order to make them last longer. Follow the steps highlighted above, but most importantly, remove paint stains from the bristles to avoid breaking them and ensure you rinse your miniature brushes at specific intervals using clean water.

What causes paint to wrinkle? The Hidden Mystery Behind

What causes paint to wrinkle

Have you ever meticulously painted a surface, only to find that the once smooth finish is now marred by unsightly wrinkles and creases? The frustrating phenomenon of paint wrinkling can turn a perfectly planned project into a disaster in a matter of moments. Understanding the root causes behind this issue is crucial for both professional painters and DIY enthusiasts alike. In this article, we delve into the complex world of paint chemistry to uncover the mysteries of what causes paint to wrinkle. From incompatible materials to improper application techniques, we will explore the various factors that can lead to this unwanted effect, providing valuable insights to help you achieve flawless finishes every time. Let’s unravel the secrets behind paint wrinkling and empower you with the knowledge needed to overcome this common painting pitfall.

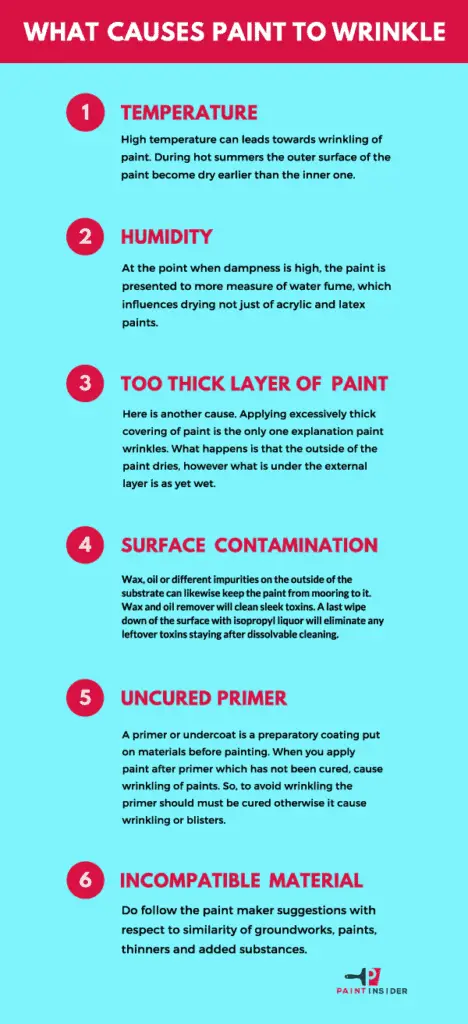
Some factors that cause paint to wrinkle:

  • Temperature
  • Humidity
  • Too thick layer of paint
  • Surface contamination
  • Uncured primer
  • Incompatible  material
What causes paint to wrinkle

how Does Temperature Cause Paint To Wrinkle?

When temperatures are too high during the painting process, the solvents and binders in the paint can evaporate too quickly, creating a wrinkled surface. This rapid evaporation results in insufficient time for the paint to level out properly, leading to uneven drying and ultimately causing wrinkles to form. Additionally, extreme temperature fluctuations can cause thermal stress on the painted surface, further contributing to wrinkling.

To prevent paint wrinkling due to temperature, it is essential to follow manufacturer guidelines regarding ideal painting conditions. Using paints specifically formulated for high-temperature applications can also help mitigate the risk of wrinkling. Proper ventilation and humidity control in painting environments are crucial factors in ensuring that paint dries uniformly and does not wrinkle due to temperature variations. By understanding how temperature influences the drying process of paint, painters can take proactive steps to achieve smooth and flawless finishes on their projects.

how Does Humidity Cause Paint To Wrinkle?

Excessive humidity can wreak havoc on freshly painted surfaces, leading to the frustrating issue of wrinkling. The presence of moisture in the air interferes with the paint’s drying process, preventing it from setting properly. As a result, the paint can form unsightly wrinkles and bubbles as it struggles to adhere to the surface.

Furthermore, high humidity levels can also slow down the evaporation of solvents present in paints, causing them to remain wet for longer periods than intended. This prolonged drying time exacerbates the chances of wrinkling occurring. To prevent this issue, it is crucial to choose low-humidity days for painting projects and ensure proper ventilation during and after application to facilitate faster drying.

By understanding how humidity impacts paint quality is essential for achieving smooth and professional finishes, and taking precautionary measures against excessive moisture in the air and following proper painting techniques, you can minimize the risk of wrinkling and other related problems that hinder your painting projects’ success.

How does “Too thick layer of paint” cause paint to wrinkle?

When a too-thick layer of paint is applied, it can cause the paint to wrinkle due to a variety of factors. One key reason is that the excessive thickness prevents proper drying and curing of the paint underneath. This inhibits proper adhesion and leads to wrinkling as the top layer dries faster than the layers below.

Additionally, when a thick coat of paint is applied, there is often an uneven distribution of solvents throughout the layers. This imbalance results in improper drying rates between layers, contributing further to wrinkling issues. Understanding how different layers interact during the drying process can help prevent this problem and ensure a smooth finish on your painted surface.

To avoid wrinkling caused by applying too thick of a layer of paint, it’s important to follow manufacturer guidelines regarding application thicknesses and drying times. Taking care to apply thin, even coats will promote proper drying and adhesion, resulting in a professional-looking finish without any unwanted wrinkles.

How does Surface contamination enhance the wrinkling issue?

Surface contamination can have a significant impact on the quality and appearance of paint application, leading to undesirable wrinkling. When contaminants such as dust, oils, or grease are present on the surface before painting, they can interfere with the adhesion of the paint and cause it to wrinkle during drying. These impurities create barriers that prevent the proper bonding between the paint and the surface, resulting in an uneven texture and wrinkled finish.

Additionally, certain chemicals found in contaminants can react with components in the paint formula, causing chemical changes that lead to wrinkling. This reaction disrupts the drying process and inhibits the formation of a smooth, uniform film. Therefore, proper surface preparation is essential to ensure a clean and contaminant-free substrate for optimal paint adhesion and finish. By identifying potential sources of contamination and implementing effective pre-painting cleaning procedures, painters can minimize the risk of wrinkling and achieve high-quality results that meet expectations.

How Does Uncured Primer Make Paint to Wrinkle?

When uncured primer is applied as a base coat before painting, it can lead to paint wrinkling issues. The main reason for this is the uneven surface created by the uncured primer. When fresh paint is applied on top of a primer that has not fully dried or cured, it does not adhere properly and can start to wrinkle as the solvents in the paint interact with the uncured surface.

Additionally, the moisture trapped underneath the uncured primer can cause further problems by creating blisters in the paint layer above. This results in an unattractive and uneven finish that may require stripping and repainting to correct. To avoid this issue, it is crucial to follow proper drying times for primers before applying any topcoat of paint, ensuring a smooth and durable finish that will last for years to come.

How Do Incompatible materials contribute to wrinkling issue?

When incompatible materials are used together in a paint mixture, an adverse reaction occurs that can cause the paint to wrinkle. This often happens when different types of paints or additives are combined without proper compatibility testing. The interaction between the chemicals in each material can lead to inconsistencies in drying times, adhesion issues, and ultimately wrinkling of the paint once it dries.

To avoid this problem, it is crucial to carefully review the product specifications and compatibility guidelines of all materials being used in a painting project. Additionally, conducting small-scale tests before applying the paint on a larger surface can help identify any potential issues early on. By ensuring that only compatible materials are used together, painters can achieve a smooth and professional finish that is free from wrinkles or other imperfections.

In conclusion, paint wrinkling can be caused by a variety of factors such as improper surface preparation, application in extreme temperatures, incompatible paint layers, or inadequate drying time. Understanding these potential causes is crucial in preventing this issue and achieving a smooth finish. By following proper painting techniques, using high-quality materials, and ensuring optimal working conditions, you can minimize the risk of paint wrinkling and produce professional results. Remember to always read and follow the manufacturer’s instructions to avoid any potential pitfalls. Take proactive measures to address any underlying issues to maintain the integrity of your paint job.