Wanna know how to fix uneven spray paints? Are you confused about why spray paint looks uneven? Don’t worry at all. Your every query will be resolved here. There can be many reasons behind the uneven surface. Most probably, it happens when you fail to apply the necessary coats. However, getting out of this problem is so easier if you work through a smart process.
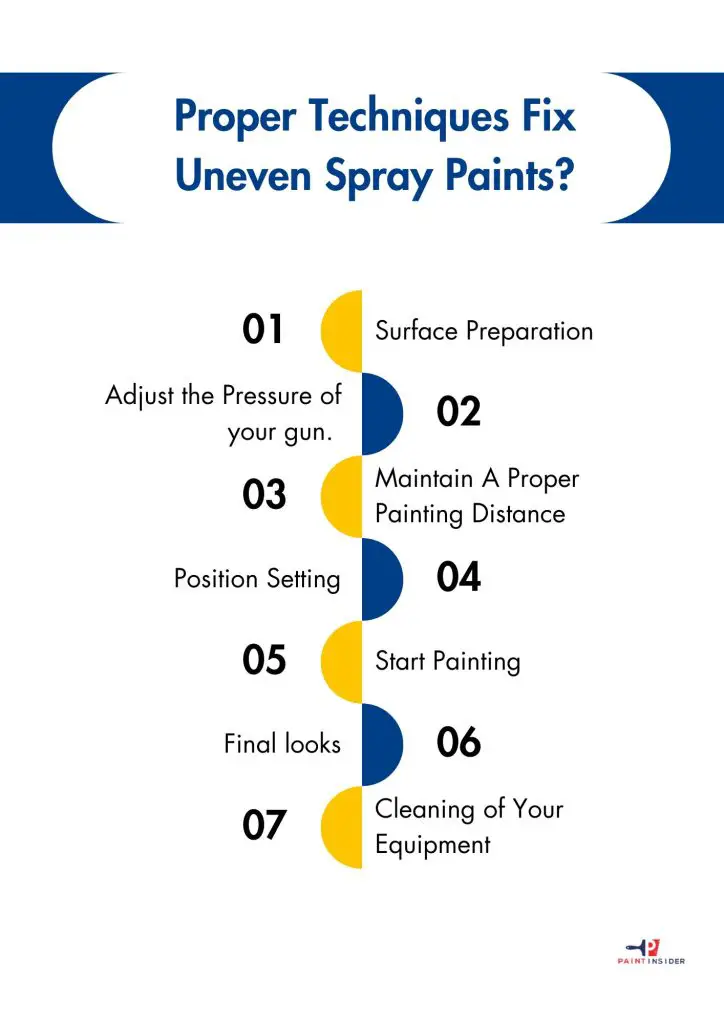
Proper Techniques Fix Uneven Spray Paints?
Supplies Needed:
● Spray gun or spray can
● Respirator
● Cardboard
● Drop Cloth
● Sandpaper
● Sanding block
● Wire brush
● Alcohol
● Trisodium phosphate (TSP)
A spray can is a metallic container, and it’s best to use for painting little parts. However, it becomes complicated to paint a large body with this can. A spray gun is in the form of a gun. It’s best for painting any area. It’ll give you more quality results than a spray can.

Step 1 – Surface Preparation
The surface preparation becomes different with the different surfaces. Let’s discuss in detail which preparations we need for which surface. Here we’re sharing some points that help in properly preparing your required surface.
Metal Surface
● The first step is picking a moist cloth for the metal surface, removing dust and pollutant particles.
● If the surface has rust, then try to clear it. You can choose a wire brush for this purpose.
● If you have any loose paint on your surface, make it clear with fine-grit sandpaper.
Plastic Surface
Now the case is different because we’re using the plastic surface.
● Pick up the soft cloth and start cleaning your surface.
● For the removal of the base coat, wet sanding the surface lightly.
● To avoid the oil on the surface, remove it with alcohol.
Wood Surface
Here the process also varies due to the unique composition of wood from other surfaces.
● As this is wood, we need trisodium phosphate (TSP) to remove any precious paint.
● To remove the base coat, use sanding. To create a smooth surface, use fine-grit sandpaper.
Step 2 – Adjust the Pressure of your gun.
For adjusting the pressure control knob of your spray gun, we need low pressure for perfect efficiency. That’s why we set low pressure on the gun. A perfect pressure setting helps you obtain fine and satisfactory results on your surface. But if you have any heavy edges or gaps, increase a little bit of pressure. To get a smooth pattern, don’t insert too much pressure.
Step 3 – Maintain A Proper Painting Distance
Distance varies with the gun you’re using. Different guns have their various settings. So it depends upon you which gun you’re using and how much distance you must keep.
For an HVLP gun, there must be at least 6-8 inches from your painted surface, And if you have a conventional gun, try to keep it 8-10 inches from the surface. Finally, there are other air-assisted airless sprayers. For this, you must be at least 10-12 inches from your painted surface. And at last, you have airless sprayers. For this one, the distance must be 12-14 inches.
Step 4 – Position Setting
Keep your position well throughout to the height of your painted surface. It increases your process of painting. Also, you can do a much faster job in this position. Don’t move your wrist but try to move the whole arm to get the best results. Keep the position of the spray gun perpendicular to your painted surface.
Step 5 – Start Painting
Never directly start applying your spray on your painted surface when you’re recoating your surface. Instead, the strategy is first to paint the side areas and move your arm towards your main surface. So how to fix uneven spray paints?
To obtain even coverage on the surface, take your arm in a straight line.
As compared to thick coats, thin coats are better. For better coverage, apply one coat and make it dry. When you realize it is fully dry, then move towards the next coat. Usually, your paint takes 30-40 minutes. It can vary according to your paint.
Make sure to have the correct color of your paint. Start your first coat process by spray painting. After applying the first coat, move towards the second coat for smooth and even coverage.
Step 6: Final looks
Your first effort is useless if you don’t do the last check. When you’re checking, if you feel any spots pick up the fine-grit sandpaper. You can also choose a dry cloth and start rubbing the paint very gently. After doing this, repaint the final coating.
Step 7: Cleaning of Your Equipment
Don’t leave your equipment dirty. Your final step is to clean it. Take your spray gun and start cleaning. Refer to the gun’s instructions for guidance. You will mainly need water or solvent, depending on whether you’re using water-based or oil-based paints.
After completing these steps, congratulations! You’ve successfully fixed uneven spray paints. Now you know how to do it. Gather your supplies and start fixing uneven spray paints at home, aiming for great results.
Fixing Common Spray Painting Issues
One common frustration when spray painting is uneven coverage. This usually happens because of being too far or too close to the surface or uneven spraying. To fix this, keep a consistent distance of about 6 to 12 inches and use smooth, sweeping motions. If you see lighter patches, apply a thin second coat after the first one dries; this can help blend the colors and remove streaks.
A common problem is paint drips or runs, which occur when too much paint is applied in one spot. To fix this during your project, let the area dry completely, then lightly sand the drips with a fine-grit sandpaper. After smoothing it out, touch it up with light coats of spray paint for better control. Patience is key; addressing these issues slowly will give you a smoother finish and improve your spray-painting skills for future projects!
Conclusion: Achieving a Flawless Finish
To get a perfect finish when spray painting, you need good technique, preparation, and the right mindset. First, remember that preparing the surface is crucial. Uneven surfaces or dirt can ruin your results, so spend time sanding, cleaning, and priming your workspace. It’s like building a strong foundation before creating a beautiful structure.
When you see uneven spray patterns, be patient. Changing the distance of your spray nozzle can greatly affect the quality. If it’s too close, you’ll get drips; if it’s too far, you’ll have overspray. Also, try different speeds and angles to gain better control over your strokes. Lastly, practice is important! Each project teaches you how to improve uneven sprays and achieve better consistency in the future.

