The Top 10 Best Body Paint For Body Art You Need to Try in 2024

Best Body Paint

As the world of body art continues to evolve and captivate audiences with its mesmerizing creations, finding the perfect body paint has never been more critical. In 2024, artists and enthusiasts are constantly looking for innovative products that can elevate their designs to new heights. From vibrant hues to long-lasting formulas, choosing the best body paint is essential for creating stunning masterpieces that leave a lasting impression.

In this article, we have curated a list of the top 10 body paints you need to try in 2024. Whether you’re a seasoned professional or a budding artist looking to experiment with new techniques, these carefully selected products offer unparalleled quality and performance. Get ready to unleash your creativity and transform your canvas into a work of art with these exceptional body paints that are sure to inspire and delight.

10 Best Body Paint To Use On Your Body

Feeling stuck in finding the best paint to use on your body? Here are the 10 best body paints that you can use for body art.

  1. Midnight Glo Black Light Paint UV Neon Face & Body Paint Glow Kit – Best for Overall Aesthetics
  2. Mehron Makeup Paradise Makeup AQ – Best Recommended by Celebrity Artists
  3. Snazaroo Classic Face and Body Paint – Best for Safe Application
  4. Neon Nights 8 x UV Body Paint Set | Black Light Glow Makeup Kit – Best for Families
  5. UV Glow Blacklight Face and Body Paint – Best for Ease of Apply
  6. CCBeauty Professional Face Body Paint Oil – Best for Versatility
  7. Madisi Body Paint Set – 12 Vivid Colors – Best for Convenience
  8. Zalan Zinc Stick – Colored Zinc Sticks for Face and Body Paint – Best for Color Variety
  9. TAG Face & Body Paint – Best for Wax Paint
  10. Custom Body Art 1-oz 8 Color Primary AirbrushWater Base Face-Body Paint Set – Best for Beginners

Who Needs This Product?

If you’re in the market for high-quality body paint for your next artistic endeavor, look no further than these top 10 picks for 2024. With vibrant colors, long-lasting formulas, and easy application, these body paints are a must-have for any professional or aspiring body artist. Whether you’re creating intricate designs for a photo shoot or preparing for a festival performance, having the right body paint can make all the difference.

Artists who prioritize quality and creativity in their work will appreciate the versatility and pigmentation of these top-rated body paints. From water-based options that provide a smooth finish to alcohol-activated paints that offer durability and smudge-proof results, there’s something for every type of body art enthusiast. Say goodbye to dull colors and unreliable products – elevate your artistry with one of these standout body paints and watch your creations come to life like never before.

What Readers Will Learn

This guide is your one-stop solution for any doubts you may have regarding body paint. Starting with some of the best body paints for body art followed by a complete buyer’s guide to ensure you are equipped with the right knowledge before dinging headfirst into the shopping. Lastly, you will get the answers to all your swarming questions to make this journey a no-brainer for you.

1.   Midnight Glo Black Light Paint UV Neon Face & Body Paint Glow Kit – Best for Overall Aesthetics

Midnight Glo Black Light Paint UV Neon Face & Body Paint Glow Kit (6 Bottles 0.75 oz. Each) - Blacklight Reactive Fluorescent Paint - Safe, Washable, Non-Toxic

These 6 bright Neon Dayglow Colors offer every color you may need to rock any party!

Whether you are going for a night out with your buddies, Halloween special day, or need to prepare for a costume, this set covers it all. Given that these body paints are neon, they give a cool effect in UV or backlights and vibrant, funny colors in the time. This is one of many reasons why this is non-toxic and easy to apply; it is the favorite of many artists out there.

Features

  • The premium quality texture glides smoothly on your skin to make creative designs with no effort whatsoever
  • The non-toxic and safe formula used dries quickly and can be washed with soap and water
  • Ideal for any kind of parties, festivals, and clubbing, they offer UV or backlighting

Reason To Buy

We all know that no product is perfect, but considering how body paint offers more good than bad compels many people to opt for it. It has a great base color that seamlessly blends into your skin and features a wide range of bright colors to suit your needs. Another thing that adds convenience to this body paint is that it can be applied to hair without damaging it in the long run. 

Reasons Not To Buy

Although the paint is easy to remove on the skin, you can expect to have trouble getting it off the fabric if you happen to stain your furniture or shirt with it. The manufacturers also warn that this body paint is not a “Glow in the Dark” product. You need to have some sort of UV light or backlight to see its cool effect.

Mehron Makeup Paradise Makeup AQ Face & Body Paint (1.4 oz) (Dark Pink)

Here are some of the celebrity makeup artist’s favorite best body paint that you see in sci-fiction movies. They are world-renowned and are water-based adding another work to its long list of benefits that it provides to its users. The pain is formatted with semi-soft, water-activated, and moisture-bold colors that help you transform anyone into a piece of art.

Mehron helps you exceed expectations by using high-quality equally safe materials with their pigmented industry-leading colors. Nowadays, you can see Mehron fans in Hollywood fashion shoes, photoshoots, movies, and theater. Some of the movies that were possible with Mehron are

  • Phantom of the Opera
  • Black Swan
  • The Lion King
  • Shrek the Musical
  • Cirque du Soleil

Along with many more who trust Mehron to create a theatrical-like result skin.

Features

  • Includes healthy ingredients like cocoa butter, avocado oil, Vitamin E, lemongrass, aloe, chamomile, and glycerin to make sure you never compromise your skin’s health for the sake of wearing this pain for one night
  • A wide range of colors, including 8 metallic shades
  • Easy to apply as its texture can cover full coverage without making it too frustrating whatsoever.

Reasons To Buy

His body paint is available in kaleidoscope colors and finishes to help you make an aesthetically appealing design without much struggle. It also offers full coverage to save time, and the water-based face and body makeup are safe to use for babies and adults.

Reasons Not To Buy

Although this paint has proven itself to be one of the best, there are a few drawbacks that make you reluctant to try it out. This includes the paint levels that leave the shade of color even after a few days.

3.   Snazaroo Classic Face and Body Paint – Best for Safe Application

Snazaroo Classic Face and Body Paint, 18ml, Pale Pink

Snazaroo is the paint you use on special occasions like Christmas, Halloween, or parties to amp up your ordinary looks. It is made up of the finest ingredients specially formulated to be fragrance-free and quick to remove from the skin.

Just like most water-based body paints, this one is friendly to delicate skin, so you can be assured of a safe journey with this, even if your skin is prone to allergies.

Each of the paints has been tested and reviewed by professors or dermatologists and toxicologists and is fully compliant with EU and FDA toy and cosmetic regulations to be paraben-free and non-toxic.

To make the best use of the product, simply add a few drops of water to the color you want, and use a sponge or brush to apply it smoothly over your skin. Once dried, you can easily wipe it off using soap and water.

Features

  • The paint is known for maximizing hygiene and QC standards to make it your go-to option for the best safe body paint.
  • With 54 colors and three textures, this Snazaroo face paint is for all those cosplayers, performers, and professional face painters to get the ever-needed satisfaction
  • Easy-to-remove features make it easier to apply it to your skin.

Reasons To Buy

Considering how this face paint is water-based, it is one toxic-free paint that artists vouch for. It is fragrance-free; this means neither do you have to risk your skin with harsh chemicals nor have to be embarrassed by the strong odor of body paints.

Reasons Not To Buy

According to a few customers who previously bought Snazaroo, the texture is too hard to get on your skin. You also may have to apply several layers of coat to get the best results. 

4.   Neon nights 8 x UV Body Paint Set | Black Light Glow Makeup Kit – Best for Families

neon nights 8 x UV Body Paint Set | Black Light Glow Makeup Kit | Fluorescent Face Paints for Music Festivals and Parties

This incredible body paint is a perfect accessory for parties and festivals where going bare skin is the most boring thing you could do. The 8 different bright glowing colors are suitable for teenagers, kids, and adults.

One of the things that make it stand above the rest is its revocable feature which makes sure to get it off your fabrics if you accidentally spill it on your precious party wear or furniture.

As this paint offers full coverage, it provides good value for money to last you for a long time. 

Features

  • The neon body paint even makes a mark during mornings for those afternoon bashes
  • Make sure your skin is perfect right after you remove the paint
  • Only glows in true backlight or UV lighting

Reasons To Buy

Being a customer myself, I can certainly say that paint comes right off with no struggle whatsoever. The durable paints stay on your skin throughout the party regardless of how rough you are with your skin.

Reasons Not To Buy

You may need to apply multiple layers to make the colors pop. This inevitably creases in your eye area or other parts sensitive to paint. Other than that, apparently, the tiny bottles are half full, which can make it a costly purchase.

5.   UV Glow Blacklight Face and Body Paint – Best for Ease of Apply

UV Glow Blacklight Face and Body Paint 0.34oz - Set of 6 Tubes - Neon Fluorescent

UV Glow Face & Body Paint is one of the most well-known body paint brands that go the extra mile to ensure you never need fluorescent glow under UV lighting at parties. The paints are easy to apply and dry quickly so that you can focus on rather important things for the night.

It has managed to satisfy most outfit customers by helping you make a masterpiece using its wide range of colors and textures to suit your needs. It meets all your requirements under the EU Cosmetics Directive to cut as if this wasn’t already enough.

Features

  • The paint is made using premium quality material to help it last long without damaging your skin
  • Ideal for clubbing and festivals
  • 6 Bright Neon Dayglow colors to glow whenever, wherever

Reasons To Buy

The paint is bright on your skin and removes easily wherever you are done with the part. You can instantly wipe off the spilled paint on any fabric using a microfiber cloth for added convenience.

Reasons Not To Buy

Although the color is durable, each has really fewer qualities to cover large areas of the body. This means you may need to spend some extra bucks to buy a few more than you need.

6.   CCBeauty Professional Face Body Paint Oil – Best for Versatility

CCbeauty Professional Face Body Paint Oil 12 Colors Halloween Art Party Fancy Makeup Palette Set with 10 Blue Brushes,Deep

The oil-based CCBeauty professional face paint is an oil-based paint that glides on your skin effortlessly and can be removed with a makeup remover or oil to break down the product. Considering how it is an oil-based paint, it may take time to dry, but you can rest assured to enjoy the endless awesome effects of your designs when it does.

This non-toxic application is a safe, superior cosmetic grade makeup that has undergone countless tests before offering it to you. However, if you work with clients daily, you should patch test before applying it to someone else’s skin.

One of the things that its customers love about CCBeauty is the large variety of colors that can perfectly blend to help you craft creative ideas in your mind. The fantastic pigmentation and coverage are ideal for crazy looks like themed parties, fancy dresses, and carnivals.

Many professional artists have been creating special effects using this thick and premium quality to create magic on screen for many years.

Features

  • Great for sensitive children’s skin on special occasions
  • You can easily mix and match colors to create your own colors
  • The oil-based factor gives a nice texture to it

Reasons To Buy

If you are afraid to put artificial paint that has the potential to damage your skin, this is your knight in shining armor. This outstanding paint is highly safe to use and is cruelty-free, which means it has not been tested on animals. A little application of this paint goes a long way to make custom and blendable colors.

It also fits your pockets just right and is super easy to clean for added convenience.

Reasons Not To Buy

As obvious as it sounds, considering how oil-based, it can be hard to remove unless you have a strong product like a makeup remover or any other oil-based liquid. It can also be difficult to apply, especially if you are a beginner.

7.   Madisi Body Paint Set – 12 Vivid Colors – Best for Convenience

Madisi Body Paint Set - 12 Vivid Colors, 12 ML Tubes

You can never go wrong with Madison Body Paint, especially when it comes to colors. It is completely safe to use not just for you but also for the environment. Bear in mind, the pants don’t dry out easily and may need a little water to apply a thin layer of coat on your skin.

The multipurpose properties can be used for a wide range of occasions to make your go-to favorite paint to make your occasions even more memorable.

Features

  • These paints are developed using a non-toxic formula to satisfy all your needs without breaking your bank
  • Excellent customer service was provided to resolve all your issues
  • Easy to apply and take off

Reasons To Buy

The beautiful colors of shades offer great value for money and beat any other product in the industry. You can feel free to choose any shade you prefer and make it a statement on all your fashion shows and parties.

Reasons Not To Buy

The only problem this paint has is that it doesn’t come with names or numbers of shades, making it difficult to remember and blend colors.

8.   Zalan Zinc Stick – Colored Zinc Sticks for Face and Body Paint – Best for Color Variety

Zalan Zinc Stick - Colored Zinc Sticks for Face and Body Paint - Set of 8

The washable face paint is skin-friendly and made up of nontoxic water-activated face paint that will help you create gorgeous designs on human skin. The manufacturers made sure to use it not to itch or irritate the skin, which is a common problem with many other paints.

The crayon face and body paint are twistable and don’t break easily to help it last for as long as you want.

It is specifically designed to keep families in mind and further elevate the fun at gatherings and parties.

Features

  • 10% Zinc Oxide is great for keeping your skin smooth after the paint
  • Each of the sticks can twist up to 2.5 inches
  • The 12 colors are enough to paint 100 faces for all sorts of festivals, sporting events, and music festivals
  • You can count on any gentle wipes or makeup remover to remove this water-resistant face and body paint.

Reasons To Buy

If you apply it with sunscreen or moisturizer before the paint, you can easily wipe off the paint and reveal beautiful skin underneath. It is mainly used for covering large surface areas for that crazy full-body art. This is one of the very few paints that artists never stop buying.

Reasons Not To Buy

Like most body paints, it smears on fabric, so it must be removed before hitting your bed. However, competitive prices always cover up these minor flaws.

9.   TAG Face & Body Paint – Best for Wax Paint

TAG Face & Body Paint - Regular Palette 12 x 10g

The TAG Face and Body Paint comes with 12 regular colors to help you create remarkable designs using a size 2 flat brush and seized 3 round brushes that come with this body paint. According to countless satisfied TAG customers, the paint doesn’t crack or peel to help you have a seamless blend on your skin.

It is hypoallergenic and made with skin-safe ingredients for a lighter feel. The brand manages to bring all these benefits using its wax-based coverage, ensuring your design doesn’t flex as you move your body throughout the occasion or party.

As this comes with a slightly creamier texture, you will only need less water to activate it than regular paint. The outstanding final result with vivid colors speaks for itself and eliminates all the cracking, which gives an overall unprofessional feel to the artwork.

Features:

  • During the day, the neon colors are colorful, but as you get to UV lights or backlights, you get to see them glowing in the dark.
  • Offers 5 different platelets with multiple shades, including regular, neon, pastel, pearl, and skin tone.
  • These paints are great for detailed work as it stick on your face perfectly without dripping whatsoever.

Reasons To Buy

If you struggle with getting the right application on your face that uplifts your face rather than making it too awkward, this one is your best bet to go.

Unlike most parts with a pungent metallic smell, these paints have a subtle sweet scent to make them ideal for wearing in crowds. The affordable price is excellent for its vibrant colors as they have great aesthetic value but have a smooth application to fill in all the lines on the face.

Reasons Not To Buy

The application process can be difficult if you don’t have much experience with body paints before. Another thing worth mentioning is that although the manufacturer claims it to be hypoallergenic, a few cases of allergies are associated with this paint.

10. Custom Body Art 1-oz 8 Color Primary AirbrushWater Base Face-Body Paint Set – Best for Beginners

Custom Body Art 1-oz 8 Color Primary AirbrushWater Base Face-Body Paint Set

The FDA-compliant and nontoxic application easily washes off your skin to leave it buttery soft at the end of the day. You can paint your whole body and not break a sweat while removing it. Yes, you read that right. This is possible with Custom Body Art 1-oz 8 Color Primary AirbrushWater Based Face-Body Paint Set.

The large selection of brilliant colors offers 8 primaries, 8 secondary, 8 pearlescent, and 4 neon colors to do the trick for you. This is a single purchase where you will enjoy all the benefits of high-end body paint to use on your body.

All in all, think about a common problem that body paints have and rest assured that this paint has the issue for them all!

Features

  • Excellent choice especially if you prefer to be in control of your artwork
  • Beginner-friendly as it is easy to use
  • It takes only a few minutes to dry

Reasons To Buy

This airbrush pant is an excellent chase if you are just starting with a body painting journey. It comes off right after you use an oil-based product or water to break down the product. Besides that, none of the products in this guide have a color variety as wide as this paint set.

Reasons Not To Buy

To be honest, here, the paint takes a considerable amount of time to dry. This means you may have to wait for a long time before touching or even sweating with this particular paint. It can easily cover the fine lines on your face to get a nice smooth overall look. According to a few customers, the paint stinks.

Best Body Paint Buying Guide

Now that you are aware of the best body paints available in the market, it’s time you weigh all the best options before you spend your time and money on them. Remember, unlike tattoos, body paint is temporary. This means it requires constant retouching and a more creative design that can make or break your party looks.

Therefore, it is essential you know the factors that make a perfect body paint to suit your needs.

Water-Based Body Paint

When you go out there in search of body paint, you get exposed to countless textures and paint types that come with their own set of perks and cons. Due to the advancements to paint materials, water-based paints offer the most non-allergic and safe products.

They are beginner-friendly and are the easiest to wash off after a full-body artwork. You can easily apply them using synthetic sponges, neutral sea sponges, or airbrushes of your choice.

However, with these benefits, you may also experience a few drawbacks so it’s important to make an educated decision. Considering how these paints are easy to wash off, you may need constant touch-ups throughout the party if you need the same polished look during your parties or photoshoots.

Depending on the weather, water-based paints are also prone to cracking or melting if you sweat a lot in those areas.

For some brands, coverage is also an issue. It will not spread across your entire skin evenly unless you apply several coats. On the brighter side, as they dry out quickly, having multiple coats is not a problem.

In a nutshell, water paints should be a priority if you are just starting with body paints that are not only easy to apply but are also relatively cheaper to buy.

Container Size

Before you go headfirst to buy body paint, take a step back and think about all the work you need to do with your body art. If it is just faces painted for a few parties, container size shouldn’t be a big problem. However, if you are covering a large surface area, you may need to go for 20g or larger container sizes, making a bang for your buck.

Remember, an ideal body paint should go a long wait without charging you a lot for it since it can be used more frequently than normal. Would these paints cost more than normal?

Yes and no. Depending on which brand, paint type, and features it offers, you can expect the price to go up to $$, and it’s worth it.

Quality

When you get to avail countless brands on the web, you must learn to distinguish good brands from bad ones. Therefore, it is recommended to stay away from odd brands that follow the formulas from the past. You can also count on customers’ reviews to get honest insights into the paint.

Frequently Asked Questions (FAQ)

Do You Have To Prepare Your Skin For Body Paint?

Preparing your skin for body paint is key to not only having a comfortable experience during parties and festivals but also making it easier to remove it right off once you are done for the day too. To do this, start with well-exfoliated and moisturized skin with a thin coat of sunscreen for added protection. If you only focus on face paint, it is recommended to carry out a full skincare routine so you have an extra layer of barrier protecting your skin from paint.

What Is The Reason Behind Body Paint Cracking?

Body Paint cracks mainly because of faults in the application process. Some of them include excessive hardener use, thick coats, too long between undercoats, and poor paint textures.

Does Body Paint Wash Off?

This answer isn’t as easy as you may think. Whether the body paint washes off properly or not depends on which paint you use as mentioned earlier, water paints are the easiest to get rid of. Therefore, if paint removal is your concern, modern-day water-based ones are non-toxic and can easily break down with gentle soap and water.

However, it’s best to thoroughly cleanse your face with an oil-based product or any other makeup remover to prevent breakouts.

How Long Does Body Paint Last?

Oil-based paints are likely to last longer than any other type of paint. They can last for up to one whole day but can be a little difficult to remove. Other types of body paint like henna tattoos or “Mehndi” can last for around 2 weeks. When buying, try to refer to the product description for the best estimate for the paint.

Is It Harmful To Paint Your Entire Body?

Although these paints are typically safe and tested, you should avoid covering your whole body for long periods. This is because as body paints block your pores, it runs the risk of heatstroke by preventing you from sweating and or even breaking out. However, it is wonderful if it’s for a 2 to 3-hour body photoshoot.

Conclusion

To sum up, body painting isn’t an ordinary hobby that one could practice; it is a form of self-expression. You could be wearing a basic outfit and amp up the whole look using creative body art. However, one wrong paint and your hours of practice in maligning that masterpiece can go to waste.

Make sure you don’t make that mistake and be well informed of all the nitty-gritty of body paints to make the best decision.

Top 7 Best Paint Rollers for Walls

Best Paint Rollers for Walls

A good paint roller can greatly simplify the job of painting the walls and therefore it’s important to look for the best paint rollers for walls.

However, before you choose a roller, it is also a good idea to learn about the different types of rollers for walls available on the market. In addition, you should know about the fiber type of paint roller to use on your walls for best results depending on the texture of your wall and the finish you have in mind.

In this article, we will not only look at the top products in this category but also discuss how to choose the best paint roller for painting your walls and how to achieve a better finish with your chosen roller.

I have also written a section on the different types of paint rollers available out there. Out of which manual and electric paint rollers are recommended for painting the walls and ceiling. Nevertheless, it’s a good idea to look at all available options and choose one according to your needs.

Best Paint Rollers for Walls

If you want to know why a roller is better than a brush when it comes to painting the walls and ceilings as well as choose the best roller available on the market according to your needs and budget, keep reading on.

So, without wasting further time, let’s get started with this guide.

What Makes a Good Paint Roller?

Painting walls is not everyone’s cup of tea. Understanding the basics of this job will help you achieve the desired results. More often than not, if the result reflects more streaking and ugly patterns than a smooth coverage, the culprit is the wrong roller cover.

Paint rollers are recommended for painting walls to make the job easier and faster. However, if you don’t choose the right roller cover, you will end up messing with your walls.

Whether it’s simply a touch-up or a complete project, oil-based or water-based paint, rough surface, or smooth surface, you are going to need professional-grade roller covers.

A good paint roller cover is one that;

  • Does not shed
  • Is easy to use
  • Offers smooth application of paint
  • Offers quality finish with no cracking, streaking, and bubbles
  • Provides value for your money
  • Is affordable
  • Is reusable

Some people may be interested in only a few of these options – not all. For example, affordability may not be your top priority but a high-quality finish may be. So, find out which roller cover works best for you by following our guide and also by looking at the products we have reviewed in this post.

Wooster offers a way to find the perfect roller for your walls by specifying the type of paint you’re using, the sheen it offers from flat, satin, or gloss, and the surface you’re painting from rough to very smooth. They also ask if you’re interested more in fast results or quality of finish.   

Roller vs. Brush – Why is a Roller Better Than a Brush?

So, you have decided to paint your walls a fresher look. The first thing that comes to mind when we want to paint the walls is whether to use a roller or a brush. Using a roller for painting the walls has a lot of advantages over painting with a brush. Not only does it save time but is also quite economical.

Moreover, if we look at the results, we see that a good-quality roller offers a much better and smoother finish than a brush especially when you know how to use it properly.

A roller provides uniform coats, particularly if you use a foam roller cover on smooth walls. In addition, an entire area can be done within a few hours as compared to a brush that might take 2 to 3 days for the same area.

There are roller covers out there designed to hold much more paint than you would anticipate. These covers make the job of painting walls much easier and simpler. You can use a thick nap roller made from a highly absorbent material to paint textured walls.

Another advantage of using a paint roller is that it is designed for everyone. On the other hand, paintbrushes are meant only for experts or professionals. Seasoned painters know a lot of hacks to create smoother finishes using paintbrushes. But when it comes to a DIYer, it is not as easy as it sounds.

So, if you have decided to paint the walls yourself, the best tool to use is a paint roller. To achieve professional results, you need a roller cover that has been designed for a specific type of job. However, it is recommended to get a paintbrush as well for painting the corners and edging especially if you want to achieve a smooth finish.

How to Get a Smooth Finish On Your Wall?

Nobody wants or expects a rough and bumpy finish when they paint their walls after choosing the products and tools carefully. Although the choice of paint and roller covers plays an important role in determining the final look of your walls, it’s not the only thing that matters.

A rough and low-quality finish is usually a result of not enough preparation on your part. Remember, if there are holes and cracks, they need to be filled up. Remove all wallpapers as well as their adhesive backing and residue and the old paint peel.

Finally, clean the surface with a damp cloth and allow it to dry completely before you apply paint or primer. A primer application is required when you want the topcoat to stay. This is an important step that most people overlook but it contributes a lot to the final look of your walls.

Use the proper tools required for priming the walls before you apply the paint. The same goes for the roller covers and the type of paint you choose. 

To get a smooth finish on your walls, you have to start painting the corners and edges with a brush and then use a roller. Check that the paint from the brush is still wet when you start using the roller. A wet edge ensures that there are no lap marks.

Apply the first coat by dipping the roller in the paint lavishly and then painting from top to bottom. Remember to roll up and down the full height and don’t let the old paint dry. It is recommended to paint an entire wall in one sitting.

Reload your roller often to make sure it’s never completely dry. Repeat the same for a second coat after the first one has dried. If you consider these instructions carefully, you will get a perfect, smooth finish just like professional painters.     

Different Types of Paint Rollers and Their Uses

Paint rollers for walls come in several forms and sizes. Although they are all designed for a specific job or purpose, it makes it all the more difficult to choose the right one among them. If you don’t do some research beforehand, you will end up buying the wrong roller.

Imagine redoing the entire paint job for your walls if you use the wrong roller! So, why not do some research beforehand and find the most suitable paint roller rather than wasting money on multiple rollers?

Here is a list of the most common rollers available on the market.

1. Manual Paint Rollers

These rollers are perfect for painting walls and ceilings because they come with extended handles and the cover can be replaced easily. You can even paint the ceilings with a long-handle manual roller without the need for a ladder.

However, you will experience a lot of paint drips especially if you are a beginner and haven’t used a paint roller before. This problem can be rectified by choosing a roller cover designed for beginners.   

2. Pad Paint Rollers

Pad rollers are recommended when you want to paint trims and edges. These rollers come with a flat pad for painting, which is made of highly absorbent material. Since the roller is flat and not round, for the circular motion there are wheels along the edges of these rollers.

These rollers produce very high-quality results as there is no splattered or dripped paint. Beginners may use these rollers because they are quite simple to use and also produce excellent results.  

3. Textured Rollers

These rollers are designed to impart a specific texture onto the walls. If you want to create an artificial finish, that is easy to apply, you can use one of these rollers. Look at the variety of textures they offer ranging from wood, grain, tile, and other patterns.

These rollers are usually made of foam because it’s easier to etch a pattern into them. You can use a textured roller for painting a wall or ceiling.

4. Mini Hot Dog Rollers

These rollers are very small in size and shaped like a hot dog. They are meant for painting specialized surfaces like tabletops and areas that are difficult to reach with other types of rollers.

You can also use mini hot dog rollers to paint edges and trims. However, you will have to use them very carefully as there is a high chance of splatters and drips especially if you apply a lot of paint.

5. Electric Paint Rollers

Also known as a powered roller, an electric paint roller will pull paint directly from the gallon making the job easier and faster for you. This is an innovative product that doesn’t require the use of manual trays and rollers that sometimes produce a lot of splatter and uneven results.

Electric paint rollers are portable devices that can be conveniently moved from one place to the other. They come with a hose, as long as 16 feet, to help you paint walls and ceilings without any trouble.  

6. Specialty Rollers

If you want to use textured paint, such as suede or stone, it will require a specialty roller for proper application. These types of rollers are not commonly available but a manufacturer may offer them as an extension to their paint kit so that you can achieve your desired results.

Some specialty rollers are also designed to replicate a pattern on a wall just like wallpaper. These patterns are embossed on the rollers and can be used on different types of walls including fabric, paper, and wood.

So, these are the six basic types of paint rollers available out there. You can choose one according to your requirements and budget but keep in mind that specialty and textured roller covers are meant for specific jobs only. Moreover, you may need some extra skills to make them work.

Top 7 Best Paint Rollers for Walls

Brands like Precision Defined and Purdy to Wooster and Wagner Spraytech offer a huge variety of paint rollers for walls. They are designed for different purposes and the manufacturer mentions it on the cover the type of paint their product works best with.

These covers are compatible with cordless, electric, and manual paint rollers. However, you need to make sure that the size of the roller cover is well-matched with the frame.

Electric and smart paint rollers come in two standard sizes: 14-inch and 18-inch. Most roller covers are designed for manual rollers with a size of 9 inches. It will be difficult to find compatible covers if you decide to use power rollers.

Moreover, when using electric rollers, you need to replace the roller covers quite frequently. Ironically, this step makes the job more expensive and also takes longer than expected. The experts suggest that a power paint roller can help you save just about 10-20 minutes of the total time it takes to paint an entire room.

So, power paint rollers may not be for everyone. Keeping that in view, we have shortlisted here the best paint rollers for walls that most people recommend. Some of these are good for beginners, while others produce great results. And there are still others that come at an affordable cost.    

Here’s our review of the top 7 best paint rollers for walls to help you make a wise and informed decision.

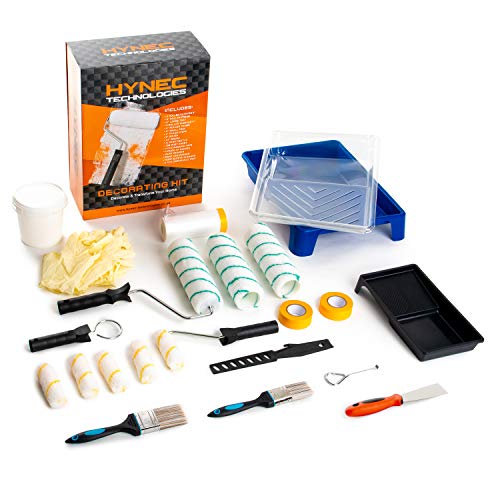
1. Hynec Technologies All in One Paint Roller Set – Best for Quality

All in One Paint Roller Set - Paint Rollers for Walls and Ceilings, Paint Pads, Paint Tray, Mini Rollers for Painting, Paint Sleeves, Paint Supplies Roller Sets for Painting Decorating Walls and Home
Check Latest Price

If you are looking for affordable yet high-quality mini rollers, paint pads, roller sets, and everything else needed for a complete renovation, look no further. This product has received a good number of positive reviews from customers owing to its durable materials.

The kit comes with a 9” roller brush and tray as well as a 4” roller brush with its tray. You also get two small paintbrushes to finish off the job neatly. Several accessories are also included to make the painting job easy for you.

The paint rollers offer a smooth finish and are therefore perfect for painting walls. If you want the job to be done quickly with very little mess, choose this kit. Some other features make this choice a preferred one, especially for beginner DIYers and hobbyists.

What We Like

  • Reasonably priced
  • Easy to use
  • Soft and absorbent material
  • Several accessories included

What We Don’t Like

  • Paint sleeves have been reported to be low-quality

2. NANJA Foam Paint Roller Kit – Best for Painting Difficult Areas

Foam Paint Roller Kit -Small Paint Tray Set with High-Density Foam Mini Roller Refills, Roller Frame, Paint Tray, 4" Microfiber Roller Covers, House Painting Roller Brush(12-Pack)
Check Latest Price

These 4” paint rollers are designed to give your walls a professional look. Made from high-quality microfiber, they are quite absorbent and you don’t need to reload them with paint very frequently.

These rollers are known for their quality as they don’t shed or drip. If you plan on using a glossy paint finish, these rollers will be best suited for the job. They are also suitable for achieving a flat finish. The kit includes 5 foam rollers and 5 microfiber rollers for painting different types of surfaces. 

NANJA microfiber rollers are suitable for both oil and water-based paints. On the other hand, foam rollers are best for water-based paints only. The kit is perfect for touching up large areas where brushes won’t work.

What We Like

  • The nap is of ideal thickness for walls
  • Clean-up is easy
  • The fiber absorbs a good amount of paint
  • Offer good value for money

What We Don’t Like

  • It’s not possible to add an extension handle to paint high areas

3. Purdy 14-inch Wire Mini Roller System – Best for Smooth and Rough Surfaces

Purdy 140765014 14 inch Wire Mini Roller System White Dove, 6-1/2 inch by 3/8 inch nap
Check Latest Price

Purdy is known for the quality of its products and this one’s no different. It’s not only affordable but has also received many positive reviews. The company calls these rollers the most “lint-free” rollers on the market and it’s not a lie. These rollers will not drop links as you paint your walls, which is one of the most desirable features.

These rollers are ideal for any type of project and any texture of walls. People have found them to be great even on semi-rough and rough-textured walls. However, if you are not experienced with using rollers, don’t use them on rough walls, otherwise, they might start shredding apart.   

One thing that some users may not like is its small size. People prefer a larger size or a standard one so the job can be done quickly.

What We Like

  • A long handle is very convenient  
  • Offer even paint coverage
  • Good for flat and rough surfaces
  • Compatible with latex and oil-based paints

What We Don’t Like

  • May not be suitable for beginners
  • The size is less than the standard 10-inch

4. SANDEGOO 6 Feet Paint Roller Brush Kit – Best for Women Painters

6FT Paint Roller Brush kit, Multi-Function Paint Roller kit with House Paint Roller Brush 6 FT Stainless Steel Pole New Splicing Rod Mural Brush for Walls and Ceiling (White)
Check Latest Price

This kit is good for both beginner and women painters. Painting large areas seems like an easy task with these rollers even if you’re doing it for the first time. The rollers offer nice even paint coverage with no dripping.

Although it is advertised as being reusable, most people have criticized that it is not easy to clean. So, you will have to get rid of it once the paint job is done.

These rollers eliminate the need for a ladder when you have to paint your walls as they come with 4-6 feet long extendible handles. That is why they are perfect for women painters as well because they won’t need a chair or ladder to paint difficult-to-reach areas.

What We Like

  • Comes in 4-feet and 6-feet varieties
  • Easily washable
  • Reusable for future projects
  • Gives a professional smooth finish to the walls

What We Don’t Like

  • May create undesirable streaks of paint

5. Bates 4-inch Paint Rollers – Best for Smooth and Semi-Smooth Surfaces

Bates- Paint Rollers, 4 inch Paint Roller with 10 Covers, Small Paint Roller, Paint Rollers for Painting Walls, Mini Rollers for Painting, Paint Roller Small, Paint Roller Frame, Wall Painting Tools
Check Latest Price

If you are looking for a pack of microfiber roller covers that are compatible with almost all paint rollers, look no further. These rollers are durable, easy to clean, and long-lasting. They have been designed to be used with all types of paints and stains.

Microfiber cloth is quite absorbent and these roller covers are recommended for projects when you want to use high-gloss paint. They are not recommended for rough and semi-rough surfaces though.

The good thing about these roller covers is that you can return them to the manufacturer if you face any issues while using them. Moreover, they can be used with all latex and oil-based paints.

What We Like

  • Best for light or medium textured surfaces
  • Absorbent material
  • Economical choice
  • Less splatter and no lint

What We Don’t Like

  • The size is not perfect for walls but is easy to use

6. Pro Grade Paint Roller Tool Kit – Best for Price 

Pro Grade - Paint Roller Tool Kit - 10 Piece Painting Set - Mini Plastic Paint Tray Set, Mini Roller Frame,Microfiber Roller Covers
Check Latest Price

Microfiber roller covers are increasingly becoming popular among the DIY community. The reason behind their popularity is their ability to be used with all types of paints. Whether you want to use enamel, urethane, varnish, or primers, these roller covers will be suitable for all jobs.

Although they are recommended for painting doors and cabinets, you can use them to paint your walls especially if the area to cover is small. However, one downside is that, although reusable, they won’t last a long time and you will have to replace them.

The great thing about microfiber rollers is that they are very absorbent. Nevertheless, they will work best only on smooth surfaces. Since they glide effortlessly over a smooth surface, even newbies can use them without any worry.

What We Like

  • Can be used with water-based and emulsion paints
  • Comes with a money-back guarantee
  • Quite affordable
  • Reusable

What We Don’t Like

  • There is a paint splash to deal with
  • May not be suitable when you have to paint huge areas

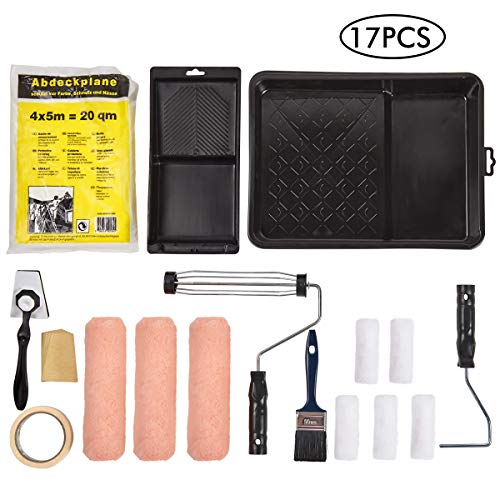
7. PILOT FISH 17-Piece Paint Roller Set – Best for Ease of Use

PILOT FISH 17 Pieces Paint Roller Set, 9 Inch 4 Inch Roller Set with Frames, Roller Paint Brush Tray Kit, Home Painting Supplies, Interior Paint Roller Brushes, Painting Tools for Indoor Painting
Check Latest Price

Polyester roller covers are excellent for beginners DIYers and professional painters alike. They are super easy to clean and once dry, they can be reused. They are designed to offer a smooth finish on flat surfaces.

You should know that polyester rollers work best on smooth and semi-smooth surfaces only. If you try to use them on rough surfaces, they won’t give the desired results. It is also advisable to clean and dry the surface before you apply paint on it using one of these foam roller covers.

The kit includes everything you need to paint the walls professionally. The accessories include a heavy-duty paint tray with the capacity to hold extra paint.

What We Like

  • Very easy to use
  • The kit includes small and large rollers
  • Professional results
  • Work with all types of paints

What We Don’t Like

  • Tend to slide off the wand

How to Choose the Best Paint Rollers for Walls?

Here is a step-by-step guide for you to choose the best paint roller according to the nature of your job.

Step #1 – Know the surface you’re painting

To determine the nap (the thickness of the roller cover) as well as the material, you first have to see the texture of the surface you’re about to paint. Is it a rough surface, a smooth one, or something in between?

Usually, the surface of walls is divided into four categories: very smooth, smooth, rough, and very rough. Find out which category your wall belongs to and then make an informed decision regarding the paint roller cover.  

If you buy the wrong roller cover not suitable for the type of surface you’re painting, you will never get the desired results.   

Microfiber rollers are recommended for textured walls. For smooth and semi-smooth surfaces, the experts advise using foam roller covers. Flat walls usually require a short pile roller and you can choose any material in this case.

Step #2 – Choose the right paint roller frame size

There are three standard paint roller frame sizes. And these are 4-inch, 9-inch, and 18-inch. For larger areas like walls and ceilings, large rollers are preferred. A 4-inch roller is usually ideal for painting doors and furniture.

These sizes are for manual paint rollers only. For electric or powered rollers, only two varieties are available: 14-inch and 18-inch.

If you are just touching up the walls for a smoother look and feel, even a 4-inch roller will do. But for larger areas to cover and to paint them quickly, large paint rollers are recommended. A 9-inch roller cover is considered the best choice for walls.

Step #3 – Choose the right paint roller nap

Paint roller covers come in varying thicknesses, materials, and colors. The absorbent material that covers the tube is made of woven or knotted materials, such as polyester and foam. Some roller covers are also made of wool and microfiber. The thicker the material, the more paint it will absorb.

Thick paint roller covers are recommended for rough surfaces and they are ¾” in thickness. Medium nap rollers, which are 3/8” in thickness are recommended for ceilings and drywall. For walls, the experts recommend using small nap rollers, which are ¼” in thickness.  

Step #4 – Consider the material of the roller cover

To decide on the material of the roller cover, you not only have to consider the surface you’re painting but also the type of paint you plan on using. Some people want to use glossy paint, which comes with a very high sheen.

To avoid showing more lint from the roller, it is advisable to use a cover that is shed-resistant. Woven roller covers usually offer the best lint-free finish. 

Flat and satin finish paints are best used with knit roller covers. However, woven covers are also good for these types of paints. If you plan on using varnish or enamel, go for foam and microfiber roller covers.

Almost all roller cover manufacturers offer different varieties of covers meant for different purposes. So, choose a product carefully and don’t forget to read the instructions on the cover, especially the type of paint it is recommended for.

Final Thoughts on Choosing the Best Paint Rollers for Walls

So, this was our roundup review of the top 7 best paint rollers for walls recommended by the experts for painting walls. We chose all types of materials from microfiber and polyester to foam roller covers so you can choose a product based on your painting needs as well as budget.

They are all recommended for different types of finishes and results and therefore you can now easily make an informed choice. Make sure you read the step-by-step guide to choosing the best roller cover before finalizing a product because that will help you narrow down your choices and arrive at a reasonable choice.  

If you want to paint your walls the professional way, you have to get yourself the right tools for the job. A paint roller can make the job easier especially if you choose the right brand and the right size. Paint rollers are affordable tools but choosing the right one will ensure that the result is just as expected.

Choose the one that seems right according to the budget you have set and other factors. Don’t forget to look at the pros and cons so you make an informed decision that will go a long way. All the best! 

Best Paint Rollers for Ceilings To Learn various techniques

Best Paint Rollers For Ceilings

Want to buy a paint roller to make your ceilings attractive? Among too many options, it is hard to pick the best one. Check out our 4 best paint rollers for ceilings.

On large surfaces, painting is a challenging task. Especially when it is about to paint on the ceiling, homeowners become too worried. Also, even many professionals couldn’t give it a perfectly smooth look when dealing with a vast surface. Please read our reviews and tips about the 4 best paint rollers for ceilings to get excellent guidance.

Paint rollers are an amazing tool for painting projects, including ceilings. Though professionals know different rollers very well, it is also possible to paint ceilings by yourself. Most of the painting projects ruin because of the wrong paint rollers. So it is quite necessary to pick out a quality roller at first. Even you can paint your ceilings like a professional if you have the right paint roller.

Best Paint Rollers For Ceilings

You can find out thousands of models and brands of paint rollers. Each roller has a specification about its usage. Here we present a prominent description of the top four products of the Wagner brand. Again, for an effective result, we’ll also give you various wholesome techniques and methods. So, go through and learn more about paint rollers!

What Are the Different Types of Paint Rollers for Ceilings?

A paint roller is an essential tool for making your walls and ceilings attractive. Ceilings become quite annoying to paint with the wrong paint roller. As ceilings are a large surface and situate above, it needs different paint rollers to paint perfectly. You can find out a variety of rollers in the market. However, all those are not suitable for painting ceilings.

There are almost ten types of paint rollers available in the industry. Among them, only a few can paint ceilings meticulously. Moreover, roller length is also a significant thing to consider. Almost 8 ft longer roller with handles and extension pole is perfect for painting ceilings. Long paint rollers with an extension pole or handle give more flexibility while working.

Besides rollers, roller covers also play a vital role in painting. Thick nap roller covers are the best for ceilings. You can use 1/2″, 1/4″, 3/8″ nap rollers for your roofs. These types of naps prevent paint dripping issues. Again, long roller covers are more favorable for a large surface. The roller cover length should be long as you have to work on a vast surface. There are four types of rollers that are ideal for ceilings.

Manual roller:

Manual rollers are the traditional version of paint rollers. These are typically used for ceilings and large surfaces like drywall. Its large area coverage feature is used to consider an ideal roller for ceilings. However, this roller feed paint too much. That’s why it creates dripping and spattering issues while painting.

Textured roller:

If you want to paint your ceiling with an eye-catching texture or print, these rollers are for you. A textured roller applies paint by following a specific texture or pattern. A foam nap cover uses with this roller. You can get an amazing artificial finishing touch on your ceiling surface with this roller.

Thick nap roller:

Generally, 3/4″ and 3/8″ nap covers consider thick nap rollers. These rollers are helpful with heavy paint that can feed more paint. The biggest advantage of this roller is its thickness. It can contain more paint but never drip or splatter.

Long roller:

The 9″ length rollers are familiar with a long roller. Long rollers can cover more area while painting, whereas a normal roller can’t. Again, this roller can become a time saver for you for its extended surface coverage. That’s why long rollers are always on our suggestion list for painting on ceilings.

Which roller cover is the best for ceilings?

To get an effective result, you have to choose the roller covers carefully. The roller cover gives the surface a smooth finish. It feeds paints and splatters the paint on the surface. Besides, there can remain cracks or shafts on the ceilings. A roller cover can also work on this issue.

These covers are made of different kinds of fibers and materials. Each roller cover has a specific advantage of using on other surfaces. Always try to choose the best quality roller covers for your ceilings.

Natural roller cover:

Natural roller covers are made with different natural fibers. These fibers are generally from lamb’s skin or other domestic animal skin. Again, these covers can give a soft texture a smooth touch on the surface. Moreover, it can contain more heavy paints to don’t have to worry about paint feeding. These types of roller covers are so easy to clean and store. However, natural roller covers are quite expensive than other covers. For a big-budget project, these roller covers are highly recommended!

Synthetic roller cover:

Nylon, polyester, or other artificial materials are the main ingredients of these roller covers. Synthetic roller covers are suitable for oil or water-based latex paints. Also, these covers can paint on both smooth and hard rough surfaces successfully. Moreover, for synthetic materials, these covers are durable and affordable to use. In short, you can call it an all-rounder roller cover for your interior decoration.

Microfiber roller cover:

Microfiber roller covers are just the same as traditional roller covers. However, these rollers have an extra coat of miniature contexture that makes the roller cover unique. Because of this texture, the microfiber roller cover becomes stable for so long. Again, a heat adhesive gives additional support to the body. Microfiber rollers have good sustainability in absorbing paint. For this reason, you don’t have to take the hassle of extra color dripping. To get a smooth surface, you can use it to give a final coating on your ceiling.

Foam roller cover:

You can get an idea about the roller cover by its name that foam is the main material of this roller cover. Foams are too good at absorbing liquids. After painting the ceiling completely, you can give a finishing touch with a foam roller cover. Besides, these roller covers can remove the extra paint from the surface. Light colors are good for this type of roller cover.

How to Paint With a Roller & Get a Smooth Finish?

You can paint your interior surfaces on your own like a professional if you have the right tools. After that, it turns to the painting method with a paint roller. For painting your surfaces like a pro, do follow our guidance below.

Necessary equipment:

The first and foremost thing that you have to do is collect the necessary equipment for the painting.

  • Face mask: For security caution, use a face mask while painting.
  • Hand gloves: Hand gloves are a necessary item for working with paint.
  • Dropcloth: It helps you to wipe spatter of paints.
  • Paint roller: Choose the best paint roller according to your project.
  • Paint Brush: Keep a paintbrush with you if necessary.
  • Paint spray: You should keep a paint spray to remove the roller marks after painting.
  • Paint tray: A paint tray needs for normal rollers. If you’re using a roller with a paint feeding tube, a paint tray is optional for you.
  • Paint stirrer: It needs when you mix the paint for painting.
  • Extension pole: Extension pole requires for ceiling or higher place projects.
  • Paint: Necessary paint that you want to apply to your surface.
  • Painter’s tape: For protecting the areas where you don’t want to apply paints.

Safety and security:

Wear your hand gloves and face mask before you start working. A face mask protects you from toxic smells and gases. Paints may have harmful chemicals that can harm your skin and health also. So, hand gloves keep your hand away from direct contact with the color.

Ready the paint:

Paint is a combination of pigments and other materials. Most of the time, paints remain mixed well for a few days after buying from the store. However, you need to stir the paint if you’re using the paint after so many days of purchasing. Then pour the paint in a pail. Always try to run the paint slowly as it creates bubbles.

Painting processes:

Step-1: Preparation

At first, remove the furniture and other things from the room and make the space fully empty. Cover all the areas with the painter’s tape that you don’t want to paint. Wrap the edges or corners with plastic sheets or adhesive tape. Try to keep off the fans and air conditions until the paint dries.

Step-2: Fill the roller with paint

Loading a roller with color may vary from roller to roller. Some rollers need a tray; some can automatically load and hold paint. This will depend on the roller’s feature. We suggest you choose the latest roller over the traditional one.

Step-3: Start rolling

After filling the roller, roll the paint roller on the surface from a specific direction. Embed the paint again before the area becomes dry. For a finishing touch, apply a second coat on the first coat. If you found any roller marks on the surface, use paint spray on these areas. You can also use a microfiber or foam roller cover for this job. Now let your work ground becomes fully dry!

How to Paint a Ceiling?

As ceilings are quite difficult to paint with a roller, we guide you to make it easier. Remember, with the right tools and proper planning, your ceilings project can succeed.

  • Make your room empty and cover the floor, corners, and edges with plastic sheets or tapes.
  • You need a paint roller, ladder, paintbrush, extension pole, and five-gallon of paint bucket for this project.
  • Use the paintbrush to paint the borders of the ceilings.
  • Now load the roller and start painting from an accurate direction.
  • Apply two-time coats of paint to make the ceiling perfect.
  • Always choose the thick and 9″ or 12″ length nap roller covers for ceilings. Also, rollers with extension poles and paint holder tubes are best for painting ceilings.

How to Clean a Paint Roller?

A paint roller will serve you for years if you store and clean it properly. After every use, you should clean the roller and dry it up with proper care.

  • First, detach the excess material from the roller cover. You can use a putty knife.
  • Put off the cover from the frame and clean it with a brush.
  • Take a bucket full of warm water and give some dishwashing liquid or cleaning agent. For latex or oil-based paints, use mineral spirits instead of the dishwasher. After that, drown the roller in water and rub it with your hand until it becomes fully clean.
  • Rinse the roller with clean, warm water and let it dry perfectly.
  • Store the roller with an extra cover or tapes.

Which Paint Roller Should I Use For ceilings?

Paint rollers have a specification according to the various projects. You should choose the right roller that matches your work demand.

For ceilings, you should use long and thick paint rollers. With extra pole system rollers, create more comfort while painting. You can use foam rollers to coat the last layer of the paint.

Our Considerable Top Picks The 4 Best Paint Rollers For Ceilings Review

1. Wagner Spraytech Sidekick Paint Roller: Best for large and multi-room projects

Wagner Spraytech 0530010 SMART Sidekick Paint Roller, Multi-Room Electric Powered Roller, Paint Power Roller, Power Paint Roller
Check Latest Price

Technical Features:

  • Manufacturer: Wagner Spraytech
  • Model Number: 0530010
  • Size: SMART SideKick
  • Product weight: 5.28 pounds
  • Item dimension: 6.38 × 13.09 × 9.3 inches

Direct-feed technology makes the roller a perfect fit for multi-rooms and residential projects. This smart sidekick roller can easily paint surfaces for various large and multi-room projects. With a long extension hose, you can reach the higher areas without effort. The roller is suitable for 32 ft work areas. You don’t need to carry any roller tray as it has a great technology of direct paint feeding. Again, you can connect the paint container or cans directly with the roller with a large extension hose.

A click attaches the arm with the roller that can fit with all types of containers and paint cans. An intake hose is available with this electric-powered roller. This intake hose is quite long to dive into the container and pull the paint. Moreover, the extension hose is 16 ft long as it allows you to work in the 32 ft workspaces.  Another fascinating feature of this roller is its 9″ × 3/8″ nap roller. Through this nap roller, the surfaces get more smooth painting.

On the handle point, there is a controller for direct paint feeding. Also, it has a hose strap to store the roller with its long hose anywhere, including in narrow places. Again, you will get a pulling adapter for pulling paints from a 5 gallon can or container. It is too easy to paint on two-story houses and ceilings with an extension pole. Without any extra paint-feeding hassle, this lightweight roller will save your time.

What we like:

  • Direct paint feeding technology.
  • Time-saving features.
  • Easy, portable, and safe.
  • Long extension pole and hose.
  • Perfect for one color in multi-room and ceiling projects.

What we don’t like:

  • Not suitable for single room painting.
  • It takes time to clean the roller properly.

2. Wagner Flow Paint Roller: Best for medium size projects

Wagner 0530004 SMART Flow Paint Roller, 22 Oz Handle Capacity Paint Roller, Paint Power Roller, Power Paint Roller, Wagner Paint Stick, Automatic Paint Roller
Check Latest Price

Technical Features:

  • Manufacturer: Wagner Spraytech
  • Model Number: 0530004
  • Size: SMART Flow Roller
  • Product weight: 1 pound
  • Item dimension: 46 × 12.5 × 4 inches

With this battery-powered roller, you can paint medium size projects like bedrooms, kitchens, etc, without any hassle as traditional ones. With a 22 oz paint holder, you can paint faster than a manual paint roller. Again, this extended paint holder can easily help you paint 8 feet ceiling. If you’re a medium-size project, you can choose this flow roller for your job. Besides, you can save time and effort in painting your house as it doesn’t need any manual paint filling. However, you can use it manually in versatile projects as well.

The roller runs through the battery power with four AA batteries. That’s why there is no need to connect directly with electrical cords while working. Moreover, the paint holder can contain sufficient paints in one fill for painting 70 square feet area. The roller cover can feed the color automatically for this paint holder can. Also, a 9″ × 3/8″ nap roller can give a finishing touch to the surface. This nap roller’s core cap is removable and renewable.

Within only six minutes, you can paint the 8′ × 8′ surfaces with less effort and hard work. It serves for painting projects without any roller tray and ladder. Oil and water-based latex coatings are quite suitable for this paint roller. The easy filling valve allows the paint to fill the cover can smoothly. There are two switches on the handle. One is to control the paint flow rate, and the other is manual control. You will get more comfort and flexibility with this smart flow roller.

What we like:

  • It works faster than a typical paint roller.
  • Battery-powered roller and easy to clean.
  • Can paint more surfaces within less time.
  • Innovative paint-feeding technology.         
  • Suitable for both automatic and manual modes.

What we don’t like:

  • It becomes a little bit heavier after loading paint.
  • Quite hard to reach in narrow edges and corners.

3. Wagner Spraytech HomeRight PaintStick Paint Roller: Best for overall

Wagner 284041 Paint Mate Plus Roller
Check Latest Price

Technical Features:

  • Manufacturer: Homeright
  • Model Number: 284041
  • Size: PaintStick EZ-Twist
  • Product weight: 2.59 pounds
  • Item dimension: 9.25 × 36 × 3 inches

This overall best pick paint roller can reach in too narrow places to draw your various home surfaces. It is an upgraded version of the original PaintStick roller. You can paint with it on the hard-to-reach areas with a twisted handle. The handle can expand about 64 inches according to your work basis. Also, this twisted version will allow you more to control paint flow. You can fill 18 oz paints in the paint holder at a single refill. Time-saving features give you more comfortable and relief for painting your house and ceilings. 

Most of the traditional rollers have a hassle with roller trays and paint-feeding. However, if you have this EZ-twisted roller, you won’t take tensions about that. With more compatibility with controlling the paint flow rate, you can fill and feed paint easily. Moreover, the paint handle tube is clear to understand the time of refill. Again, the fill tube clips are universal to fit any type of paint container. You can paint the 8’× 8′ wall within only one minute.

If you want a shed-covering roller cover, this one is perfect for you. The fibers of the roller cover never come out from the core. Besides, you can change the cover alternate with a 3/8″ or 3/4″ nap roller any time based on your demand. Again, there are various little holes in the nap that helps to absorb the paint faster. It is quite easier to paint on the hallways and stairways quickly for the long twisted handle.

What we like:

  • Long twisted handle to reach in difficult spaces.
  • More flexible and comfortable to control paint flow.
  • With a durable paint roller nap.
  • It prevents color dripping and mess.
  • Too easy to clean after using.

What we don’t like:

  • Need more roller-cover for big projects.
  • Not suitable for large projects.

4. Wagner Paint N’Roll Plus Paint Roller: Best for budget-friendly

Wagner 0284026 Paint N'Roll Plus, Paint Power Roller, Power Paint Roller, Wagner Paint Stick, Automatic Paint Roller
Check Latest Price

Technical Features:

  • Manufacturer: Wagner Spraytech
  • Model Number: 284026
  • Size: Paint N’Roll
  • Product weight: 1.24 pounds
  • Item dimension: 33 × 2.5 × 8 inches

In a budget-friendly way, this roller will give you more flexibility in your home painting. People who have a budget concern can choose the best budget roller for their project. With a splatter shield, this paint roller can paint without any drips and spots of the paint on the surface. You can hold stains inside the paint holder tube while working. Also, the line can contain up to 18 oz colors at a single time. You will get a perfect roller for your ceiling projects without spending too much money.

Moreover, this roller is reusable as you can use it repeatedly. The cleaning method is also easier than other paint rollers. There are loading valves in the tube. That’s why you can reload paints effortlessly thousands of times. A switch plunger is available to feed the roller cover within a click. By using a ladder, you can paint your ceilings, though there is no need to use ladders in most cases.

A 9″ × 3/8″ nap roller installs with the roller. You can use oil and water-based latex coating liquids with this nap roller. It provides a long-reach handle so that you don’t need to carry an extension pole or hose. You only need water and soaps for cleaning the whole paint roller. It gives you two times faster results than a traditional old paint roller.

What we like:

  • Easy to clean and rewash able.
  • With an affordable price serves more.
  • Too easy to reload the paint again and again.
  • No dripping and tray are messing.
  • Works on ceilings without any support.

What we don’t like:

  • Only suitable for a one-gallon paint container.
  • Need support to reach in narrow spaces.

Buyer’s Guide To Choosing the Best Paint Roller for Ceilings

It is quite normal to be worried for a newbie to choose the right paint roller. For buying the right one, there are many things to consider. Before buying, always try to understand the features of the roller and compare it with your project. We try to give here some notable things which are essential for choosing any paint roller.

1. Frame:

A paint roller has two parts- frame and roller cover. The roller frame holds the roller cover. Also, a roller frame should be sturdy, strong, and flexible. Also, long roller frames like 9″ or 12″ are best for ceilings, stairways, hallways. While purchasing, try to choose a long roller frame. You can buy the stand separately or with a roller cover. However, we recommend purchasing a roller frame separately. It allows you to choose a roller cover according to your needs.

2. Roller cover’s material:

There are different types of materials for roller covers. Each material has some advantages and drawbacks. Natural, synthetic, microfiber, and foam roller covers are popular. However, natural woolen roller covers are quite expensive to use. If you have a budget issue, synthetic or foam roller covers can become an all-rounder for you.

3. Roller cover’s nap:

A roller cover nap is the most significant thing for painting on any surface. Your painting quality much depends on the roller cover nap. On a smooth surface, use thinner naps for painting. On the other hand, thick naps are the best choice to paint for rough surfaces.

4. Roller cover’s length:

The roller cover’s length should belong according to your project. A long roller cover is efficient if you are doing a big project. Again, a small roller cover is perfect for narrow edges and corners, toilets, kitchens.

5. Paint feeding system:

Painting with a paint roller is a time-consuming job. However, it depends on the features and technologies of your roller. Traditional rollers need a paint tray to load and feed the paint. This job is quite annoying and time-consuming. Nowadays, there is a drastic change in the paint feeding system. Many rollers have direct-feed options and portable pain tubes. With the roller handle control; these rollers take less time than a traditional one.

Frequently Asked Questions (FAQs):

1. Do you need a special roller for painting ceilings?

Answer: Ceilings should paint in grid-like sections. In this method, you can know your work progress in coatings. For painting ceilings, medium and small nap cover rollers are best. Always use these nap rollers for ceilings to bring a smooth look.

2. How do you prevent roller marks when painting a ceiling?

Answer: Roller marks can ruin your ceiling projects. There are many techniques and tips for removing roller marks. Try to use a thicker roller nap and a flat paint sheen for painting ceilings. Always take less paint on the roller cover. Also, paint the roof in the opposite direction with a new coat. Lastly, if all the above tips become a failure, spray on the roller mark areas of the ceiling.

3. Why does my foam roller leave bubbles?

Answer: Foam rollers leave bubbles for many reasons. When it drives too rapidly, the additional air enters the film. Besides too glossy or semi-glossy paints, the wrong thickness of the naps can also create bubbles.

4. Does the quality of the paint roller matter?

Answer: Yes, it is. A paint roller can paint faster than a painting brush and create fewer mix-ups than painting sprays. However, there remains combat with the quality of a paint roller. Best quality rollers will serve you the best service. You can work smoothly with the roller and roller covers. On the other hand, low-quality rollers can skip and leave marks on your surface. Also, bad nap covers can ruin your paintings as well.

5.  Should you get a foam roller before painting?

Answer: Before painting, it is unnecessary to wet the foam roller with water. If your roller soaks fully with water, it can’t absorb the paint. Again, a too dry roller is not suitable for drinking paint. So, use a damp roller but not fully saturated with water.

Final Thoughts:

Paint rollers are the most common and easier way to paint ceilings than other options. Though this option is a little time-consuming, it results significantly. You have to choose the right roller cover for your project. Otherwise, it is possible to ruin your projects before starting.

Among the four best paint rollers for ceilings, we like to suggest you the Spraytech and Flow roller for your roofs and another big project. PaintStick and N’Roll rollers are more suitable for walls and cabinets.

Top 8 Best Paint for Kitchen Cabinets – A Buyer’s Guide In 2024

Best Paint For Kitchen Cabinets

Are you planning to renovate your kitchen and give it a whole new look? Then you must be on the lookout for the best paint for kitchen cabinets as cabinets are the essence of any kitchen – modern or traditional.


Finding the right paint can sometimes be a bit tricky, especially when there are quite a number of options to choose from. You might be in need of a paint that is durable, shiny, and available in many colors, but what other factors must you consider?


The kitchen cabinet experts tell us that the best paint for kitchen cabinets is one that offers a semi-gloss or satin finish. Moreover, it should be able to reflect light and should also be washable.


It is also recommended to use acrylic paint instead of vinyl for painting kitchen cabinets. This is because acrylic latex-based paint is not only washable but it also quite durable and long-lasting. So, there you go.


If you are ready to discover some of the top-rated paints available on the market in this category, keep reading on. In this article, you will learn why it is important to paint your cupboards, and what types of paints are available to choose from.


So, let’s get started.

Best Paint For Kitchen Cabinets

What do You need to Know Before Painting Cabinets?

Kitchen cabinets come in many different materials. It is usually easy and straightforward to paint wooden and metallic cabinets without having to worry about the results. However, plastic laminate cabinets may not be that simple to paint.

If you have plastic laminate cabinets, it is recommended that you took the advice of a professional paint dealer. This is because different paints have different results on these types of cabinets. So, it would be better to first test a sample of the paint and then decide depending on its result.

Let’s look at some of the pre-requisites of painting kitchen cabinets.

1. Clean and Prep the Cabinets

It’s not possible to just start painting your cabinets as it is. Your existing cabinets must be in a good condition overall to respond properly to any kind of paint you plan on using. So, first of all, check the existing paint and see if it needs to be brushed off using an abrasive pad. And finally, use a vacuum cleaner to eliminate dust particles completely.

2. Choose the Right Paint

There is a huge variety of paints available on the market. From acrylic milk paint and enamel-based paint to chalk and velvet finishes, the choices are quite diverse. To choose the right paint, you need to take into account the material your cabinets are made of, and the finish you have in mind.

Choose acrylic over vinyl and make sure you follow the instructions on the can regarding cure time especially when it comes to using latex paints. We have a complete section on how to choose the right paint for your cabinets because this requires further elaboration, so keep reading on.  

3. Keep Your Expectations Realistic

Before you choose to paint or start painting your kitchen cabinets, it is highly recommended that you check the condition of your cabinets. If they are outrageously damaged or chipped, applying paint on them is not going to do any good.

Also, keep in mind that it’s not going to be a one-day job or something you can achieve quickly or without any hassle. Keep your expectations realistic so the results would match with them and not with the images you drool over every day on Pinterest and Instagram.   

4. Use a Primer

Make sure you use a primer before applying paint to your kitchen cabinets. Not only will it cover the imperfections but will also provide a suitable surface to accept the paint more readily and make it stick. Once the primer dries off, you can sand the surfaces that are flat.

A primer particularly offers a good base for water-based paint with a semi-gloss finish. Never go for a cheap or low-quality primer-sealer just to save money because this is an important step and you cannot expect to have perfectly painted cabinets without priming them first.  

5. Set Up a Temporary Kitchen    

And last but not least, you need to have a makeshift kitchen ready for use when you start painting your kitchen cabinets. This is because the process might take longer than you expect, particularly if you’re doing it for the first time. And therefore, you need an adjacent room to use as a temporary kitchen till you’re done.

Different Types of Kitchen Cupboard Paints

We thought this topic requires a complete section so here it is. Choosing the most suitable paint for your cabinets is important to achieve the desired results. So, here are a few suggestions including tips and tricks to make the job easier for you.   

Alkyd Enamel Paint

The kitchen cabinet experts recommend using Alkyd enamel paint, which is water-based and offers all the benefits of an oil-based paint with extra features and durability. But it is advisable to use a primer first if you plan on using this type of paint. If you have unfinished wooden cabinets, use a primer-sealer that blocks wood tannins.

When using Alkyd paint, there is no need for a topcoat. Moreover, it is easy to clean with any type of solvent or cleaner since it is water-based. All major brands nowadays offer alkyd enamel paint for kitchen cabinets including Behr, Valspar, and Benjamin Moore.

Out of these, Sherwin Williams ProClassic is the most expensive and Behr is the least expensive paint. You can choose any one of these brands depending on your budget as they all have been tried and tested and offer great results.

General Finishes Milk Paint

Another expert suggestion for painting kitchen cabinets is General Finishes Milk Paint. It is recommended to lightly scuff the cabinets using 220 grit sandpaper if you plan on using this type of paint. While many people would not recommend sanding, professionals always advise it.

You don’t need to apply a primer though and that’s probably the biggest advantage of General Finishes. But unlike Alkyd paint, you would need to apply a topcoat to achieve the desired level of sheen ranging from extra flat to high gloss.

GF milk paints take about 2 to 3 weeks to cure completely. This type of paint is recommended if you are aiming for more depth in color and a low luster finish. It is commonly used by designers who want to lend a vintage or “worn out” look to their furniture.

Chalk Paint

Chalk Paint is best for wooden kitchen cabinets and is recommended if you want to give your kitchen a refresh at the minimum possible cost. It is advisable to use a flat brush for applying chalk paint over your cabinet doors and drawers. Before painting a second coat, let the first coat dry.

When you’re done painting all the cabinets, let the paint dry, and then wax the doors using Clear Chalk Paint Wax. If you leave it overnight and then buff it with a cotton cloth the other day, it gives a perfect polished finish.

Chalk Paint holds up really well with absolutely no chipping even after months. And the best thing is, that you don’t need to prep your cabinets before applying this type of paint. So, it’s perfect for small DIY projects or renovations you want to achieve without seeking professional help.

You Can Read More: best chalk paint for furniture.

Tips on Painting Kitchen Cabinets the Proper Way

Painting cabinets can be a messy job especially if you are painting them for the first time. There will be backsplash and drips to clean after the job is done. So, you need to know how to carry out this DIY project safely and properly.

Follow these tips to paint your cabinets the way professionals do.

  • You can use rosin paper to cover and protect the countertops and the floor. It is inexpensive and quite useful.
  • It is recommended to remove cabinet doors and drawer fronts before painting them. This way you will get a much neater result and avoid slopping the interior of the cabinets and drawers with paint.
  • Before you start the job, label each cabinet door and make a rough sketch on paper to understand where each part will go once the job is done.
  • If your cabinets are old and greasy, de-grease them first using phosphate-free cleaner. Some people also use simple and handy dishwashing liquid for this step but getting a professional solution is better if you want the best results.
  • The next step is to sand the cabinets. This step is required to make sure the paint will easily grip to the surface. If there are bumps and other imperfections on your cabinets, it is recommended to use coarser 100-grit sandpaper. Otherwise, 120-grit sandpaper used for light sanding should be adequate.
  • Remove the sanding dust completely before you start applying the paint. Use a vacuum cleaner for this job and afterwards use a tack cloth to pick up remaining particles of dust.
  • If the paint you have chosen requires a primer, choose a fast-drying product. Oil-based enamel primer is the recommended choice for optimal results. It not only levels well but also sands easily.
  • If your wooden cabinets come with holes and dents, use wood filler to fill them up before applying the first coat. You can use a flashlight to illuminate imperfections that are less noticeable. Use filler that sticks well and re-prime the areas you have just repaired. 
  • Many painting experts advise sanding lightly between coats to remove dust that settles in while the paint is drying. You can use 220-grit sandpaper for this step. Again, use a vacuum cleaner and a tack cloth afterward to remove all dust particles before applying the next coat of paint.

Top 8 Best Paint for Kitchen Cabinets

Here is our review of the top 8 best paint for kitchen cabinets based on customer feedback and their suitability for painting different types of kitchen cabinets.

1. INSL-X Cabinet Coat Semi-Gloss Paint – Best for Beginners

INSL-X CC560109A-01 Cabinet Coat Enamel, Semi-Gloss Paint, 128 Fl Oz (Pack of 1), White
Check Latest Price

This paint is perfect if you don’t have any prior experience in painting your cabinets. It doesn’t require much effort on part of the painter and still gives the desired results. Its ultra-smooth finish is great for kitchen and bathroom cabinets.

It is recommended to use an angled sash brush to apply this paint. It may require multiple coats to reach the desired consistency and you will have to wait for about 6 hours before applying a second coat. Moreover, it may not wipe off as easily as other paints do. So, be prepared for this kind of extra work.

Some people may find the paint a bit pricey but since it’s great for beginners the price shouldn’t be a concern. If you don’t prep the cabinet before using it, it may chip easily. Always follow the instructions on the label to achieve the best possible results.

Features

  • Urethane-acrylic cabinet paint
  • Ultra-smooth finish
  • Meant for interior use only
  • Water-based paint
  • 6 hours of drying time
  • Easy to work with and great for beginners

What We Like

  • No priming is required if the surface is spick and span
  • Easy to clean and wash
  • No streaking

What We Don’t Like

  • Sanding required in between coats
  • Not meant for exterior use
  • A little more expensive than other products

2. Rust-Oleum Multi-Purpose Enamel Paint – Best for Quick Drying

Rust-Oleum 1993502 Multi-Purpose Enamel Paint, 32 Fl Oz (Pack of 1), Semi-Gloss White
Check Latest Price

Rust-Oleum is a brand trusted by most homeowners and professional painters. The company offers a wide range of acrylic paints for interior and exterior items. This particular water-based enamel paint by Rust-Oleum provides a semi-gloss finish and resists chipping.

It is also a recommended choice for concealing imperfections in your cabinets. However, before using this paint, you need to sand the surface using either 180 or 200 grit sandpaper. This may increase the overall time required to complete your project but the quick-drying feature of this paint compensates for that time.  

It is advisable to use a base primer before applying this paint. Also, if you try to paint two thick coats instead of multiple thin layers, the result might differ from what you expect. So, it’s a good idea to go through the instructions on the can before using this paint.

Features

  • Semi-gloss smooth finish
  • Water-based latex paint
  • Easy to apply 
  • Good for different surfaces including wood, metal, and ceramic
  • Requires two bonding coats and a topcoat

What We Like

  • Dries in half an hour
  • Easy to clean and wash
  • Available in a number of attractive colors

What We Don’t Like

  • Without using a primer, the paint doesn’t provide desired results
  • Extremely drippy
  • It may harden your paintbrush

3. Giani Granite Nuvo Cabinet Makeover Kit – Best for Fast Results

Nuvo Titanium Infusion 1 Day Cabinet Makeover Kit
Check Latest Price

This makeover kit has received great reviews from customers as it does not require a lot of time and it is also quite easy to use. Nuvo cabinet paint has been formulated to be self-leveling, which means the brush strokes will not be visible after you are done. The result is an extremely smooth and satin finish, which is perfect for kitchen cabinets. 

To paint dark cabinets white, you will have to sand them using 300 to 330 sandpaper first and then use multiple coats for full coverage. You will be able to start using your kitchen again after a few hours of application and that is why it is best for fast results.

There is no need to remove the cabinets to paint them using this product. This kit can be compared to the famous Rust-Oleum makeover kit in terms of features and price. Both are DIY-friendly but Nuvo is even better suited to beginners because it is self-leveling. If you want a more professional finished result, then go for Rust-Oleum.

Features

  • Acrylic water-based paint with primer
  • Satin finish
  • Low odor and free from VOCs
  • A single coat takes about two hours to dry completely
  • Ideal for wooden, laminate, vinyl, and metal cabinets
  • Available in a number of beautiful colors

What We Like

  • It comes with a primer in it
  • Can be used on multiple surfaces including thermofoil
  • Offers a 24-hour cabinet makeover system
  • The finish is durable and requires no protective topcoat

What We Don’t Like

  • The rollers that come with the kit are not very efficient
  • It is a bit pricey for DIY projects

4. INSL-X Cabinet Satin Sheen Paint Set – Best for Professional Look

INSL-X CC5501099-1K Cabinet Coat Enamel, Satin Sheen Paint, 5 Piece Set, White
Check Latest Price

If you are looking for a complete cabinet painting kit that will offer factory-like results, choose this paint. All that is required is to clean and dry the surface completely before applying this paint. It doesn’t require a primer and is therefore easy to use.

However, if you want to hide stains and marks, use a primer for best results. You can use a primer from the same supplier. The paint can be applied with a sprayer and there is no need to thin it down. However, keep in mind that you may need up to four coats to reach your desired level of color and texture.

The instructions recommend light coating but you can also use heavy coating depending on your requirements. The paint is self-leveling and does not leave brush strokes. The recommended recoat time is six hours.  

Features

  • Urethane-acrylic paint formula
  • Ultra-smooth durable finish
  • Does not require a primer
  • Works well on previously painted cabinets
  • Good for multiple surfaces

What We Like

  • Resists chipping and staining
  • Is known to last for many years
  • No odor  
  • Easy to work with

What We Don’t Like

  • It May require up to 3 gallons to paint the entire kitchen due to the thin consistency
  • May cause streaking in some areas

5. Rust-Oleum Protective Satin Enamel – Best for Durability

1 qt Rust-Oleum Brands 7777502 Black Stops Rust Protective Enamel, Satin
Check Latest Price

Although formulated for outdoor furniture, this paint works well on all types of surfaces including wood, concrete, and metal. It’s an oil-based formula, unlike the other paints we have discussed in this review. It offers a protective top layer to protect the cabinet against abrasion, fading and chipping.

The paint can be thinned out using a paint thinner especially if you want to use a sprayer. However, thinning is not required if you plan on using a brush or roller. The paint is self-leveling and smooths out on its own. So, it’s good for beginners.

The result of this paint is very different from what you get with water-based latex paint. The colors are rich and the finish is absolutely beautiful and ultra-smooth to the touch. It can be used to paint just about any surface including ceramic in the bathroom, outdoor metal furniture, or wooden cabinets and drawers.

Features

  • Available in nature-inspired colors
  • Low-sheen satin finish
  • Oil-based paint formula
  • Good for indoor/outdoor use
  • Offers excellent resistance against rust and chipping

What We Like

  • Quick drying
  • Does not fade easily
  • Durable and protective against chipping and cracking
  • UV resistant

What We Don’t Like

  • Strong and unpleasant odor
  • Some people may find it thick and not easy to work with

6. Rust-Oleum Transformations Cabinet Refreshing Kit – Best for Complete Renovation on a Budget

Rust-Oleum 298060 Transformations Cabinet Refinishing Kit, 143 Fl Oz (Pack of 1), Pure White
Check Latest Price

The best thing about this painting kit is that you don’t need to sand or prime your cabinets. However, some people have mentioned that if you use a primer before applying this paint, you may not need three or more coats to achieve the desired results. So, it’s your own decision if you want to use a primer or not. 

Once you’re done painting your cabinets, they would have completely transformed. The system offers a multi-layered protected surface that will last for many years to come. It comes with a deglosser so you don’t have to spend hours prepping and sanding the cabinets.

It also offers a glaze paint in the kit, which is optional to use. After two bonding coats, you may use a third glaze layer and then finally a protective topcoat. A lot of people have found the results to be extraordinary and very pleasing. 

Features

  • Perfect for laminate cabinetry
  • Durable and professional results
  • Acrylic water-based paint
  • Easy to clean with water and soap
  • May work well without priming

What We Like

  • No sanding or stripping required
  • Absolutely no odor
  • Great for DIY projects on a budget
  • One kit is sufficient for a small kitchen

What We Don’t Like

  • It May require multiple coats for full coverage
  • You have to buy the complete kit even if you don’t need the glaze paint

7. General Finishes Water-Based Milk Paint – Best for Inexpensive Makeover

General Finishes Water Based Milk Paint, 1 Gallon, Antique White
Check Latest Price

This paint is highly recommended for cabinet refinishing and therefore we added this to our list of best paints for kitchen cabinets. It is known to cover really well so even if you have old and highly stained cabinets, you can safely use this paint to give them a completely new look.

A gallon of this paint would be enough to paint a kitchen, which is average in size. The paint is thick in nature and therefore only a couple of coats would be enough to reach your desired color. Nevertheless, keep in mind that it won’t be possible to use a sprayer because it wouldn’t thin down.

If you want to use a protective or semi-gloss topcoat, choose General Finishes semi-gloss top layer paint. It will give the flat finish a glossy look, which is recommended for kitchen cabinets.  

Features

  • Water-based milk formula
  • Flat finish
  • Simple and easy to apply
  • High quality and high coverage paint
  • Quick drying

What We Like

  • Can be applied with a roller, brush, or sprayer
  • Extremely durable
  • Easy to clean
  • Does not leave brush marks  

What We Don’t Like

  • A topcoat may cause yellowing when you’re using white color due to a reaction with the substrate
  • May chip without a topcoat

8. Rust-Oleum Milk Paint Finish – Best for Matte Finish 

Rust-Oleum 331052 Milk Paint Finish, 32 Fl Oz (Pack of 1), Eclipse
Check Latest Price

If you want to give your cabinets a unique brushed effect with a matte finish, choose this paint. It is perfect for achieving that antique look some people desire in their décor. It is a pre-mixed formula and therefore there is no need to use a primer before application.

The result is a semi-transparent look, which gives a modern touch to your cabinets. You can mix multiple colors and apply a number of coats to create your own custom texture. Some people choose to lightly sand it after application for a distressed and antique appearance.

It is recommended to wait half an hour before applying a second coat. The paint is available in a number of beautiful colors including navy, highland blue, and Venetian yellow. Since it doesn’t need priming, it is easy to work with. If you want to make the result look a bit glossy, you can use a clear gloss over it.

Features

  • Beautiful modern matte finish
  • Non-toxic and safe to use
  • Water-based milk paint formula
  • Lightly textured in nature
  • Can be layered for a different customized look 

What We Like

  • Dries in about half an hour
  • Good for new and old cabinets alike
  • No need for a primer
  • Low odor formula

What We Don’t Like

  • You May need several coats to reach your desired color
  • May scratch and chip easily

How to Choose the Right Paint For Cabinets?

Now, this is the tricky part. With so many options available on the market and mixed reviews on each of those products, it sometimes gets difficult to decide which one is best suited to your needs.

Here is a step-by-step guide to choosing the best paint for kitchen cabinets.

Step 1 – Consider your budget

There are many types of paints available on the market and to choose the best paint for kitchen cabinets, you have to consider your budget first. Instead of buying two or three gallons together, first, buy a quart and do a patch test to see if it’s the right color and the right finish.

Sometimes painting kits are more cost-effective than buying individual supplies. This is because these kits are designed to get the job done quickly and are often quite reasonably priced.

Step 2 – Read the label

This is an important step because you need paint that has been specially formulated for woodwork and cabinetry. Moreover, check the finish the paint offers and choose semi-gloss or a satin sheen because it is easy to achieve even for beginners.

If you choose a highly glossy finish, you might need to prep and sand your cabinets very precisely; otherwise, the desired results will not be achieved. 

Step 3 – Make sure it’s easy to work with

Paints that are too thick and require thinners in order to be able to level out on their own are not easy to work with. If you haven’t painted cabinets in the past, make sure you buy paint that already contains all the substances needed and is easy to work with.

Step 4 – When in doubt, go for acrylic urethane

Many people out there might not have any idea about the type of paint to use for their cabinets. So, when you are unsure, simply go for acrylic urethane because it sticks quite well to almost any type of material. You can also opt for acrylic urethane as a primer and any other paint for topcoats.  

Step 5 – Read user reviews

This might sound obvious but some people tend to ignore the negative reviews a product has received. If more people are dissatisfied with a particular paint or brand, try to find a substitute in the same category.   

Final Thought

Updating kitchen cabinets can tremendously enrich your old and boring kitchen. However, not everyone can afford to replace their cabinets entirely. The best way to spruce up your kitchen on a budget is to update your kitchen cabinets with fresh paint. Remember, any surface that can be scraped with sandpaper is good for painting.

However, it’s important to find the best paint for kitchen cabinets depending on their overall condition, the material they are made of, and the final result you are looking for. Always choose high-quality paint because it’s a job that requires special skills and a lot of effort and you definitely wouldn’t want all that to go wasted.

Use this article as a guide to help you choose the right paint for your cupboards and get yourself ready for the job! 

Best White Spray Paint

Best White Spray Paint

When preparing for your next project, it is crucial to have the best spray paint for your project. We will highlight to you ways to identify the best white spray paint.

Nothing is so satisfying than using the best quality spray paint for your painting projects. If you are a do-it-yourself person, you can rest assured of excellent results if you use quality paints.

Your primary focus when shopping for the best spray paint is to buy a paint that has all the essential properties of quality paint. With that in mind, be sure to go for durable paints, you might also want to consider the aspect of resistance to rust and corrosion.

I would suggest that you consider spending a few bucks to buy quality paints if you want a professionally painted surface then go for substandard paints. So, how, are you going to pick the best white spray paint for your project because the market is filled with all types of brands? To answer your question, keep reading to find out.

Who Needs This Product? 

Projects involving spray paint demand that you master the art of using the sprayer besides having the best spray paint. So, if you are trying to weigh your options on the best spray paint to buy, you are in the right place because this product is meant for do-it-yourself guys like you and professional painters.

What Do Readers Will Learn?

So far, if you are still reading this post, one thing stands out; you are in search of information to help you in your next painting project.

In this blog, we have created well-analyzed content to help you to make the best selection regarding the best white spray paint for your project. What is more, we will take you through a brief buying guide consisting of factors to consider when buying the best white spray paint for your next paintwork.

Top 2 Best White Spray Paint in 2021

You would be forgiven for thinking that getting to buy the best spray paint is a walk in the park. Be it as it may, it would be best if you considered learning a few tricks to help you make the correct choice. You don’t want to buy paint that will give you regrettable results.

We crafted this post to help you to make an informed decision concerning the best white spray paint for your next project; considering learning let us jump right into the list of the best white spray paint in the market.

You May Also Like Best Spray Paint For Metal.

1. Krylon GIDDS-800143 K05150807 Colormaster Paint + Primer, Semi-Gloss, White, 12 oz: Best for  indoor and outdoor paintworks

Krylon GIDDS-800143 K05150807 Colormaster Paint + Primer, Semi-Gloss, White, 12 oz.
Check Latest Price

Out of all the many brands we analyzed, Krylon stood out because it has a ton of beneficial properties when it comes to painting. Krylon Color Master Enamel Spray Paint Semi-Gloss White is a quick-drying paint. It’s easy to apply. It is suitable for use on wood, cane, cloth, paper, cast iron, ceramic, glass, plaster, and metal surfaces. Below we highlight the most prominent features of this product, have a look!

Features

  • KrylonColormaster Paint + Primer has multiple applications.
  • The product is compatible with most surfaces.
  • It is suitable for indoor and outdoor-based paintworks.
  • This paint is suitable for both small and big projects.
  • It has durable Covermax technology for premium coverage and brilliant color.

Pros

  • KrylonColormaster Paint + Primergives your surface a bit of longevity.
  • The product is pocket friendly but of high quality.
  • It is pretty easy to use by anybody.
  • It takes less drying time.
  • It is safe to use.

Cons

  • It is affected by scarcity(not readily available).

Reason to Buy

Out of all the many brands we analyzed, Krylon stood out because it has a ton of beneficial properties when it comes to painting. The paint is pretty versatile so you can work seamlessly, special-purpose additionally, you can use it for most painting projects.

2. Rust-Oleum 3389286-PK Stops Rust Advanced Spray Paint, 12 Ounce (Pack of 6), Gloss White, 72 Ounce: Best for protection  against rust and corrosion

Rust-Oleum 3389286-PK Stops Rust Advanced Spray Paint, 12 Ounce (Pack of 6), Gloss White, 72 Ounce
Check Latest Price

Looking for the most suitable paint to help you fight the effects of rust and corrosion? Look no further because, with this product, you are assured of durability on your art and what is more, this product prides itself on color retention properties to give your artwork a more refined finish. Rust-Oleum Stops Rust Advanced Spray Paint is resistant to environmental effects. Features of this paint are highlighted below:

Features

  • Rust-Oleum Stops Rust Advanced Spray Painthas matte finish.
  • It is rust and corrosion-resistant.
  • It can be used as a shield for outdoor surfaces.
  • It has excellent output to give your surface a clean finish.
  • It has excellent color retention properties.
  • It is a durable paint to give you a lasting effect.

Pros

  • Rust-Oleum Stops Rust Advanced Spray Painthas excellent color retention enhances the final look.
  • It is easy to apply.
  • It produces a more refined finish on the surface.
  • It has well designed nozzle for fast spray.
  • This paint spray comes in many colors to give you a variety of color options.

Cons

Reason to buy

Looking for the most suitable paint to help you fight the effects of rust and corrosion? Look no further because, with this product, you are assured of durability on your art and what is more, this product prides itself on color retention properties to give your artwork a more refined finish.

Top 2 Best White Spray Paint in 2021: Buying Guide and Key Factors to Consider When Choosing the Best White Spray Paint

Ensuring you are well versed in matters to do with spray paints will come in handy whenever you contemplate buying spray paint for your upcoming project. With that being said, there are basic factors that you should take into consideration to help you to settle on the best white spray paint. Below we discuss the above-mentioned products.

Nature of the surface

This should be your main consideration whenever you are shopping for your preferred paint. The nature of the surface will determine the type of paint you are going to buy. Spray paints can be classified according to their use such as general-purpose,special-purpose et cetera.

The color and finish of the paint

If you have done a couple of paintworks involving spray paints, you may have noted that you can capitalize on spray paint to create customized paintworks. The color of your spray paint will determine the nature of the finish you will achieve on your project.

Most spray paint is multicolored to allow you to make your preferred color. Always go for spray paint that will blend in properly with the surface. Your primary concern should be to give your piece of painting a more nuanced finish.

The texture of the paint

We tend to think that fluids have no texture. This is an outright lie because patients, just like other substances, have a particular feel when applied on a given surface. With that being said, it would be a good idea to go for a paint that has the correct composition of additives to achieve the kind of finish you want.

A good example of textured paintwork is hammered paint. Not that this type of paintwork requires a high degree of precision to achieve desired results. Be sure to buy high-quality paint to achieve better results.

The time it takes to dry

Depending on the type of your project, you might want to consider the aspect of drying time of the paint you intend to buy. It would be best if you go for fast-drying paint because you don’t want to spend a ton of time waiting for your paintwork to dry. Note that the nature of the prevailing climate will affect the rate at which your paint will dry. The density of your paint will influence drying time.

The base of the spray paint

Another key consideration would be the base of your preferred paint. Before you decide on the most suitable paint to use, it would be better to find out whether it is oil-based or water-based. This will enable you to plan whether to use a primer or not. If I were you, I would go for oil-based paints because they are pretty durable.

It would be a good idea to consider buying the suitable density of your preferred paint if you want to achieve a professionally painted piece of art.

The advantage of using water-based spray paint is that they require less effort to clean. However, be sure to use a suitable primer to enhance the adhesive features of your paint. If you utilize the information we have shared in this post, you are on your way to mastering the spray painting (opens in a new tab)” rel=”noreferrer noopener” class=”ek-link”>art of spray painting and choosing the best paint for your projects.

The viscosity and hue of the paint

Light paints have many advantages. Apart from the fact that they dry fast, these kinds of paints are also easy to give you a consistent and even coat of paint. It would be a good idea to consider buying the suitable density of your preferred paint if you want to achieve a professionally painted piece of art.

Coverage of the paint

When shopping for your preferred spray paint, one of the factors to note is its coverage properties and the ease with which it dries. You want to achieve a professionally painted surface, so it would be a good idea if you take this factor seriously to get the results you want.

It is recommended to go for general-purpose paint if you are unsure of the right type of paint to use for your painting project. Other crucial factors worth looking at include resistance to heat and other environmental hazards. It would be a good idea to consider buying the suitable density of your preferred paint if you want to achieve a professionally painted piece of art.

Frequently asked questions

Even when you are certain that you have mastered the art of painting, there is still more to be covered. Having said that, while carrying out our research, we came across a ton of frequently asked questions both by professional and amateur painters. We crafted a well-thought solution to each of the questions to enable you to understand better. Have a look at them below.

Question: Where is spray paint applicable?

Answer: Spray paint has many uses which is why it is the most preferred paint by most painting artists. You can use it to add creative finishes to your paintwork to give it a more refined look. What is more, you can do away with the effects of rust and corrosion by applying a light coat of paint on your preferred metal surface.

Question: Is it possible to apply paint over spray paint?

Answer: Yes. However, you must ensure that you have a thorough mastery of the subject of spray paint. For better results, it would be better to consider doing the basic preparatory activities on your surface such as sanding and priming. We strongly suggest that you seek expert advice in addition to what we have mentioned in this post to be on the safer side.

Question: Is it necessary to prime your surface before spray painting?

Answer: We are going to be straightforward, so yes. It is common knowledge applying a primer on whatever painting project you have is essential to enhance the bonding properties of the paint. It would be better if you consider using a primer based for your project.

Question: What is the life of spray paint?

Answer: If well stored, spray paint can last for quite some time, to be more precise, up to ten years. This is only possible if the can containing the paint remains closed. On the other hand, the maximum time the spray paint will last if the can is opened is anywhere between two to three years.

Conclusion

From the discussion in this post, it is clear that there is more to spray painting than what we normally think. It even becomes more challenging if you don’t have the slightest idea about spray paints. However, if you utilize the information we have shared in this post, you are on your way to mastering the art of spray painting and choosing the best paint for your projects. We strongly suggest that you seek expert advice in addition to what we have mentioned in this post to be on the safer side.

Best Spray Paint For Leather Shoes

Best Spray Paint For Leather Shoes

Your leather shoes will fade over time; Once you acknowledge that your shoes will fade as time progresses, it would be better to know the best paint to apply on them.

With that being said, it is crucial to learn about the methods and supplies you will need to restore the look of your leather shoes and give them a more refined look. Note that this is not going to be an easy task, so you might want to learn and plan properly before you begin your project.

Handling spray paint might prove to be a tricky affair, fortunately, we have tried to highlight the best paints to use on your leather shoes to help you achieve the results you want. Additionally, in this post, you will find a detailed list of key factors to consider when buying your preferred paint to enable you to dodge common pitfalls committed by many artists.

Who Needs This Product? 

Painting on leather materials is a bit difficult, so knowing the features of the best paint to use will help you a great deal. If you are a do-it-yourself artist, this is your product, pro painters can also count on this type of product to produce stunning artworks.

What Do Readers Will Learn?

You can never go wrong with whatever project you are handling if you are on the lookout for new information. We purposely created this article to help you master the art of spraying paint on leather shoes like a pro.

Here, you will study crucial information about the best paint to use on your leather shoes and how to make the best selection when shopping for your preferred paints.

Top 2 Best Spray Paint For Leather Shoes (2021)

There are many paints in the market but we chose to stick to the two best spray paints for use on leather shoes in 2021. From our earlier discussions, we mentioned the need to know the different features of paints to help you pick the most suitable paint for use in your project. Below we highlight a few of these features.

There are countless reasons why we would advise you to buy this paint. Apart from the fact that it does not peel off easily, this product is also chemically designed to work on leather surfaces. Additionally, it is water-resistant paint, a factor that enhances the durability aspect of your paint.

You can never go wrong with whatever project you are handling if you are on the lookout for new information. We purposely created this article to help you master the art of spraying paint on leather shoes like a pro.

1. Tulip ColorShot Instant Fabric Color: Best for

Tulip ColorShot Instant Fabric Color 3oz. Black
Check Latest Price

There are countless reasons why we would advise you to buy this paint. Apart from the fact that it does not peel off easily, this product is also chemically designed to work on leather surfaces. Tulip ColorShot Instant Fabric Color will give your fabrics an instant shot of beautiful, washable, permanent color. Additionally, it is water-resistant paint, a factor that enhances the durability aspect of your paint. Let’s see the paints in detail:

Features

  • Tulip ColorShot Instant Fabric Colorhas excellent fast drying features.
  • With this product, you can produce a smooth finish
  • It has a variety of colors.
  • It has easy usage directions.
  • You can have many color options from this product.

Pros

  • Tulip ColorShot Instant Fabric Coloris compatible with machine wash.
  • You can work pretty fast because the product dries pretty fast.
  • It is nicely designed nozzle for easy handling.
  • It produces an even finish.
  • Offers permanency and durability on your leather shoes.

Cons

  • It is not effective on leather surfaces.

Reason to buy

There are countless reasons why we would advise you to buy this paint. Apart from the fact that it does not peel off easily, this product is also chemically designed to work on leather surfaces. Additionally, it is water-resistant paint, a factor that enhances the durability aspect of your paint.

2. Moneysworth& Best Brillo Renew Spray: Best for

Moneysworth & Best Brillo Nu-Life Leather/Vinyl/Plastic Color Renew Spray 4.5 oz, 015 Black
Check Latest Price

There are several reasons why we would advise you to buy Moneysworth& Best Brillo Renew Spray. Apart from the fact that it does not peel off easily, this product is also chemically designed to work on leather surfaces. Additionally, it is water-resistant paint, a factor that enhances the durability aspect of your paint. Let’s know more about this paint:

Features

  • Moneysworth& Best Brillo Renew SprayIt has excellent adhesive properties.
  • It is also good for re-dying the same color.
  • This paint is suitable for Multi Surface.
  • It is resistant to peeling due to a strong chemical composition.
  • It is easy to use.
  • It is waterproof.

Pros

  • Moneysworth& Best Brillo Renew Spray is Cost-effective.
  • It creates a non-peeling finish on your paintwork.
  • It is multicolored paint.
  • It is waterproof.
  • The paint is safe to use (non-toxic).

Cons

  • This paint requires several coats for effective results.

Reason to Buy 

There are several reasons why we would advise you to buy this paint. Apart from the fact that it does not peel off easily, this product is also chemically designed to work on leather surfaces. Additionally, it is water-resistant paint, a factor that enhances the durability aspect of your paint.

2021s Top 2 Best Spray Paint For Leather Shoes: Buying Guide and What to Look for When Buying Spray Paint for leather shoes

Since leather shoes are bound to wear out due to poor maintenance or other environmental conditions, you might want to repaint them to restore their original look. However, this is not going to be easy if you have no idea of the factors to look for when buying your preferred paint. Keep pursuing to discover some of these factors.

Compatibility

Different paints work better on certain surfaces. When shopping for your preferred paint, it would be better to understand the nature of your material to help you decode accordingly.

I would suggest that you go for spray paint that is specifically designed for use on leather surfaces if you want to achieve exceptional results with your paintwork. You might want to do a bit of research to get a better idea of different surfaces and the type of paint to be used on them.

Color

Most paint products are multicolored to give you several options to choose from. The original look of your leather shoes will determine the color you will select for your project. I would advise you to go for colors that are resistant to fading and other environmental effects.

If you deem it fit, you may read through the labels to know which colors have the best properties to use on your shoes.

Ease of use

You don’t want to buy a paint product that has complicated usage instructions. The chances of doing a shoddy job are pretty high if you use products that you find hard to use. Be sure you know how to use a given product by reading the label; you may also capitalize on the views of various users to get an idea.

Safety

Safety is key when buying paint products. I suggest you buy paint products that are toxic-free to safeguard your health. Most painting projects are done by young adults who are unaware of the dangers of aerosol paints, so you might want to choose less toxic paints to protect you and your family.

Durability and strength

Depending on the nature of your leather shoes, you might want to carefully consider the aspect of the durability of the paint. If you use your shoes constantly, you should consider buying high-quality paint to achieve the kind of stability you need.

Steps to Spray Paint on Leather Shoes

If you follow the laid down steps, painting your leather shoes will not pose any problems. However, to attain the best results, it would be better to consider buying high-quality products. So, what steps do you follow to spray paint on your leather shoes? Below we provide a detailed answer to your question. Continue reading!

  • Make an imprint of your preferred design on your shoes. Not that this is only necessary if you are painting a small area of your shoe.
  • Be sure to do the basic painting preparations before spraying your paint for better results. You might want to do a thorough cleaning to remove any form of dirt and stains. Let your shoes dry before applying your paint.
  • Be creative enough if you want to achieve a smoother surface on your leather shoes by using appropriate painter’s tape to conceal certain areas of your shoes.
  • Be creative enough if you want to achieve a smoother surface on your leather shoes by using appropriate painter’s tape to conceal certain areas of your shoes.
  • When you are sure that the shoes are dry, you can go ahead and spray your paint using even and consistent motions
  • Let your spray paint dry for a significant amount of time(preferably 24 hours). Be sure to keep your shoes away from dirt and dust because you want to produce professionally painted artwork.
  • There are countless reasons why we would advise you to buy these products. Apart from the fact that it does not peel off easily, this product is also chemically designed to work on leather surfaces. Additionally, it is water-resistant paint, a factor that enhances the durability aspect of your paint.
  • Since leather shoes are bound to wear out due to poor maintenance or other environmental conditions, you might want to repaint them to restore their original look. However, this is not going to be easy if you have no idea of the factors to look for when buying your preferred paint.
  • Most painting projects are done by young adults who are unaware of the dangers of aerosol paints, so you might want to choose less toxic paints to protect you and your family.
  • If you use your shoes constantly, you should consider buying high-quality paint to achieve the kind of stability you need. You might want to do a thorough cleaning to remove any form of dirt and stains. Let your shoes dry before applying your paint.

You may also like Best Spray Paint for Wood (opens in a new tab)” rel=”noreferrer noopener” class=”ek-link”>Best Spray Paint for Wood.

Frequently asked questions

Spraying your leather shoes will pose insurmountable challenges especially if you are a beginner. However, with the right supplies, you can produce a commendable piece of paintwork. With that in mind, we have compiled a list of questions to assist in understanding the process of spraying paint on leather shoes effortlessly.

Question: Is there a specific duration for the paint to last on shoes?

Answer: If you prepare your leather shoes properly for painting, the only things that can reduce the lifespan of paint on your shoes are environmental conditions such as rain and failure on your part to clean your shoes.

Question: Which is the most suitable paint to use on shoes?

Answer: If the two types of paints, what will determine the type of paint to use is the nature of leather used to make your shoes, however, spray paint works efficiently on leather shoes.

Question: Is it possible to paint the soles of your shoes?

Answer: Yes. However, be sure to prepare the sole surface if you want the paint to stick properly. It would be better if you considered using acrylic-based paints for the best results.

Question: Are there specific spray paints to use on shoes?

Answer: There are several brands of spray paint to opt for whenever you want to paint your leather shoes. It would be better to study the labels of various paints to understand the chemical formulae of each paint to know the correct paint for your project. I would advise you to go for paints designed for leather surfaces(shoes).

Conclusion

With all the fun associated with spraying shoes, you can easily get it wrong if you don’t follow the necessary steps. One notable thing you should remember is how to select the best paints for your project. This won’t be a big deal because we have analyzed every detail in this post to enable you to make a proper buying decision.

There are countless reasons why we would advise you to buy this paint. Apart from the fact that it does not peel off easily, this product is also chemically designed to work on leather surfaces. Additionally, it is water-resistant paint, a factor that enhances the durability aspect of your paint.

Best Spray Paint For Canvas

Best Spray Paint For Canvas

Sometimes, painting on certain surfaces requires you to have special paints. In this post, you will learn about the best spray paint for canvas. Enjoy!

We have accustomed our minds to thinking that spray paint is meant for street artists, so we have not taken time to study this type of paint properly. I never imagined myself painting on canvas using spray paint but the moment I gave it a shot, the results were astounding.

I urge you to continue reading this article to discover 2021sbest spray paints (opens in a new tab)” rel=”noreferrer noopener” class=”ek-link”> top two best spray paints you can use in your canvas material. If you grasp every tip I have highlighted in this post, you will dodge many painting flaws during the actual painting of your project.

Who Needs This Product? 

I suggest that you shun off the idea that spray paint is meant for particular artists, and more specifically, street artists. If you keep harboring this thought, you might never learn a lot about spray paints, so this product will be pretty useful to do0-it-yourself artists and street painters alike.

You may also be interested in Best Spray Paint For Metal.

What Readers do Will Learn?

I took a lot of time to research this topic, so you can rest assured that what is contained in this article is reliable. In this post, you will discover the features of the top two best spray paint for the canvas to guide you in making an informed buying decision. Let’s get into our discussion. Shall we?
Top 2 Best Spray Paint for Canvas (2021)

While carrying out my research, I realized that the number of paint brands in the market currently is something you should be worried about. Depending on the nature of your canvas fabric, you may either do prep work or avoid it altogether. You are not going to burden yourself with preparation procedures because most canvas fabrics come already primed, so you can paint directly upon purchase.

With that being said, it is now becoming more difficult to buy the best quality paint if you don’t have discerning features of various paints. Fortunately, I have laid bare the features to look for in the two best spray paints for canvas seen below.

1. Rust-Oleum 302591 Chalked Spray Paint: Best for  DIY projects

Rust-Oleum 302591 Chalked Spray Paint, 12 oz, Linen White Ultra Matte, 12 Ounce (Pack of 1)
Check Latest Price

The first product to examine is Rust-Oleum 302591 Chalked Spray Paint. One feature that makes this product stand out amongst its competitors is the ultra-matte finish it gives your paintwork. Besides, this product is multicolored to give you variety in terms of color choices for your project. This oil based paint is perfect for use on various interior surfaces like wood, metal, ceramic, canvas and easy to create vintage look. This paint will save your time. Here is a list of its feature and advantages:

Features

  • Rust-Oleum 302591 Chalked Spray Painthas excellent adhesive properties.
  • The product is multicolored to give you a variety of options.
  • It is easy to use.
  • It is multicolored.
  • You can use it with minimal preparation.
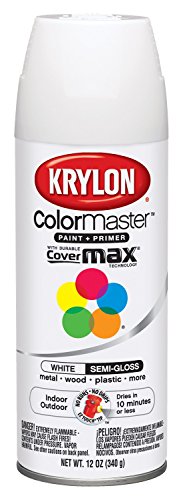
  • You can use the product on a variety of surfaces because it is versatile.

Pros

  • Rust-Oleum 302591 Chalked Spray Paintcontains desirable sticking features to enhance bonding.
  • It is durable.
  • It can be used on most materials.
  • It dries fast.
  • It produces a smooth finish once you are done applying it.

Cons

  • It is pretty expensive.

Reason to Buy

Looking to give your canvas painting project a more refined outlook? Try Rust-Oleum 302591 Chalked Spray Paint. One feature that makes this product stand out amongst its competitors is the ultra-matte finish it gives your paintwork. Besides, this product is multicolored to give you variety in terms of color choices for your project.

2. 26412 Acrylic Sealer Gloss Finish Spray: Best for  use on multiple surfaces

Aleene's 26412 Spray Gloss Finish, 6 Oz Acrylic Sealer, Original Version
Check Latest Price

Current stats indicate that this is one of the top best spray paints on the market. The paint has a ton of excellent features that work exceedingly well to make your paintwork more durable. One notable characteristic of this paint is that it can be used on a variety of materials apart from the canvas. This acrylic sealer spray paints provide a protective and glossy finish to your projects. Moreover, this spray paint doesn’t contain CFCS in accordance with federal regulations. Let’s know more about this Aleene’s 26412 Acrylic Sealer Gloss Finish Spray paint more.

Features

  • Aleene’s 26412 Spray Gloss FinishOffers you a durable and clear finish.
  • It is versatile.
  • It is suitable for outdoor and indoor paintworks.
  • It produces an even and consistent finish on your paintwork.
  • This spray paint comes in different capacities to cater to your budget needs.
  • It is safe to use since it has a lesser concentration of active compounds.

Pros

  • Aleene’s 26412 Spray Gloss Finish is safe to us.
  • Its application procedure is easy.
  • This paint spray is effective against fading.
  • It is fast drying paint.
  • It is non-toxic.

Reason to buy

Regardless of your project type, I suggest you try   Aleene’s acrylic sealer for reliable results. Current stats indicate that this is one of the top best spray paints on the market. The paint has a ton of excellent features that work exceedingly well to make your paintwork more durable. One notable characteristic of this paint is that it can be used on a variety of materials apart from the canvas.

2021s Top 2 Best Spray Paint for Canvas: Buying Guide and What to Look for When Buying Spray Paint for Canvas

It is common knowledge that whenever you visit any dealer to buy your preferred product, there are several factors to put into consideration before making your purchase. You want to buy a product that will give you the results you want. On that note, let us take a look at some of the critical considerations to look into if you want to buy the best spray paint for your canvas project.

Usage aspects

Before you purchase your preferred item, you might want to understand its applications. Most products require you to follow specific usage instructions. In our case, the product you buy may be intended to be used as a sealant or for general purposes, whatever the case, ensure you have the correct information regarding its usability.

Color

There are many color options to choose from depending on your preferences and the type of finish you want to achieve. Different finishes such as gloss, matte, and satin are determined by the type of color you choose to use, so make an informed choice.

Surfaces

In our previous posts, we underpinned the importance of spray paint and one feature that stands out is that spray paint is applicable on almost all surfaces. Due to the nature of canvas fabric, paint is likely to be absorbed, so you need to master the art of spraying on canvas material for better results.

Durability aspects

I cannot overemphasize the importance of durability when looking to buy the best quality paint. You want to shield your project from external conditions so buying spray paint with excellent durability will help achieve that. Be sure to buy quality paint products because it is through the use of quality products that the aspect of durability can be attained.

Drying time

Different paints have different chemical compositions which also determine the amount of drying time taken by each painting. When you decide to buy spray paint for your canvas project, you might want to understand the duration it takes for the paint to dry upon application. You want to go for fast-drying paints, however, be sure not to compromise the quality of your paint and project.

Supplies Needed for Your Canvas Painting Project

Before you embark on your painting activity, it is necessary to know the supplies you will require to produce excellent pieces of art. You don’t want to be messy with your project, so you might want to have magazines or old rags to wipe any paint overspray to produce a clean piece of artwork.

If you are a beginner, spray painting may prove to be a difficult task and the outcome is messy and shoddy work. To minimize these occurrences, make sure you have cleaning materials such as magazines to wipe any paint spoils and overspray.

Here are some of the supplies you will need for a successful canvas painting project:

Protective gear

You don’t want to start your painting project without properly shielding yourself from the harmful effects of paint fumes. Aerosol paints emit very strong fumes that might interfere with your respiratory system if you don’t protect yourself adequately. It would be better to buy the right clothing to protect yourself during painting. Supplies like hand gloves, boots, and goggles are a must-have for every artist.

Depending on the nature of your canvas fabric, you may either do prep work or avoid it altogether. You are not going to burden yourself with preparation procedures because most canvas fabrics come already primed, so you can paint directly upon purchase.

Spray Paints

Because there are many varieties of spray paint in the market it is proper that you ensure you have the best quality products to give you the results you want. Be sure to consider all the factors we have enlisted above to be able to buy the best paint.

Magazines/old rags

You don’t want to be messy with your project, so you might want to have magazines or old rags to wipe any paint overspray to produce a clean piece of artwork. If you are a beginner, spray painting may prove to be a difficult task and the outcome is messy and shoddy work. To minimize these occurrences, make sure you have cleaning materials such as magazines to wipe any paint spoils and overspray.

Cleaning substances

Be sure to have the necessary cleaning agents to help you get rid of paint overspray and to clean the tools you will use after painting. Various thinning agents can also be used as cleaning agents if you cannot access commercial cleaning agents. Another alternative could be rubbing alcohol.

Frequently asked questions

The painting niche is pretty wide, so you need to have the correct information if you want to produce professionally painted artwork. I have crafted a list of commonly asked questions about this topic to help you add to your existing knowledge base. Take a look!

Question: Which is the Best Method to Spray Paint on Canvas?

Answer: When you start your project, you want to produce stunning results, so it would be better to ensure you go through the basic procedure such as surface priming for better results. Be sure to read the usage instructions if there are any to be sure you don’t miss any steps because you want to achieve the best results

Question: Is there a specific canvas that professional artists use?

Answer: Yes. Most professional artists prefer cotton-based canvas although it might be pretty expensive if you are starting as a painter. Another alternative to cotton is a linen canvas which is equally expensive but with desirable properties such as elasticity of its fabric.

Question: What is the most suitable paint for canvas?

Answer: From our previous posts, we indicated that acrylic-based paints are universally used in most artworks. Canvas requires a special type of acrylic and oil-based paints for best results. Oil-based paint is a better alternative to use on canvas because they have an excellent consistency that works well on canvas.

Question: Do you have to prepare your canvas surface before painting?

Answer: Depending on the nature of your canvas fabric, you may either do prep work or avoid it altogether. You are not going to burden yourself with preparation procedures because most canvas fabrics come already primed, so you can paint directly upon purchase.

Conclusion

It is my firm belief that I have covered every aspect of spray paint for canvas. I factored in the commonly asked questions to help you to have a better understanding of this topic. By now, you already know that spray paint has multiple applications and canvas painting is one such application.
I must remind you that painting with spray paints is not a walk in the park, so you need to practice continuously to master all the tricks and intricacies involved in spray painting. If you learned something, feel free to add your comments in the comments sections and I will gladly reach out.

Best Paint For Vinyl Toys

Best Paint For Vinyl Toys

Applying paint to different types of arts requires you to have a proper mastery of paint types and that is what we are going to discuss in this article.

Did you know that even the most skilled artists find it hard to make the right choice when it is a question of paint? Mastering the art of paint selection is what separates quality artists from amateurs. The process becomes even more hectic because the number of brands in the market currently is overwhelming.

Producing a professionally painted artistry calls for more than picking your painting tools and beginning applying your paint. It is the goal of every artist both upcoming and established, to do quality work, however, you can never achieve these results if you do not take the time to buy the best paints for your projects.

Who Needs This Product? 

Do I need this product? You may ask yourself. If you are a painting artist, your main focus is to use the best quality products on whatever project you are handling. Whether or not you are an established artist, this product will come in handy in your next artwork project involving vinyl toys.

What Do Readers Will Learn?

It is needless to say that you are, actually, in the right place if you are looking for information regarding the best paint for your vinyl toys project. Here, you will be taken through a well-crafted piece consisting of a buyer’s guide and what to look for in the best paint for vinyl toys. Enjoy!

2021s Top 2 Best Paint For Vinyl Toys

The painting niche is pretty dynamic, so you should try to learn about the latest tricks regarding painting. It is now time to look at our list of 2021s top 2 paints for vinyl toys.

Because there are several brands of paints to use on vinyl toys, you may find it hard to pick the best, so out of the many paints we analyzed, we settled on the two best paints that we believe can give you the best results. Here we go!

[table id=1 /]

1. FolkArt Multi-Surface Acrylic Paint: Best for hobby and craft projects

FolkArt Multi Surface Acrylic Paint Set 16 piece Pastel Colors, Count
Check Latest Price

If you are looking for quality, I bet you should try this product. Not only is FolkArt paint a quality product, but it is also budget-friendly so you can do a ton of projects without worrying about costs.

Another positive feature of this product is the fact that it can be applied on almost all surfaces with excellent results. What is more, the paint is easy to use by anybody. Check out a detailed list of its features below:

Features

  • FolkArt Multi-Surface Acrylic Paint has excellent blending properties.
  • It ensures a clean and beautiful finish.
  • It has an enhanced chemical formula for better results.
  • The brand is widely used, so you can be sure of getting the best results.
  • It produces a more nuanced finish.
  • It has an excellent chemical combination to give you the best results.

Pros

  • FolkArt Multi-Surface Acrylic PaintGives you a more refined finish.
  • The paint blends well with most surfaces.
  • It is fairly priced (pocket friendly).
  • It has multiple colors to choose from.
  • It is easy to clean.
  • It is one of the most commonly used brands (it has a positive image).

Cons

  • The colors fade over time.

Reason to Buy

If you are looking for quality, I bet you should try this product. Not only is FolkArt paint a quality product, but it is also budget-friendly so you can do a ton of projects without worrying about costs.

Another positive feature of this product is the fact that it can be applied on almost all surfaces with excellent results. It has an excellent consistency for ease of application on your vinyl collections.

2. Warhammer Age of Sigmar: Best for models and miniatures

Warhammer Age of Sigmar Paints + Tools Set
Check Latest Price

We promised to give you a list of top-quality paints and next on our list is the Warhammer Age of Sigmar painting.

The paint has all the features you are looking for to give your artwork a classic look. If you are a painting artist, your main focus is to use the best quality products on whatever project you are handling. Let’s check out a detailed list of its features below:

Features

  • Warhammer Age of Sigmar paint is easy to clean.
  • It is pocket friendly.
  • It is a top-rated acrylic paint so you can be sure of quality results.
  • The product comes with a paintbrush, this is a reduction in costs.
  • It is most suitable for indoor projects.

Pros

  • Warhammer Age of Sigmar paint offers excellent blending.
  • Both newbies and professionals can use it.
  • It is suitable for use on projects involving miniatures.
  • It dries fast.
  • It is durable.

Cons

  • This paint is pretty expensive.

Reason to buy

We promised to give you a list of top-quality paints and next on our list is the Warhammer Age of Sigmar painting.

The paint has all the features you are looking for to give your artwork a classic look. If you are a painting artist, your main focus is to use the best quality products on whatever project you are handling.

2021s Top 2 Best Paint For Vinyl Toys: Buying Guide and What to Look for in the Best Paint for Vinyl Toys

Nothing is so challenging as trying to select the best product from a ton of many brands each with varied features. However, if you know what to look out for in your preferred paint, then you won’t have any problems during your next visit to the store.

It is essential to know the key factors that make up a quality paint if you want to produce beautiful pieces of art. The painting niche is pretty dynamic, so you should try to learn about the latest tricks regarding painting.

Ability to resist fading

Before you part with your hard-earned cash, it would be better if you considered the aspect of fading in your preferred paint. A highly rated paint should be able to withstand the effects of fading for a long time. You don’t want to buy a product that will fade at the slightest exposure to sunlight.

Price factor

It is better to go with products that will meet your budget needs. However, we tend to go for cheaper paints because we don’t look at the aspect of quality. Both substandard products and high-quality paints will give you almost the same results but in terms of durability, there is a big departure between the two.

Durability

The length of time a given product will withstand the various environmental conditions plays a key role when deciding on the best paint to buy. You don’t want to buy a product that will last for a few days and then start renovations or redoing the whole project.

Quantity Needed

Knowing the amount of paint you need for your project will not only save you in terms of costs but will also help you to dodge wastages that occur as a result of buying excess paint. I would suggest that you do your calculation duly to determine the right quantity of paint you need for your entire project before visiting the dealer.

Drying Time

When buying your preferred paint, the amount of drying time is a key factor you should consider before making that purchase. The primary focus of any artist is to take the shortest time possible with whatever project you are working on, so if the paint you are using takes the shorter your paint takes to dry the better. However, be sure to strike a balance between quality and substandard paints by taking into account the aspect of drying time.

A highly rated paint should be able to take the shortest time to dry. You don’t want to buy a product that takes an eternity to dry.

Safety aspects

When buying your preferred paint, it would be better to look out for the aspect of safety. You don’t want to buy a product that will not only affect you health-wise but should also be environmentally friendly and safe to handle by everybody including children. I would advise you to go for less toxic and odorless paints to be on the safer side.

Shelf-life of the paint

Sometimes we are tempted to buy certain products in bulk; If this sounds like you, then you should always consider the life of your preferred product while keeping it on the shelves. Products that have a longer shelf-life are a good pick because they can be used at a future date instead of buying new ones.

Primer

Buying paints that are primer-based will save you an incredible amount of time and money going to buy a primer besides your paint. Vinyl surfaces require an initial application of a suitable primer before applying your first coat of paint. The timer improves the ability of your paint to stick to the surface excellently.

Color Selection

According to experts, artists who have a wide range of colors to choose from are twice as likely to produce quality artworks compared to those who rely on a single color.

With that being said, it would be a good idea if you consider going for multicolored paints to give you variety when it comes to making color sections. As you develop your artistic skills you will discover that color plays an important role in the life of a painting artist.

Frequently asked questions

For best painting results, it is always a good idea to be on the lookout for new information regarding the best brands of paint to use. Nevertheless, this does not mean that you will limit yourself to learning about paint brands.

The painting niche is pretty dynamic, so you should try to learn about the latest tricks regarding painting. To enhance your understanding, we have compiled a list of questions from various artists and the possible solutions to the questions. Have a look!

Question: Which type of paint can you use on vinyl toys?

Answer: Acrylic paint is used in almost all painting projects due to its varied properties and vinyl toys are not an exception. However, before you apply your paint, ensure that your vinyl collections are well primed for better results.

Question: Is there a way to seal acrylic paint on vinyl?

Answer: Yes, you can use the acrylic method to achieve this exercise. It would be best if you use a water-based finish to seal your vinyl surface. All other procedures involved in applying a final finish are pretty the same here.

Question: Is there a suitable primer for vinyl?

Answer: The best response to this query would be to ensure that you go for a primer that is primarily meant to be used on vinyl surfaces for better results. Alkyd-based primer could give you good results but we would advise you to go with a readily available product. Be sure to apply only a single layer of your primer for excellent results.

Question: Is it possible to make the paint stick to vinyl toys?

Answer: To achieve this feat, it would be better to use acetone as your cleaning agent. Be sure to clean the vinyl surface thoroughly to improve the bending properties between the surface and the paint. Use a clean rag to wipe the surface of your vinyl to get rid of unwanted dirt.

Conclusion

Of the two paints, we have so far highlighted, The Warhammer Age of Sigmar painting seems like a pretty good choice although both of them can give you the results you want. If you are a painting artist, your main focus is to use the best quality products on whatever project you are handling. Whether or not you are an established artist, this product will come in handy in your next artwork project involving vinyl toys.

FolkArt is also a pretty good choice however it has a few limitations such as but it is still a better paint for these types of projects. We appreciate you immensely for taking your time to go through this post, we hope you have learned a lot to help you to make the best decision during your next project.

Best Paint For Plaster Sculpture

Best Paint For Plaster Sculpture

If you are finding it hard to navigate through the challenges of painting a plaster sculpture, this is your article. Read through the article to learn more.

We can all agree that finding the best paint to use for your project is the most difficult task. This is due to the high number of paint brands in the market. Be that as it may, you are still expected to master the art of picking the best quality paints in the market if you intend to produce refined artworks.

There are varied reasons why you would want to paint your plaster sculpture, but all these reasons are aimed at achieving one objective; Using the best quality paint for your plaster sculpture. Nobody is willing to use substandard paints unless they want to do a shoddy job.

Who Needs This Product? 

Many crafts are thought to be a preserve of professional painters, but did you know that even amateur paints can venture into these kinds of projects. Most painting artists are scanty regarding this topic and this becomes a big challenge. This product is particularly important to DIY artists because they engage in painting activities more often.

What Do Readers Will Learn?

Our main aim in writing this post is to craft well-analyzed ideas about the best paint for plaster sculpture. We have incorporated expert opinions and user feedback to give you reliable content. Besides all that, in this post, you will find out ways to determine the best paint for your plaster sculpture project.

2021s Top 2 Best Paint for Plaster Sculpture

As we mentioned earlier, the market is currently overwhelmed by many paint brands, so choosing the best paint for your craft projects will not be an easy task. It is for this reason that we decided to compile a list of paints that we think will give you the best results with your plaster sculpture. We narrowed our list of the best paints into two best; Check them out!

1. Apple Barrel: Best for  DIY projects

Apple Barrel PROMOABI 18pc Matte Finish Acrylic Craft Paint Set, 2 Fl Oz (Pack of 18), Assorted Colors 1, 18 Count
Check Latest Price

If you are a craft enthusiast, then this is your product. The paint is full of desirable properties to help you with your artistic works. It is made from the purest ingredients which provide premium performance on wood, Styrofoam, tin, terra cotta, wood, and any porous surface. What is more, this product is pocket-friendly, so you can go about your daily projects without any worries. Moreover, it is great for outdoor projects, too. Let’s know some more about this paint.

Features

  • Apple Barrelis multicolored, so you can choose from many colors.
  • It produces a matte look.
  • It is water based paint. So, it is easy to clean.
  • It is non-toxic.
  • The product is brightly colored to give your plaster sculpture a refined finish.
  • It is durable.

Pros

  • Apple Barrelcomes in the right package to cater to your budgetary needs.
  • It is packed in suitable sizes.
  • It is easy to use for everybody.
  • It is a fast drying paint.
  • It is fairly priced.

Cons

  • The product has not received any negative views so far.

Reason to Buy

If you are a craft enthusiast, then this is your product. The paint is full of desirable properties to help you with your artistic works. This product is particularly important to DIY artists because they engage in painting activities more often. What is more, this product is pocket-friendly, so you can go about your daily projects without any worries.

2. Color Technik: Best for Beginners and professional artists

Color Technik Acrylic Paint Set, Artist Quality, Large Set - 18x59ml (2-Ounce) Bottles, Best Colors for Painting Canvas, Wood, Clay, Fabric, Nail Art & Ceramic, Rich Pigments, Heavy Body, Gift Box
Check Latest Price

This product can be used by both experienced and beginner artists. If you have been looking for paint to use for your DIY craft projects, you are in the right post. The product has a ton of desirable features to give your plaster the finish you desire. It has a variety of uses such as murals, DIY projects, arts and crafts, adult and children’s coloring books, scrapbooks, school projects, party invitations, greeting cards, doodles, DIY decorations, and letters to friends and family. At this point, it would be a good idea to examine the features of this product. Let’s know some more about this paint.

Features

  • Color Technikhas a durable effect on your surface.
  • It has multiple uses.
  • It is easy to use. You don’t need to learn any complicated usage procedures.
  • You can do clean paintwork because this product is pretty easy to clean after use.
  • An amateur artist can also use it without experience.

Pros

  • Color Technik contains additives that enhance its durability.
  • It is durable.
  • The product is suitable for use on most surfaces.
  • The product is non-toxic, so it can be used by both adults and children.
  • This paint is best for DIY projects, large and small.

Cons

  • This paint is expensive.

Reason to buy

This product can be used by both experienced and beginner artists. If you have been looking for paint to use for your DIY craft projects, you are in the right post. The product has a ton of desirable features to give your plaster the finish you desire.

2021s Top 2 Best Paint for Plaster Sculpture: Buying Guide and How to Choose the best paint

If you ask any painting artist, they would probably tell you that the most difficult task they encounter is choosing the best paint to use for whatever project they are handling. Now, how do you pick the best paint for your next project without settling for less? To get the most appropriate reply to this question, it would be better if we start looking at some of the crucial factors to look for paint. Here we go!

Durability

The first thing to consider in your preferred paint is the durability aspect. Take great caution not to compromise on the durability of your preferred paint. You may be right if you say that nothing lasts for eternity, but it would be prudent enough for you to consider buying a type of paint that will stay on your plaster sculpture for quite some time as this will save you in terms of cost.

Quantity

Let us say you are in the paint store and you have no idea of the quantity you require for your project. The quantity of paint you will need will depend on how big your project is. If your plaster sculpture is big, you might want to buy a few gallons as you may deem fit. The bottom line is to plan properly; always estimate the size of your project to help you determine the quantity you will require for your entire project.

Color

What comes to your mind when one mentions color, my color implies preferences, and we all have different tests when it comes to the aspect of color. The final look of your artwork will be determined by the type of color you choose from the word go. When deciding on the most suitable color to use, keep in mind that the look of paint when freshly painted is different when it is dry, so consider using deep-colored paints for best results.

Drying

We all want to do away with our projects within the shortest time possible, so the paint will play a key role in determining how quickly you will finish your project and begin using it. It is recommended to go for fast drying paints if you want to achieve quick results but beware of quality aspects, some paints may be fast drying but of poor quality.

Safety

The safety of any given product is an essential consideration whenever you visit a dealer. You don’t want to buy a paint product that is not only for your health but also for the environment. Paint that doesn’t have a strong smell is considered safe, these paints are also nontoxic hence safe to use.

Shelf-life

Sometimes we purchase paint over what we need and because you don’t want to dispose of it, you might want to store it for future projects. However, the paint may not have a good shelf-life and it will expire before you know it. With that being said, it would be better to understand the shelf-life of your preferred paint before buying it.

Primer

Most paintworks will require you to start with a coat of a suitable primer to enhance the bonding properties of your paint. High-quality paint has a primer added to it so you don’t need to apply any primer. With that being said, you might want to go for primer-based paints.

Tips to note when painting a plaster sculpture

  • To achieve the best results with your project, reading usage directions and all other instructions will be paramount. Follow every step from surface preparation to the application of your last coat if you want the best results.
  • Be sure to use a primer as your first coat; Allow it to dry properly before you proceed to apply your first layer of paint. Priming is necessary because you want your paint to bond properly to the surface of plaster.
  • It would be better to use a thinner to achieve the required consistency; Be sure that your paint has reached every part of your plaster for the best result. You might want to use a paintbrush to reach hard-to-paint areas on your plaster sculpture. Ensure you give each coat of paint enough time to dry before adding a subsequent layer. Repeat these steps until you achieve an evenly covered surface
  • An alternative sealant would be to use a moist coat of emulsion paint. This is particularly suitable whenever you want to seal thick layers on your plaster sculpture
  • Use fine-grained sandpaper to do a light sanding on your sculpture to get rid of blemishes on the surface
  • Go ahead and start decorating your plaster sculpture only after you are sure it is dry
  • When deciding on the most suitable color to use, keep in mind that the look of paint when freshly painted is different when it is dry, so consider using deep-colored paints for best results.

Frequently asked questions

Painting as an art is an ongoing process; What do we mean by this assertion? No human will wake up in a single day and master the art of painting, note that there are many unexplored painting niches which is why you should strive to learn more if you are a painting enthusiast. Having said that, we must look at some of the commonly asked questions in the niche of plaster sculpture painting to learn more.

Question: Is it possible to paint plaster casts?

Answer: Yes, However, the most common challenge you are likely to encounter is partial or poor bonding of the paint. The surface of your plaster can not allow for easy application of paint because it is extra smooth. You might consider using high-grade acrylic paints to achieve the best results, however, these paints are often costly.

When deciding on the most suitable color to use, keep in mind that the look of paint when freshly painted is different when it is dry, so consider using deep-colored paints for best results.

Question: Does paint act as protection for plaster?

Answer: Yes. Just like any other surface, paint from a protective barrier on the surface of your plaster sculpture, that enhances its durability since the inner parts are shielded from the external environment

Question: Is it possible to use spray paint on a plaster sculpture?

Answer: Yes. You can employ spray paints that are designed for use on plaster sculpture surfaces. Note that spray paints are effective because they enhance protection to the surface of your plaster. Depending on the size of your project, you can spray up to three layers for better results

Question: Is it okay to put plaster primer over paint?

Answer: This is possible. But be sure to examine your wall thoroughly to determine the status of paint that is applied on the wall before you can think of preceding. Note that you can seek the service of a professional artist to help you in this kind of assessment if you are a beginner painter.

Question: Do you need a primer when painting a plaster sculpture?

Answer: Yes, however, it would be better to go for paints that have a primer as an additive in them. This will not only give you the best results, but it will also save you from spending more money buying a primer.

Conclusion

No human will wake up in a single day and master the art of painting, note that there are many unexplored painting niches which is why you should strive to learn more if you are a painting enthusiast. Because the brands you can use are many, we would advise you to go for acrylic-based paints to get a more refined finish on your art.

Best Paint For Fishing Lures

Best Paint For Fishing Lures

Painting fish lures is one of the most neglected paintworks; As interesting as it sounds, we will try to uncover crucial information regarding this topic. Sit tight!

If you are like me, you have probably been wondering whether fishing lures can be painted. Well, if you ask the experts, you will notice that almost all materials can be painted. We believe there is no better way to hone your artistic skills than through painting.

From our previous posts, you may have realized that finding the best paint to use for your painting project is not an easy task. For this reason, we have endeavored to give you a detailed blog post about the best paint for fishing lures considering that this is one of the most ignored niches.

Best Paint For Fishing Lures

By now you are aware that producing great paintworks starts with buying the correct paint for your project. With that being said, we have created a detailed list of the top two best paints for fishing lures. Please read through the article to understand all the intricacies involved in this form of painting.

Who Needs This Product? 

The product we are reviewing in this post is meant for all painting artists. However, if fishing is your thing, this post will help you a great deal. With that being said, you will benefit the most from the contents of this article if you are a do-it-yourself person.

What Do Readers Will Learn?

We have exploited our extensive research skills to give nothing but the best. The contents of this article consist of consumer reviews and feedback coupled with expert opinion, so you can be sure that the information we are sharing is reliable. If this is your thing, you are about to know about the best paint for fishing lures in 2021.

2 Best Paint for Fishing Lures

We cannot emphasize enough the need to have the correct information when shopping for the best paint to use on your next project. The market is flooded with a ton of paint brands and we will promise you one thing, it is going to be a challenging affair to try to get the best paint for your paintwork. However, you shouldn’t be worried because we took a considerable amount of time to craft this article just for you. Having said all that, it is time to look at the two products we promised you earlier, bright-colored and their detailed features.

1. Createx Colors 5804-00: Best for use on projects that are susceptible to fading

Createx Colors 5804-00 Createx Pearl Airbrush Set, Assorted Colors, 2 oz, 6 Pieces, 2 Ounce (Pack of 6), Multicolor, 12 Fl Oz
Check Latest Price

Top on our list today is the Createx Colors brand; This product is suitable for projects that are susceptible to fading. It has desirable properties that make it the darling of many do-it-yourself artists. Fade-resistant pigments are used to ensure that your work looks as new as ever. Made with quality ingredients and lightfast pigments, this airbrush paint can be used on multiple surfaces like leather, wood, metal, plastic, glass, and ceramic. What is more, it is multicolored to give your project the finish that you want. Below we discuss some of its features.

Features

  • Createx Colors 5804-00 is multicolored.
  • It is ready to spray on textile, canvass, leather, wood, ceramic, glass and more.
  • It is highly resistant to UV rays.
  • The product is brightly colored to give your fishing lures a great finish.
  • It is desirable pigments that give it an excellent texture and look.
  • It needs primer on hard surface.

Pros

  • Createx Colors 5804-00non-fading paint.
  • It works excellently on many surfaces.
  • It is suitable for DIY projects.
  • It dries fast.
  • It gives you a sharp color.

Cons

  • It is high-priced product.
  • It is not safe for children.

Reason to Buy

We cannot exhaust the reasons why you would want to opt for this product. Apart from the fact that it has many desirable features, it is multicolored to give your project a more nuanced finish. Additionally, if you are a do-it-yourself artist, you will find this product an invaluable asset in your projects. Please, give it a shot!

2. Iridescent 8 Createx Airbrush Paint Colors Set: Best for use on Both Dull and Bright Surfaces

Iridescent 8 Createx Airbrush Paint Colors Set 2 Oz Bottles
Check Latest Price

Iridescent 8 Createx Airbrush Paint Colors Set is a professional-grade airbrush color made with the highest quality control and standards. These colors can be used on a variety of surfaces such as fabric, leather, canvas, paper, wood, ceramic, and clay. You cannot exhaust reasons why you would settle for this paint. Apart from the fact that it has many desirable features, it is multicolored to give your project a more nuanced finish. Additionally, if you are a do-it-yourself artist, you will find this product an invaluable asset in your projects. You should try this product!

Features

  • Iridescent 8 Createx Airbrush Paint is a multicolored paint set.
  • It has excellent opacity properties.
  • The colors of this product have a metallic finish.
  • It contains excellent color pigments for a more refined finish.
  • It is suitable for use on both dull and bright surfaces.
  • The product blends easily with other paint colors.

Pros

  • Iridescent 8 Createx Airbrush Paintcontains finest pigments.
  • The colorsgive a unique brightness and richness to your project.
  • It allows the artists to customize the colors for special application.
  • Its shimmering metallic look which changes at the angle of light.
  • These colors will give you a permanent result.
  • It is easy to use.

Cons

  • It is a highly-priced paint.

Reason to buy

There are many reasons why you would want to opt for this product. Apart from the fact that it has many desirable features, it is multicolored to give your project a more nuanced finish. Additionally, if you are a do-it-yourself artist, you will find this product an invaluable asset in your projects. You should try this product!

Buying Guide and Key Aspects to Look For in The Best Paint For Fishing Lures

Before you part with your money to buy your preferred paint, it would be better to know a few aspects to look out for in quality paints. Ensure you buy the correct product to have value for your money. Buying substandard paints will only stress you the more.

1. The surface: This, perhaps, is the most crucial consideration when you are in the paint store. Fishing lures have a particular texture on their surface and this means you need to select your paint carefully. Be sure to buy paint that is compatible with the surface of your fishing lures.

2. The finish: Whenever you are shopping for the best paint to use on your fishing lures, it is essential to consider the nature of the finish you intend to get out of your preferred paint. Always go for bright colors to achieve a bright finish; you might want to consider going for metallic finish paints for better results.

3. Durability: The aspect of quality comes into play in many paintworks. Part of the key considerations when buying your preferred paint would be the life of the paint once it has been applied on a particular surface. It is advisable to go for high-quality paints which also have a long-lasting effect on whatever surface they are applied to.

4. Drying time: Fast-drying paints will give you the best outcome. Considering the environment where your fishing lures will be exposed, it would be best if you considered buying fast-drying paint. However, be sure not to buy poor-quality products in the process.

5. Consumer Feedback: The customer is always right, whoever confined this phrase was right. Before you make any purchase, it would be better to know what other users think about the product you intend to buy. This will act as the guide whenever you are shopping for the best paint for your project.

6. Strength: Your fishing lures will be exposed to the, not so friendly environment, on that note, it would be better to consider buying a paint that is strong and durable to withstand the harsh conditions underwater.

Steps Involved In Painting Fishing Lures

Painting fishing lures is a DIY project, so you are not restricted in terms of your creative abilities. Be sure to have the correct supplies at your disposal to achieve a professionally painted project. Below, we describe a step-by-step guide on how to paint your fishing lures like a pro. Check it out!

  • Be sure to buy all the necessary supplies including a suitable airbrush and paint. For better results, I suggest that you buy high-quality colored paints. It might also be a better idea to consider the most suitable airbrush for your project.
  • Other necessary tools that you must have are things like a suitable compressor to help with your air spray.
  • Go through the usage manure of the compressor to be sure you understand how to operate it. Be sure to master all the settings for better results.
  • Part of the preparatory activities before you start painting your fishing lures should be ensuring that your fishing lures are thoroughly cleaned. Use a suitable cleaning agent to perform this task.
  • Be sure to have a painter’s tape to mask any arrest on your fishing lures that you don’t intend to paint
  • Note that painting fishing lures is an engaging exercise, so it would be better to consider doing constant practice to be sure you have mastered the art of applying paint on your fishing lures.

Frequently asked questions

If you take the time to go through various online posts involving the painting, you will be shocked at the number of questions that have been raised regarding the best paint use on your fishing lures. Some of these queries have been answered and some have not. With that having been mentioned, it would be better if we looked at some of those queries with possible alternatives.

Is there a specific paint you can use to paint fishing lures?

Yes. Due to their nature, acrylic paints are considered the best for use on fishing lures. Be sure you buy the best quality acrylic paint for this purpose otherwise you may end up being disappointed. You might want to consider doing a little bit of research to get recommendations on the best form of acrylic paint to use.

Which is the most suitable airbrush to use for painting fishing lures?

There are many airbrushes you can use for this undertaking, however, it would be better for you to consider using water-based acrylic airbrush paints because they are best suited for use when painting fishing lures.

Is there a way to seal fishing lures?

Yes. You can capitalize on many methods to achieve this requirement. With that being said, experts recommend using linseed oil to conceal the surface of your fishing lures. Be sure to prepare your sealant properly before causing it on your surface.

Which method do you use to paint wood fishing lures?

The method used to apply paint to wood fishing lures is pretty the same as the one used when painting on other projects. For better results, you want to consider going through all the basic steps. Use a suitable cleaning agent to perform this task. When you are done with the paint application process, ensure you apply a thin layer of a suitable finish to shield the wood from the effect of water. None of us would wish to use a short live product.

Conclusion

Having the correct information at your disposal is a big step towards mastering the art of painting fishing lures. However, a lot of input is needed to attain the standards you want. I would suggest that you cultivate in you the habit of researching; Always be on the lookout for new information because this painting as a niche is pretty dynamic. We hope that the contents of this article will help you a great deal in your next painting project. You might want to read over and over to grasp the contents we have shared in this post. Enjoy your painting!